Showing posts with label Painted Labels Dies. Show all posts

Saturday, April 8, 2023

Stamping Inkspirations April Blog Hop Fun Fold Time

Welcome to the Stamping Inkspirations April Blog Hop as we month explore the wonderful world of "Fun Folds". Our talented Design Team members will be sharing their projects and ideas to help inspire to try creating your own beautiful projects and step outside your comfort zone. 
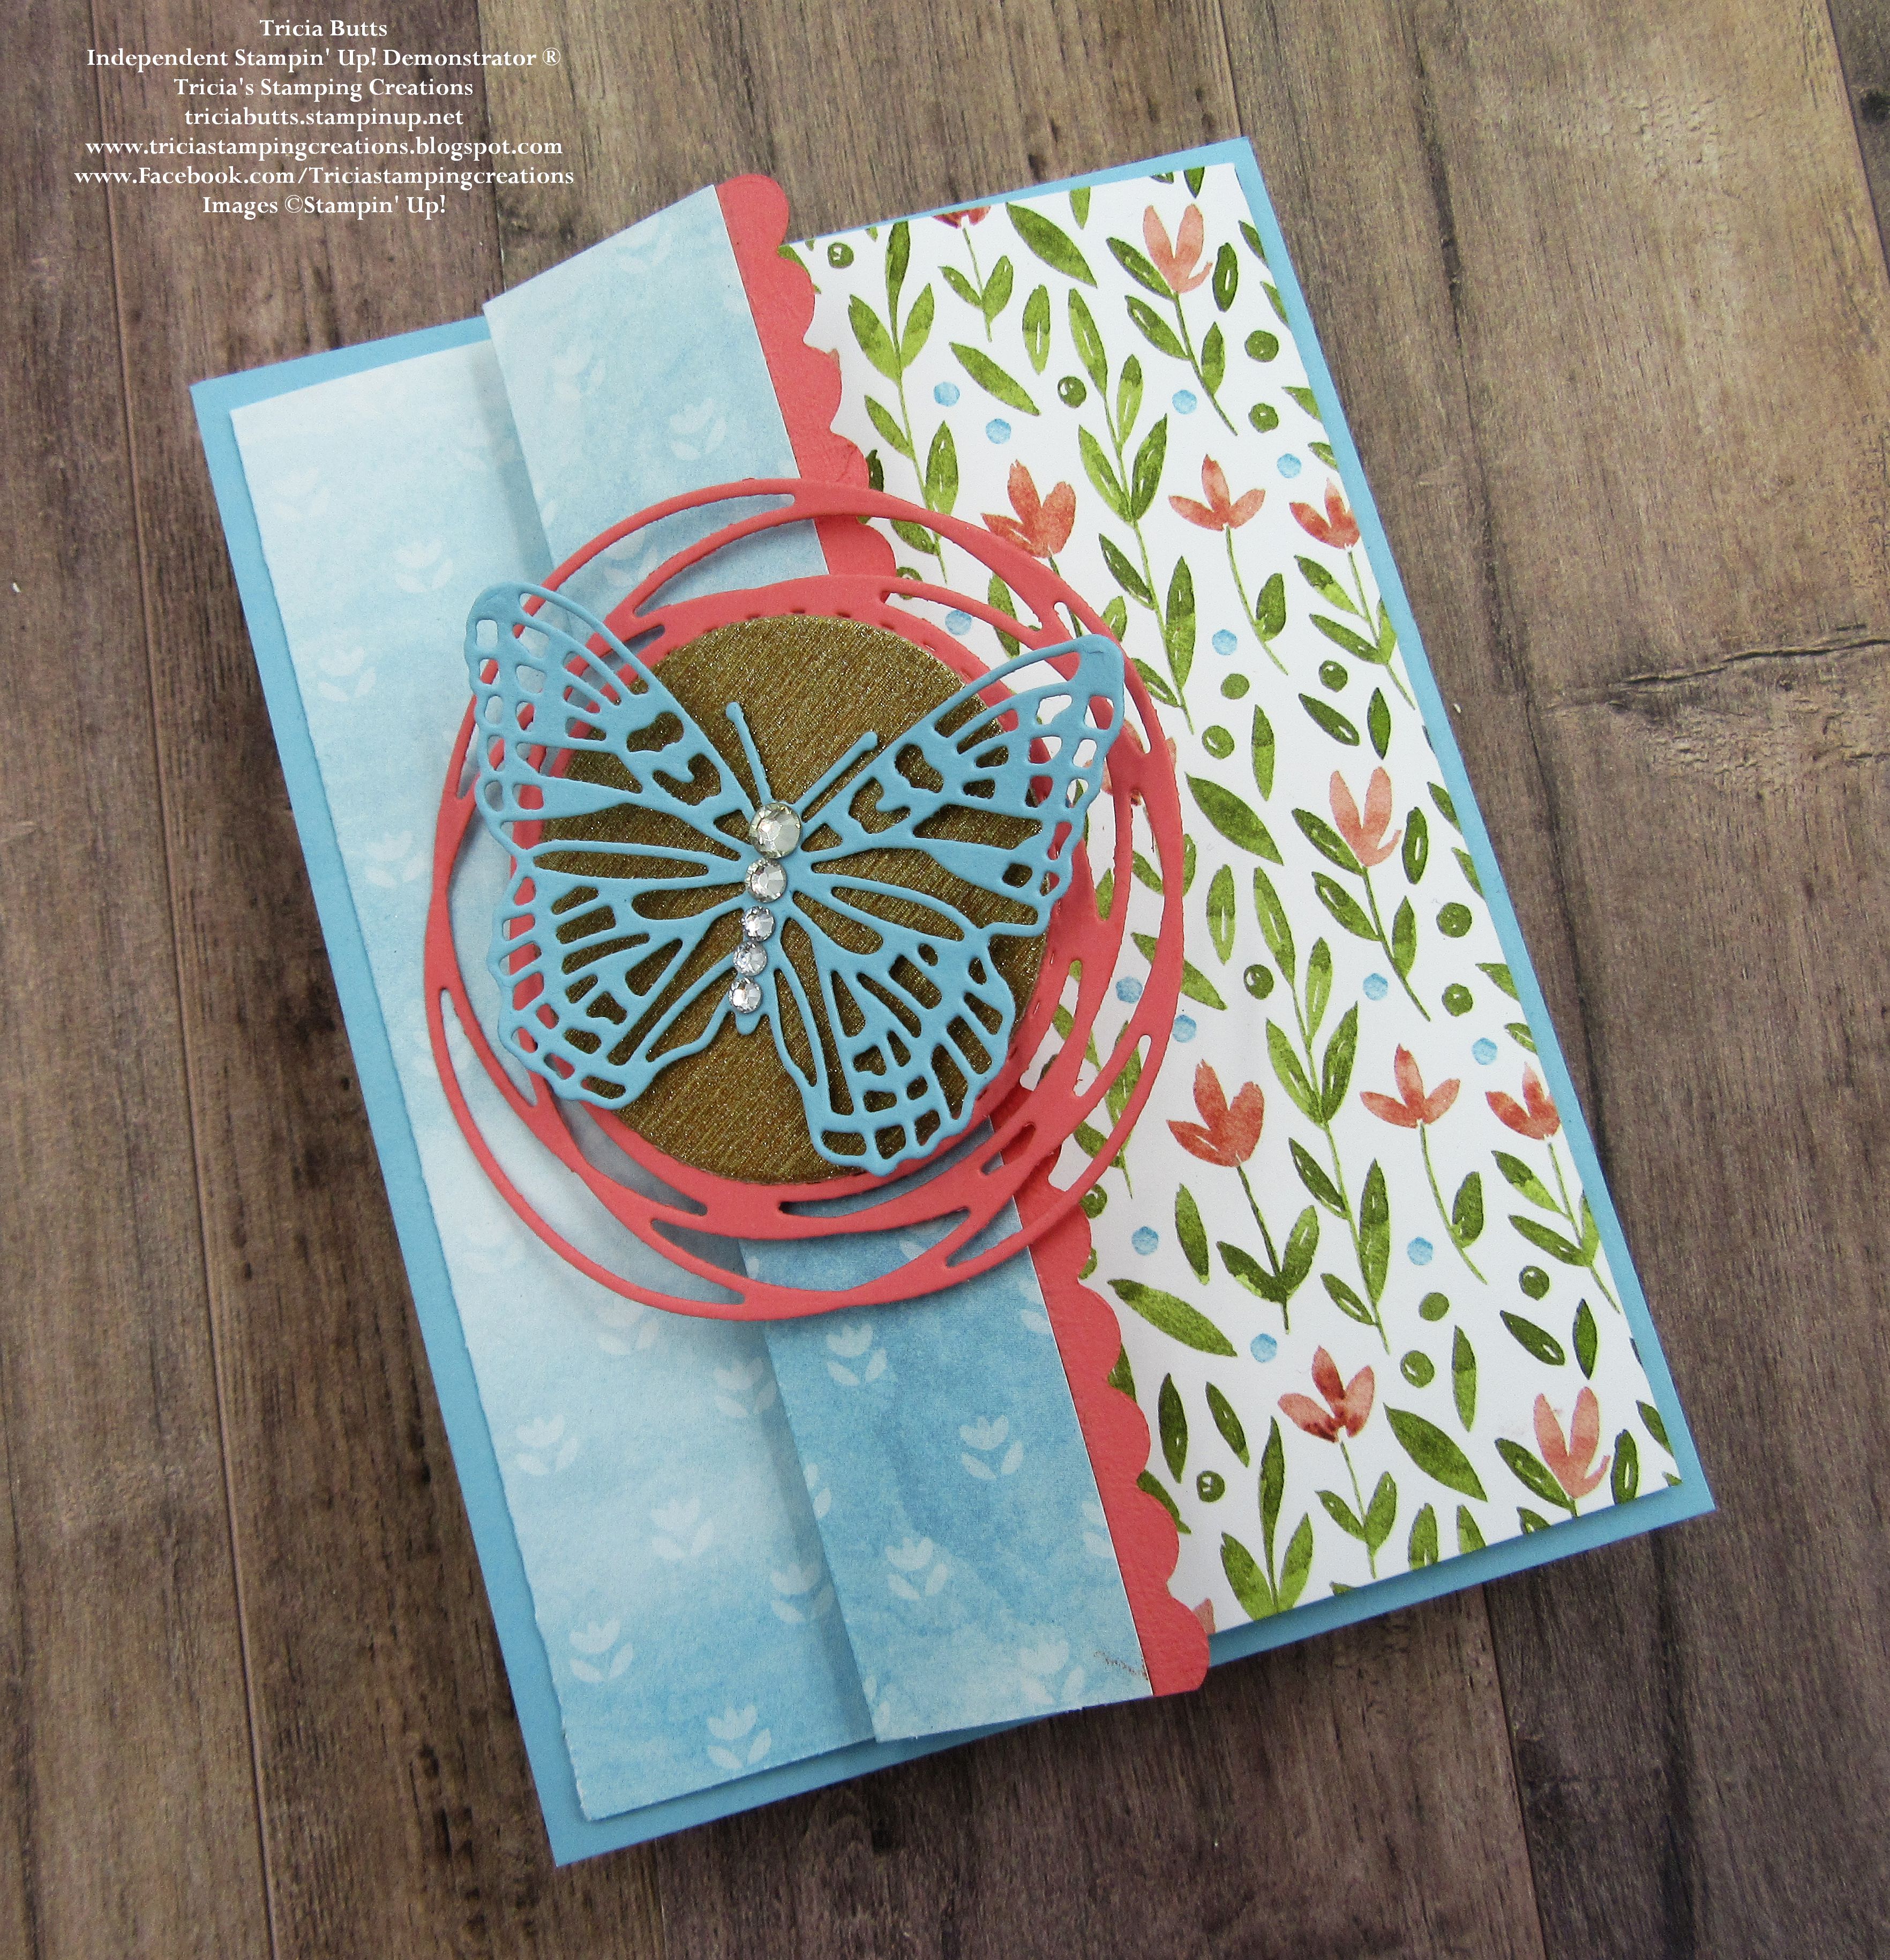
Today I wanted to showcase the beautiful Awash In Beauty Designer Series Paper, which is sadly retiring. I chose to create a simple Accordion Fun Fold that I saw on fellow Demonstrator, Tami White's blog. The wonderful thing about this fun fold is that it allows you to see both sides of the designer series paper for an extra Wow factor. I paired it with several retiring die sets, including the Brilliant Wings Dies, which as the most beautiful detailed butterfly die cuts that are wonderful focal designs. 
Products Used:
Graceful Tiles stamp set (item #159390) Retiring
Penned Flowers Dies (item 155557) Retiring
Painted Labels Dies (item #151605) Retiring
Brilliant Wings Dies (item #155523) Retiring
Layering Circles Dies (item #151770) Retiring 
Awash In Beauty Designer Series Paper (item #158973) Retiring
Gold & Rose Gold 6"x6" Metallic Specialty Paper (item #156844) Retiring
Balmy Blue Cardstock (item #146982)
Calypso Coral Cardstock (item #122925) 
Basic White Cardstock (item #159276)
Calypso Coral Classic Ink Pad (item #147101)
Basic Rhinestone Jewels (item #144220)
Stampin' Dimensionals (item #104430)
Mini Glue Dots (item #103683)
Measurements:
Balmy Blue Cardstock
Card Base - 5 1/2" x 4 1/4"
Detailed Butterfly die cut with the Brilliant Wings Dies
Inside Layer - 3 1/4" x 4 1/2"
Basic White Cardstock
Inside Sentiment Layer - 3" x 4 1/4"
Gold Metallic Specialty Paper
Circle die cut with the Layering Circles Dies
Calypso Coral Cardstock
Detailed Swirl Circle die cut with the Painted Labels Dies
Decorative Scalloped Edge die cut with Penned Flowers Dies 
Awash In Beauty Designer Series Paper
Fun Fold Layer - 12" x 5 1/4" (Scored at 1", 4" & 8"
This pretty Accordion Fun Fold is simple to create and so much fun to decorate. After scoring the designer series paper layer and folding on the score lines, I attached the back panel to the Balmy Blue card base to create the basic card design. For the inside insert, I stamped the sentiment with Calypso Coral Classic ink onto the Basic White layer and attached it to the Balmy Blue cardstock layer. I then attached this to the inside back panel of the designer series paper. To decorate the front panel, I added a Calypso Coral cardstock scalloped border to the inside edge of the front panel so that the stitched line is visible on the inside front layer and scalloped edge is even and straight when viewing from the front of the card. I attached the Swirled Circle to the front folded flap with Stampin' Dimensionals and then added the Gold Metallic circle to the center. For the detailed butterfly, I attached it to the center of the Gold circle with Mini Glue Dots and added Basic Rhinestones to the center of the butterfly for a touch of bling. This is a great way to display both sides of your designer series paper to create a beautiful card design.
Thank you for taking the time to visit my blog. I hope that my Fun Fold card design will help inspire you to experiment with creating your own designs to share with family and friends. There are so many wonderful possibilities to explore. 
Now it's time to visit Judith's blog and see what fabulous fun fold she has to share with us. Just click on the Next button to visit her blog or use the Roll Call List to find your way. We would love it if you would leave us a comment and let us know what you liked about our projects. I hope you enjoy the rest of our blog hop.


If you live in the U.S. and do not have a Stampin' Up! Demonstrator, please contact me and I would be happy to help you with your creative projects. You may also visit my Online Store to place your order and have it shipped to you. 

Until Next Time

Happy Stamping,

Tricia Butts
Independent Stampin' Up! Demonstrator

Like What You See? Visit My Online Store Here

Visit My Facebook Business Page for Updates & Ideas

Click here to Contact Me

Take Advantage Of The Last Chance Sale
Save Up To 60% Off Select Retiring Products
Visit My Online Store To Place Your Order


Tuesday, September 13, 2022

Inspire. Create. Share. September Blog Hop My Favorite Designer Series Paper

Welcome to the Inspire. Create. Share. September Blog Hop as we showcase our favorite designer series paper, currently available in the 2022-2023 Annual Catalog and July-December 2022 Mini Catalog. We will sharing projects and ideas to help inspire you to explore the many wonderful designs available. 
There are so many wonderful designer series paper designs to choose from, which makes it difficult to pick just one as a favorite. For today's card design, I chose to use one of my new favorites from the July-December 2022 Mini Catalog, the Rustic Harvest Designer Series Paper, which is perfect as we transition into Fall. The beautiful designs and warm colors provide wonderful backgrounds and focal designs for projects and I have chosen one of the designs that is perfect for creating clean and simple cards. 
Products Used:
Peaceful Moments stamp set (item #151595)
Painted Labels Dies (item #151605)
Rustic Harvest Designer Series Paper (item #159633)
Mossy Meadow Cardstock (item #133676)
Basic White Cardstock (item #159276)
Versamark Pad (item #102283)
Metallics Embossing Powders (item #155555)
Brushed Metallic Adhesive Backed Dots (item #156506)
Glitter Washi Tape (item #159973)
Measurements:
Mossy Meadow Cardstock
Card Base - 8 1/2" x 5 1/2" (Scored at 4 1/4")
Sentiment Label die cut with the Painted Labels Dies
Basic White Cardstock
Strip approx. 1/2" x 3" covered with 2 strips of Pumpkin Pie Glitter Washi Tape & die cut with the Painted Labels Dies
This beautiful Fall card focuses on the wonderful floral design of the designer series paper as the background and focal image for the design. I chose to use Mossy Meadow cardstock for the card base and coordinating sentiment label. The sentiment image has been heat embossed with Gold embossing powder and I chose to use several of the small Brushed Metallic Adhesive Backed Dots in each of the corners to embellish the label. For a touch of sparkle and color, I die cut a detailed border using the Painted Labels Dies. To create this border, I layered two pieces of the Pumpkin Pie Glitter Washi Tape side by side on a strip of Basic White cardstock and then die cut it to create the detailed edge. I thought the Pumpkin Pie Glitter Washi Tape coordinated beautifully with one of the flowers in the background to finish off the design. This card layout can be used for a variety of occasions and I love the wonderful sentiments in the Peaceful Moments stamp set that work well with this pretty paper. The Peaceful Moments stamp set is just one of the stamp sets that will be on sale September 15th as part of the 24 Hour Stamp Sale.  
Thank you for taking the time to visit my blog. I hope that my card design will help inspire you to create your own beautiful projects with your favorite designer series paper. There are so many wonderful designs to choose from, suitable for a variety of occasion throughout the year. 
Now it's time to visit Deb's wonderful blog to see what designer series paper she has chosen to share. Just click on the Next button below to visit her blog. We would love it if you would leave us a comment and let us know what you liked about our projects. I hope you enjoy the rest of our blog hop. 


If you live in the U.S. and do not have a Stampin' Up! Demonstrator, please contact me and I would be happy to help you with your creative projects. You may also visit my Online Store to place your order and have it shipped to you. 
Until Next Time

Happy Stamping,

Tricia Butts
Independent Stampin' Up! Demonstrator

Like What You See? Visit My Online Store Here

Visit My Facebook Business Page for Updates & Ideas

Click here to Contact Me


Coming September 15th Only

Save 15% off Select Stamp Sets 
From The 2022-2023 Annual Catalog
Click Below To View The List Of Stamp Sets On Sale

Perfect Partners Exclusive Die Sets
Available Only While Supplies Last
Click Below For More Details
Weekly Deals Are Here During September
Available For A Limited Time
Click Below To Visit My Online Store


Saturday, August 13, 2022

Ink. Stamp. Share. August Showcase Blog Hop

Welcome to the Ink. Stamp. Share. August Showcase Blog Hop as we share projects we are currently working on. Our amazing Design Team are busy creating projects using products from our current Stampin' Up! catalogs as well as getting ready for the upcoming holidays. I hope our projects and ideas will help you to get excited about creating your own fun projects. 
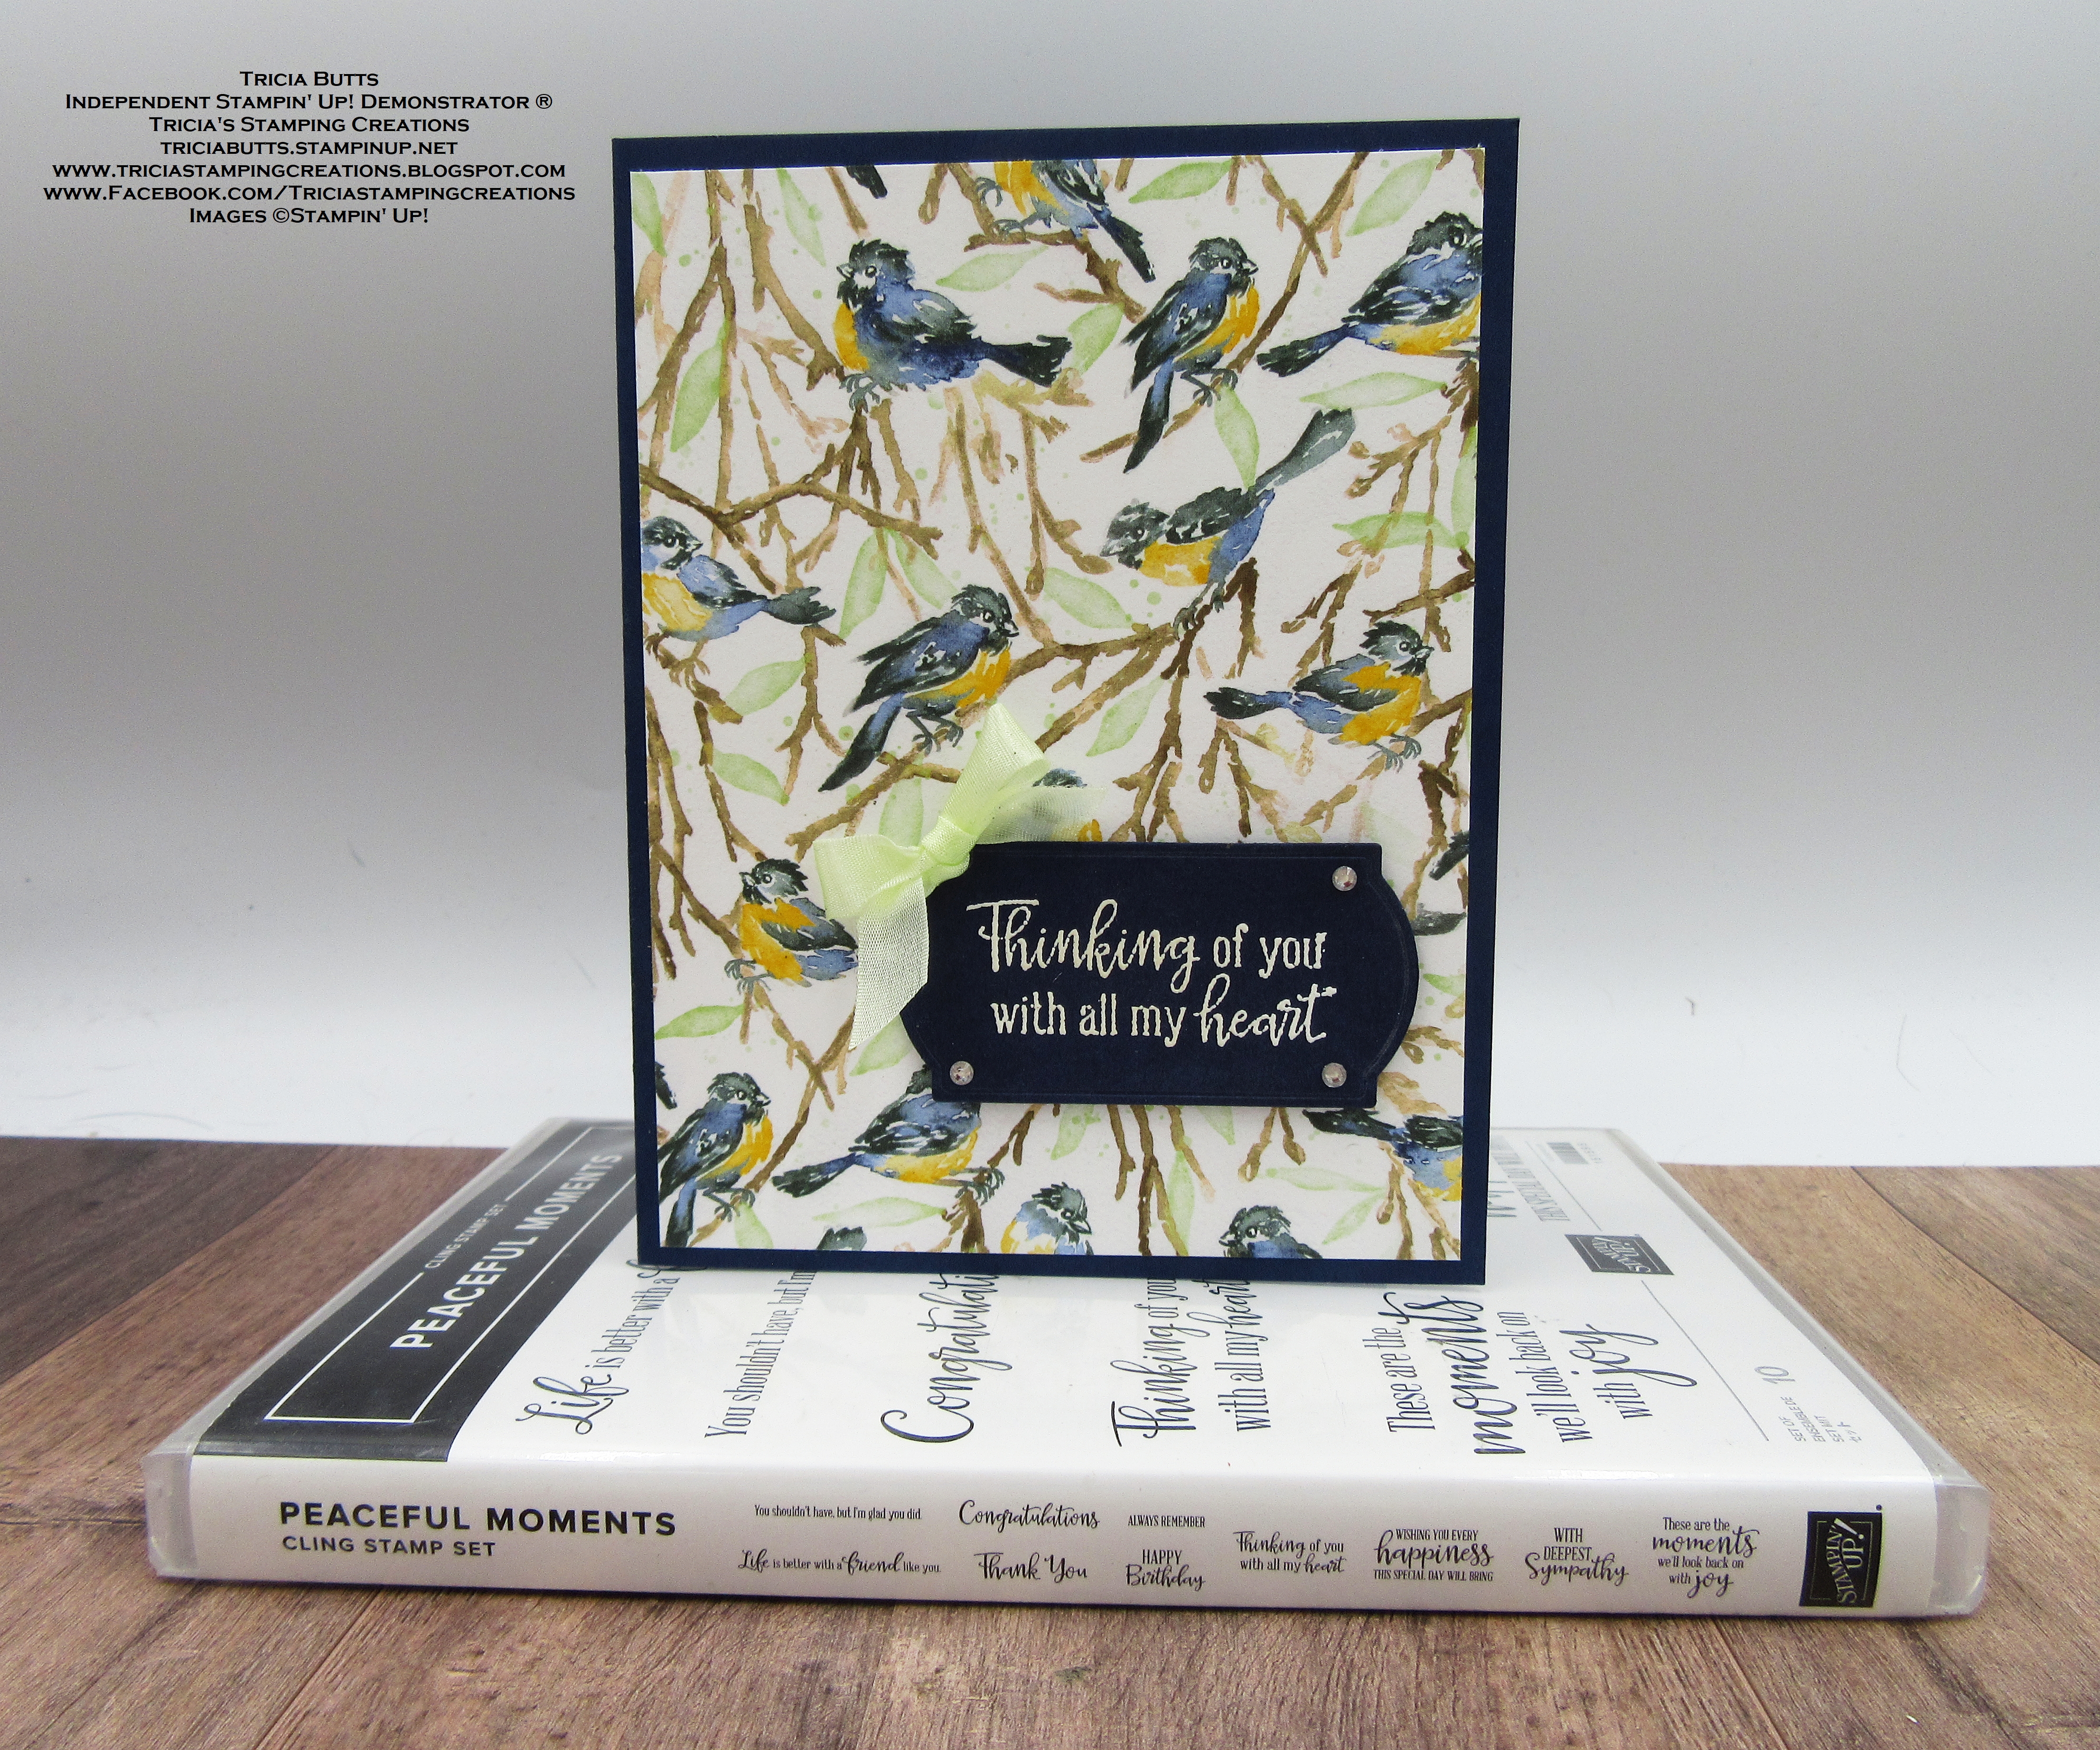
Some of the hardest cards to design and create are sympathy cards and cards providing comfort to people experiencing difficult times. When I saw this beautiful Rings of Love Designer Series Paper, I knew that the designs in this paper pack would work perfectly to create cards from the heart. The design I chose with the bluebirds, was perfect for the card I wanted to create. I love how simple this card design is and how it provides a sense of peace and comfort.
Products Used:
Peaceful Moments stamp set (item #151595)
Painted Labels Dies (item #151605)
Rings of Love Designer Series Paper (item #159939) Sale-a-bration Reward
Night of Navy Cardstock (item #100867)
Versamark Pad (item #102283)
Basics Embossing Powders (item #155554)
Soft Sea Foam 3/8" Seam Binding Ribbon
Basic Rhinestone Jewels (item #144220)
Stampin' Dimensionals (item #104430)
Mini Glue Dots (item #103683)
Measurements:
Night of Navy Cardstock
Card Base - 8 1/2" x 5 1/2" (Scored at 4 1/4")
Sentiment Label die cut with Painted Labels Dies
Rings of Love Designer Series Paper
Card Front - 5 1/4" x 4"
This beautiful clean and simple card design is all about this amazing designer series paper. I just love the sweet little bluebirds and the wonderful colors in this pretty paper. I wanted to make sure that the paper was the star of the show, so I kept the sentiment small and simple. The sentiment label was die cut from Night of Navy cardstock with the Painted Labels Dies and I heat embossed the sentiment with White embossing powder so that it would pop. I kept the embellishments simple as well with a bow tied with the pretty Soft Sea Foam Seam Binding Ribbon and a touch of bling with the small Basic Rhinestone Jewels. This design would work well as a masculine card and you could use some Linen Thread or Baker's Twine instead of the ribbon and forgo the rhinestones for a simpler look.
Thank you for taking the time to visit my blog. I hope that my card design will help inspire you to create your own beautiful projects. There is something for every occasion to help spark your creativity. 
Please take the time to visit with the other Design Team members to see the amazing projects they are sharing on their blogs. Just use the Roll Call List below to follow along our blog hop. We would appreciate it if you would leave us a comment and let us know what you liked about our projects. 

If you live in the U.S. and do not have a Stampin' Up! Demonstrator, please contact me and I would be happy to help you with your creative projects. You may also visit my Online Store to place your order and have it shipped to you. Remember, Sale-a-bration ends August 31st, so don't delay in placing your qualifying order to earn your free Sale-a-bration products. 

Until Next Time

Happy Stamping,

Tricia Butts
Independent Stampin' Up! Demonstrator

Like What You See? Visit My Online Store Here

Visit My Facebook Business Page for Updates & Ideas

Click here to Contact Me


Earn Exclusive Free Products
During Sale-a-bration
Click Below For More Details

Get Creative For The Holidays
With The July-December 2022 Mini Catalog
Click Below To Visit My Online Store


Tuesday, December 28, 2021

Paper Pumpkin Possibilities December Blog Hop Lots of Pun

Welcome to the Paper Pumpkin Possibilities December Blog Hop as we showcase fun alternative projects using the Lots of Pun Kit. You will be visiting with our talented Design Team Members as they share their projects and ideas to help you think outside the box. 
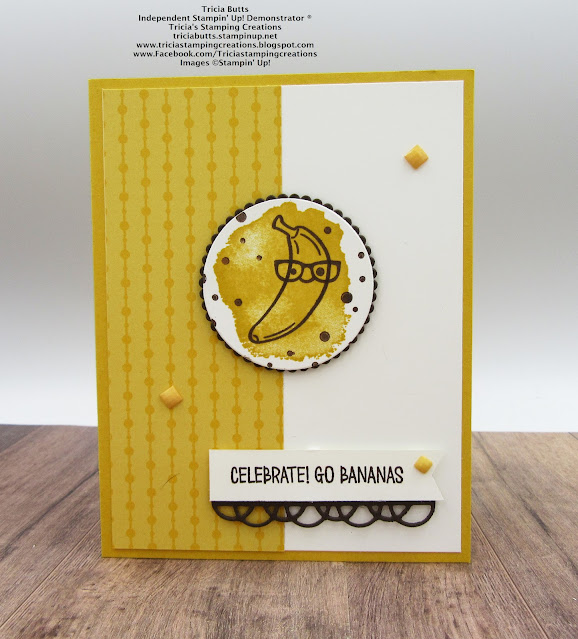
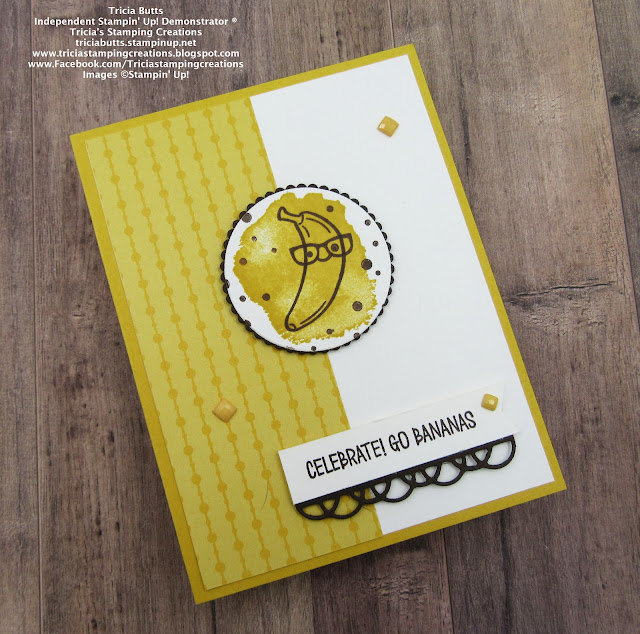
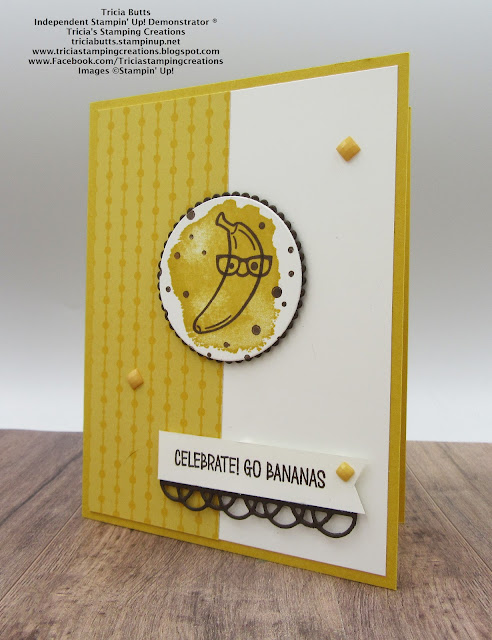
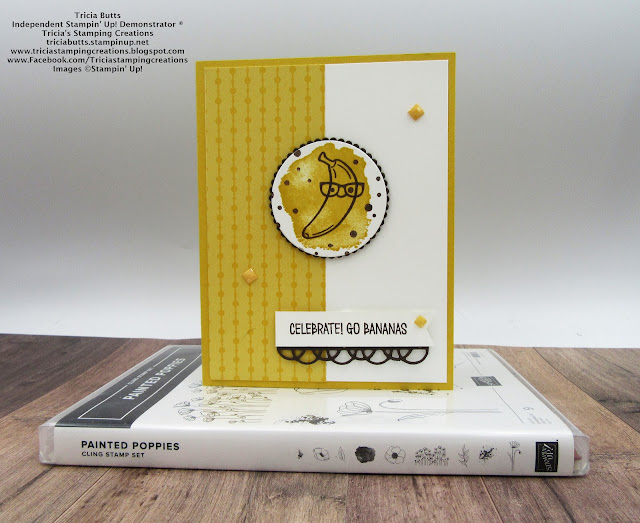
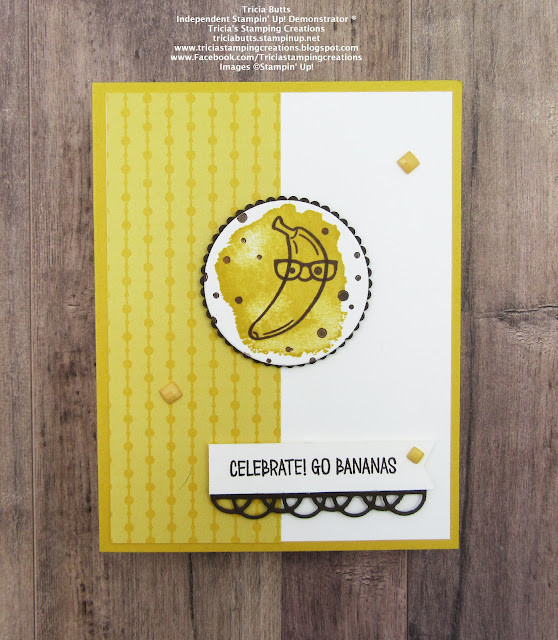
This fun Paper Pumpkin has so many wonderful possibilities and I wanted to try creating a cute alternative card design with the exclusive stamp set. The images in this stamp set are perfect for funny Valentine's Day cards or quirky all occasion cards. For today's card, I decided to create a celebration card using the banana image and coordinating sentiment. 
Products Used:
Paper Pumpkin December 2021 Lots of Pun Kit
Painted Poppies stamp set (item #151599)
Painted Labels Dies (item #151605)
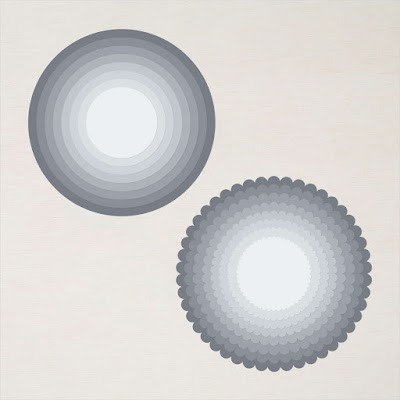
Layering Circles Dies (item #151770)
Tailored Tag Punch (item #145667)
2020-2022 In Color 6"x6" Designer Series Paper (item #155230)
Bumblebee Cardstock (item #153077)
Early Espresso Cardstock (item #119686)
Basic White Cardstock (item #159276)
Bumblebee Classic Ink Pad (item #153116)
Early Espresso Classic Ink Pad (item #147114)
2020-2022 In Color Square Gems (item #155572)
Stampin' Dimensionals
Measurements:
Bumblebee Cardstock
Card Base - 8 1/2" x 5 1/2" (Scored at 4 1/4")
Basic White Cardstock
Card Front - 5 1/4" x 4"
Focal circle die cut with the Layering Circles Dies 
Sentiment Label strip - 5/8" x 3"
Bumblebee Designer Series Paper
1 Strip - 2" x 5 1/4"
Early Espresso Cardstock
Scalloped Circle die cut with Layering Circles Dies
Border die cut with Painted Labels Dies
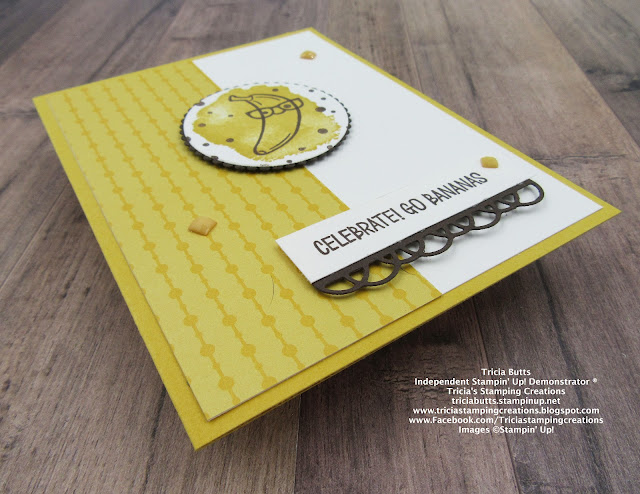
This card layout can be used with any of the images and sentiments from this wonderful stamp set to create punny cards to send to family and friends. For my card design, I chose to use Bumblebee cardstock for the card base to tie in with the color of a ripe banana. I added a piece of the Bumblebee designer series paper to the left side of the Basic White card front to help step up the card design. For the focal image, I stamped the background using the large splotch stamp in the Painted Poppies stamp set onto the Basic White circle using Bumblebee Classic ink. I then stamped the banana, face and glasses images with Early Espresso Classic ink onto the Bumblebee stamped background. This is great for adding color to the image. I added some dots with Early Espresso for the background to add a bit of texture to the design. I layered the focal image onto the Early Espresso scalloped circle and attached it to the center of the card front with Stampin' Dimensionals. For the sentiment, I stamped the image onto a strip of Basic White cardstock with Early Espresso cardstock and flagged the right end with the Tailored Tag Punch to create a banner. I added the Early Espresso border to the bottom of the sentiment label and added it to the card front with Stampin' Dimensionals To finish off the card design, I added some Bumblebee Square Gems for a touch of bling. Doesn't this card just make you want to smile? I love making happy cards and I can see so many wonderful possibilities with the stamp set in this kit. 
Thank you for taking the time to visit my blog. I hope that my card design will help you explore creating your own amazing alternative projects. The exclusive stamp set in this kit will provide you with endless opportunities to create fun projects long after the other supplies have been used up.
Now it's time to visit Mary's blog and see what she has created with this wonderful kit. Just click the Next button to visit her blog. We would love it if you would leave us a comment and let us know what you enjoyed about our projects. I hope our blog hop inspires you to create your own beautiful projects. 

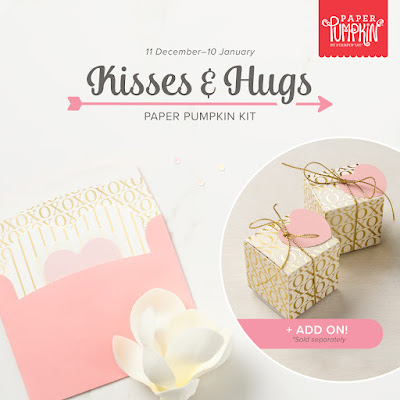
If you live in the U.S. and do not have a Stampin' Up! Demonstrator, please contact me and I would be happy to help you with your creative projects. You may also visit my Online Store to place your order and have it shipped to you. If you are not already a Paper Pumpkin subscriber, make sure to sign up by January 10th to receive the January Kisses & Hugs Kit. 

Until Next Time

Happy Stamping,

Tricia Butts
Independent Stampin' Up! Demonstrator

Like What You See? Visit My Online Store Here

Visit My Facebook Business Page for Updates & Ideas

Click here to Contact Me


Stock Up On Your Favorite Retiring Products
From The July-December 2021 Mini Catalog
Click Below To Visit My Online Store

Send Kisses & Hugs
With The January Paper Pumpkin Kit
Click Below To Subscribe By January 10th, 2022


Tuesday, December 14, 2021

Inspire Create Share December Blog Hop Thank You

Welcome to the Inspire Create Share December Blog Hop with the theme of Thank You cards. Our Design Team Members will be sharing their projects and ideas to help inspire you to create your own beautiful cards to send to family and friends. 
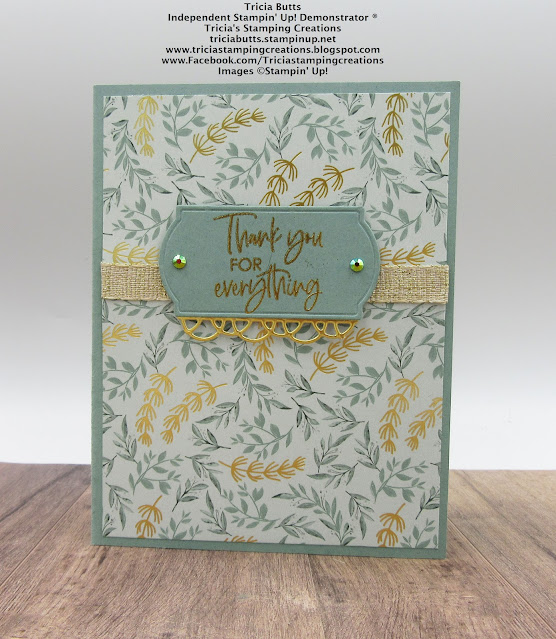
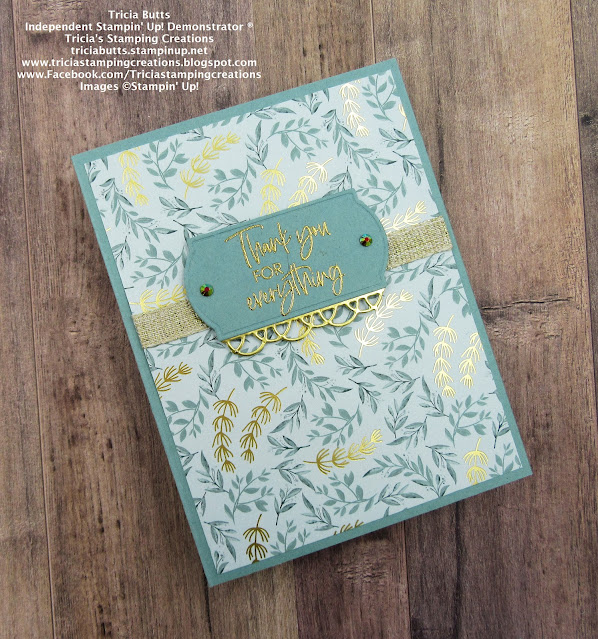
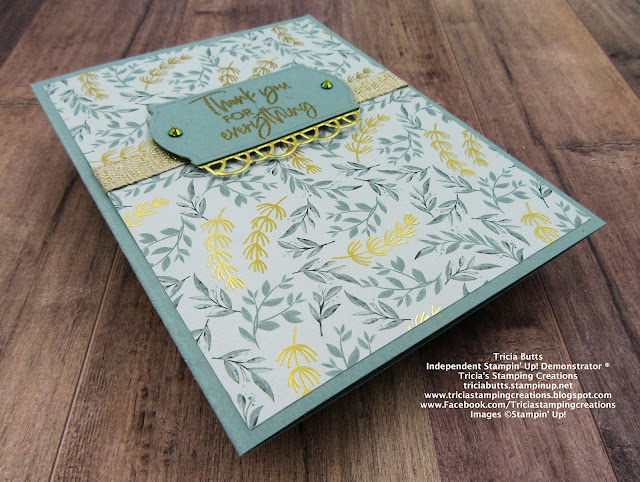
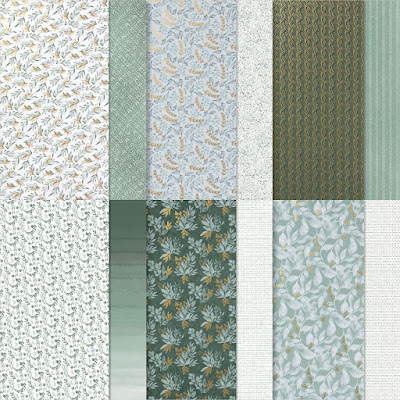
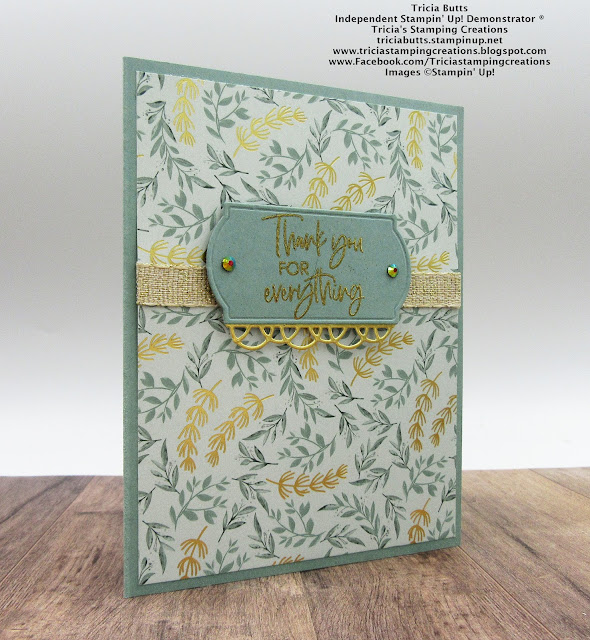
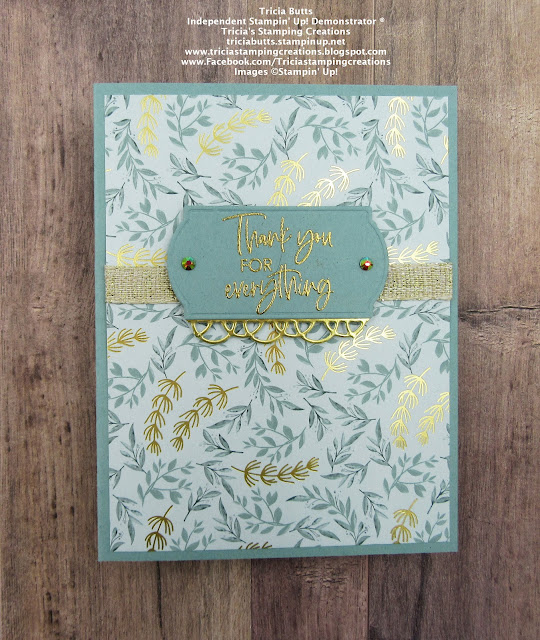
Thank You cards are one of the most popular cards and often we need one at a moment's notice to let someone know how much we appreciate them. For my card design today, I wanted to share how you can create multiple cards with the same layout, using pretty designer series paper. I chose to use the beautiful Ever Eden Specialty Designer Series Paper as it has so many wonderful patterns that work well for both masculine and feminine card designs. I used the Painted Labels Dies to create the sentiment label and the detailed border and the sentiment is from the Color & Contour stamp set. A little Gold embossing and embellishments help step up this clean and simple card design and make it extra special. From one sheet of 12"x12" designer series paper, you can get 6 card fronts measuring 5 1/4" x 4. With 12 sheets of this pretty paper in the pack, you can create 72 beautiful cards using this layout to create a wonderful stash of cards to have on hand when you need them. 
Products Used:
Color & Contour stamp set (item #154994)
Painted Labels Dies (item #151605)
Ever Eden Specialty Designer Series Paper (item #159996)
Soft Succulent Cardstock (item #155776)
Gold Foil Sheets (item #132622)
Versamark Pad (item #102283)
Metallics Embossing Powders (item #155555)
Garden Gems (item #159277)
Fine Art 3/8" Gold Ribbon (item #154561)
Measurements:
Soft Succulent Cardstock
Card Base - 5 1/2" x 8 1/2" (Scored at 4 1/4")
Sentiment Label die cut with the Painted Labels Dies
Ever Eden Specialty Designer Series Paper 
Card Front - 5 1/4" x 4"
Gold Foil
Detailed Border die cut with the Painted Labels Dies
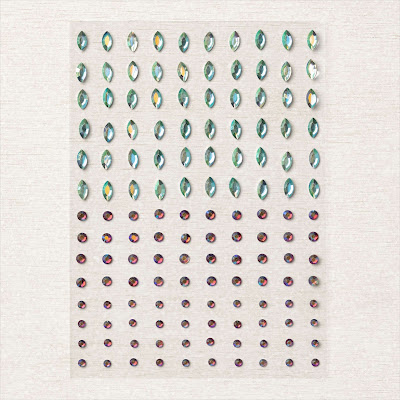
Using designer series paper is a great way to create beautiful Thank You cards quickly and makes it easy to mass produce a bunch of cards in a relatively short time. The Ever Eden Specialty Designer Series Paper is the perfect way to step your card design up to the next level and when you combine it with Gold heat embossing and Gold Foil detail, you have an amazing card with minimal supplies. I used the Fine Art Ribbon and Garden Gems to embellish this card for a touch of bling that helps give the design an elegant look. Both the Ever Eden Designer Series Paper and Garden Gems are available while supplies last, so don't delay placing your order for these wonderful products.
Thank you for taking the time to visit my blog. I hope that my card design will help inspire you to explore creating your own beautiful cards to share with the people you care about. Using designer series paper is a wonderful way to create amazing cards quickly and simply.

Now it's time to visit Charmane's blog and see what she has to share with us. Just click the Next button to visit her blog. We would love it if you would leave us a comment and let us know what you liked about our projects. I hope you enjoy the rest of our blog hop.


If you live in the U.S. and do not have a Stampin' Up! Demonstrator, please contact me and I would be happy to help you with your creative projects. You may also visit my Online Store to place your order and have it shipped to you. 

Until Next Time

Happy Stamping,

Tricia Butts
Independent Stampin' Up! Demonstrator

Like What You See? Visit My Online Store Here

Visit My Facebook Business Page for Updates & Ideas

Click here to Contact Me 


Stock Up On Your Favorite Retiring Products
From The July-December 2021 Mini Catalog
Click Below To Visit My Online Store