Friday, March 29, 2024

Crafty Collaborations Monochromatic Color Challenge Week 13 - Flirty Flamingo

Another week has gone by and it's once again time for the Crafty Collaborations Monochromatic Color Challenge. For Week 13 we are showcasing Flirty Flamingo, from the Brights Collection. 
For this week's card design, I chose to use an old favorite, the Playing In The Rain stamp set and coordinating dies to create a fun clean and simple card design. I paired them with the Perennial Postage Dies to create the layers for this card and had some fun with the Paper Piecing technique to add a touch of color to our little bunny friend.
Products Used:
Playing In the Rain stamp set (item #160542)
Playing In The Rain Dies (item #160550)
Perennial Postage Dies (item #162607)
Brights 6"x6" Designer Series Paper (item #161643)
Flirty Flamingo Cardstock (item #141416)
Thick Basic White Cardstock (item #159229)
Basic White Cardstock (item #159276)
Memento Tuxedo Black Pad (item #132708)
Flirty Flamingo Stampin' Blends Combo Pack (item #154884)
Baker's Twine Three Color Pack (item #162759)
Rainbow Adhesive Backed Dots (item #162758)
Stampin' Dimensionals (item #162758)
Measurements:
Thick Basic White Cardstock
Card Base - 8 1/2" x 5 1/2" (Scored at 4 1/4")
Flirty Flamingo Cardstock
Layer 1 die cut with the Perennial Postage Dies
Basic White Cardstock
Card Front die cut with the Perennial Postage Dies
Rabbit image stamped and die cut with the Playing In The Rain Dies
Flirty Flamingo Designer Series Paper
Jacket image stamped and fussy cut with Paper Snips
For this card design, I started with a Thick Basic White card base to help make the rest of the design pop. I added a layer of Flirty Flamingo cardstock that I die cut using the largest die from the Perennial Postage Dies. I also cut a Basic White cardstock layer using the next size down from the same die set to create the card front. I stamped the sentiment using Memento Tuxedo Black ink towards the bottom of the card front. I tied a piece of Flirty Flamingo Baker's Twine around the middle of the card front, wrapping it around twice before tying a knot on the right side. For the cute bunny, I stamped the image once onto Basic White cardstock and die cut it out with the coordinating die. I colored the nose and inside of the ears with the Dark Flirty Flamingo Stampin' Blends Marker and then gently blended it with the Color Lifter to soften the color. For the jacket, I stamped the image onto a piece of the Flirty Flamingo Designer Series Paper using Memento Black ink and then fussy cut it out with Paper Snips. I attached the jacket to bunny die cut and then attached it to the card front with Stampin' Dimensionals just above the Baker's Twine. To complete the card design, I added several Flirty Flamingo Dots. I love how this card design turned out and how cute this little bunny looks with her custom jacket. Paper Piecing is such a fun technique and a great way to add some color to your images without actually having to color. What do you think of my card this week? Let me know in the comments.
Thank you for taking the time to visit my blog. I hope that my card design will help inspire you to explore using Flirty Flamingo in your future projects. This is such a fun color to work with and there are so many wonderful possibilities to explore. 
Please take a look at this week's Monochromatic Insta Hop to see all the wonderful projects created this week using Flirty Flamingo. Just click here to get started. We would appreciate it if you would leave us a comment and let us know what you think about our projects. 

If you live in the U.S. and do not have a Stampin' Up! Demonstrator, please contact me and I would be happy to help you with your creative projects. You may also visit my Online Store to place your order and have it shipped to you. 

Until Next Time

Happy Stamping,

Tricia Butts
Independent Stampin' Up! Demonstrator

Like What You See? Visit My Online Store Here

Visit My Facebook Business Page for Updates & Ideas

Click here to Contact Me


Wednesday, March 27, 2024

Paper Pumpkin Possibilities March Blog Hop Memorable Meadows

Welcome to the Paper Pumpkin Possibilities March Blog Hop featuring the Memorable Meadows Kit. Our Design Team will be showcasing wonderful alternative projects to help spark your creativity and think beyond the projects included in this month's kit. 
For my alternative card design, I wanted to use part of one of the card bases to create the focal image for my design. I wanted to create the view looking out a window and I used the Garden Meadows Dies from the Online Exclusives to create the opening for my card. To add some texture, I used the Exposed Brick 3D Embossing Folder to emboss the Smoky Slate cardstock card front to create the look of a wall. The background design from the card base was a perfect scene for this calm and peaceful design. I wanted to keep it clean and simple to showcase this beautiful view. 
Products Used:
Paper Pumpkin April Kit Memorable Meadows
Garden Meadow Dies (item #162740)
Exposed Brick 3D Embossing Folder (item #161600)
Night of Navy Cardstock (item #100867)
Smoky Slate Cardstock (item #131202)
Smoky Slate Classic Ink Pad (item #147113)
Adhesive Backed Dragonflies & Birds (item #162743)
Sponge Daubers (item #133773)
Measurements:
Night of Navy Cardstock
Card Base - 5 1/2" x 8 1/2" (Scored at 4 1/4")
Smoky Slate Cardstock
Card Front - 5 1/4" x 4" Embossed with the Exposed Brick 3D Embossing Folder
Memorable Meadows Kit
Focal View die cut with the Garden Meadows Dies from one of the card bases
1 Sentiment Label 
This beautiful card is simple to create and has a wonderful combination of texture and detail. I started with a Night of Navy card base and chose a piece of Smoky Slate cardstock for the card front. I embossed it using the Exposed Brick 3D Embossing Folder to create the look of a brick wall. Using a Sponge Dauber and Smoky Slate Classic ink, I gently sponged the edges and raised areas of the card front to bring out the detail and add dimension to the design. To create the window opening, I used the large die from the Garden Meadow Dies to die cut the opening from the Smoky Slate cardstock. For the view inside the window, I used the same large die to die cut the piece out of the card base from the kit. I attached the Smoky Slate card front to the Night of Navy card base using Stampin' Dimensionals from the kit, to raise it up and add dimension to the design. I then attached the scenery insert to the card base, placing it inside the opening of the Smoky Slate cardstock layer. For the sentiment, I stamped the image from the exclusive stamp set using the Garden Green ink spot onto the sentiment label and attached it across the opening, towards the bottom of the window. To complete the card design, I added several of the Adhesive Backed Birds to add a touch of bling to the card design. I love the peaceful feeling of this card design and I hope it will bring comfort to someone who may be going through a difficult time.
Thank you for taking the time to visit my blog. I hope that my alternative card design will help inspire you to think outside the box to create your own wonderful projects. The Memorable Meadows Refill Kit is available while supplies last for Paper Pumpkin subscribers and can be ordered from my Online Store here.
Please take the time to visit with my fellow Design Team members to view their amazing projects using this month's kit. Just click on the links in the Roll Call List to find visit their blogs. We would appreciate it if you would leave us a comment and let us know what you enjoyed about our projects.

If you live in the U.S. and do not have a Stampin' Up! Demonstrator, please contact me and I would be happy to help you with your creative projects. You may also visit my Online Store to place your order and have it shipped to you. 

Until Next Time

Happy Stamping,

Tricia Butts
Independent Stampin' Up! Demonstrator

Like What You See? Visit My Online Store Here

Visit My Facebook Business Page for Updates & Ideas

Click here to Contact Me


Create Beautiful Elegant Cards
With The Delicate Wings Paper Pumpkin Kit
Click Below To Subscribe By April 10th

Explore The Amazing New Products
Just Added To The Online Exclusives
Click Below To View Them In My Online Store


Monday, March 25, 2024

Crafty Challenge March Blog Hop Color Challenge

 It's time to start off a new week with the Crafty Challenge March Blog Hop. This month we have a Color Challenge using the following colors: Calypso Coral, Flirty Flamingo, Berry Burst, Crushed Curry and Garden Green. Our Design Team will be sharing their projects and ideas to help inspire you to create your own beautiful projects using these pretty colors which are perfect for Spring. 
When I saw the colors for this month's color challenge, I was drawn to the cup image in the Everyday Details Bundle. I thought it would be perfect for coloring with Watercolor Pencils and luckily most of the challenge colors are available in the two sets of Watercolor Pencils that Stampin' Up! offers. I found this beautiful striped pattern in the Les Shoppes Designer Series Paper which made the perfect background for my card design and features Flirty Flamingo and Calypso Coral with Basic White to create an almost wallpaper background. I loved the sentiment and coordinating dies from the Thoughtful Expressions Bundle and they added just the right balance to this card design. 
Products Used:
Everyday Details Bundle (item #162865)
Thoughtful Expressions Bundle (item #162822)
Stylish Shapes Dies (item #159183)
Les Shoppes Designer Series Paper (item #161322)
Calypso Coral Cardstock (item #122925)
Basic White Cardstock (item #159276)
Berry Burst Classic Ink Pad (item #147143)
Memento Tuxedo Black Pad (item #132708)
Versamark Pad (item #102283)
Metallics Embossing Powders (item #155555)
Blender Pens (item #102845)
Watercolor Pencils Assortment 1 (item #161700)
Watercolor Pencils Assortment 2 (item #149014)
Gold & Silver 1/8" Trim Combo Pack (item #161633)
Festive Pearls (item #159963)
Stampin' Dimensionals (item #104430)
Measurements:
Calypso Coral Cardstock 
Card Base - 5 1/2" x 8 1/2" (Scored at 4 1/4")
Large Circle die cut with the Stylish Shapes Dies 
Matte Sentiment Label die cut with the Thoughtful Expressions Dies
Basic White Cardstock
Detailed Circle die cut with the Everyday Details Dies
Sentiment Label die cut with the Thoughtful Expressions Dies
Les Shoppes Designer Series Paper 
Card Front - 5 1/4" x 4" 
For this card, I wanted to keep the design clean and simple with the main focus being the combination of Flirty Flamingo and Calypso Coral with accents using the other colors to color the cup image. I used a Blender Pen to add a touch of Berry Burst Classic ink to color the flower and add shadows to the base of the cup and the inside rim. I also used the Blender Pen to gently smooth out the coloring using the Watercolor Pencils to add a softer look. I die cut the image out the one of the detailed circle dies from the Everyday Details Dies and layered it onto a larger Calypso Coral circle that I die cut out with the Stylish Shapes Dies. For the sentiment, I heat embossed the image with Gold embossing powder and die cut it out with the coordinating die from the Thoughtful Expressions Dies before layering it onto a slightly larger label die cut from Calypso Coral cardstock using the same set of dies. To help step up the design, I added two pieces of ribbon around the bottom of the designer series paper card front and attached them to the back before adding it to the card base. I attached both the focal circle and the sentiment label to the card front using Stampin' Dimensionals to pop them up. To complete the design, I added several of the Gold Pearls to decorate the sentiment label and the center of the flower. The finished card is a wonderful combination of all five colors to create a lovely clean and simple design. 
Thank you for taking the time to visit my blog. Hope that my card design will help provide you with fresh ideas to use these beautiful colors to create your own wonderful projects. Whether you choose to use just a couple, or all five of them together, the possibilities are endless.
Please take a moment to journey along our blog hop and see all the other wonderful projects being shared this month. Just click on the links in the Roll Call List below to find your way. We would appreciate it if you would leave us a comment and let us know what you like about our projects. 

If you live in the U.S. and do not have a Stampin' Up! Demonstrator, please contact me and I would be happy to help you with your creative projects. You may also visit my Online Store to place your order and have it shipped to you. 

Until Next Time

Happy Stamping,

Tricia Butts
Independent Stampin' Up! Demonstrator

Like What You See? Visit My Online Store Here

Visit My Facebook Business Page for Updates & Ideas

Click here to Contact Me


Explore The Amazing New Products
Just Added To The Online Exclusives
Click Below To View Them In My Online Store

Coming Soon!
Last Chance Product Sale
April 9-30, 2024
Retiring Products Available While Supplies Last


Saturday, March 23, 2024

Stamping With Friends March Color Challenge Blog Hop

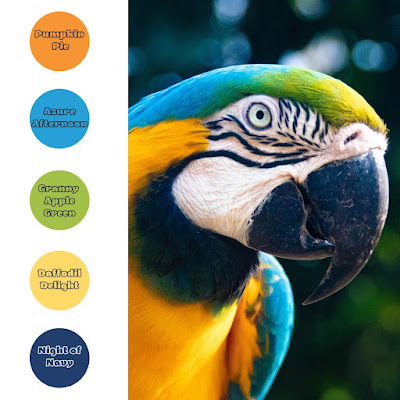
Let's have some fun with today's Stamping With Friends March Color Challenge Blog Hop. We have been challenged to create a project using at least three of the following colors: Pumpkin Pie, Azure Afternoon, Granny Apple Green, Daffodil Delight and Night of Navy. I am excited to see what our Design Team will be sharing using these bold, beautiful colors. 
For this color challenge, I decided to use all five colors to create a fun scrappy strip birthday card. I love this technique for using up my scraps of designer series paper and I decided to arrange them in rainbow order to create a bold, fun design. I used Night of Navy cardstock for the card base and the sentiment to help make the bright colors pop. This design would be perfect for a masculine birthday card and requires just a few supplies to create. Plus, did you notice there is no stamping? How great is that for creating this clean and simple design.
Products Used:
Wanted To Say Dies (item #161594)
Brights 6"x6" Designer Series Paper (item #161643)
Neutrals 6"x6" Designer Series Paper (item #161641)
Night of Navy Cardstock (item #100867)
Basic White Cardstock (item #159276)
Neutrals Adhesive Backed Sequins (item #161627)
Measurements:
Night of Navy Cardstock
Card Base - 5 1/2" x 8 1/2" (Scored at 4 1/4")
Sentiment Matte Layer die cut with the Wanted To Say Dies
Basic White Cardstock
Card Front Layer - 5 1/4" x 4"
Designer Series Paper Strips
1 each of Pumpkin Pie, Daffodil Delight, Granny Apple Green, Azure Afternoon and Night of Navy - 1" x 4"
Scrappy strip cards are so much fun to create and are simple to assemble. For this card design, I was able to use the Brights 6" x 6" Designer Series Paper for all but Night of Navy to create the focal design (Night of Navy is from the Neutrals 6" x 6" Designer Series Paper) and it was simple to cut 1" x 4" strips from each of the colors using the same pattern for each. I attached them to the Basic White cardstock card front, leaving a very narrow border between the strips and also on each end to create that extra contrast. For the sentiment, I die cut the detailed sentiment from Basic White cardstock and the matte layer from Night of Navy cardstock and layered them to create a bold sentiment. I attached it to the center of the card front layer and then added the card front to the Night of Navy card base. To complete the card design, I added several Gold sequins for a touch of bling, including a small sequin to create the dot for the "i". I love how simple this card was to put together and for this style of card, it doesn't have to be perfectly spaced or lined up. It's part of the charm of a scrappy strip card. 
Thank you for taking the time to visit my blog. I hope that my card design will inspire you to give this color challenge a try and see what wonderful projects you can create using these beautiful colors. There are so many possibilities to explore. 
Please take a journey along our blog hop and visit our Design Team to see their amazing projects. Just click the links in the Roll Call List below to find your way. We would appreciate it if you would leave us a comment and let us know what you liked about our projects.

If you live in the U.S. and do not have a Stampin' Up! Demonstrator, please contact me and I would be happy to help you with your creative projects. You may also visit my Online Store to place your order and have it shipped to you. 

Until Next Time

Happy Stamping,

Tricia Butts
Independent Stampin' Up! Demonstrator

Like What You See? Visit My Online Store Here

Visit My Facebook Business Page for Updates & Ideas

Click here to Contact Me


Explore The Amazing New Products
Just Added To The Online Exclusives
Click Below To View Them In My Online Store

Coming Soon!
Last Chance Product Sale
April 9-30, 2024
Retiring Products Available While Supplies Last


Friday, March 22, 2024

Crafty Collaborations Monochromatic Color Challenge Week 12 - Melon Mambo

Happy Friday everyone. It's time for Week 12 of the Crafty Collaborations Monochromatic Color Challenge and this week we are showcasing Melon Mambo, from the Brights Collection. This bold, beautiful pink was a fun color to work with and I chose to combine stamps, papers and ink to create a pretty birthday card to help celebrate a special day.
For this card design, I chose to create an ombre background to help make the stamped images pop. I chose to use the Beautiful Balloons Bundle from the 2023-2024 Annual Catalog and combined it with the sentiment from the Biggest Wish stamp set. I used a combination of 1st, 2nd and even 3rd generation stamping to create the different shades of Melon Mambo for the sentiment, streamers and detail on the balloons. I love how this card design showcases how versatile this color is. 
Products Used:
Beautiful Balloons Bundle (item #161457)
Biggest Wish stamp set (item #155052)
Brights 6"x6" Designer Series Paper (item #161643)
Melon Mambo Cardstock (item #115320)
Basic White Cardstock (item #159276)
Melon Mambo Classic Ink Pad (item #147051)
Baker's Twine Essentials Pack (item #155475)
Glossy Dots Assortment (item #158827)
Blending Brushes (item #153611)
Mini Glue Dots (item #103683)
Stampin' Dimensionals (item #104430)
Measurements:
Melon Mambo Cardstock
Card Base - 8 1/2" x 5 1/2" (Scored at 4 1/4")
1 Medium Balloon die cut with the Beautiful Balloons Dies
1 Small Balloon die cut with the Beautiful Balloons Dies
Basic White Cardstock
Card Front - 5 1/4" x 4"
2 Small Balloons die cut with the Beautiful Balloons Dies
Melon Mambo Designer Series Paper
2 Small Balloons die cut with the Beautiful Balloons Dies
To create this card design, I started with a Melon Mambo card base and added a piece of Basic White cardstock for the card front that I colored using a Blending Brush and Melon Mambo Classic ink. I wanted to create a soft, blended ombre background with the darkest color at the bottom and then fading out to the lightest color towards the top. I stamped the sentiment towards the center of the card front using a combination of the fonts available in the Biggest Wish stamp set to create a fun contrast. For the streamers, I stamped off once and then added them across the top and bottom of the card front to create a partial frame. I wanted to add some texture and dimension using the balloons and I die cut two each from Basic White cardstock, Melon Mambo cardstock and the heart patterned designer series paper. For the Basic White Balloons, I stamped off the small detailed image twice before stamping each of the balloons and then blended soft color onto the balloons using the remaining ink left in the Blending Brush. To create the strings, I stamped the image onto the card front in the area where I wanted to add the balloons. I attached the balloons to the card front in the top right and bottom left corners, popping up the top balloon with Stampin' Dimensionals. To complete the design, I added two White Baker's Twine bows to the balloons using Mini Glue Dots and several Glossy Dots for a touch of bling. I love how bold and beautiful this card design looks and how well it showcases the versatility of Melon Mambo. Let me know what you think about this fun card design in the comments.
Thank you for taking the time to visit my blog. I hope that my card design will help inspire you to explore using Melon Mambo to create your own beautiful projects. It's amazing what you can achieve by combining stamps, paper and ink to create your projects.
Don't forget to check out all the amazing projects being shared in today's Monochromatic Insta Hop over on Instagram. Just click here to get started and click on the links to see all the wonderful ideas shared today. We would love it if you would leave us a comment and let us know what you liked about our projects. 

If you live in the U.S. and do not have a Stampin' Up! Demonstrator, please contact me and I would be happy to help you with your creative projects. You may also visit my Online Store to place your order and have it shipped to you. 

Until Next Time

Happy Stamping,

Tricia Butts
Independent Stampin' Up! Demonstrator

Like What You See? Visit My Online Store Here

Visit My Facebook Business Page for Updates & Ideas

Click here to Contact Me


Explore The Amazing New Products
Just Added To The Online Exclusives
Click Below To View Them In My Online Store

Coming Soon!
Last Chance Product Sale
Retiring Products Available While Supplies Last