Showing posts with label Color & Contour stamp set. Show all posts

Tuesday, December 14, 2021

Inspire Create Share December Blog Hop Thank You

Welcome to the Inspire Create Share December Blog Hop with the theme of Thank You cards. Our Design Team Members will be sharing their projects and ideas to help inspire you to create your own beautiful cards to send to family and friends. 
Thank You cards are one of the most popular cards and often we need one at a moment's notice to let someone know how much we appreciate them. For my card design today, I wanted to share how you can create multiple cards with the same layout, using pretty designer series paper. I chose to use the beautiful Ever Eden Specialty Designer Series Paper as it has so many wonderful patterns that work well for both masculine and feminine card designs. I used the Painted Labels Dies to create the sentiment label and the detailed border and the sentiment is from the Color & Contour stamp set. A little Gold embossing and embellishments help step up this clean and simple card design and make it extra special. From one sheet of 12"x12" designer series paper, you can get 6 card fronts measuring 5 1/4" x 4. With 12 sheets of this pretty paper in the pack, you can create 72 beautiful cards using this layout to create a wonderful stash of cards to have on hand when you need them. 
Products Used:
Color & Contour stamp set (item #154994)
Painted Labels Dies (item #151605)
Ever Eden Specialty Designer Series Paper (item #159996)
Soft Succulent Cardstock (item #155776)
Gold Foil Sheets (item #132622)
Versamark Pad (item #102283)
Metallics Embossing Powders (item #155555)
Garden Gems (item #159277)
Fine Art 3/8" Gold Ribbon (item #154561)
Measurements:
Soft Succulent Cardstock
Card Base - 5 1/2" x 8 1/2" (Scored at 4 1/4")
Sentiment Label die cut with the Painted Labels Dies
Ever Eden Specialty Designer Series Paper 
Card Front - 5 1/4" x 4"
Gold Foil
Detailed Border die cut with the Painted Labels Dies
Using designer series paper is a great way to create beautiful Thank You cards quickly and makes it easy to mass produce a bunch of cards in a relatively short time. The Ever Eden Specialty Designer Series Paper is the perfect way to step your card design up to the next level and when you combine it with Gold heat embossing and Gold Foil detail, you have an amazing card with minimal supplies. I used the Fine Art Ribbon and Garden Gems to embellish this card for a touch of bling that helps give the design an elegant look. Both the Ever Eden Designer Series Paper and Garden Gems are available while supplies last, so don't delay placing your order for these wonderful products.
Thank you for taking the time to visit my blog. I hope that my card design will help inspire you to explore creating your own beautiful cards to share with the people you care about. Using designer series paper is a wonderful way to create amazing cards quickly and simply.

Now it's time to visit Charmane's blog and see what she has to share with us. Just click the Next button to visit her blog. We would love it if you would leave us a comment and let us know what you liked about our projects. I hope you enjoy the rest of our blog hop.


If you live in the U.S. and do not have a Stampin' Up! Demonstrator, please contact me and I would be happy to help you with your creative projects. You may also visit my Online Store to place your order and have it shipped to you. 

Until Next Time

Happy Stamping,

Tricia Butts
Independent Stampin' Up! Demonstrator

Like What You See? Visit My Online Store Here

Visit My Facebook Business Page for Updates & Ideas

Click here to Contact Me 


Stock Up On Your Favorite Retiring Products
From The July-December 2021 Mini Catalog
Click Below To Visit My Online Store


Saturday, August 14, 2021

Stamping Inkspirations August Blog Hop Reading Is Fonts-amental

Welcome to the Stamping Inkspirations August Blog Hop as we explore the theme, "Reading is Fonts-amental". We are being challenged to show how fonts can make a difference to a project and also to incorporate mixed media as a way to texture and character. 
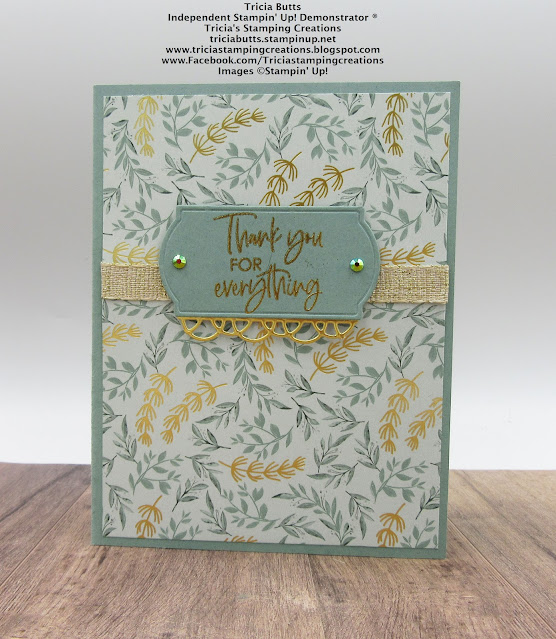
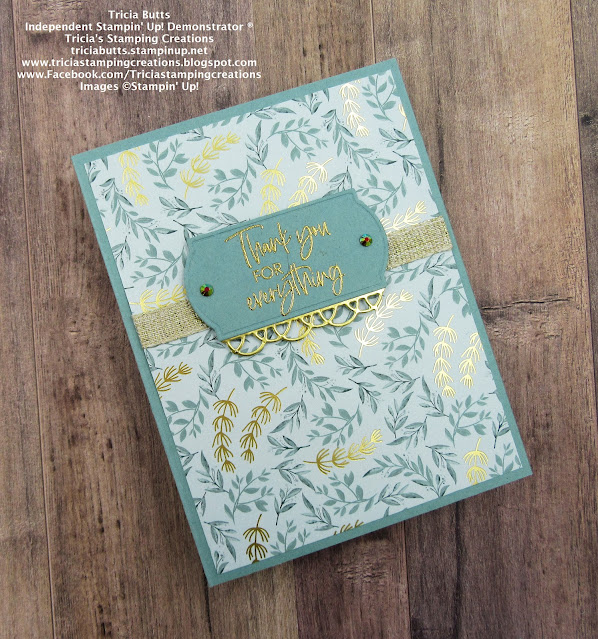
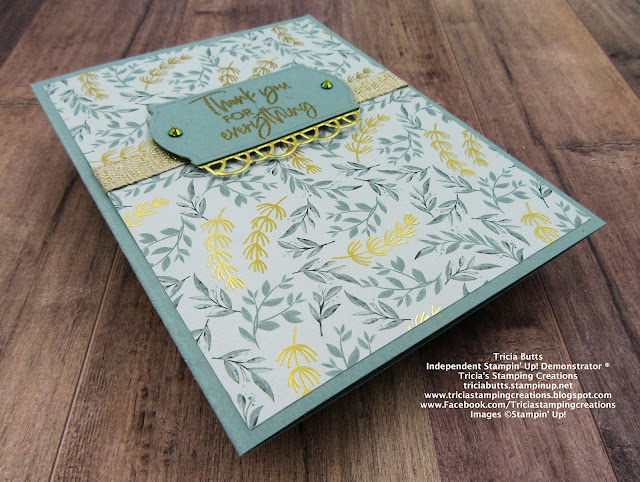
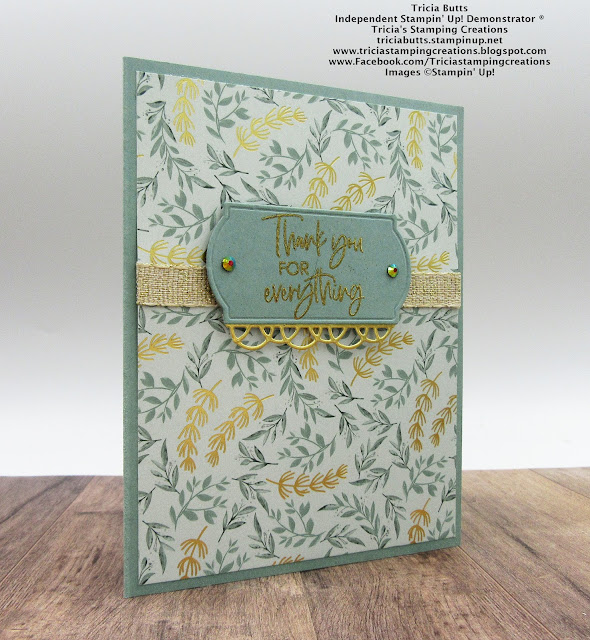
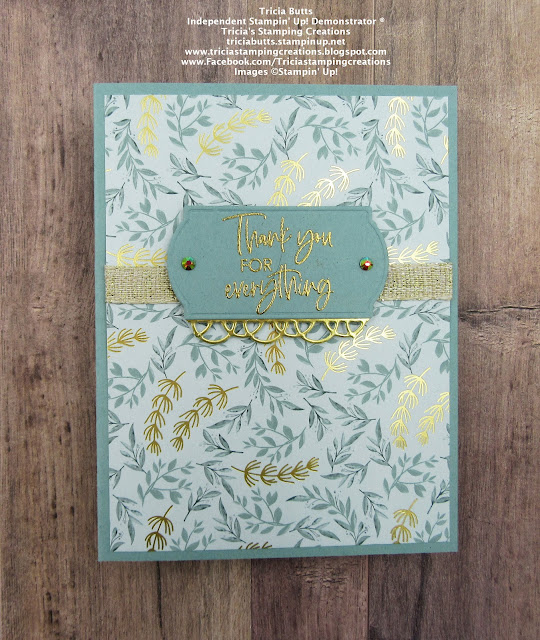
For my card design today, I chose to use the Gorgeous Leaves stamp set to create a collage style background with Fall colors. I also embossed the background with the Timeworn Type 3D Embossing Folder which has text as part of the design. I love the way it adds texture to the background. I highlighted some of the areas by heat embossing Gold embossing Powder to some of the raised areas, including the embossed words. The gold adds a vintage feeling to the design. I heat embossed the sentiment from the Color & Contour stamp set onto the Early Espresso label punched out with the Label Me Lovely Punch. 
Products Used:
Gorgeous Leaves stamp set (item #153365)
Color & Contour stamp set (item #154994)
Timeworn Type 3D Embossing Folder (item #156505)
Label Me Lovely Punch (item #151296)
Early Espresso Cardstock (item #119686)
Crumb Cake Cardstock (item #120953)
Very Vanilla Cardstock (item #101650)
Soft Suede Classic Ink Pad (item #147115)
Pear Pizzazz Classic Ink Pad (item #147104)
Old Olive Classic Ink Pad (item #147090)
Cajun Craze Classic Ink Pad (item #147085)
Sahara Sand Classic Ink Pad (item #147117)
Versamark Pad (item #102283)
Metallics Embossing Powders (item # 155555)
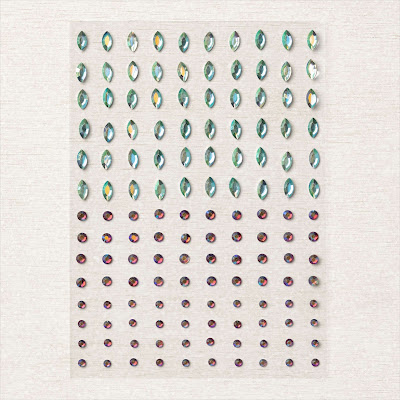
Gilded Gems (item #152478)
Fine Art 3/8" Ribbon (item #154561)
Stampin' Dimensionals (item # 104430)
Measurements:
Crumb Cake Cardstock
Card Base - 8 1/2" x 5 1/2" (Scored at 4 1/4")
Early Espresso Cardstock
Layer 1 - 5 1/4" x 4"
Sentiment Label punched out with the Label Me Lovely Punch
Very Vanilla Cardstock
Background Layer - 5" x 3 3/4"
This card design was so much fun to create and I love being able to combine stamping with embossing to add texture and dimension to the design. The Very Vanilla cardstock layer was stamped with a variety of images from the Gorgeous Leaves stamp set to create a wonderful collage. The Timeworn Type 3D Embossing Fold adds a vintage feel to the card and I used a Sponge Dauber to gently sponge Versamark ink onto some of the raised embossing and then heat embossed with Gold Embossing Powder. To help bring out the text of the embossing, I used a Sponge Dauber with Sahara Sand Classic ink to burnish over the raised areas to make the words pop out. For the sentiment, I heat embossed the image from the Color & Contour stamp set with Gold Embossing powder onto an Early Espresso label punched out with the Label Me Lovely Punch and I added it over a piece of the Fine Art Ribbon with Stampin' Dimensionals attached to the card front. I added two large Gilded Gems to finish off the design and add a touch of bling. 
Thank you for taking the time to visit my blog. I hope that my card design will help inspire you to explore adding character to your projects by adding texture and fonts with different mediums. There are so many wonderful options to explore.
Now it's time to visit Mo's wonderful blog to see what she has created for us. Just click the Next button to visit her blog or use the Roll Call List below to find your way. We would love it if you would leave us a comment and let us know what you like about our projects. I hope you enjoy the rest of our blog hop.


If you live in the U.S. and do not have a Stampin' Up! Demonstrator, please contact me and I would be happy to help you with your creative projects. You may also visit my Online Store to place your order and have it shipped to you.

Until Next Time

Happy Stamping,

Tricia Butts
Independent Stampin' Up! Demonstrator

Like What You See? Visit My Online Store Here

Visit My Facebook Business Page for Updates & Ideas

Click here to Contact Me


Earn Exclusive Free Products

During Sale-a-bration

Click Below For More Details


Explore Your Creativity
With The July-December 2021 Mini Catalog
Click Below To Visit My Online Store

Celebrate Fall
With The Haunts & Harvest Paper Pumpkin Kit
Click Below To Subscribe By September 10th