Welcome to the Paper Pumpkin Possibilities December Blog Hop as we showcase fun alternative projects using the Lots of Pun Kit. You will be visiting with our talented Design Team Members as they share their projects and ideas to help you think outside the box.
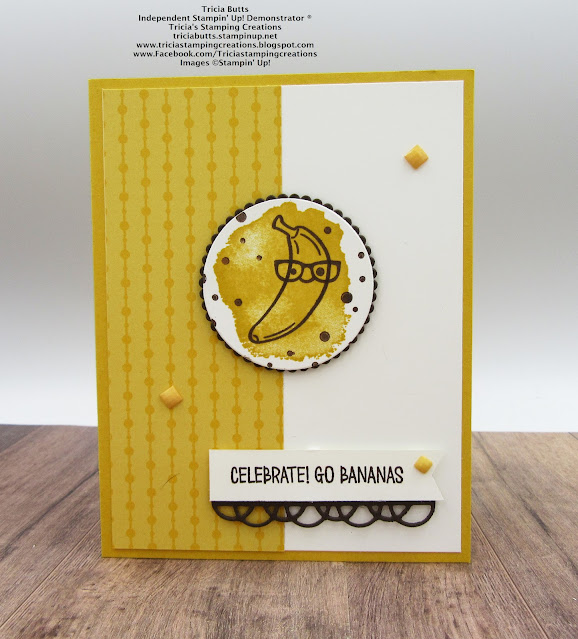
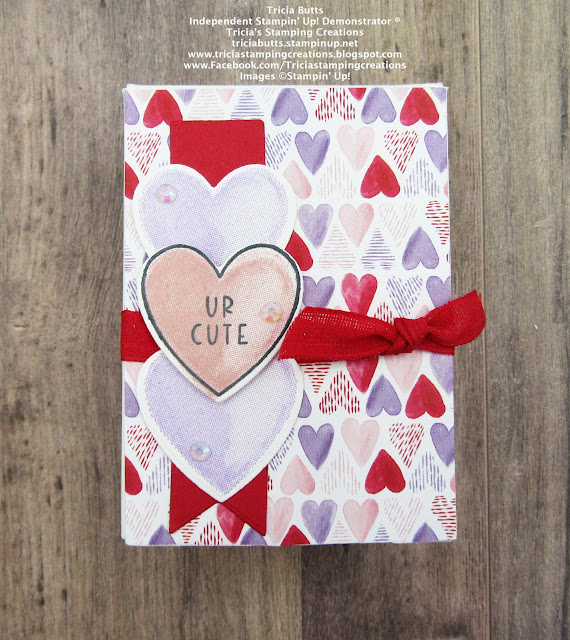
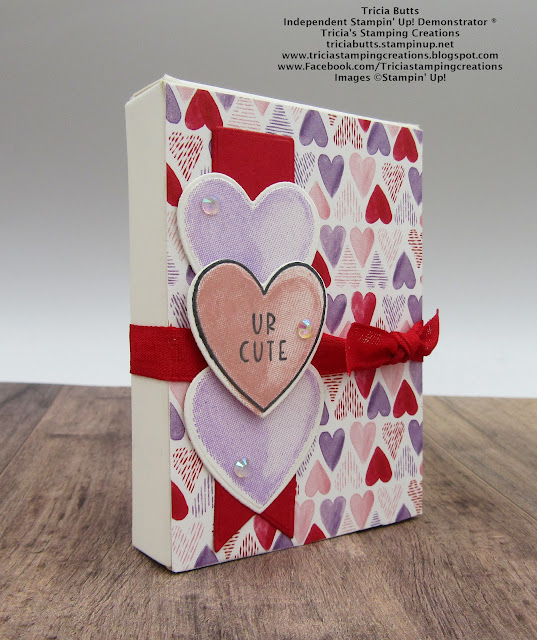
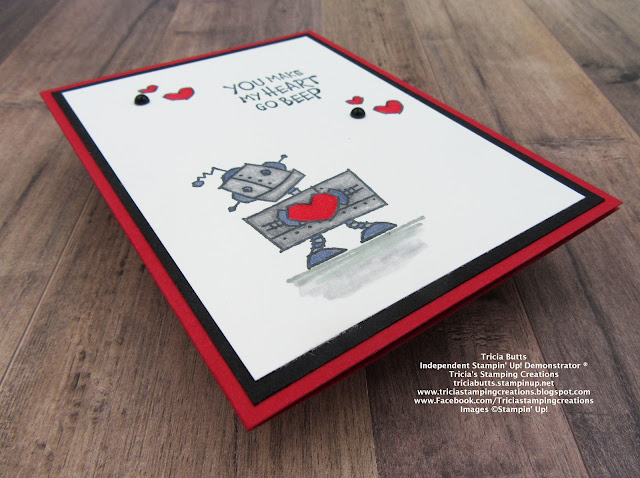
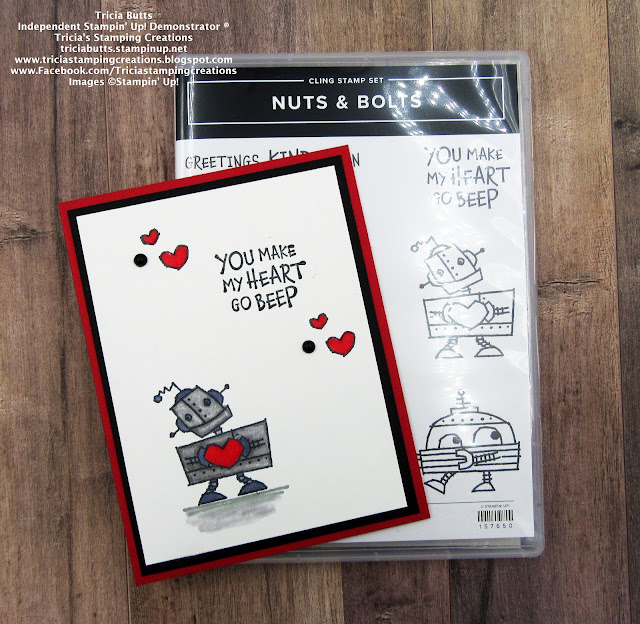
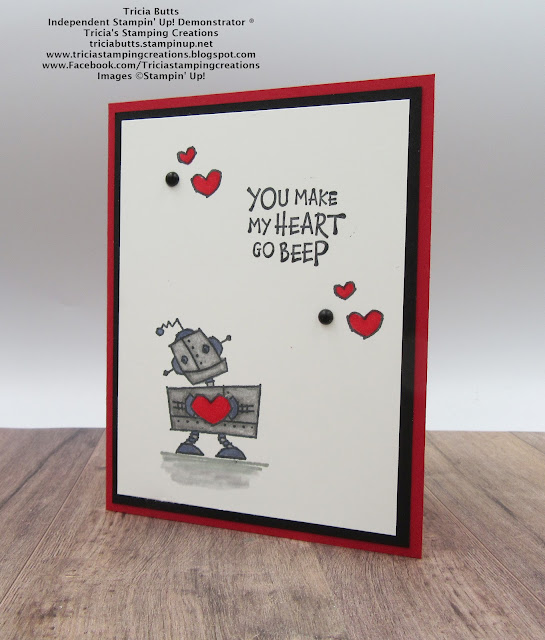
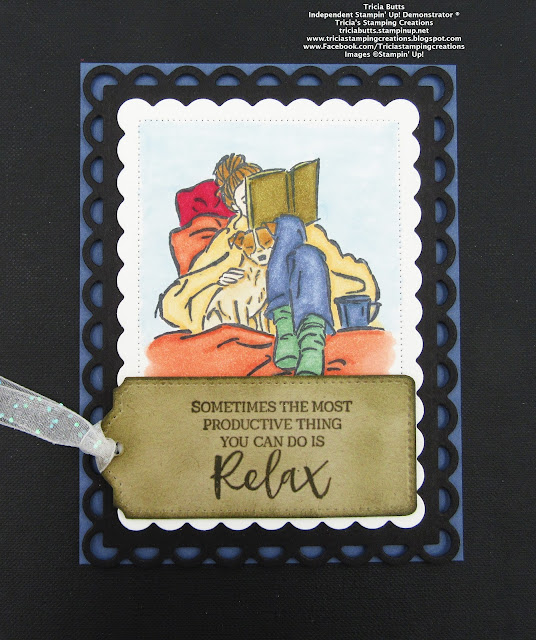
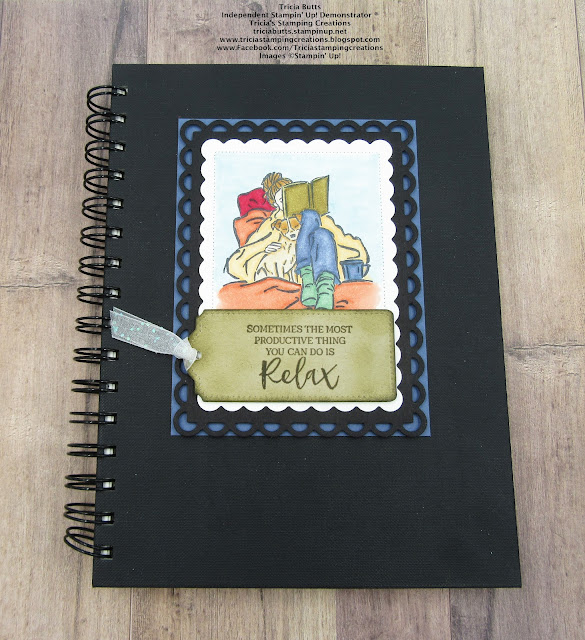
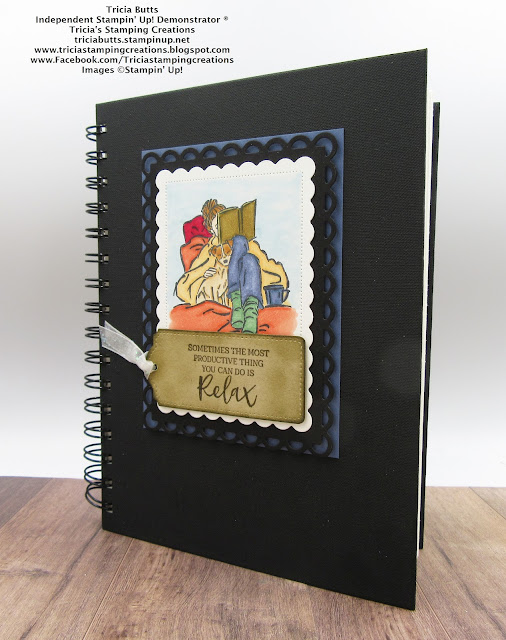
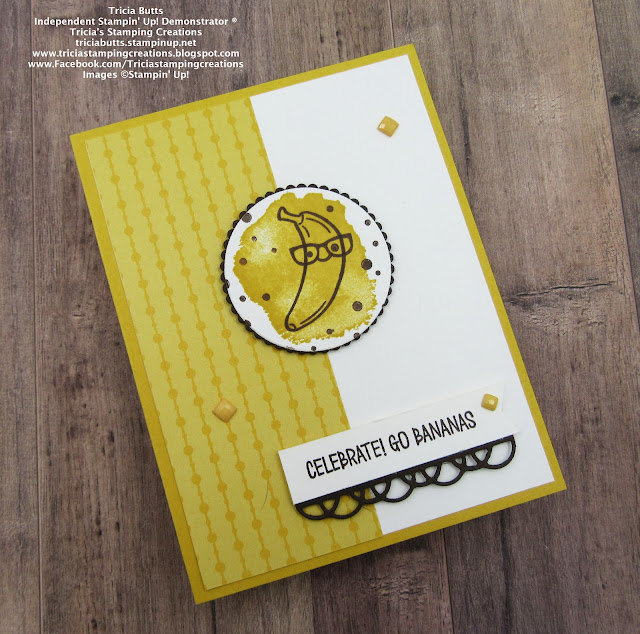
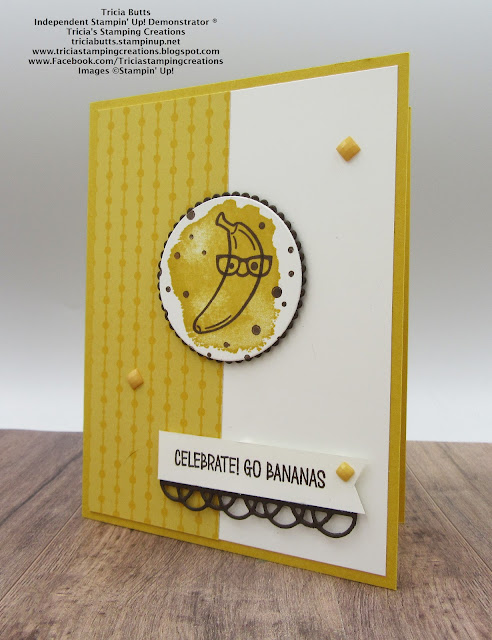
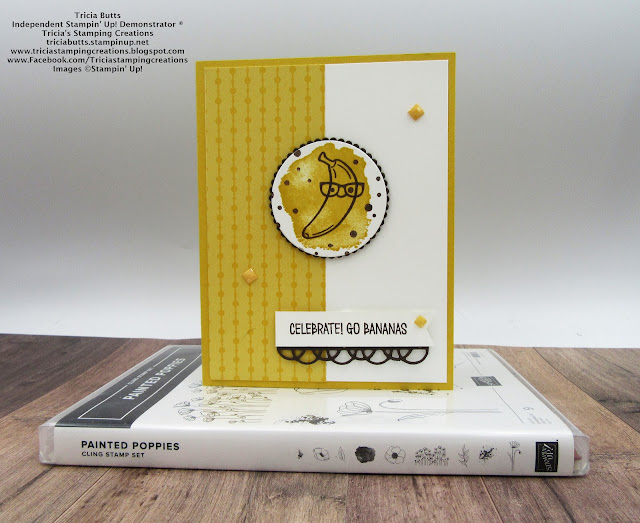
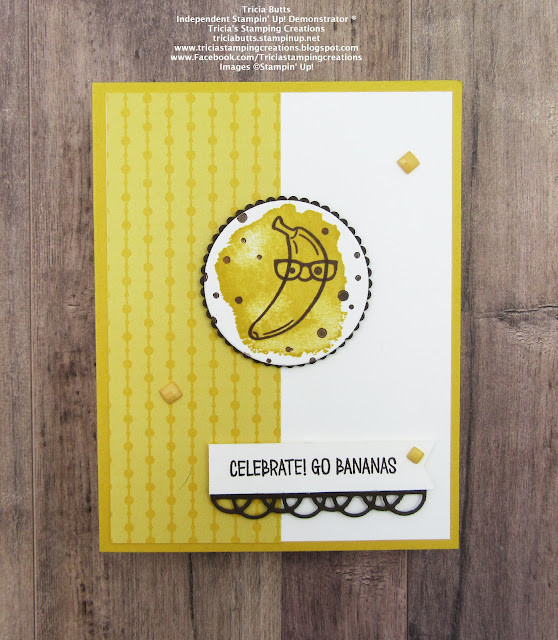
This fun Paper Pumpkin has so many wonderful possibilities and I wanted to try creating a cute alternative card design with the exclusive stamp set. The images in this stamp set are perfect for funny Valentine's Day cards or quirky all occasion cards. For today's card, I decided to create a celebration card using the banana image and coordinating sentiment.
Products Used:
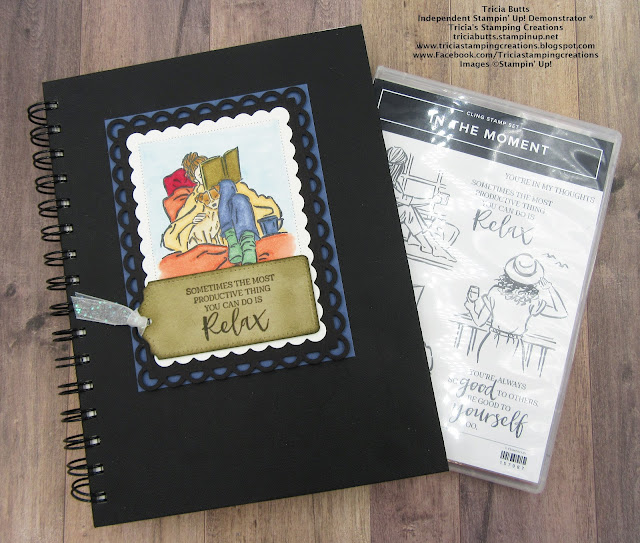
Paper Pumpkin December 2021 Lots of Pun Kit
Painted Poppies stamp set (item #151599)
Painted Labels Dies (item #151605)
Layering Circles Dies (item #151770)
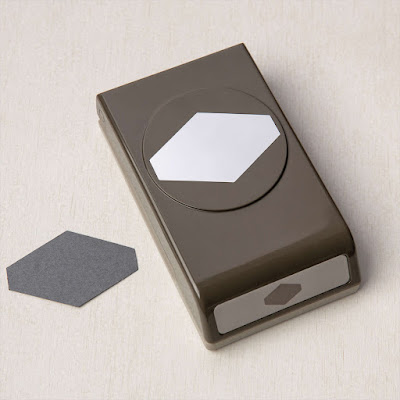
Tailored Tag Punch (item #145667)
2020-2022 In Color 6"x6" Designer Series Paper (item #155230)
Bumblebee Cardstock (item #153077)
Early Espresso Cardstock (item #119686)
Basic White Cardstock (item #159276)
Bumblebee Classic Ink Pad (item #153116)
Early Espresso Classic Ink Pad (item #147114)
2020-2022 In Color Square Gems (item #155572)
Stampin' Dimensionals

Measurements:
Bumblebee Cardstock
Card Base - 8 1/2" x 5 1/2" (Scored at 4 1/4")
Basic White Cardstock
Card Front - 5 1/4" x 4"
Focal circle die cut with the Layering Circles Dies
Sentiment Label strip - 5/8" x 3"
Bumblebee Designer Series Paper
1 Strip - 2" x 5 1/4"
Early Espresso Cardstock
Scalloped Circle die cut with Layering Circles Dies
Border die cut with Painted Labels Dies

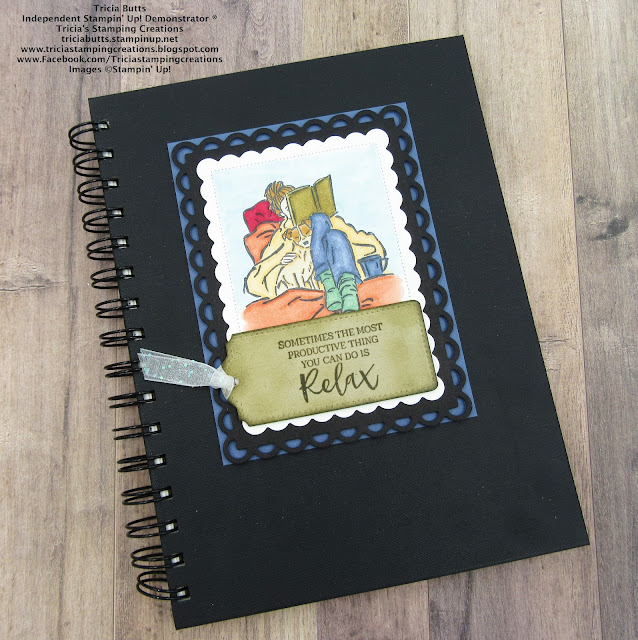
This card layout can be used with any of the images and sentiments from this wonderful stamp set to create punny cards to send to family and friends. For my card design, I chose to use Bumblebee cardstock for the card base to tie in with the color of a ripe banana. I added a piece of the Bumblebee designer series paper to the left side of the Basic White card front to help step up the card design. For the focal image, I stamped the background using the large splotch stamp in the Painted Poppies stamp set onto the Basic White circle using Bumblebee Classic ink. I then stamped the banana, face and glasses images with Early Espresso Classic ink onto the Bumblebee stamped background. This is great for adding color to the image. I added some dots with Early Espresso for the background to add a bit of texture to the design. I layered the focal image onto the Early Espresso scalloped circle and attached it to the center of the card front with Stampin' Dimensionals. For the sentiment, I stamped the image onto a strip of Basic White cardstock with Early Espresso cardstock and flagged the right end with the Tailored Tag Punch to create a banner. I added the Early Espresso border to the bottom of the sentiment label and added it to the card front with Stampin' Dimensionals To finish off the card design, I added some Bumblebee Square Gems for a touch of bling. Doesn't this card just make you want to smile? I love making happy cards and I can see so many wonderful possibilities with the stamp set in this kit.
Thank you for taking the time to visit my blog. I hope that my card design will help you explore creating your own amazing alternative projects. The exclusive stamp set in this kit will provide you with endless opportunities to create fun projects long after the other supplies have been used up.
Now it's time to visit Mary's blog and see what she has created with this wonderful kit. Just click the Next button to visit her blog. We would love it if you would leave us a comment and let us know what you enjoyed about our projects. I hope our blog hop inspires you to create your own beautiful projects.
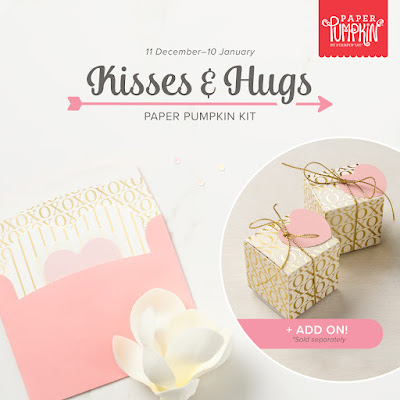
If you live in the U.S. and do not have a Stampin' Up! Demonstrator, please contact me and I would be happy to help you with your creative projects. You may also visit my Online Store to place your order and have it shipped to you. If you are not already a Paper Pumpkin subscriber, make sure to sign up by January 10th to receive the January Kisses & Hugs Kit.
Until Next
Time
Happy
Stamping,
Tricia Butts
Independent Stampin' Up!
Demonstrator
Like What You
See? Visit My Online Store Here
Visit My Facebook Business Page for Updates & Ideas
Click here to Contact Me
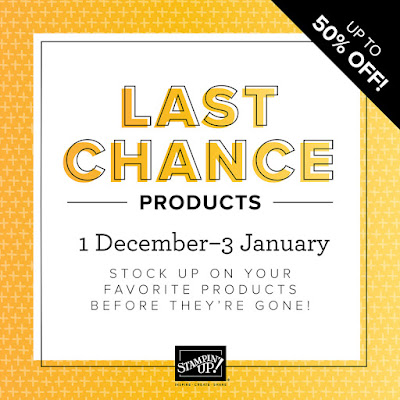
Stock Up On Your Favorite Retiring Products
From The July-December 2021 Mini Catalog
Click Below To Visit My Online Store
From The July-December 2021 Mini Catalog
Click Below To Visit My Online Store
Send Kisses & Hugs
With The January Paper Pumpkin Kit
Click Below To Subscribe By January 10th, 2022