Showing posts with label Painted Poppies stamp set. Show all posts

Tuesday, December 28, 2021

Paper Pumpkin Possibilities December Blog Hop Lots of Pun

Welcome to the Paper Pumpkin Possibilities December Blog Hop as we showcase fun alternative projects using the Lots of Pun Kit. You will be visiting with our talented Design Team Members as they share their projects and ideas to help you think outside the box. 
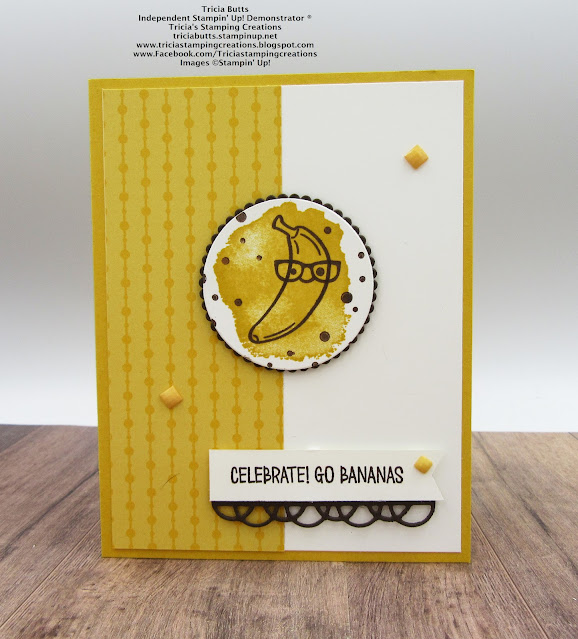
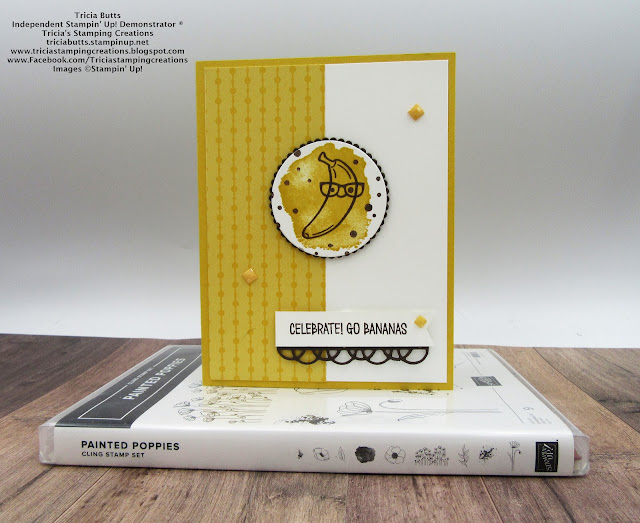
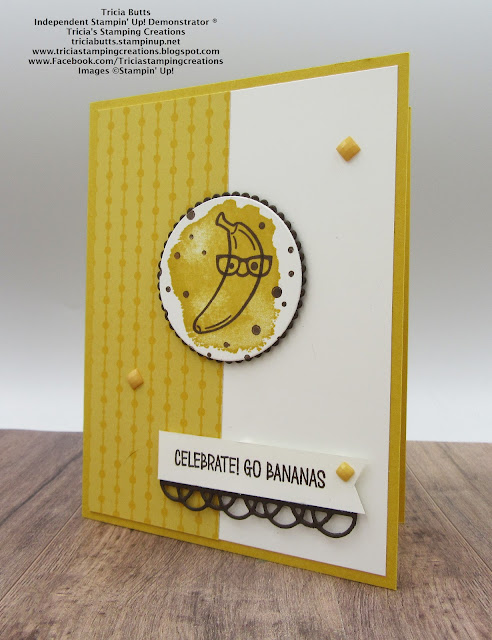
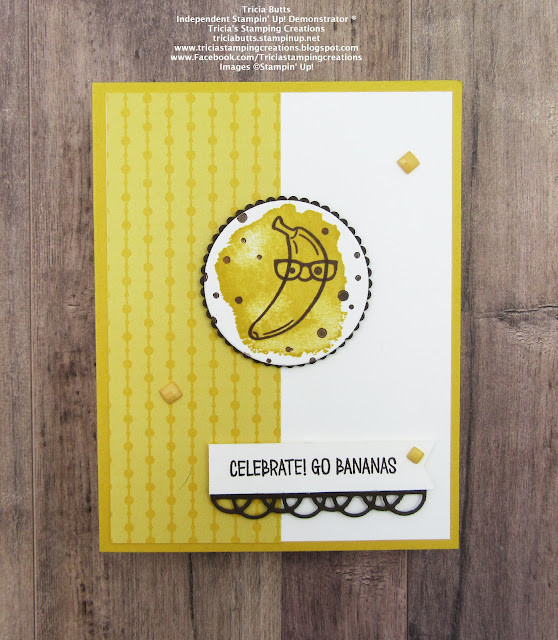
This fun Paper Pumpkin has so many wonderful possibilities and I wanted to try creating a cute alternative card design with the exclusive stamp set. The images in this stamp set are perfect for funny Valentine's Day cards or quirky all occasion cards. For today's card, I decided to create a celebration card using the banana image and coordinating sentiment. 
Products Used:
Paper Pumpkin December 2021 Lots of Pun Kit
Painted Poppies stamp set (item #151599)
Painted Labels Dies (item #151605)
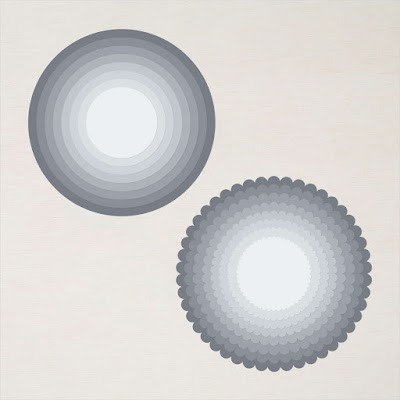
Layering Circles Dies (item #151770)
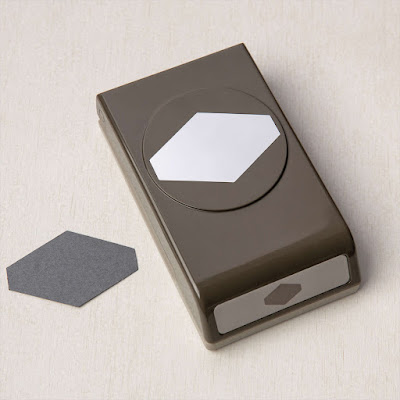
Tailored Tag Punch (item #145667)
2020-2022 In Color 6"x6" Designer Series Paper (item #155230)
Bumblebee Cardstock (item #153077)
Early Espresso Cardstock (item #119686)
Basic White Cardstock (item #159276)
Bumblebee Classic Ink Pad (item #153116)
Early Espresso Classic Ink Pad (item #147114)
2020-2022 In Color Square Gems (item #155572)
Stampin' Dimensionals
Measurements:
Bumblebee Cardstock
Card Base - 8 1/2" x 5 1/2" (Scored at 4 1/4")
Basic White Cardstock
Card Front - 5 1/4" x 4"
Focal circle die cut with the Layering Circles Dies 
Sentiment Label strip - 5/8" x 3"
Bumblebee Designer Series Paper
1 Strip - 2" x 5 1/4"
Early Espresso Cardstock
Scalloped Circle die cut with Layering Circles Dies
Border die cut with Painted Labels Dies
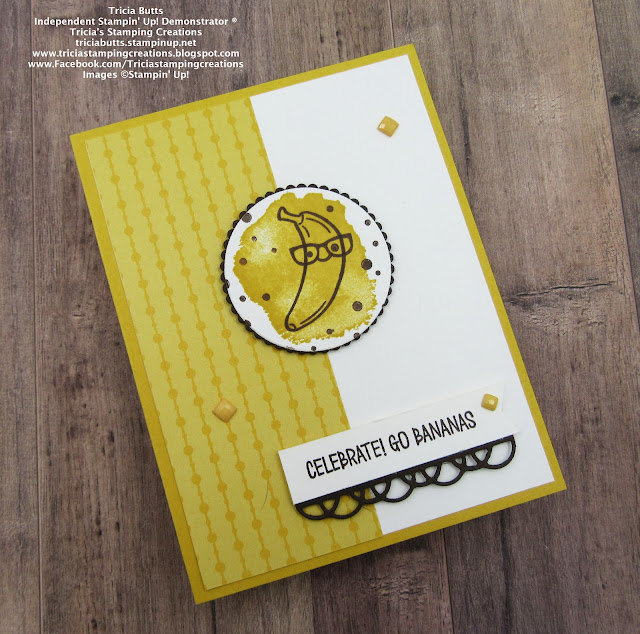
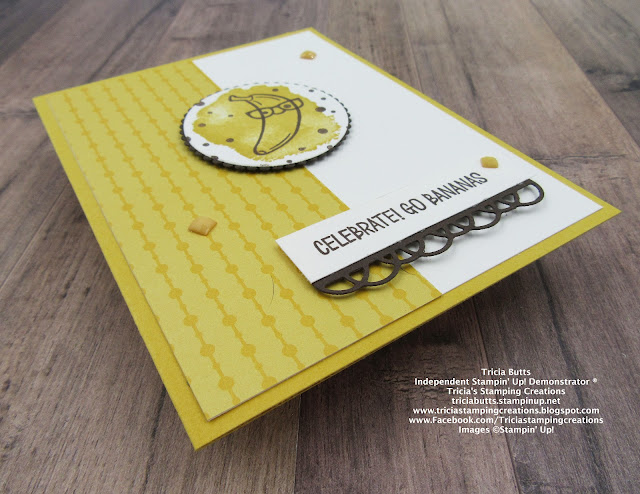
This card layout can be used with any of the images and sentiments from this wonderful stamp set to create punny cards to send to family and friends. For my card design, I chose to use Bumblebee cardstock for the card base to tie in with the color of a ripe banana. I added a piece of the Bumblebee designer series paper to the left side of the Basic White card front to help step up the card design. For the focal image, I stamped the background using the large splotch stamp in the Painted Poppies stamp set onto the Basic White circle using Bumblebee Classic ink. I then stamped the banana, face and glasses images with Early Espresso Classic ink onto the Bumblebee stamped background. This is great for adding color to the image. I added some dots with Early Espresso for the background to add a bit of texture to the design. I layered the focal image onto the Early Espresso scalloped circle and attached it to the center of the card front with Stampin' Dimensionals. For the sentiment, I stamped the image onto a strip of Basic White cardstock with Early Espresso cardstock and flagged the right end with the Tailored Tag Punch to create a banner. I added the Early Espresso border to the bottom of the sentiment label and added it to the card front with Stampin' Dimensionals To finish off the card design, I added some Bumblebee Square Gems for a touch of bling. Doesn't this card just make you want to smile? I love making happy cards and I can see so many wonderful possibilities with the stamp set in this kit. 
Thank you for taking the time to visit my blog. I hope that my card design will help you explore creating your own amazing alternative projects. The exclusive stamp set in this kit will provide you with endless opportunities to create fun projects long after the other supplies have been used up.
Now it's time to visit Mary's blog and see what she has created with this wonderful kit. Just click the Next button to visit her blog. We would love it if you would leave us a comment and let us know what you enjoyed about our projects. I hope our blog hop inspires you to create your own beautiful projects. 
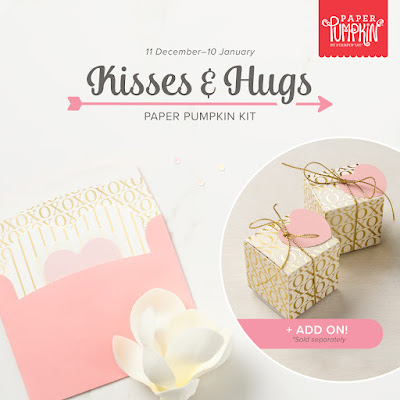
If you live in the U.S. and do not have a Stampin' Up! Demonstrator, please contact me and I would be happy to help you with your creative projects. You may also visit my Online Store to place your order and have it shipped to you. If you are not already a Paper Pumpkin subscriber, make sure to sign up by January 10th to receive the January Kisses & Hugs Kit. 
Until Next Time

Happy Stamping,

Tricia Butts
Independent Stampin' Up! Demonstrator

Like What You See? Visit My Online Store Here

Visit My Facebook Business Page for Updates & Ideas

Click here to Contact Me


Stock Up On Your Favorite Retiring Products
From The July-December 2021 Mini Catalog
Click Below To Visit My Online Store

Send Kisses & Hugs
With The January Paper Pumpkin Kit
Click Below To Subscribe By January 10th, 2022

Thursday, November 11, 2021

Stampin' Dreams November Blog Hop In Memoriam

Welcome to the Stampin' Dreams November Blog Hop as we showcase projects with the theme In Memoriam to provide comfort and to remember people we have lost. November 11th is a day of remembrance as we honor those who gave their lives to protect us. We hope our projects will help inspire you to create your own beautiful creations.
Growing up in Australia, November 11th was Remembrance Day and everyone wore a poppy as a sign of respect. I wanted to create a design featuring poppies to reflect this memory and I chose to use the Painted Poppies stamp set with the coordinating Painted Labels Dies to create my card. To add texture to the background, I used the Timeworn Type 3D Embossing Folder for a vintage feel to the design. 
Products Used:
Painted Poppies stamp set (item #151599)
Painted Labels Dies (item #151605)
Peaceful Moments stamp set (item #151595)
Timeworn Type 3D Embossing Folder (item #156505)
Basic Black Cardstock (item #121045)
Basic White Cardstock (item #159276)
Balmy Blue Classic Ink Pad (item #147105)
Granny Apple Green Classic Ink Pad (item #147095)
Memento Tuxedo Black Pad (item #132708)
Versamark Pad (item #102283)
Metallics Embossing Powders (item #155555)
Poppy Parade Stampin' Blends Combo Pack (item #154958)
Granny Apple Green Stampin' Blends Combo Pack (item # 154885)
Simply Elegant Trim (item #155766)
Stampin' Dimensionals (item #104430)
Measurements:
Basic Black Cardstock
Card Base - 8 1/2" x 5 1/2"
Rectangle Layer - 2 1/8" x 3 3/8"
Sentiment Label die cut with the Painted Labels Dies
Basic White Cardstock
Card Front - 5 1/4" x 4" Embossed with the Timeworn Type 3D Embossing Folder
Focal Panel die cut with the Painted Labels Dies
This clean and simple card design has a focal image which provides a pop of color against a black and white background. I stamped the image with Memento Tuxedo Black ink onto the Basic White die cut panel and colored the poppies with the Dark Poppy Parade Stampin' Blends Marker and the stems and leaves with the Light Granny Apple Green Stampin' Blends Marker. I used the small splatter stamp image to create the sky with Balmy Blue Classic ink around the top of the panel and I repeated the process across the bottom with Granny Apple Green Classic ink to create the ground. I framed the focal panel with a rectangle of Basic Black to help make the colors pop against the embossed Basic White bacckground. For the sentiment, I heat embossed the image with Gold embossing powder for a touch of elegance that I thought was appropriate for the card design. I added some Gold Trim behind the sentiment label to coordinate with the embossed sentiment to step up the design. I feel like my card design has captured the fields of poppies associated with the battlefields of Flanders Fields, a tribute to all who were lost in World War I. Lest We Forget.
Thank you for taking the time to visit my blog. I hope that my card design will help inspire you to create your own projects in memory of the people in your life and to remember those who made the ultimate sacrifice to protect our freedoms. 
Now it's time to visit with my fellow Stampin' Up! Demonstrators as they share their wonderful projects to help inspire you. Please click on the links in the Roll Call List below to view their blogs. We would love it if you would leave us a comment and let us know what you enjoyed about our projects.

If you live in the U.S. and do not have a Stampin' Up! Demonstrator, please contact me and I would be happy to help you with your creative projects. You may also visit my Online Store to place your order and have it shipped to you. 

Until Next Time

Happy Stamping,

Tricia Butts
Independent Stampin' Up! Demonstrator

Like What You See? Visit My Online Store Here

Visit My Facebook Business Page for Updates & Ideas

Click here to Contact Me


Explore The Beautiful Eden's Garden Collection

Click Below For More Details


Saturday, March 7, 2020

Colour Combo March Blog Hop

Welcome to the Colour Combo March Blog Hop as we are challenged to use Blushing Bride, Melon Mambo and Crushed Curry to create our projects. You will be visiting with Stampin' Up! Demonstrators from around the world as we share our ideas to help inspire you to explore this wonderful color combination. 
Today I am sharing a fun birthday card design using the Hoot Hooray stamp set (item #149352) from the Experience Creativity Brochure. I love the simple images in this stamp set and the fact that they include the sentiment in one stamp. 
 To create this card design, I started with a Melon Mambo cardstock card base and added a layer of Crushed Curry cardstock as a matte to the Whisper White cardstock layer. I stamped the Whisper White cardstock with the stars stamp image using Crushed Curry Classic ink and then stamped the splatter design from the Painted Poppies stamp set (item #151599) using second generation stamping with Blushing Bride Classic ink. This means that I stamped off the image once after inking it up onto a scrap piece of paper before stamping it onto the Whisper White cardstock. This gave me a softer, lighter color that added color to the background without overwhelming the design.
The focal design was created by die cutting a tag using one of the dies from the Bonanza Dies (item #151566) from Whisper White cardstock and I stamped the image from the Hoot Hoot Hooray stamp set with Stazon Jet Black ink onto the tag. I colored the image using Melon Mambo, Crushed Curry and Blushing Bride Stampin' Write Markers and then added a touch of shimmer to the images with Clear Wink of Stella. I added a small piece of Whisper White 5/8" Polka Dot Tulle Ribbon (item #146912) to the tag and tied it with a simple knot. I attached the tag to the card front with Stampin' Dimensionals to pop it up. 
 To finish off the card design, I colored in some of the stamped stars with Clear Wink of Stella and added a Basic Rhinestones for a touch of bling. This card design would work well for girls of all ages and I really love the way the splatter adds a distressed look to the background.
Thank you for visiting my blog today. I hope that my card design will help inspire you to create your own design using this color combination. There are so many possibilities with these beautiful colors.

Now it's time to visit Sue's blog and see what she has created with this wonderful colour combination. Just click the Next button below to visit her blog. I hope you enjoy the rest of our blog hop. 


If you live in the U.S. and do not already have a Stampin' Up! Demonstrator, please contact me and I would be happy to help you. 

Until Next Time
Happy Stamping,
Tricia Butts
Independent Stampin' Up! Demonstrator
Like What You See? Visit My Online Store Here
Visit My Facebook Business Page for Updates & Ideas
Click here to Contact Me


Coordination Product Release Ends March 31st. Products Available While Supplies Last


 Time is Running Out to Earn Exclusive Free Products With a Qualifying Order. 
Sale-a-bration Ends March 31st, 2020

Wednesday, January 22, 2020

What's New At SU January Blog Hop Peaceful Poppies Suite

It's time to hop along with the What's New At SU Blog Hop as we showcase the amazing Peaceful Poppies Suite from the new January-June 2020 Mini Catalog. You will be visiting with Stampin' Up! Demonstrators as they share their ideas and projects to help inspire you. 
 My card design today features the Painted Poppies Bundle (item #153827) along with the Peaceful Moments stamp set (item #151595) to create this elegant thank you card. For my color combination, I chose Blushing Bride, Smoky Slate, Basic Black and Whisper White to create a clean and simple design with non-traditional colors. 
 To create this card, I chose Smoky Slate cardstock for the card base and added a layer of Blushing Bride cardstock that I embossed with the Stone 3D Embossing Folder from the Power of Hope Bundle (item #152318), a Sale-a-bration product that you can earn Free with a qualifying order. I love the texture this embossing folder adds to the background. 
The poppies and leaves images from the Painted Poppies stamp set were stamped with Versamark ink onto Whisper White cardstock and I heat embossed them with Shimmer Black Embossing Powder. I die cut them with the coordinating dies from the Painted Labels Dies and water colored the poppies with Blushing Bride Classic ink and the leaves with Soft Sea Foam Classic ink using an Aquapainter. I die cut a large label from Smoky Slate cardstock and the smaller label from Whisper White cardstock. 
Using Silver embossing powder, I heat embossed the sentiment from the Peaceful Moments stamp set (item #151595)onto the Whisper White label. I die cut the border from Basic Black cardstock and attached it to the bottom of the Smoky Slate label and attached the layered labels to the card front with Stampin' Dimensionals. I attached the poppies and leaves with Stampin' Dimensionals to the card front so that they overlapped the label. To complete the design, I added some shimmer to the poppies and leaves with Clear Wink of Stella and colored two of the Basic Pearls with the Dark Basic Black Stampin' Blends Marker and added them to the opposite corners for a touch of bling. 

Thank you for taking the time to visit my blog today. I hope that my card design will inspire you to explore the wonderful products in this beautiful suite and inspire you to create your own projects.

Now it's time to visit Joyce's blog and see what beautiful ideas she has to share with us. Just click on the Next button below to visit her blog or click on the Previous button to visit Cheryl's wonderful blog.  There is also a Blog Hop List to help you if you get lost. I hope you enjoy our blog hop today.


January 2020 Blog Hop Roll Call

Judi Anderson- Judi Stamps
Diane Browning- 24-7 Inkspiration
Cynthia McQueen- A Crowning Creation
Sharon Burkert- As the Ink Dries
Cheryl Hamilton- Create With Cheryl
Tricia Butts- Tricia's Stamping Creations
Joyce Whitman- Stampin’ Scrapper
Linda Moore- Moore Fun Stampin’
Brenda Copper- Stamping with the Copper Cropper
Heather Cooper- Playing with Papercrafting
Loni Spendlove- Creative Juice by Loni

The Peaceful Poppies Suite is full of wonderful products that coordinate to take the stress out of creating beautiful projects. If you live in the U.S. and do not already have a Stampin' Up! Demonstrator, please contact me and I would be happy to help you.

Until Next Time
Happy Stamping,
Tricia Butts
Independent Stampin' Up! Demonstrator
Like What You See? Visit My Online Store Here
Visit My Facebook Business Page for Updates & Ideas

Click here to Contact Me

The January-June 2020 Mini Catalog is full of amazing new products to help you get creative for the New Year. 

 Earn Free Exclusive Products during Sale-a-bration with a Qualifying Order