Welcome to the Stamping With Friends Blog Hop as we share Sneak Peeks from the upcoming new January-April Mini Catalog and 2023 Sale-a-bration Catalog. It's always so exciting to share new projects created with these amazing new products to help inspire you. Our wonderful Design Team members will be sharing their projects and ideas to help spark your creativity. The January-April 2023 Mini Catalog and 2023 Sale-a-bration Catalog will be available for customers to order from beginning January 5th, 2023.


Best Day stamp set (item #160798) Sneak Peek January-April 2023 Mini Catalog
Deckled Rectangles Dies (item #159173)
Give It A Whirl dies (item #154336)
Dandy Designs Designer Series Paper (item #160836) Sneak Peek 2023 Sale-a-bration Catalog
Fresh Freesia Cardstock (item #155613)
Pale Papaya Cardstock (item #155668)
Basic White Cardstock (item #159276)
Silver Foil Specialty Pack (item #156457)
Fresh Freesia Classic Ink Pad (item #155611)
Pale Papaya Classic Ink Pad (item #155670)
Memento Tuxedo Black Pad (item #132708)
Versamark Pad (item #102283)
Metallics Embossing Powders (item #155555)
Fresh Freesia Stampin' Blends Combo Pack (item #155518)
Pale Papaya Stampin' Blends Combo Pack (item #155519)
Petal Pink Stampin' Blends Combo Pack (item #154893)
Highland Heather Stampin' Blends Combo Pack (item #154887)
Clear Wink of Stella Glitter Brush (item #141897)
Pale Papaya 3/8" Open Weave Ribbon (item #155672)
Stampin' Dimensionals (item #104430)
Sponge Daubers (item #133773)

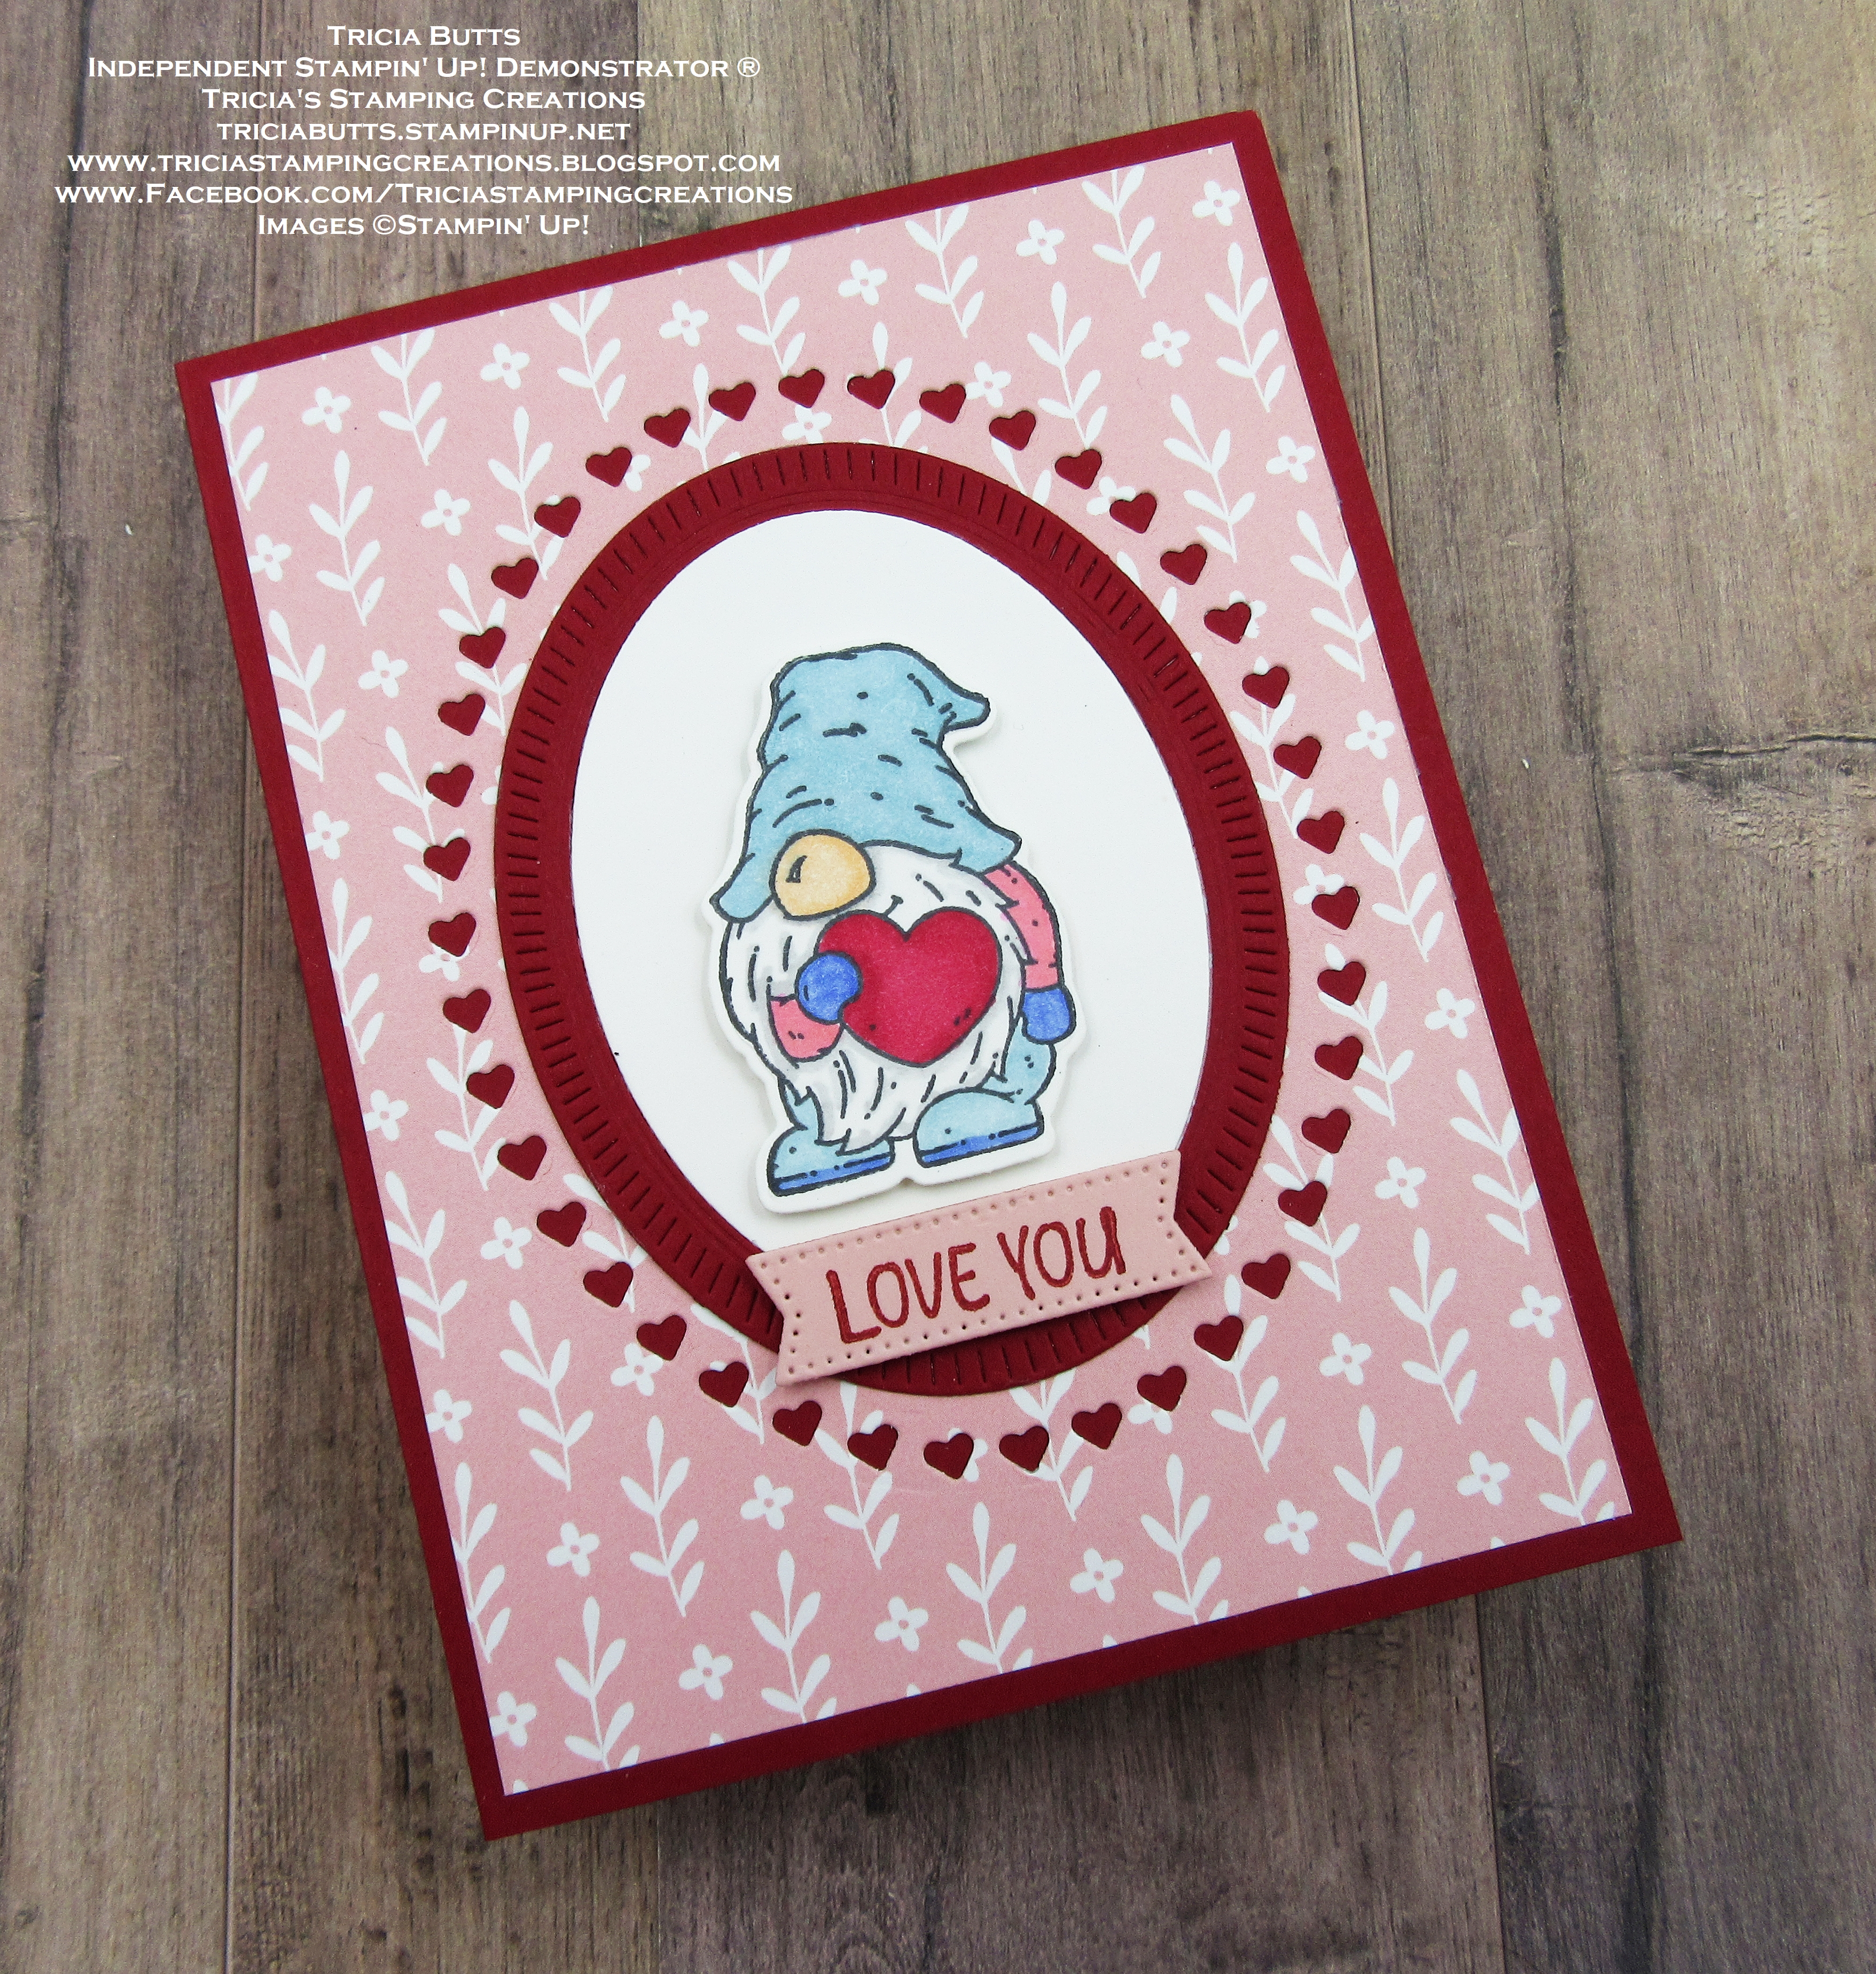
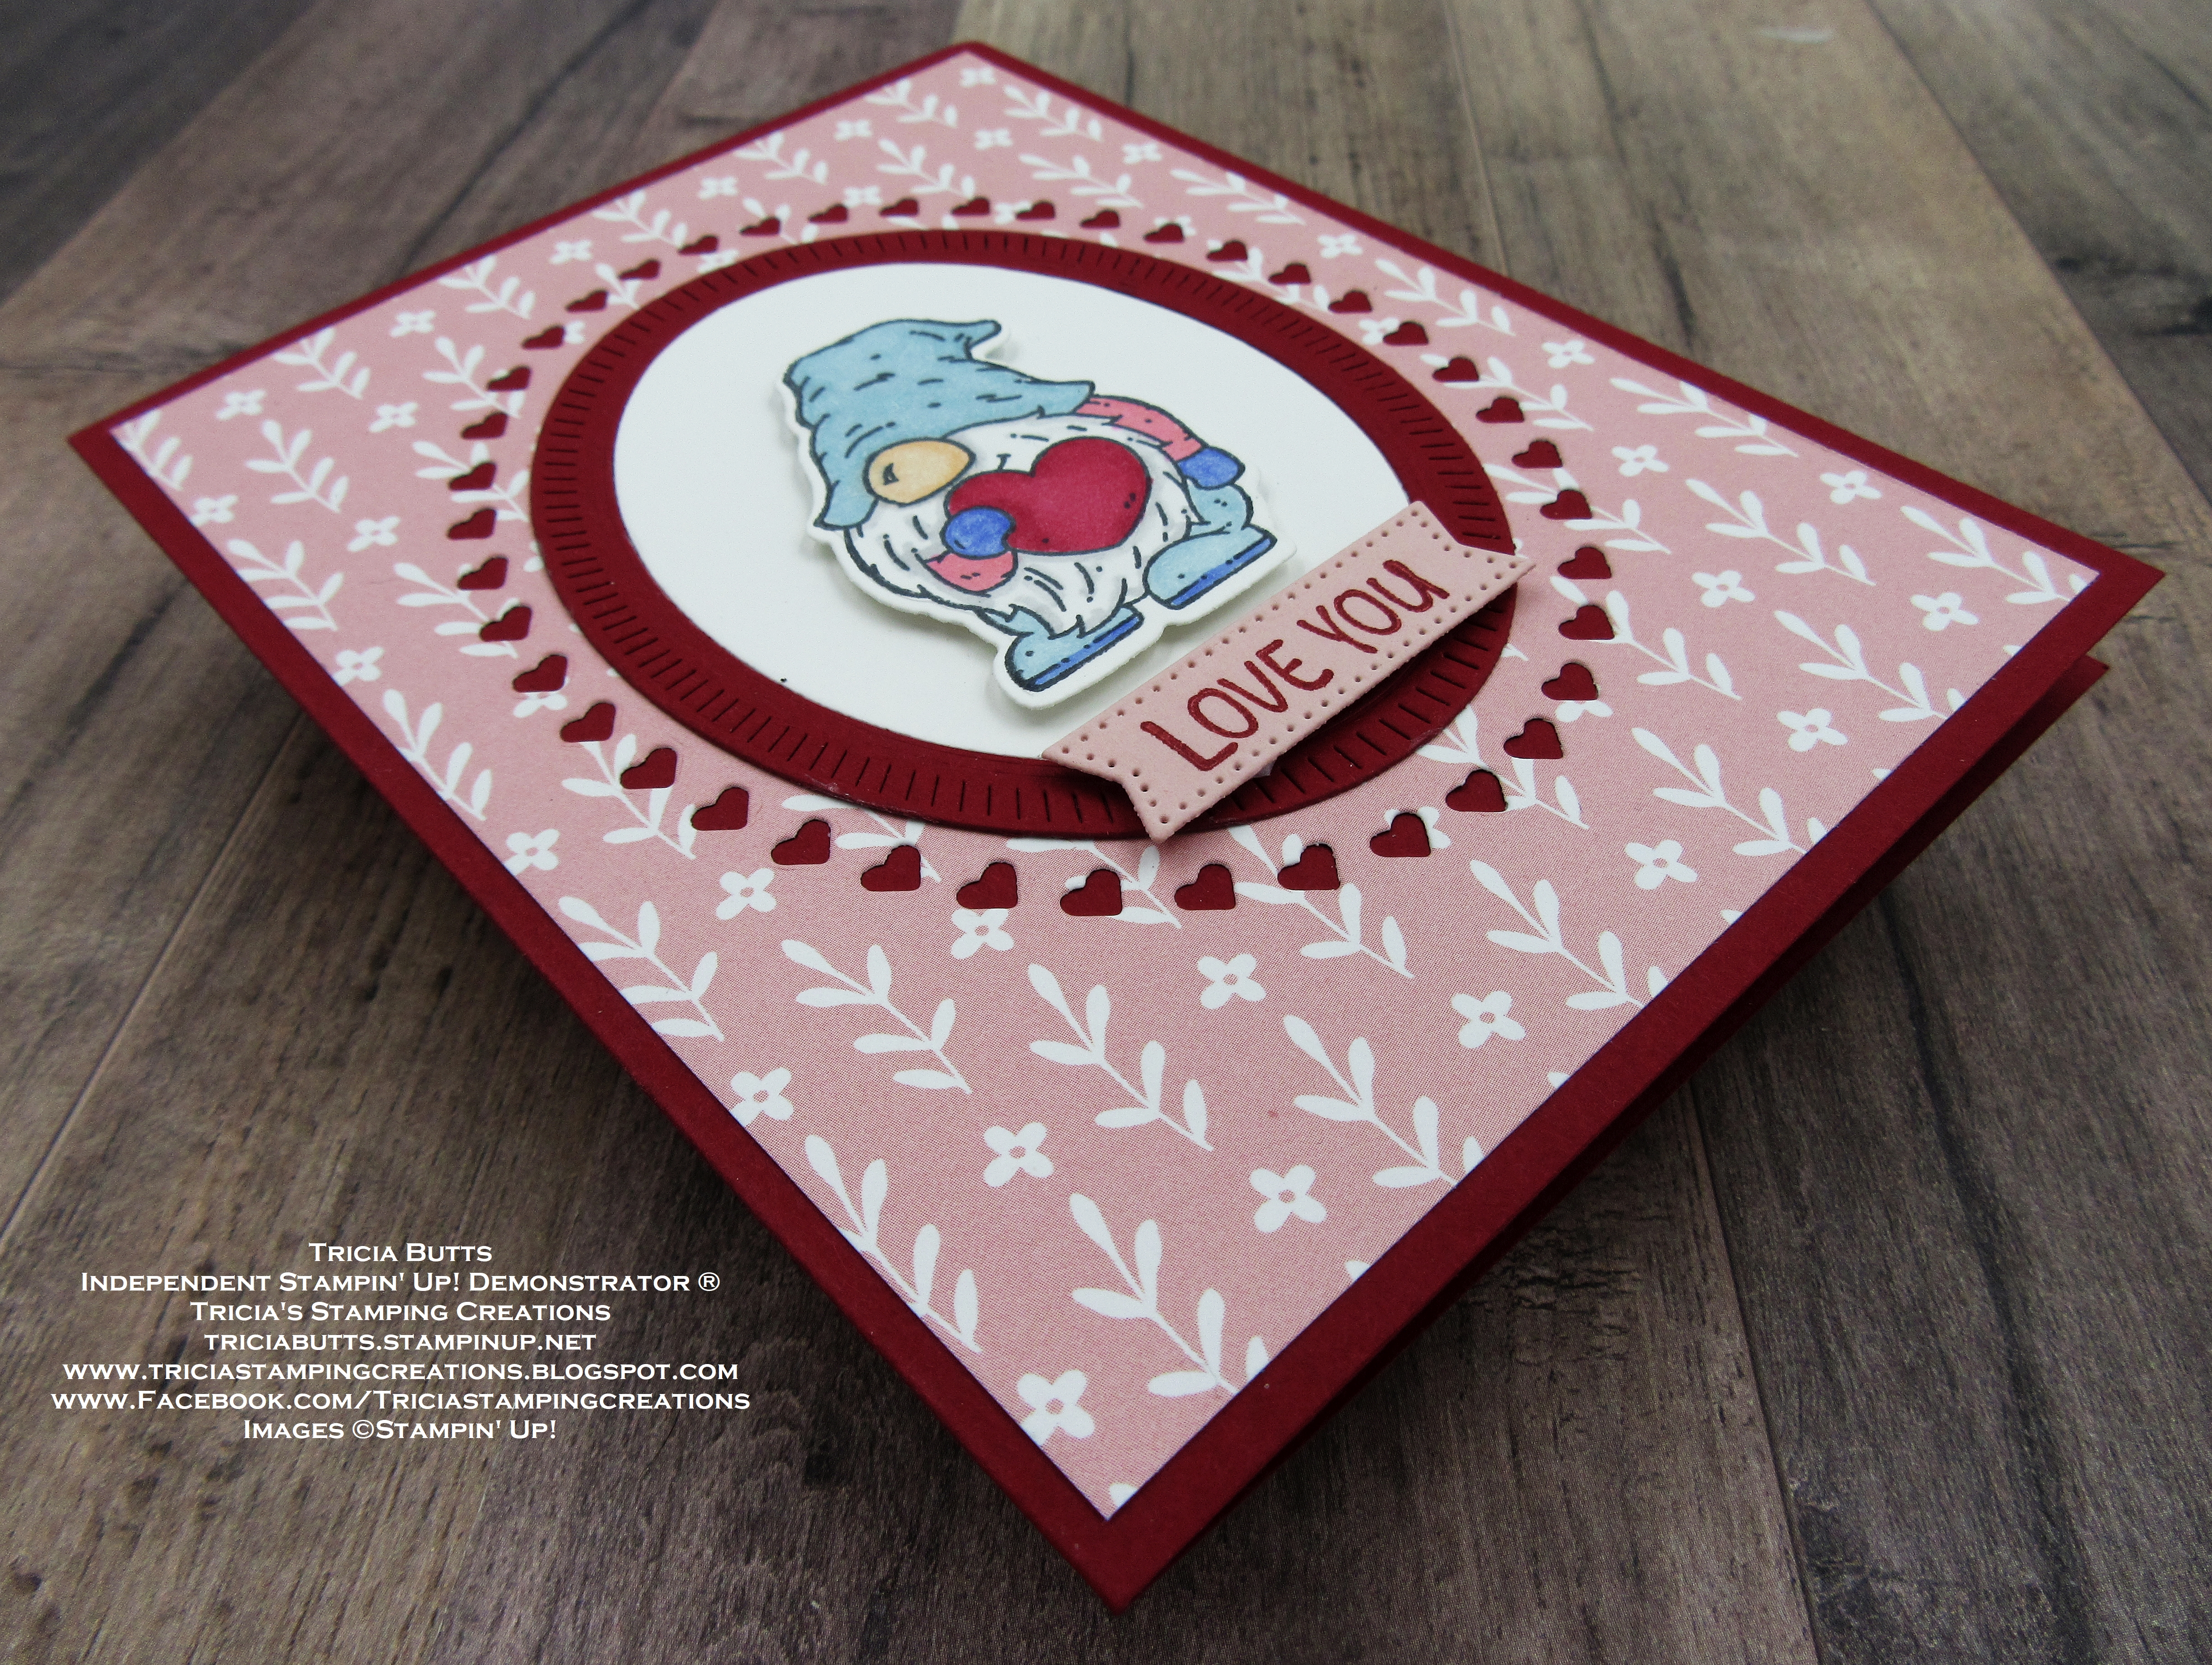
Fresh Freesia Cardstock
Card Base - 8 1/2" x 5 1/2" (Scored at 4 1/4")
Large Deckled Rectangle die cut with the Deckled Rectangles Dies
Basic White Cardstock
Focal Layer die cut with the Deckled Rectangles Dies
Dandy Designs Designer Series Paper
Background Layer - 5 1/4" x 4"
Pale Papaya Cardstock
Sentiment Label die cut with the Give It A Whirl Dies
Silver Foil Specialty Pack
Assorted stars die cut with the Give It A Whirl Dies


This card design is made up of different layers to provide depth and dimension. I stamped the focal image with Momento Tuxedo Black ink onto the Basic White layer and colored the image with Stampin' Blends Markers, choosing colors that coordinated with the designer series paper layer. For the sentiment, I heat embossed the image with Silver embossing powder onto the Pale Papaya sentiment label and added it to the bottom of the focal layer with Stampin' Dimensionals. To assemble the card, I attached the focal layer to the Fresh Freesia Deckled Rectangle. Next, I attached the Pale Papaya Open Weave Ribbon around the center of the designer series paper layer to the card base. Using Stampin' Dimensionals, I attached the focal layer to the card base, centering it on the designer series paper. To add a touch of sparkle, I added the Silver Foil stars to the card front and then colored the Happy and layers of the cake with Clear Wink of Stella. I love how fresh and cheerful this card design looks and I think it's a wonderful way to showcase these amazing new products and how they work with existing products in the 2022-2023 Annual Catalog.

Thank you for taking the time to visit my blog. I hope that my card design will help get you excited about these wonderful new products from the January-April 2023 Mini Catalog and 2023 Sale-a-bration Catalog, when they launch on January 5th, 2023. There are so many wonderful possibilities to help you with your creative journey for the New Year.

Please take the time to visit my fellow Design Team members, by clicking on the links in the Roll Call List below, to visit their blogs. We would appreciate it if you would leave us a comment and let us know what you liked about our projects and maybe what your favorite new product might be. I hope you enjoy the rest of our blog hop.

If you live in
the U.S. and do not have a Stampin' Up! Demonstrator, please contact me and I
would be happy to help you with your creative projects. You may also visit my
Online Store to place your order and have it shipped to you. 

Until Next
Time
Happy
Stamping,
Tricia Butts
Independent Stampin' Up!
Demonstrator
Like What You
See? Visit My Online Store Here
Visit My Facebook Business Page for Updates & Ideas
Click here to Contact Me
Visit The Clearance Rack
Save Up To 60% On Discontinued Products
Click Below To Shop Now
Save Up To 60% On Retiring Products
From The July-December 2022 Mini Catalog While Supplies Last
Click Below To Visit My Online Store