Tuesday, July 28, 2020

PPP July Blog Hop Summer Nights

Welcome to the PPP July Blog Hop as we showcase projects created with the Summer Nights July Paper Pumpkin kit. You will be visiting with talented Stampin' Up! Demonstrators as we share fun alternative projects and ideas to help inspire you. 
 Today's alternative card design was inspired by an easel card design created by fellow Stampin' Up! Demonstrator, Ronda Wade. I just love how simple this card was to create and it has a real Wow to it. Plus, it used mostly supplies from the August Summer Nights Paper Pumpkin kit combined with one of the card bases from the Summer Nights Add-On kit (item #154973), which is still available to order while supplies last. 
 To create this card design, I simply cut the front panel of the card base with two cuts - 1 1/4" from each end of the card front (along the 5 1/2" side), from the bottom up to the center fold. I then scored the center panel at 2 1/8" and burnished it with my Bone Folder to create a mountain fold. 
 I adhered the two side panels to the card base with adhesive and this creates a channel in the middle for the easel. Using one of the larger sentiment labels from the kit, I stamped the sentiment from the exclusive stamp set onto the label using the Blackberry Bliss Classic ink spot. To decorate the label, I attached two of the stars and one each of the Coastal Cabana and Night of Navy Fireflies using the Mini Stampin' Dimensionals for the Fireflies and the Mini Glue Dots for the stars.
Using the Mini Stampin' Dimensionals, I attached the lower half of the sentiment label to the lower section of the middle panel of the card front. To create the label on the bottom of the card, I stamped the sentiment from the stamp set onto a scrap of Whisper White cardstock and die cut it with one of the oval dies from the Layering Ovals Dies (item #151771). I layered it onto a Coastal Cabana cardstock scalloped oval die cut with one of the dies from the same die set. I attached the sentiment to the card base with Mini Stampin' Dimensionals, centering it in the channel so that the center panel can rest against it to prop up the easel. For a touch of bling, I added two Basic Rhinestones to the sentiment label to finish it off. The area underneath the easel is perfect for a short message or you can write a longer message on the back of the card base. 

The card bases in the Summer Nights Add-On Kit (item #154973) are perfect for creating fun alternative card designs and I love how they coordinate with the supplies in the August kit. Also, there are refill kits for the August Summer Nights kit (item #154956) available to order while supplies last. 
Thank you for taking the time to visit my blog today. I hope that my card design will help inspire you to explore your own alternative projects with this wonderful kit and the Summer Nights Add-On kit that is available while supplies last from my Online Store. 
Now it's time to visit Darla's blog and see what she has to share with this month's kit. Just click the Next button below to visit her blog. We would love it if you would leave us a comment and let us know what you enjoyed about our projects. I hope that you enjoy the rest of our blog hop. 

If you live in the U.S. and do not already have a Stampin' Up! Demonstrator, please contact me and I would be happy to help you with your creative projects. You may also place your order via my Online Store and have it shipped directly to you. 

Until Next Time
Happy Stamping,
Tricia Butts
Independent Stampin' Up! Demonstrator
Like What You See? Visit My Online Store Here
Visit My Facebook Business Page for Updates & Ideas
Click here to Contact Me


Celebrate The Everyday Heroes In Your Life
With The August Paper Pumpkin Kit
Click Here To Subscribe By August 10th
 Click Here To Subscribe


Available While Supplies Last!
Summer Nights Add-On Kit
Click Below To Order
 Click Here To Order


Final Days To Take Advantage Of Bonus Days!
Earn A $5 Coupon With Every $50 You Order
July 1st - August 3rd
Redeem Your Coupons August 4th - August 31st
Click Below To Visit My Online Store
 Click Here To Order


The New August-December 2020 Mini Catalog 
Is Coming Soon!
Contact Me To Receive Your Copy
 Contact Me


Saturday, July 25, 2020

3D Paper Trimmer July Blog Hop Christmas In July

It's time to hop along with the 3D Paper Trimmer July Blog Hop as we showcase this month's theme, Christmas In July, creating projects with our Paper Trimmer. You will be visiting with talented Stampin' Up! Demonstrators from around the world as they share their beautiful ideas and projects. 
 For my Christmas In July card design, I chose to use the new Warm & Toasty stamp set (item #152615) from the new August-December 2020 Mini Catalog, to create this fun Easel design. I paired the images in this stamp set with the Old Olive and Real Red Designer Series Paper from the Regals 6"x6" Designer Series Paper (item #153073) to create a festive feeling to my card design.
 I was inspired by an Easel card design created by Ronda Wade for her Creating For Christ Facebook group and tweaked the measurements to create my own design. To start with I used Thick Whisper White cardstock to create the card base. I cut at 1 1/2" from each end of the front of the card base, along the 5 1/2" side, up to the fold in the card base. This will create three separate pieces to the front of the card. I then scored the middle section at 2 1/8" and burnished the score line with my Bone Folder to create a mountain fold. 
To decorate the side strips, I cut two pieces of Real Red Designer Series Paper at 2 3/8" x 4 1/8" and attached them to the strips with adhesive. I also cut two pieces of Old Olive Designer Series Paper at 2 3/8' X 2" and attached them to the two sections of the middle strip, above and below the score line. I adhered the two side strips down to the bottom of the Whisper White card base with adhesive. 
For the focal design, I stamped the reindeer image from the Warm & Toasty stamp set using Early Espresso Classic ink onto a scrap of Thick Whisper White cardstock and colored the image with Stampin' Blends Markers. I fussy cut out the image and attached it to an Old Olive cardstock oval die cut using the Layering Ovals dies (item #151771) and layered it onto a slightly larger Real Red scalloped oval die cut using the same die set, using Stampin' Dimensionals. 

I created the smaller sentiment label using the Lovely Labels Pick A Punch (item #152883) with Whisper White and Real Red cardstock and heat embossed the sentiment with Gold embossing powder. I attached it to the bottom of the center panel with Stampin' Dimensionals and then added the oval focal image above it, attaching it to the lower half of the center panel with Mini Stampin' Dimensionals. Using two small Gilded Gems, I embellished the sentiment label. 

For the other sentiment, I used the Layering Ovals Dies with Old Olive and Whisper White cardstock and heat embossed the sentiment with Gold embossing powder. I attached it to the card base with Mini Stampin' Dimensionals so that it props up the easel portion of the card. I love this cute card design and how it lies flat to make it easy to mail. 
Thank you for taking the time to visit my blog today. I hope that my sweet easel Christmas card will help inspire you to get an early start on your own Christmas designs. The new August-December 2020 Mini Catalog is full of wonderful products to help you with your Holiday creations. 

Now it's time to visit Jo's Blog and see what wonderful project she has to share with us. Just click the Next button below to visit her blog. We would love it if you would leave us a comment and let us know what you enjoyed about our projects. I hope you enjoy the rest of our blog hop. 
 Jo


If you live in the U.S. and do not already have a Stampin' Up! Demonstrator, please contact me and I would be happy to help you with your creative projects. You can also visit my Online Store to place an order and have it shipped directly to you.

Until Next Time
Happy Stamping,
Tricia Butts
Independent Stampin' Up! Demonstrator
Like What You See? Visit My Online Store Here
Visit My Facebook Business Page for Updates & Ideas
Click here to Contact Me


Time Is Running Out!
Take Advantage of Bonus Days
Earn A $5 Coupon With Every $50 You Order
July 1st - August 3rd
Redeem Your Coupons August 4th - August 31st
Click Below To Visit My Online Store
 Click Here To Shop


Celebrate The Everyday Heroes In Your Life
With The August Paper Pumpkin Kit
Click Below To Subscribe By August 10th 
 Click Here To Subscribe


The August - December 2020 Mini Catalog
Is Coming Soon!
Contact Me To Receive Your Copy
 Contact Me


Ink. Stamp. Share. July Blog Hop Other Celebration

Welcome to the Ink. Stamp. Share. July Blog Hop as we explore other celebrations besides birthdays. You will be visiting with Stampin' Up! Demonstrators from around the world as they share their projects to help inspire you. 
 For my celebration, I chose to focus on Halloween with the new Have A Hoot Bundle (item #155208) in the upcoming August-December 2020 Mini Catalog, which launches August 4th. I paired it with the Cobwebs 3D Embossing Folder (item #153578) that can also be found in the new catalog and I love the texture it adds to the background. 
 I chose Pumpkin Pie cardstock for my card base and added a layer of Basic Black cardstock that I embossed with the Cobwebs 3D Embossing Folder to create this wonderfully detailed background. It's hard to see in the photos, but I am already in love with this new embossing folder and can't wait to use it on more projects. Using the labels die from the Peek A Hoot Dies, I die cut the openings in the Basic Black card front to create windows for my images to "peek" through. 

To create the background for the images, I used a layer of Whisper White cardstock the same size as the Basic Black cardstock layer and using a pencil, I traced a faint outline for each window onto the Whisper White layer. I then stamped the two larger owl images onto the Whisper White cardstock layer using Memento Tuxedo Black ink so that they lined up inside the two larger windows. I colored the branches using the Crumb Cake Stampin' Blends Markers Combo and colored the background of all three windows with the Gorgeous Grape Watercolor Pencil from the Watercolor Pencils Assortment 2 pack (item #149014). I used a Blender Pen to smooth out the pencil lines to create a soft watercolor look for the background. I also used the Crushed Curry Watercolor Pencil from the same set, to add a little light around the spider image and smoothed it out with the Blender Pen. 
The owls were stamped a second time onto a scrap of Whisper White cardstock and I colored each of the images from the Have A Hoot stamp set (item #153389) using a variety of colors of Stampin' Blends Markers. I then die cut them using the coordinating dies from the Peek A Hoot Dies (item #153573). I attached the Whisper White layer behind the Basic Black layer so that the stamped backgrounds appeared through the windows. I then added the die cut images to the windows using Stampin' Dimensionals to pop them up. 

For the sentiment, I heat embossed the image onto a scrap of Highland Heather cardstock with White Embossing Powder and colored the embossed sentiment with the Light Pumpkin Pie Stampin' Blends Marker to color it. I die cut the sentiment with one of the small oval dies from the Layering Ovals Dies and attached it to the card front with Stampin' Dimensionals in the bottom left corner. I attached the card front to the Pumpkin Pie card base to complete the design. This bundle was one of my "Must Haves" from the new catalog and I love that it covers a variety of seasons. When you order the stamp set and coordinating dies as a bundle, you save 10%.
Thank you for taking the time to visit my blog today. I hope that you enjoy my card design and it inspires you to create your own beautiful projects. Creating projects for the holidays can be so much fun and there are so many great options in the new August-December 2020 Mini Catalog to explore. 

Now it's time to visit Rochelle's blog and see what she has created this month. Just click the Next button to visit her blog or use the Roll Call List below to find your way. We would love it if you would leave us a comment and let us know what you enjoyed about our projects. I hope you enjoy the rest of our blog hop. 
 Rochelle


Roll Call

If you live in the U.S. and do not already have a Stampin' Up! Demonstrator, please contact me and I would be happy to help you with your creative projects. You can visit my Online Store to place your order 24/7 and have it delivered directly to you. 

Until Next Time
Happy Stamping,
Tricia Butts
Independent Stampin' Up! Demonstrator
Like What You See? Visit My Online Store Here
Visit My Facebook Business Page for Updates & Ideas
Click here to Contact Me

There Is Still Time To Take Advantage of Bonus Days!
Earn a $5 Coupon For Every $50 You Order 
July 1st - August 3rd
Redeem Your Coupons August 4th - August 31st
Click Below To Visit My Online Store
 Click Here To Shop


Celebrate The Everyday Heroes In Your Life
With The August Paper Pumpkin Kit
Click Below To Subscribe By August 10th
 Click Here To Subscribe


The August-December 2020 Mini Catalog
Is Coming Soon!
Contact Me To Receive Your Copy
 Click Here


Friday, July 17, 2020

SBTD July Blog Hop Embossing Folders

It's time to hop along with the Stampers By The Dozen (aka STBTD) July Blog Hop as we showcase the amazing embossing folders that Stampin' Up! has to offer. You will be visiting with Stampin' Up! Demonstrators from around the world as the share ideas and projects to help inspire you.
 My card design today features some Sneak Peek products from the New August-December 2020 Mini Catalog that launches August 4th. To escape the hot Summer weather outside, I had fun creating this beautiful snowflake themed Christmas card with products from the Snowflake Splendor Suite. The Winter Snow Embossing Folder adds a delicate embossed snowflake pattern to the background of this design that sets the theme for this card.
 To create this card, I chose to use Misty Moonlight cardstock for the card base and added a layer of Seaside Spray cardstock that I embossed with the Winter Snow Embossing Folder (item #153577) to add soft texture to the background. To create the sentiment label, I die cut a piece of Misty Moonlight cardstock using a die from the Stitched Nested Labels Dies (item #149638). I heat embossed the sentiment from the new Snowflake Wishes stamp set (item #153444) with White Embossing Powder and embellished the label with three of the beautifully detailed snowflakes die cut using the coordinating So Many Snowflakes Dies (item #153560) from Whisper White cardstock.  For a touch of bling, I added Basic Rhinestones to the centers of each of the die cut snowflakes. 
This clean and simple card design is easy to create and assemble. I added a piece of the Silver 3/8" Metallic Edge Ribbon (item #144213) across the center of the card front and added the sentiment label over the top using Stampin' Dimensionals so that the snowflakes added depth and dimension to the design. I love that the Snowflake Wishes Bundle (item #155172) and the Winter Snow Embossing Folder provide me with everything I need to create pretty Christmas and Winter themed cards. 
Thank you for taking the time to visit my blog today. I hope that my card design will get you excited about the new August-December 2020 Mini Catalog that will launch August 4th. There are so many wonderful new products to help you get started with Holiday projects. 

Now it's time to visit Judi's blog and see what embossing folder she has showcased today. Just click on the Next button below to visit her blog. We would love it if you would leave us a comment and let us know what you enjoyed about our projects. I hope you enjoy the rest of our blog hop. 

 Judi


If you live in the U.S. and do not already have a Stampin' Up! Demonstrator, please contact me and I would be happy to help you with your creative projects. You can also visit my Online Store and place your order 24/7 and have it shipped directly to you. 

Until Next Time
Happy Stamping,
Tricia Butts
Independent Stampin' Up! Demonstrator
Like What You See? Visit My Online Store Here
Visit My Facebook Business Page for Updates & Ideas
Click here to Contact Me


Bonus Days Are Back!
Earn A $5 Coupon For Every $50 You Order
July 1st - August 3rd
Redeem August 4th - August 31st
Click Below To Visit My Online Store
 Click Here To Shop


Celebrate The Everyday Heroes In Your Life
With The August Paper Pumpkin Kit
Click Below To Subscribe By August 10th
 Click Here To Subscribe


The August - December 2020 Mini Catalog 
Is Coming Soon!
Contact Me To Receive Your Copy
 Contact Me


Monday, July 13, 2020

Kylie's Demonstrator Training Program Monthly Blog Hop July 2020

Today we are hopping with Kylie's Demonstrator Training Program Monthly Blog Hop as we showcase current products from Stampin' Up! You will be visiting with talented Stampin' Up! Demonstrators from around the world as they share their ideas and projects to help inspire you.
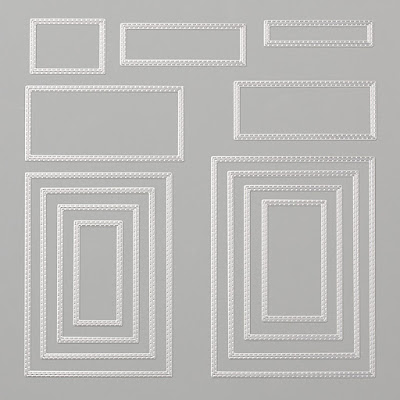
 Today's card design is a pretty Summer birthday card featuring one stamp set and one die set using some old favorites. I chose the Beautiful Friendship stamp set (item #149252) and paired it with the Stitched Rectangles Dies (item #151820) to create this clean and simple birthday card.
 For this card design, I wanted the stamped images to be the star, so I chose to use Thick Whisper White cardstock for the card base and I created the background layer using the Stitched Rectangles Dies to create the frame for the design. The sentiment layer in the center of the card was also die cut from Thick Whisper White cardstock using one of the smaller stitched rectangle dies.
My color combination for this card was Magenta Madness for the roses, Highland Heather for the detailed floral, Granny Apple Green for the leaves and Mango Melody for the centers of the roses. I really like how these colors combined to create this pretty design. I stamped each of the images using these Classic ink pads, onto the Whisper White frame. I attached the frame to the card base using Stampin' Dimensionals to pop it up. 
 To create the sentiment, I heat embossed the sentiment image onto the Whisper White stitched rectangle die cut with Gold Embossing Powder. I added it to the center of the frame with Stampin' Dimensionals so that it was raised to the same level as the frame. To embellish the card, I added a simple bow created with Whisper White 1/4" Crinkled Seam Binding Ribbon and added it to the top left corner of the frame with a Mini Glue Dot. I used two of the medium Gilded Gems to embellish the sentiment label for a touch of bling. This bright and cheerful birthday card is simple to create with just a few supplies and you can choose your own color combination to personalize it for the person who is receiving it.
Thank you for taking the time to visit my blog today. I hope that my card design inspires you to create your own beautiful projects. There are so many wonderful products in the 2020-2021 Annual Catalog to help spark your creativity. 

Please take the time to visit my fellow demonstrators and see their wonderful projects and ideas. Just click on the links in the list below to visit their blogs. I hope you will leave us a comment and let us know what you enjoyed about our creations. 
 If you live in the U.S. and do not already have a Stampin' Up! Demonstrator, please contact me and I would be happy to help you with your creative projects. 

Until Next Time
Happy Stamping,
Tricia Butts
Independent Stampin' Up! Demonstrator
Like What You See? Visit My Online Store Here
Visit My Facebook Business Page for Updates & Ideas
Click here to Contact Me

Bonus Days Are Back!
Earn a $5 Coupon For Every $50 You Order
July 1st - August 3rd
Redeem August 4th - August 31st
Click Below To Visit My Online Store
 Click Here To Order


Celebrate The Everyday Heroes In Your Life
With The August Paper Pumpkin Kit
Click Below To Subscribe By August 10th
 Click Here To Subscribe


The 2020 August - December Mini Catalog
Is Coming Soon!
Contact Me To Receive Your Copy
 Contact Me