Showing posts with label Peaceful Moments stamp set. Show all posts

Tuesday, September 13, 2022

Inspire. Create. Share. September Blog Hop My Favorite Designer Series Paper

Welcome to the Inspire. Create. Share. September Blog Hop as we showcase our favorite designer series paper, currently available in the 2022-2023 Annual Catalog and July-December 2022 Mini Catalog. We will sharing projects and ideas to help inspire you to explore the many wonderful designs available. 
There are so many wonderful designer series paper designs to choose from, which makes it difficult to pick just one as a favorite. For today's card design, I chose to use one of my new favorites from the July-December 2022 Mini Catalog, the Rustic Harvest Designer Series Paper, which is perfect as we transition into Fall. The beautiful designs and warm colors provide wonderful backgrounds and focal designs for projects and I have chosen one of the designs that is perfect for creating clean and simple cards. 
Products Used:
Peaceful Moments stamp set (item #151595)
Painted Labels Dies (item #151605)
Rustic Harvest Designer Series Paper (item #159633)
Mossy Meadow Cardstock (item #133676)
Basic White Cardstock (item #159276)
Versamark Pad (item #102283)
Metallics Embossing Powders (item #155555)
Brushed Metallic Adhesive Backed Dots (item #156506)
Glitter Washi Tape (item #159973)
Measurements:
Mossy Meadow Cardstock
Card Base - 8 1/2" x 5 1/2" (Scored at 4 1/4")
Sentiment Label die cut with the Painted Labels Dies
Basic White Cardstock
Strip approx. 1/2" x 3" covered with 2 strips of Pumpkin Pie Glitter Washi Tape & die cut with the Painted Labels Dies
This beautiful Fall card focuses on the wonderful floral design of the designer series paper as the background and focal image for the design. I chose to use Mossy Meadow cardstock for the card base and coordinating sentiment label. The sentiment image has been heat embossed with Gold embossing powder and I chose to use several of the small Brushed Metallic Adhesive Backed Dots in each of the corners to embellish the label. For a touch of sparkle and color, I die cut a detailed border using the Painted Labels Dies. To create this border, I layered two pieces of the Pumpkin Pie Glitter Washi Tape side by side on a strip of Basic White cardstock and then die cut it to create the detailed edge. I thought the Pumpkin Pie Glitter Washi Tape coordinated beautifully with one of the flowers in the background to finish off the design. This card layout can be used for a variety of occasions and I love the wonderful sentiments in the Peaceful Moments stamp set that work well with this pretty paper. The Peaceful Moments stamp set is just one of the stamp sets that will be on sale September 15th as part of the 24 Hour Stamp Sale.  
Thank you for taking the time to visit my blog. I hope that my card design will help inspire you to create your own beautiful projects with your favorite designer series paper. There are so many wonderful designs to choose from, suitable for a variety of occasion throughout the year. 
Now it's time to visit Deb's wonderful blog to see what designer series paper she has chosen to share. Just click on the Next button below to visit her blog. We would love it if you would leave us a comment and let us know what you liked about our projects. I hope you enjoy the rest of our blog hop. 


If you live in the U.S. and do not have a Stampin' Up! Demonstrator, please contact me and I would be happy to help you with your creative projects. You may also visit my Online Store to place your order and have it shipped to you. 

Until Next Time

Happy Stamping,

Tricia Butts
Independent Stampin' Up! Demonstrator

Like What You See? Visit My Online Store Here

Visit My Facebook Business Page for Updates & Ideas

Click here to Contact Me


Coming September 15th Only
Save 15% off Select Stamp Sets 
From The 2022-2023 Annual Catalog
Click Below To View The List Of Stamp Sets On Sale

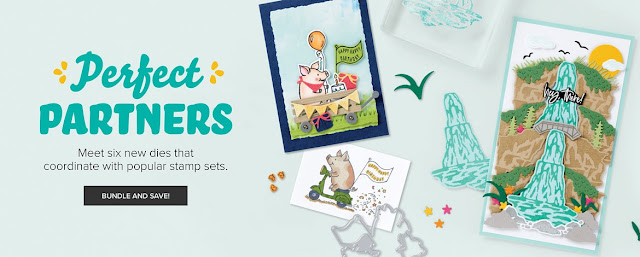
Perfect Partners Exclusive Die Sets
Available Only While Supplies Last
Click Below For More Details

Weekly Deals Are Here During September
Available For A Limited Time
Click Below To Visit My Online Store


Thursday, September 1, 2022

We Create August Blog Hop Nourish & Flourish

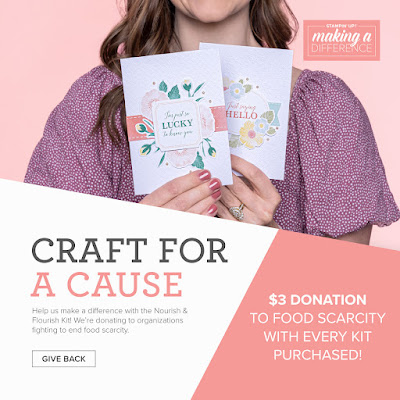
Welcome to the We Create August Blog Hop with our theme this month, "Nourish & Flourish". As we prepare to transition into Fall, it's a time for us to think about the people around us and how we can help those who may be struggling physically, mentally or emotionally. Stampin' Up! has a wonderful kit in the July-December 2022 Mini Catalog that is part of their Stampin' Up! Making A Difference program, with $3 from every kit being sold being donated to support organizations working to end food insecurity. The Flourish & Nourish Kit is just one way we can help make a difference to the people in our lives. Something as simple as a card can also make a big difference to someone who is struggling. Today we will be sharing projects and ideas to help inspire you to help make a difference in the life of someone you care about. 
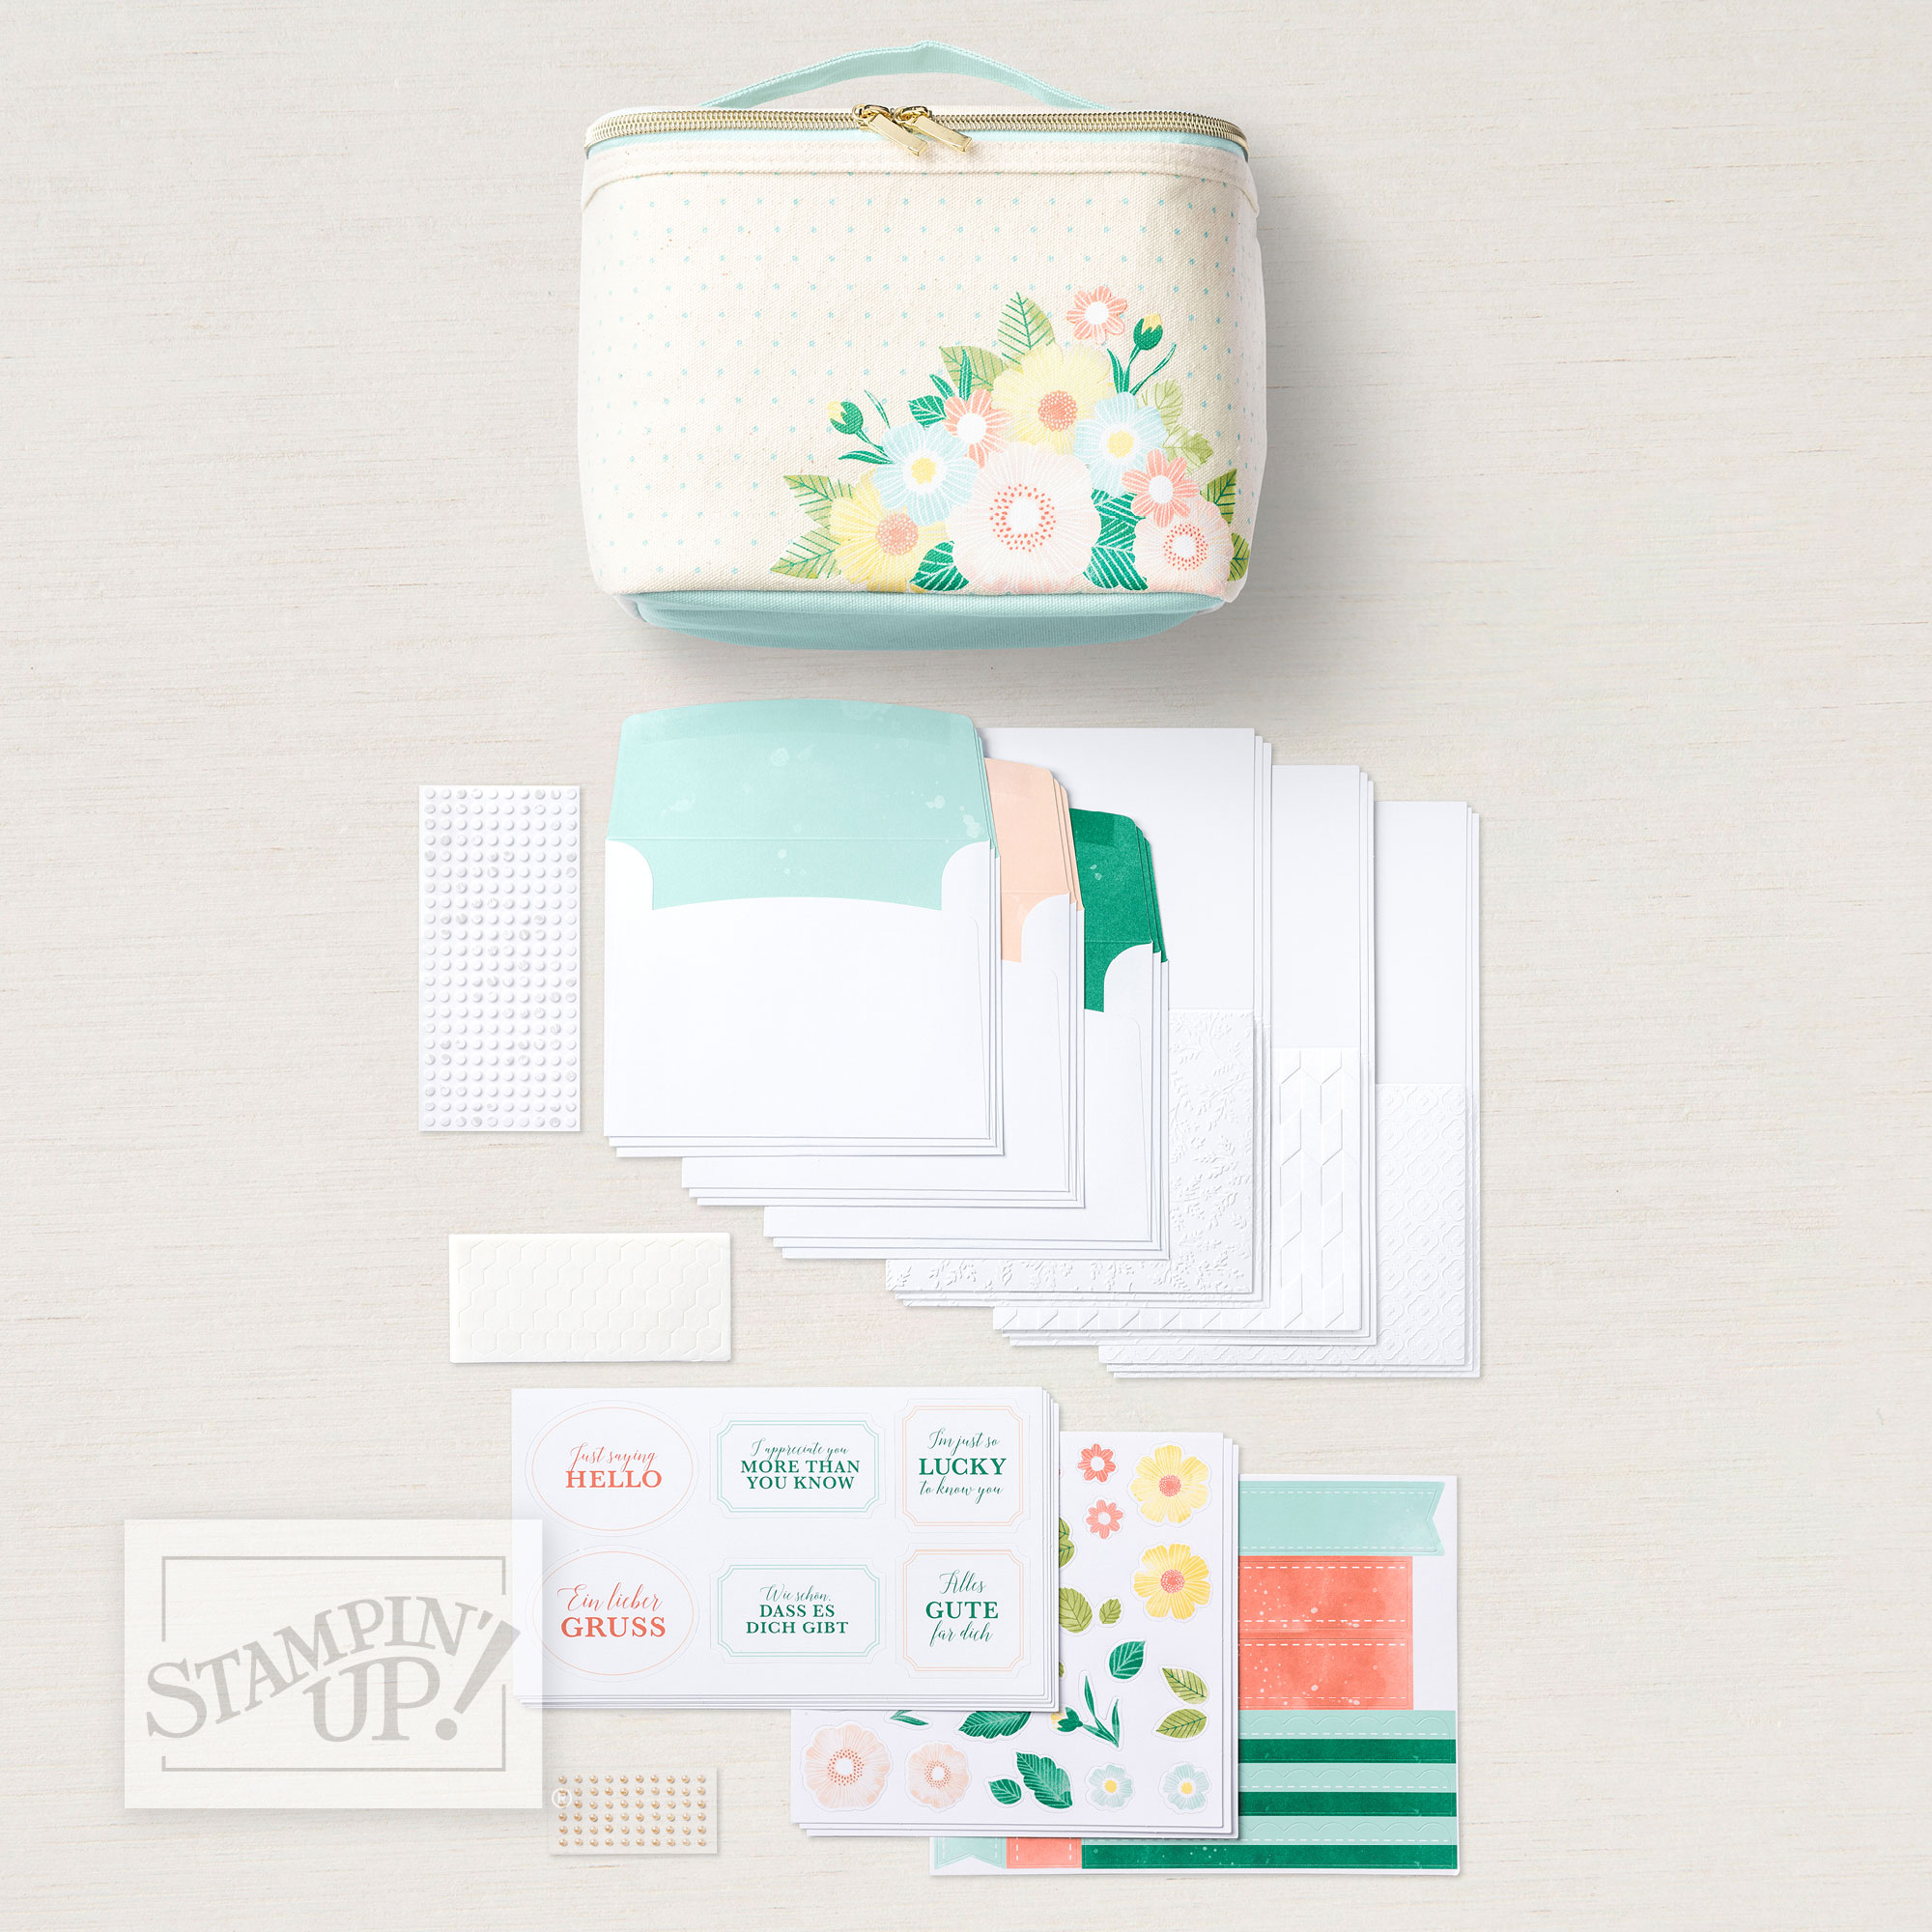
The Nourish & Flourish Kit contains supplies to create 9 beautiful cards with coordinating envelopes. The wonderful thing about this card kit is that there is not stamping required, so it is perfect for crafters of all stages, including beginners. The textured backgrounds on the front of the card bases adds a wonderful elegance to the designs and these cards are perfect for a variety of occasions. This kit has sentiments in English, French and German and for my card design today, I wanted to share how you can use the sentiment labels in the other languages to provide more options for your kit.
Products Used:
Nourish & Flourish Kit (item #160230)
Peaceful Moments stamp set (item #151595)
Versamark Pad (item #102283)
Metallics Embossing Powders (item #155555)
Clear Wink Of Stella Glitter Brush (item #141897)
Iridescent Rhinestone Jewels (item #158130)
For my card design, I chose to use most of my supplies from the kit to create a card similar to the second design in the kit. For the sentiment, I chose one of the French sentiment labels, and heat embossed the Happy Birthday image from the Peaceful Moments stamp set on the reverse side, using Gold embossing powder. I followed the layout of the card design in the kit, but I chose not to use all the flowers and leaves shown in the original and placed two of the larger flowers so that they overlapped the top and bottom corners using Stampin' Dimensionals. For a touch of bling, I chose to add Iridescent Rhinestone Jewels to the centers of the two larger flowers as well as on the sentiment label and card front. I also added some Clear Wink of Stella to the centers of the large flowers and as accents to the leaves and small yellow flowers. I love the clean and simple elegance of this card design. The extra labels in this kit provide you with the ability to customize your cards using your favorite sentiment stamp. There are so many ways we can help reach out to people, whether it is to help celebrate a birthday or just to let them know you are thinking of them. 
Thank you for taking the time to visit my blog. I hope that my card design will help inspire you to create your own beautiful cards to share with others to help brighten their day. There are so many wonderful possibilities to explore to help make a difference.
Now it's time to visit Tanya's blog and see what she has created to share with us. Just click the Next button below to visit her blog. We would love it if you would leave us a comment and let us know what you liked about our projects. I hope you enjoy the rest of our blog hop. 


If you live in the U.S. and do not have a Stampin' Up! Demonstrator, please contact me and I would be happy to help you with your creative projects. You may also visit my Online Store to place your order and have it shipped to you. 

Until Next Time

Happy Stamping,

Tricia Butts
Independent Stampin' Up! Demonstrator

Like What You See? Visit My Online Store Here

Visit My Facebook Business Page for Updates & Ideas

Click here to Contact Me


Craft For A Cause
With The Nourish & Flourish Kit
Click Below For More Information 

Available For A Limited Time, While Supplies Last
Perfect Partners Exclusive Die Sets
Click Below For More Details

Weekly Deals Are Here During September
Available For A Limited Time
Click Here To View In My Online Store


Saturday, August 13, 2022

Ink. Stamp. Share. August Showcase Blog Hop

Welcome to the Ink. Stamp. Share. August Showcase Blog Hop as we share projects we are currently working on. Our amazing Design Team are busy creating projects using products from our current Stampin' Up! catalogs as well as getting ready for the upcoming holidays. I hope our projects and ideas will help you to get excited about creating your own fun projects. 
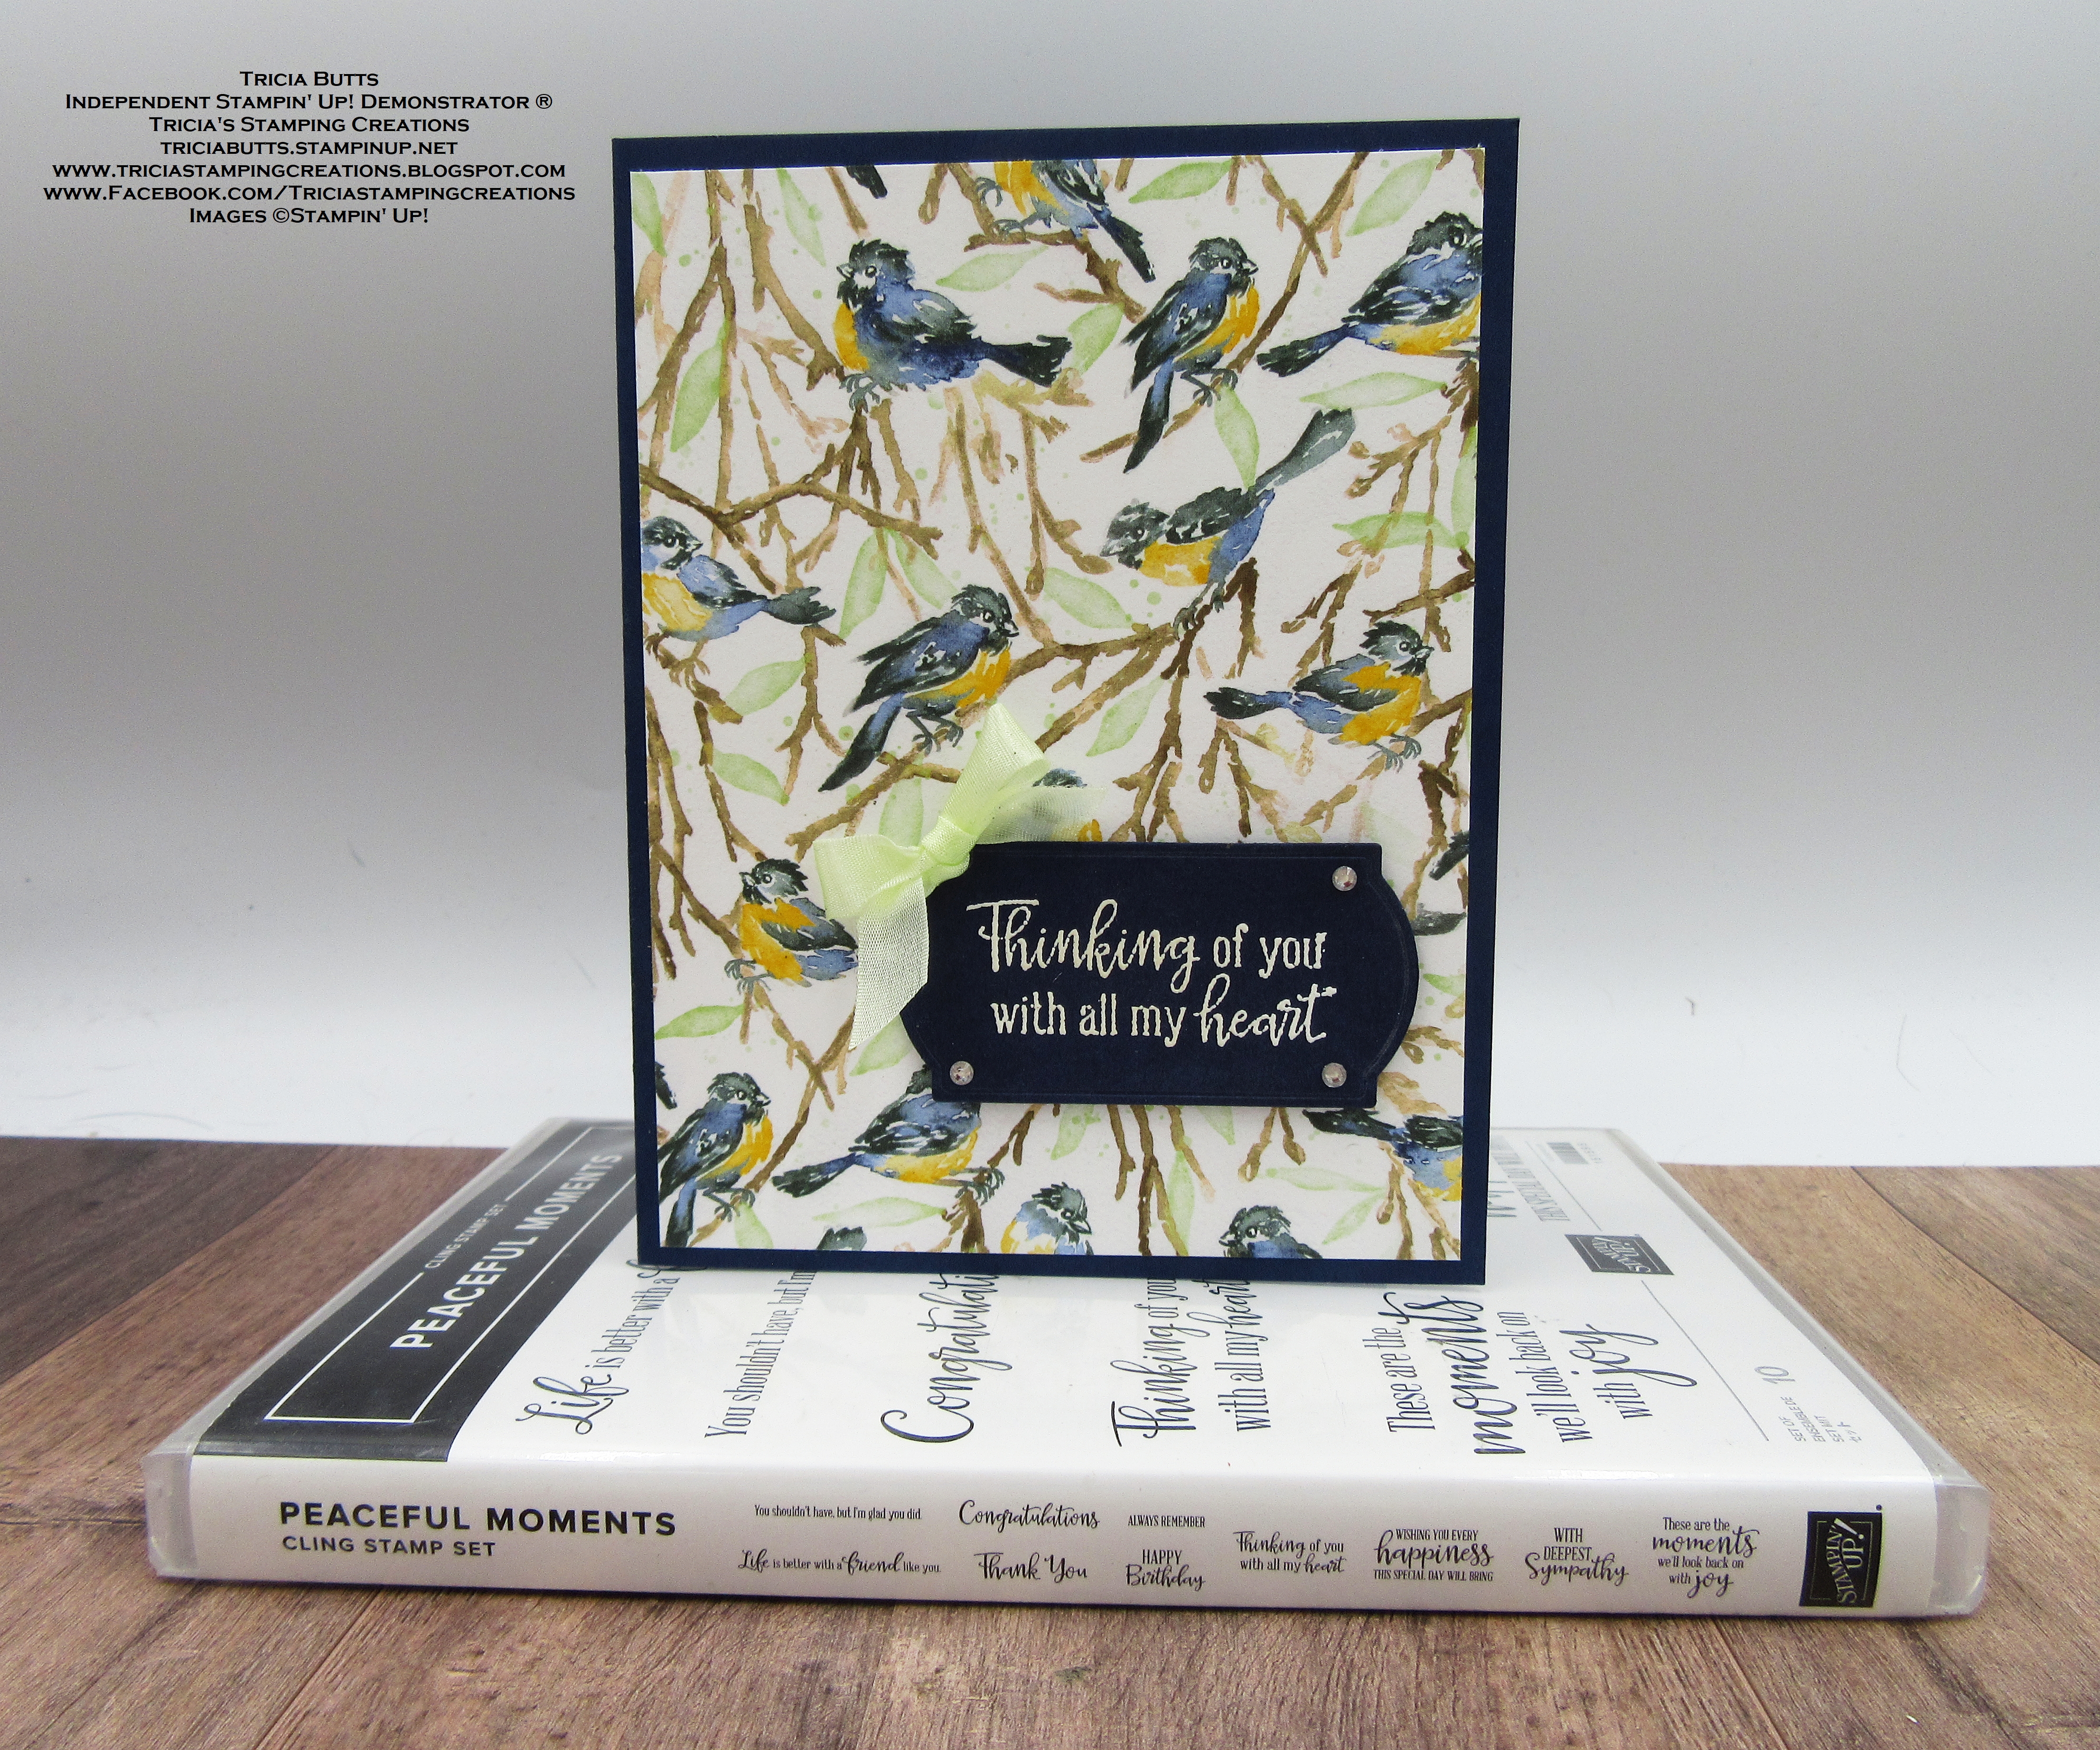
Some of the hardest cards to design and create are sympathy cards and cards providing comfort to people experiencing difficult times. When I saw this beautiful Rings of Love Designer Series Paper, I knew that the designs in this paper pack would work perfectly to create cards from the heart. The design I chose with the bluebirds, was perfect for the card I wanted to create. I love how simple this card design is and how it provides a sense of peace and comfort.
Products Used:
Peaceful Moments stamp set (item #151595)
Painted Labels Dies (item #151605)
Rings of Love Designer Series Paper (item #159939) Sale-a-bration Reward
Night of Navy Cardstock (item #100867)
Versamark Pad (item #102283)
Basics Embossing Powders (item #155554)
Soft Sea Foam 3/8" Seam Binding Ribbon
Basic Rhinestone Jewels (item #144220)
Stampin' Dimensionals (item #104430)
Mini Glue Dots (item #103683)
Measurements:
Night of Navy Cardstock
Card Base - 8 1/2" x 5 1/2" (Scored at 4 1/4")
Sentiment Label die cut with Painted Labels Dies
Rings of Love Designer Series Paper
Card Front - 5 1/4" x 4"
This beautiful clean and simple card design is all about this amazing designer series paper. I just love the sweet little bluebirds and the wonderful colors in this pretty paper. I wanted to make sure that the paper was the star of the show, so I kept the sentiment small and simple. The sentiment label was die cut from Night of Navy cardstock with the Painted Labels Dies and I heat embossed the sentiment with White embossing powder so that it would pop. I kept the embellishments simple as well with a bow tied with the pretty Soft Sea Foam Seam Binding Ribbon and a touch of bling with the small Basic Rhinestone Jewels. This design would work well as a masculine card and you could use some Linen Thread or Baker's Twine instead of the ribbon and forgo the rhinestones for a simpler look.
Thank you for taking the time to visit my blog. I hope that my card design will help inspire you to create your own beautiful projects. There is something for every occasion to help spark your creativity. 
Please take the time to visit with the other Design Team members to see the amazing projects they are sharing on their blogs. Just use the Roll Call List below to follow along our blog hop. We would appreciate it if you would leave us a comment and let us know what you liked about our projects. 

If you live in the U.S. and do not have a Stampin' Up! Demonstrator, please contact me and I would be happy to help you with your creative projects. You may also visit my Online Store to place your order and have it shipped to you. Remember, Sale-a-bration ends August 31st, so don't delay in placing your qualifying order to earn your free Sale-a-bration products. 

Until Next Time

Happy Stamping,

Tricia Butts
Independent Stampin' Up! Demonstrator

Like What You See? Visit My Online Store Here

Visit My Facebook Business Page for Updates & Ideas

Click here to Contact Me


Earn Exclusive Free Products
During Sale-a-bration
Click Below For More Details

Get Creative For The Holidays
With The July-December 2022 Mini Catalog
Click Below To Visit My Online Store


Saturday, February 27, 2021

Ink. Stamp. Share. February Monthly Blog Hop Fancy Fold Cards

Welcome to the Ink. Stamp. Share. February Monthly Blog Hop as we showcase wonderful Fancy Fold cards to help inspire you. I hope you will take the time to hop along and visit the amazing Stampin' Up! Demonstrators who are participating in our blog hop as they share their ideas and projects to help spark your creative spirit.
Fancy Fold cards are a wonderful way to make the people you care about feel extra special. For my Fancy Fold card, I chose to create a Gate Fold card and I stepped it up by using the pretty Flowers For Every Season 6"x6" Designer Series Paper (item #152486) combined with Gold Foil and Gold Embossing for an elegant touch. I am not normally a yellow person, but I just love this gorgeous designer series paper and wanted it to be the showcase for this card. 
Products Used:
Jar Of Flowers stamp set (item #152515)
Peaceful Moments stamp set (item #151595)
Flowers For Every Season 6"x6" Designer Series Paper 
(item #152486)
Stitched Shapes Dies (item #152323)
Layering Ovals Dies (item #151771)
Thick Basic White Cardstock (item #159229)
Basic White Cardstock (item #159276)
Bumblebee Cardstock (item #153077)
Gold Foil Sheets (item #132622)
Versamark Pad (item #102283)
Gold Embossing Powder (item #109129)
Bumblebee 1/4" Ribbon (item #153622)
Measurements:
Basic White Thick Cardstock
5 1/2" x 8 1/2" (Scored at 2 1/8" and 6 3/8")
Basic White Cardstock
Inside Layer - 5 1/4" x 4"
Oval die cut with Stitched Shapes Dies
Bumblebee Cardstock 
Inside Layer - 5 3/8" x 4 1/8"
Flowers For Every Season 6"x6" Designer Series Paper
2 Pieces - 5 1/4" x 1 7/8"
Gold Foil
Scalloped Oval die cut with Layering Ovals Dies
This pretty Gate Fold card is simple to create and fits inside a regular medium sized envelope. The Bumblebee designer series paper really pops against the Basic White cardstock and I love how the Gold Foil frames the sentiment label. The Gold Embossing for the sentiment label and on the inside layer of the card adds a touch of elegance to the card. I used the sentiment from the Peaceful Moments stamp set and I added the floral image from the Jar Of Flowers stamp set to the sentiment label and the inside of the card to coordinate with the designer series paper. The used a piece of the Bumblebee ribbon to keep the card closed and tied a bow next to the sentiment label as a decorative touch. This pretty Spring themed card would work for a variety of occasions.
Thank you for taking the time to visit my blog. I hope that my fancy fold card design inspires you to explore creating your own beautiful cards. There are so many wonderful possibilities to try.  
Now it's time to visit Donna's wonderful blog and see what Fancy Fold card she has to share with us. Just click the Next button below to visit her blog or use the Roll Call List below to find your way. I hope you enjoy the rest of our blog hop. Please leave us a comment and let us know what you enjoyed about our projects.

Roll Call

Jo Blackman

Cindy Mitchell-Clark

Kim Price

Sue McDonald

Sue Allen

Gez Carpenter

Rebecca-Jo Unwin

Laura Mackie

Annette Elias

Mo Rootes

Tricia Butts

Donna Lester

Karen Egan

Nicole Mahler

Kirsty Pattrick

Jill Chapman

Rochelle Laird-Smith

Donna Coffman

Deb Naylor

Victoria Littlewood


If you live in the U.S. and do not have a Stampin' Up! Demonstrator, please contact me and I would be happy to help you with your creative projects. You may also visit my Online Store to place your order and have it shipped to you. Remember, Sale-a-bration ends February 28th, so make sure to place your order soon to avoid missing out. 

Until Next Time

Happy Stamping,

Tricia Butts
Independent Stampin' Up! Demonstrator

Like What You See? Visit My Online Store Here

Visit My Facebook Business Page for Updates & Ideas

Click here to Contact Me


Craft Away The Winter Blues
With Products From The January-June 2021 Mini Catalog
Click Below To Visit My Online Store


Final Days To Earn Free Exclusive Products
During Sale-a-bration
Click Below To Place Your Order By February 28th

Available For A Limited Time
The Hey Chick & Hey Chick Birthday Bundles
Click Below For More Details 


Wednesday, November 11, 2020

Around The World On Wednesday November Blog Hop The Market - All About Texture

It's time to hop along with the Around The World On Wednesday November Blog Hop as we explore the theme of "The Market - All About Texture". You will be visiting with wonderful Stampin' Up! Demonstrators from around the world as they explore this theme and provide you with wonderful ideas and projects to inspire you. 
Today is November 11th, Veteran's Day here in the U.S. and Remembrance Day in other parts of the world, including Australia. As I think back to being a young girl growing up in a small country town in Australia, I have strong memories of this day and the importance of remembering those who made the ultimate sacrifice. Red Poppies are an important symbol of this special day and I wanted to incorporate them into my card design today to create this special card. When I think of markets, I think of the beautiful assortment of flowers on display, waiting to go home with someone to brighten their day. The Peaceful Moments Bundle (item #153824) was a perfect choice with it's wonderful dies that layer to create detailed flowers and the beautiful sentiments that express the importance of this occasion. 
Products Used:
Peaceful Moments Dies (item #153824)
Stitched Rectangles Dies (item #151820)
Old World Paper 3D Embossing Folder (item #153200)
Classic Label Punch (item #141491)
Poppy Parade Cardstock (item #119793)
Calypso Coral Cardstock (item #122925)
Garden Green Cardstock (item #102584)
Old Olive Cardstock (item #100702)
Basic Black Cardstock (item #121045)
Whisper White Cardstock (item #100730)
Memento Tuxedo Black Ink Pad (item #132708)
Gold Embossing Powder (item #109129)
Gilded Gems (item #152478)
Measurements:
Poppy Parade Cardstock Card Base - 8 1/2" x 5 1/2" 
(Scored at 4 1/4")
Whisper White Cardstock Layer - 5 1/4" x 4" 
(Embossed with the Old World Paper 3D Embossing Folder)
Basic Black Cardstock Layer - 5 1/4" x 4" 
(Die cut the center opening with the Stitched Rectangles Dies)
Basic Black Cardstock - for flower die cuts and sentiment label
Poppy Parade Cardstock - For flower base die cuts
Calypso Coral Cardstock - For intricate floral die cuts
Old Olive Cardstock - For leaf base die cuts
Garden Green Cardstock - For intricate leaf die cuts and small leaves
This beautiful card design is all about layers. I stamped the sentiment from the Peaceful Moments stamp set onto the Whisper White cardstock layer with Memento Tuxedo Black Ink and then embossed the layer with the Old World Paper 3D Embossing Folder. I attached this layer to the Poppy Parade card base. To create the Basic Black cardstock frame, I die cut the center out using the 3 largest die in the Stitched Rectangles Dies. I attached the frame over the top of the Whisper White cardstock layer using Stampin' Dimensionals. To create the poppies, I die cut the bases of the flowers from Poppy Parade cardstock and the detailed layers from Calypso Coral cardstock using the Poppy Moments Dies and attached them with adhesive. I die cut the detailed centers of the flowers from Basic Black cardstock and added them to the centers of the flowers. The leaves were created by die cutting the bases from Old Olive cardstock and the detailed layers and small leaves from Garden Green cardstock. I assembled the leaves and flowers and attached them to the Basic Black cardstock frame, using Stampin' Dimensionals and Stampin' Seal adhesive. The small sentiment was created by heat embossing the image onto a scrap of Basic Black cardstock with Gold Embossing Powder and punched out using the Classic Label Punch. I tucked one end of the label under the flower and attached it to the card front with Mini Stampin' Dimensionals. For a touch of bling, I added a small Gilded Gem at the end of the sentiment label to coordinate with the Gold embossing. I love this bold color combination and the wonderful texture of the background that makes me think of wrinkled paper that could represent an old letter written home to family. This card design is just my way of remembering this special day. Lest We Forget. 
Thank you for taking the time to visit my blog today. I hope that my card design will help inspire you to explore adding texture to your projects. It's amazing the ideas you can find in the world around you and how you can use these elements to create special memories and projects. 

Now it's time to visit Elaine's amazing blog and see what she has to share with us this month. Just click on the Next button below to visit her blog or use the Roll Call List below to find your way. We would love it if you would leave us a comment and let us know what you enjoyed about our projects. I hope that you enjoy the rest of our blog hop. 


Angela Meiritz-Reid - NZ

Tatiana Tobin - AU

Rochelle Laird-Smith - AU

Cheryll Miller - AU

Danielle Kassing - NL

Manuela Geiswinkler - AT

Aurélie Fabre - FR

Mikaela Titheridge - UK

Annette Ball - CA

Angie McKenzie - US

Mary Deatherage - US

Shel Anderson - CA

Chris Smith - US

Anne Marie Hile - US

Brenda Nelson - CA

Tricia Butts - US

Elaine de Montmorency - CA

Teri West - US

Cheryl Hamilton - US

If you live in the U.S. and do not already have a Stampin' Up! Demonstrator, please contact me and I would be happy to help you with your creative projects. You may also visit my Online Store to place your order and have it shipped to you. 

Until Next Time

Happy Stamping,

Tricia Butts
Independent Stampin' Up! Demonstrator

Like What You See? Visit My Online Store Here

Visit My Facebook Business Page for Updates & Ideas

Click here to Contact Me


Create With The Curvy Celebrations Promotion
Click Below To Visit My Online Store 


Create Beautiful Projects For The Holidays
With The Products In The August-December 2020 Mini Catalog
Click Below To Visit My Blog