Showing posts with label Lovely Labels Pick A Punch. Show all posts

Friday, August 6, 2021

Global Stamping Friends August Blog Hop Animals

Welcome to the Global Stamping Friends August Blog Hop as we showcase the theme "Animals". You will be visiting with talented Stampin' Up! Demonstrators from around the world as they share their ideas and projects to help inspire you.
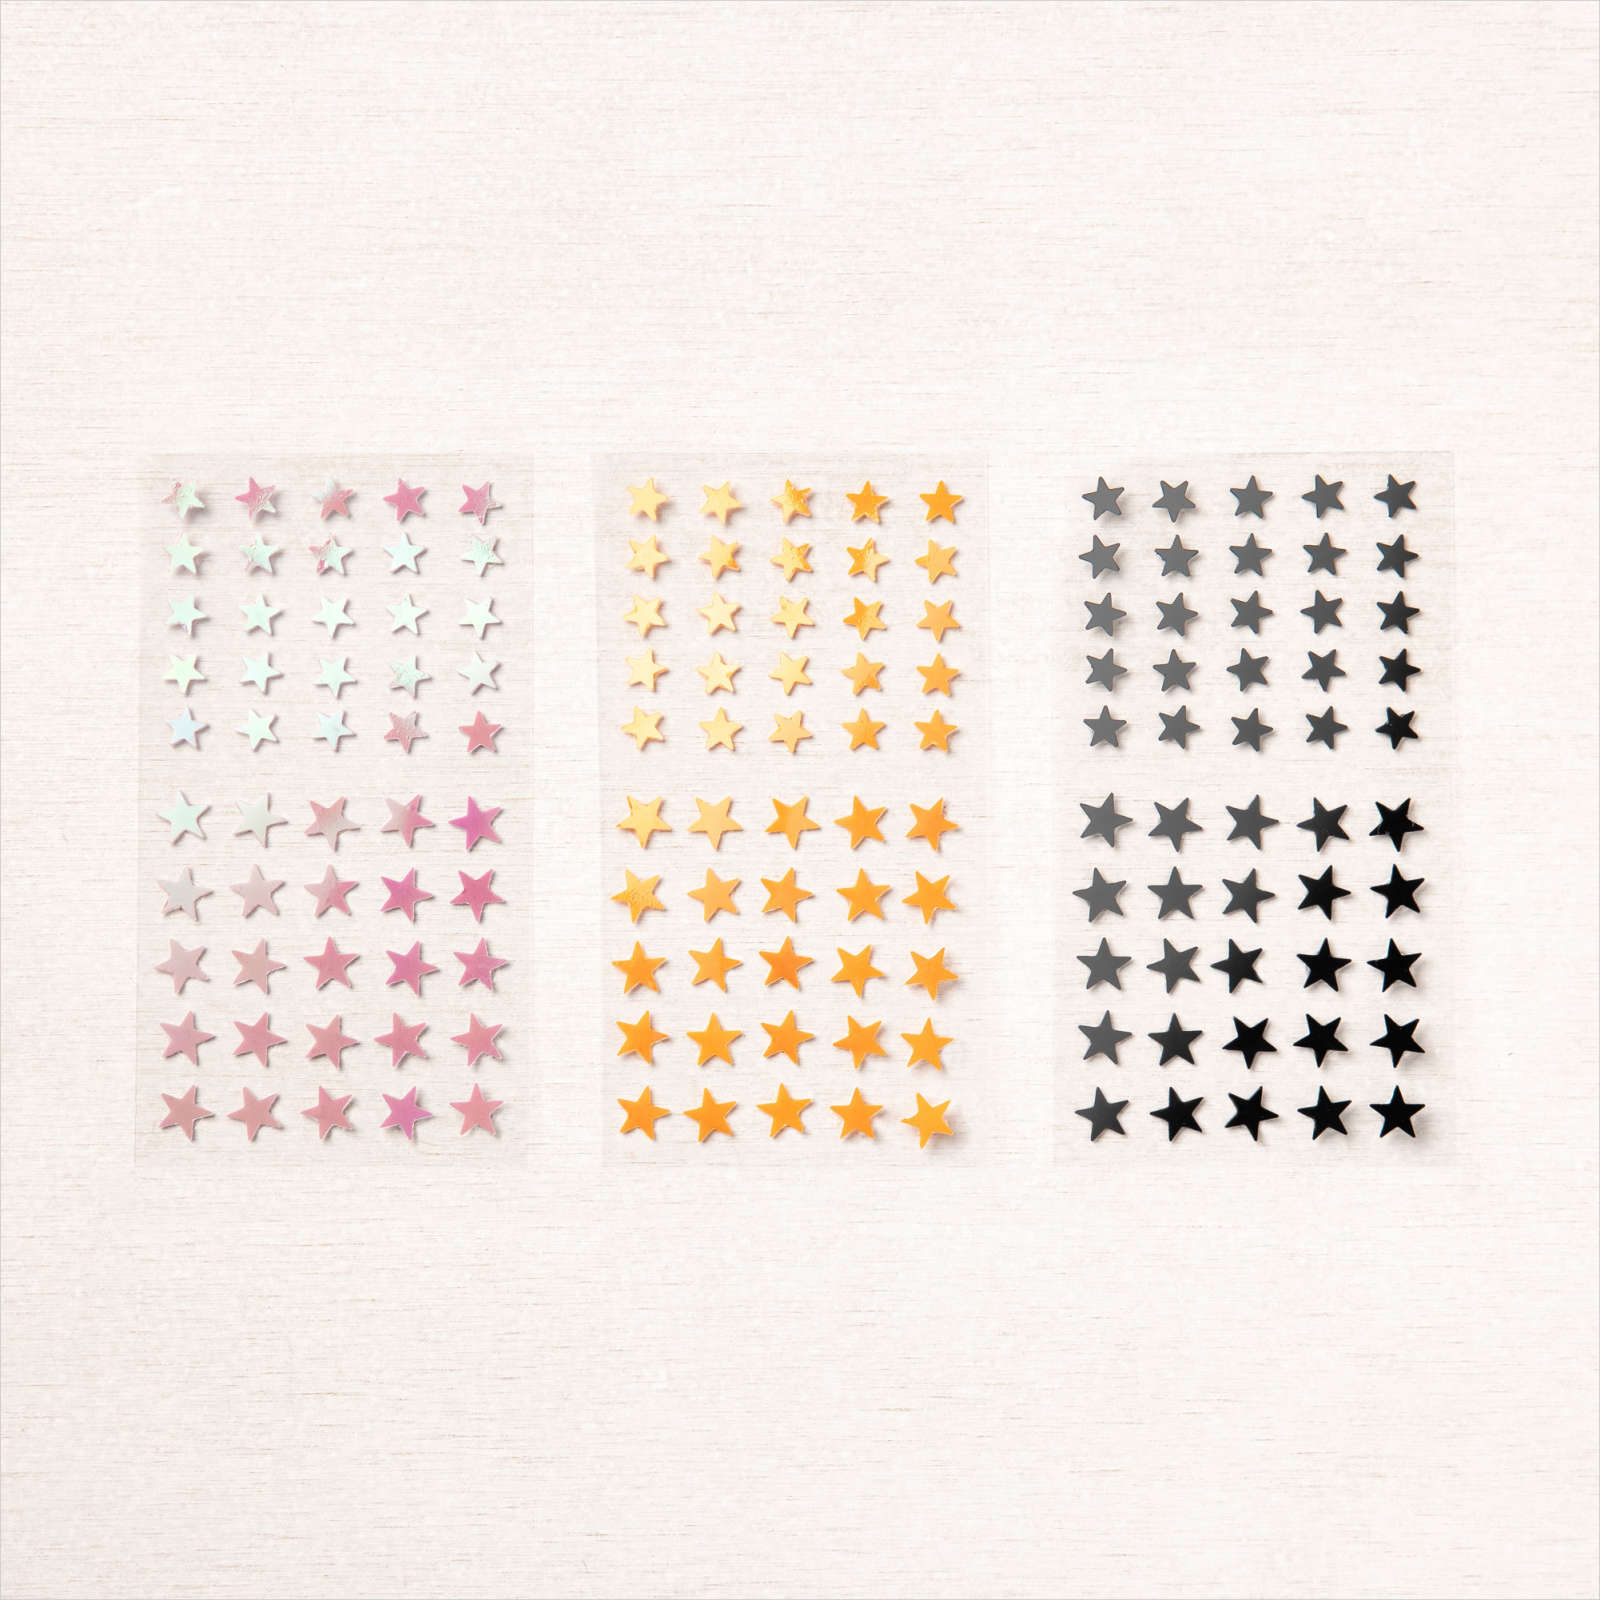
One of my favorite new stamp sets from the new July-December 2021 Mini Catalog would have to be the Clever Cats stamp set. I love Halloween and I love cats, so you could say it's a match made in heaven. The cat image I chose reminds me of our Tuxedo cat, Sylvester, and I couldn't resist having him fly through the night sky on a broomstick to celebrate Halloween. The embellishments really bring this card design to life with the Cute Stars Adhesive Backed Sequins and the 1 1/2" Metallic Mesh Ribbon adding sparkle and texture to the background. 
Products Used:
Clever Cats stamp set (item #156490) New
Gorgeous Leaves stamp set (item #153365) New
Layering Circles Dies (item #151770)
Lovely Labels Pick A Punch Punch (item #152883)
Neutrals 6"x6" Designer Series Paper (item #155226)
Night Of Navy Cardstock (item #100867)
Crushed Curry Cardstock (item #131199)
Basic White Cardstock (item #159276)
Memento Tuxedo Black Pad (item #102283)
Soft Suede Classic Ink Pad (item #147115)
Crushed Curry Classic Ink Pad (item #147087)
Night Of Navy Classic Ink Pad (item #147110)
Clear Wink Of Stella Glitter Brush (item #141897)
Daffodil Delight Stampin' Blends Combo Pack (item #154883)
Granny Apple Green Stampin' Blends Combo Pack (item #154885)
Cute Stars Adhesive Backed Sequins (item #156484) New
1 1/2" Metallic Mesh Ribbon (item #153550)
Stampin' Dimensionals (item #104430)
Measurements:
Night Of Navy Cardstock
Card Base - 8 1/2" x 5 1/2" ( Scored at 4 1/4")
Crushed Curry Cardstock
Layer 1 - 5 1/4" x 4"
Large Circle die cut with Layering Circles Dies
3/4" x 3" trimmed and ends punched using the Lovely Labels Pick A Punch
Night Of Navy Designer Series Paper
Background Layer - 5" x 3 3/4"
Basic White Cardstock
Sentiment Label - 1/2" x 2 1/2" strip, trimmed and ends punched with the Lovely Labels Pick A Punch
Piece for cat and broomstick stamped images, fussy cut with scissors
This was such a fun card to design and I love that how the images in the Clever Cats stamp set work together. I stamped the cat image with Memento Tuxedo Black ink onto a scrap of Basic White cardstock and the broomstick I stamped with Soft Suede Classic ink also onto a scrap of Basic White cardstock. I colored the broomstick image with the Dark Daffodil Delight Stampin' Blends Marker to add color and depth to the image. I colored the cat's eyes with the Light Granny Apple Green Stampin' Blends Marker to give them that wonderful glow. I fussy cut both images out with scissors. For the large Crushed Curry circle, I stamped one side with large spotted background image from the Gorgeous Leaves stamp set, using Crushed Curry Classic ink. I wanted to create the detail you can see on the surface of a full moon and I love how this image worked. Using the Metallic Mesh Ribbon, I attached a piece around the Night of Navy Designer Series Paper layer and attached the layer to the Crushed Curry cardstock layer. I attached the Crushed Curry moon over the top of the ribbon with Stampin' Dimensionals so that the stamped side is on the right side. I attached the broom and the cat to the moon so that the broomstick is level with the bottom edge of the ribbon. For the sentiment, I stamped the image onto the Basic White strip with Night of Navy Classic ink and trimmed and punched the ends with the Lovely Labels Pick A Punch. I trimmed and punched the ends of the Crushed Curry strip withe Lovely Labels Pick A Punch so that it is approx. a 1/4" longer than the sentiment label. I layered the sentiment layer on top and attached the sentiment to the card front with Stampin' Dimensionals. To complete the card design, I added several of the Cute Stars to the designer series paper background and the sentiment and colored the moon, the cat and the broomstick with Clear Wink of Stella to give them a touch of shimmer. 
Thank you for taking the time to visit my blog. I hope that my card design will help inspire you to use animals to create your own projects. Stampin' Up! has a wonderful range of projects to help meet your needs, whatever the occasion. 
Now it's time to visit Jan's wonderful blog and see what she has created for us this month. Just click the Next button below to visit her blog or use the Roll Call List to find your way. We would appreciate it if you would leave us a comment and let us know what you liked about our projects. I hope you enjoy the rest of our blog hop. 

If you live in the U.S. and do not have a Stampin' Up! Demonstrator, please contact me and I would be happy to help you with your creative projects. You may also visit my Online Store to place your order and have it shipped to you. Take advantage of Sale-a-bration and earn exclusive Free products with a qualifying order until September 30th. 

Until Next Time

Happy Stamping,

Tricia Butts
Independent Stampin' Up! Demonstrator

Like What You See? Visit My Online Store Here

Visit My Facebook Business Page for Updates & Ideas

Click here to Contact Me


Earn Exclusive Free Products

During Sale-a-bration

Click Below For More Details


Celebrate The Coming Seasons
With The July-December 2021 Mini Catalog
Click Below To Visit My Online Store

Share A Box Of Hope
With The August Paper Pumpkin Kit
Click Below To Subscribe By August 10th


Saturday, May 15, 2021

Ink. Stamp. Share. May Showcase Blog Hop

Welcome to the Ink. Stamp. Share. May Showcase Blog Hop as we share projects we are currently working on using current projects from Stampin' Up! You will be visiting with wonderful Stampin' Up! Demonstrators from around the world as they share their ideas and projects to help inspire you.
With the launch of a new catalog, it's so much fun to be able to play with new products and I just love the new Badger Besties (item #156930) stamp set. The images are so cute and I love the versatility of the sentiments in this set. I paired it with the wonderful new Pattern Party Host Designer Series Paper (item #155426) that is an exclusive Host Reward that you can earn Free with a qualifying order or party. This amazing paper pack contains 48 sheets of 12"x12" Designer Series Paper with 4 each of 12 double sided designs. One side is predominantly black and white while the reverse side has wonderful color combinations. It is definitely my pick from this new Annual Catalog.
Products Used:
Badger Besties stamp set (item #156930) New
Pattern Party 12"x12" Host Reward Designer Series Paper 
(item #155426) New 
Layering Circles Dies (item #151770)
Lovely Labels Pick A Punch (item #152883)
Pool Party Cardstock (item #122924)
Basic White Cardstock (item #159276)
Memento Tuxedo Black Ink Pad (item #132708)
Smoky Slate Stampin' Blends Combo Pack (item #154904)
Basic Black Stampin' Blends Combo Pack (item #154843)
Pool Party Stampin' Blends Combo Pack (item #154894)
Fresh Freesia Stampin' Blends Combo Pack (item #155518) New
Color Lifter (item #144608)
Basic Rhinestone Jewels (item #144220)
Measurements:
Pool Party Cardstock 
Card Base - 8 1/2" x 5 1/2" (Scored at 4 1/4")
Basic White Cardstock
Layer 1 - 5 1/4" x 4"
Circle die cut with Layering Circles Dies 
1/2" strip for sentiment using the Lovely Labels Pick A Punch at each end
This cute clean and simple card is easy to assemble and the cute badger is easy to color. I used the Smoky Slate Stampin' Blends Combo with the Light Basic Black Stampin' Blends Marker to color the body of the badger and used the Color Lifter to create highlights and blend. For the flower I used the Light Fresh Freesia Stampin' Blend and I used the Dark Pool Party Stampin' Blend for the leaf. Using the Dark Pool Party Stampin' Blends Marker, I colored the bottom of the circle to create the ground and blended it with the Color Lifter. For the Rhinestones, I colored them with the Dark Fresh Freesia Stampin' Blends Marker and added one to the center of the flower and the other two to decorate the sentiment for a touch of bling. The sentiment was stamped onto a 1/2" strip of Basic White cardstock with Memento Tuxedo Black ink and I used the Lovely Labels Pick A Punch on each end for a decorative touch. I really do love this stamp set and with all the wonderful designs in the Pattern Party Designer Series Paper, I think that I will be having a lot of fun creating many more cards with these products. 
Thanks for taking the time to visit my blog. I hope that my card will help to inspire you to create your own fun designs with the new products in the 2021-2022 Annual Catalog. There are so many options to choose from. 
Now it's time to visit Jo's blog and see what wonderful projects she has to share with us. Just click on the Next button to visit her blog or use the Roll Call List below to find your way. We would love it if you would leave us a comment and let us know what you enjoyed about our projects. I hope that you enjoy the rest of our blog hop. 

If you live in the U.S. and do not have a Stampin' Up! Demonstrator, please contact me and I would be happy to help you with your creative projects. You may also visit my Online Store to place your order and have it shipped to you. 

Until Next Time

Happy Stamping,

Tricia Butts
Independent Stampin' Up! Demonstrator

Like What You See? Visit My Online Store Here

Visit My Facebook Business Page for Updates & Ideas

Click here to Contact Me


Enjoy The Amazing New Products
In The 2021-2022 Annual Catalog
Click Below To Visit My Online Store

Explore The Amazing New In Colors
With The June Paper Pumpkin Expressions In Color Kit
Click Below To Subscribe By June 10th

Celebrate Spring
With The January-June 2021 Mini Catalog
Click Below To Visit My Online Store


Saturday, December 12, 2020

Colour Combo December Blog Hop

It's time to hop along with the Colour Combo December Blog Hop as we create with this month's wonderful color combination of Gray Granite, Real Red and Cinnamon Cider. You will be visiting with talented Stampin' Up! Demonstrators from around the world as we share our ideas and projects to help inspire you to explore this beautiful color combination. 
Today's card is a fun Winter themed design featuring the Freezin' Fun Bundle and the Tis The Season 6"x6" Designer Series Paper from the August-December 2020 Mini Catalog. I love how this color combination adds a twist to this skiing snow bunny for a warm and cozy card design. I love the simplicity of this clean and simple design and it works well as a thinking of you card but could also be a great Winter birthday card. 
Products Used:
Freezin' Fun Bundle (item #155176)
Tis The Season 6" x 6" Designer Series Paper (item #153489)
Stitched Shapes Dies (item #152323)
Layering Circles Dies (item #151770)
Lovely Labels Pick A Punch (item #152883)
Classic Label Punch (item #141491)
Cinnamon Cider Cardstock (item #153078)
Gray Granite Cardstock (item #146983)
Very Vanilla Cardstock (item #101650)
Cinnamon Cider Classic Ink Pad (item #153114)
Very Vanilla 3/8" Scalloped Lace Trim (item #149593)
Red Rhinestone Basic Jewels (item #144220)
Cinnamon Cider Stampin' Blends Combo Pack (item #153105)
Gray Granite Stampin' Blends Combo Pack (item #154886)
Real Red Stampin' Blends Combo Pack (item #154899)
Measurements:
Cinnamon Cider Cardstock Card Base - 8 1/2" x 5 1/2" 
(Scored at 4 1/4")
Tis The Season 6"x6" Designer Series Paper Layer 
- 5 1/4" x 4"
Cinnamon Cider Cardstock 
- For Scalloped Circle die cut with the Layering Circles Dies
- For the Sentiment layer punched with the Lovely Labels Pick A Punch
Gray Granite Cardstock - For the snow layer die cut with the Freezin' Friends Dies
Very Vanilla Cardstock 
- For the Very Vanilla Stitched Circle die cut with the Stitched Shapes Dies
- For the sentiment label punched with the Classic Label Punch
- For the stamped image
This card design features layers of color created with dies for the focal image and sentiment. I was so happy that there were Stampin' Blends Markers in each of the colors in this month's color combo to help me color in my sweet little bunny. The Scalloped Lace Trim adds wonderful detail to the bottom of the sentiment label and the Red Rhinestones finish off the design with a little bling. Both the Freezin' Fun Bundle and Tis The Season 6"x6" Designer Series Paper are retiring and are available to order while supplies last. 
Thank you for taking the time to visit my blog today. I hope that my card design helps to inspire you to try this color combination to create your own projects and step outside your comfort zone. 

Now it's time to visit Sigrid's wonderful blog and see what she has created with this month's color combination. Just click the Next button below to visit her blog. We would love it if you would leave us a comment and let us know what you enjoyed about our projects. I hope you enjoy the rest of our blog hop. 


If you live in the U.S. and do not already have a Stampin' Up! Demonstrator, please contact me and I would be happy to help you with your creative projects. You may also visit my Online Store to place your order and have it shipped to you. 

Until Next Time

Happy Stamping,

Tricia Butts
Independent Stampin' Up! Demonstrator

Like What You See? Visit My Online Store Here

Visit My Facebook Business Page for Updates & Ideas

Click here to Contact Me


The Giant Year-End Closeout Sale Is Here

Stock Up On Your Favorite Retiring Products

From The August-December 2020 Mini Catalog

Before They Disappear

Click Below To Visit My Online Store


The Clearance Rack Has Been Refreshed
Save Up To 60% On Retired & Discontinued Products
Available While Supplies Last
Click Below To Visit My Online Store

Share The Love With The People In Your Life
With The January Paper Pumpkin Kit
Click Below To Subscribe By January 10th, 2021 


Saturday, August 29, 2020

Ink. Stamp. Share. August Blog Hop August-December 2020 Mini Catalog

It's time to hop along with the Ink. Stamp. Share. August Blog Hop as we showcase products from the new August-December 2020 Mini Catalog. You will be visiting with talented Stampin' Up! Demonstrators from around the world as they share their projects and ideas to help inspire you for the holidays. 
 Today I thought I would share a clean and simple card design featuring the Gather Together Bundle (item #153036) from the new August-December 2020 Mini Catalog. You may remember this returning favorite from last year's Holiday Catalog and I am so happy that it has made a comeback. I combined it with several products from the 2020-2021 Annual Catalog to create a design that would be perfect as a masculine Fall card. I love the soft texture of the background created with the Subtle 3D Embossing Folder (item #151775) and the Lovely Labels Pick A Punch is great for creating custom sized sentiment labels to suit longer sentiments. The color combination I chose was Mint Macaron, Cajun Craze and Very Vanilla and I used Gold Embossing Powder to heat emboss the leaf image and sentiment. The beautiful ribbon is from the new Basket Weave & Metallic Ribbon Combo Pack (item #153553) in the new Mini Catalog as is part of the wonderful Gilded Autumn Suite. 
 Products Used:
Gather Together Bundle (Mini Catalog) item #153036
Subtle 3D Embossing Folder (Annual Catalog) item #151775
Lovely Labels Pick A Punch (Annual Catalog) item #152883
Basket Weave & Metallic Ribbon Combo Pack (Mini Catalog) item #153553
Gold Embossing Powder
Measurements:
Mint Macaron cardstock card base - 8 1/2" x 5 1/2" (scored at 4 1/4")
Cajun Craze cardstock layer - 5 1/4" x 4"
Very Vanilla cardstock layer - 5" x 3 3/4" (embossed with Subtle 3D Embossing Folder)
Cajun Craze cardstock strip - 3/4" x 3 1/4"
Mint Macaron Basket Weave Ribbon - approx 4 1/2"
 The leaf image from the Gather Together stamp set was stamped onto the Cajun Craze layer of cardstock (towards the top center) and heat embossed with Gold Embossing Powder. I die cut the leaf image with the coordinating die from the Gathered Leaves Dies. I also die cut an opening in the top center of the Very Vanilla embossed cardstock layer using the same die. When assembling the card design, I attached the Cajun Craze cardstock layer to the Mint Macaron card base with adhesive. I added Stampin' Dimensionals to the back of the Very Vanilla cardstock layer and attached the Mint Macaron Ribbon to the bottom of the layer approx. 3/4" from the bottom. I attached the Very Vanilla cardstock layer on top of the Cajun Craze layer and then added the die cut embossed leaf inside the opening with adhesive, pressing down firmly to attach it to the Cajun Craze cardstock layer. The sentiment layer was added to the ribbon with Stampin' Dimensionals to complete the design. The Gold Embossing adds a touch of elegance to the card that doesn't over power this simple design.
Thank you for taking the time to visit my blog today. I hope that my card design helps inspire you to create your own holiday projects for the upcoming seasons with the amazing new products in the August-December 2020 Mini Catalog. There are so many wonderful options to choose from. 

Now it's time to visit Cindy's wonderful blog and see what she has to share with us from the new Mini Catalog. Just click on the Next button below to visit her blog or use the Roll Call List below to find your way. We would love it if you would leave us a comment and let us know what you enjoyed about our projects. I hope you enjoy the rest of our blog hop. 
 Cindy

Roll Call

If you live in the U.S. and do not already have a Stampin' Up! Demonstrator, please contact me and I would be happy to help you with your creative projects. You may also visit my Online Store to place your order and have it shipped to you. 

Until Next Time
Happy Stamping,
Tricia Butts
Independent Stampin' Up! Demonstrator
Like What You See? Visit My Online Store Here
Visit My Facebook Business Page for Updates & Ideas
Click here to Contact Me


The August-December 2020 Mini Catalog Is Here!
Click Below To Visit My Online Store
 Click Here To Visit My Online Store


Saturday, July 25, 2020

3D Paper Trimmer July Blog Hop Christmas In July

It's time to hop along with the 3D Paper Trimmer July Blog Hop as we showcase this month's theme, Christmas In July, creating projects with our Paper Trimmer. You will be visiting with talented Stampin' Up! Demonstrators from around the world as they share their beautiful ideas and projects. 
 For my Christmas In July card design, I chose to use the new Warm & Toasty stamp set (item #152615) from the new August-December 2020 Mini Catalog, to create this fun Easel design. I paired the images in this stamp set with the Old Olive and Real Red Designer Series Paper from the Regals 6"x6" Designer Series Paper (item #153073) to create a festive feeling to my card design.
 I was inspired by an Easel card design created by Ronda Wade for her Creating For Christ Facebook group and tweaked the measurements to create my own design. To start with I used Thick Whisper White cardstock to create the card base. I cut at 1 1/2" from each end of the front of the card base, along the 5 1/2" side, up to the fold in the card base. This will create three separate pieces to the front of the card. I then scored the middle section at 2 1/8" and burnished the score line with my Bone Folder to create a mountain fold. 
To decorate the side strips, I cut two pieces of Real Red Designer Series Paper at 2 3/8" x 4 1/8" and attached them to the strips with adhesive. I also cut two pieces of Old Olive Designer Series Paper at 2 3/8' X 2" and attached them to the two sections of the middle strip, above and below the score line. I adhered the two side strips down to the bottom of the Whisper White card base with adhesive. 
For the focal design, I stamped the reindeer image from the Warm & Toasty stamp set using Early Espresso Classic ink onto a scrap of Thick Whisper White cardstock and colored the image with Stampin' Blends Markers. I fussy cut out the image and attached it to an Old Olive cardstock oval die cut using the Layering Ovals dies (item #151771) and layered it onto a slightly larger Real Red scalloped oval die cut using the same die set, using Stampin' Dimensionals. 

I created the smaller sentiment label using the Lovely Labels Pick A Punch (item #152883) with Whisper White and Real Red cardstock and heat embossed the sentiment with Gold embossing powder. I attached it to the bottom of the center panel with Stampin' Dimensionals and then added the oval focal image above it, attaching it to the lower half of the center panel with Mini Stampin' Dimensionals. Using two small Gilded Gems, I embellished the sentiment label. 

For the other sentiment, I used the Layering Ovals Dies with Old Olive and Whisper White cardstock and heat embossed the sentiment with Gold embossing powder. I attached it to the card base with Mini Stampin' Dimensionals so that it props up the easel portion of the card. I love this cute card design and how it lies flat to make it easy to mail. 
Thank you for taking the time to visit my blog today. I hope that my sweet easel Christmas card will help inspire you to get an early start on your own Christmas designs. The new August-December 2020 Mini Catalog is full of wonderful products to help you with your Holiday creations. 

Now it's time to visit Jo's Blog and see what wonderful project she has to share with us. Just click the Next button below to visit her blog. We would love it if you would leave us a comment and let us know what you enjoyed about our projects. I hope you enjoy the rest of our blog hop. 
 Jo


If you live in the U.S. and do not already have a Stampin' Up! Demonstrator, please contact me and I would be happy to help you with your creative projects. You can also visit my Online Store to place an order and have it shipped directly to you.

Until Next Time
Happy Stamping,
Tricia Butts
Independent Stampin' Up! Demonstrator
Like What You See? Visit My Online Store Here
Visit My Facebook Business Page for Updates & Ideas
Click here to Contact Me


Time Is Running Out!
Take Advantage of Bonus Days
Earn A $5 Coupon With Every $50 You Order
July 1st - August 3rd
Redeem Your Coupons August 4th - August 31st
Click Below To Visit My Online Store
 Click Here To Shop


Celebrate The Everyday Heroes In Your Life
With The August Paper Pumpkin Kit
Click Below To Subscribe By August 10th 
 Click Here To Subscribe


The August - December 2020 Mini Catalog
Is Coming Soon!
Contact Me To Receive Your Copy
 Contact Me