Showing posts with label Something Fancy stamp set. Show all posts

Friday, January 24, 2025

Crafty Collaborations Monochromatic Color Challenge 2025 Week 4 - Petunia Pop

Happy Friday everyone, it's time for Week 4 of the Crafty Collaborations Monochromatic Color Challenge 2025. This week we are showcasing Petunia Pop, one of the 2024-2026 In Colors. I love this bright and beautiful color and how it has that perfect mix of pink and purple to help brighten up our creative projects.
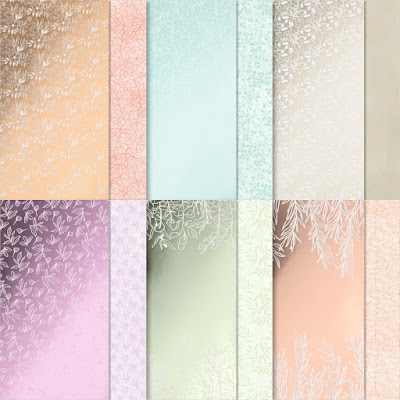
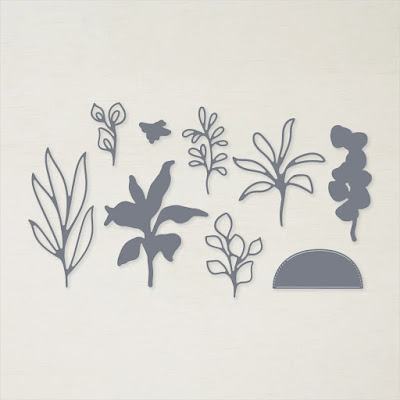
For today's card design, I decided to play with some old favorites in my stash. I chose to use one of the designs from the Nature's Sweetness Specialty Designer Series Paper for my card front and paired it with the Something Fancy stamp set and coordinating Something Fancy Dies to create the sentiment. To create this design, I added some color with the Petunia Pop Classic ink and a Blender Pen to color in the Gold embossed flowers as well as some soft background color using a Blending Brush. I love how the Petunia Pop helps bring this beautiful paper to life to create a soft and pretty card design.
Products Used:
Something Fancy stamp set (item #160416)
Something Fancy Dies (item #160424)
Nature's Sweetness Specialty Designer Series Paper (item #162616)
Petunia Pop Cardstock (item #163801)
Petunia Pop Classic Ink Pad (item #163811)
Versamark Pad (item #102283)
Metallics Wow Embossing Powders (item #165678)
Petunia Pop 3/8" Bordered Ribbon (item #163785)
Blooming Pearls (item #162238)
Blender Pens (item #102845)
Blending Brushes (item #153611)
Stampin' Dimensionals (item #104430)
Measurements:
Petunia Pop Cardstock
Card Base - 5 1/2" x 8 1/2" (Scored at 4 1/4")
Sentiment Label die cut with the Something Fancy Dies
Nature's Sweetness Specialty Designer Series Paper
Card Front - 5 1/4" x 4"
I love creating pretty card designs with designer series paper and this card design is no exception. The Gold embossed design is the perfect way to step up the card and when you add a bit of color to the design, it takes it to a whole new level. I love using Blender Pens to "color" images using ink. It's a wonderful way to be able to control the intensity of the color you add to your images. To soften the background, I applied a light layer of Petunia Pop using a Blending Brush, which helps bring out the detail of the Gold embossed images. The combination of these two techniques is a great way to add some color and interest to your designer series paper. For the sentiment, I heat embossed the image from the Something Fancy stamp set with Gold embossing powder to coordinate with the designer series paper layer. The sentiment label was die cut with the coordinating Something Fancy Dies and I layered it over a piece of the Petunia Pop Bordered Ribbon that I added to provide some texture and contrast to the card front. The Gold Blooming Pearls add the perfect finishing touch to the sentiment label to help tie everything together.
Thank you for taking the time to visit my blog. I hope that my card design will inspire you to explore using Petunia Pop in your creative projects. There are so many wonderful products you can use to create your own unique designs. I love that Petunia Pop has a variety of coordinating products that makes it easier to mix and match to create fun and pretty card designs.
Please take a moment to visit this week's Monochromatic Insta Hop to see all the amazing projects featuring Petunia Pop. You can get started by clicking here. We would love it if you would leave us a comment and let us know what you liked about our projects.

If you live in the U.S. and do not have a Stampin' Up! Demonstrator, please contact me and I would be happy to help you with your creative projects. You may also visit my Online Store to place your order and have it shipped to you. 

Until Next Time

Happy Stamping,

Tricia Butts
Independent Stampin' Up! Demonstrator

Like What You See? Visit My Online Store Here

Visit My Facebook Business Page for Updates & Ideas

Click here to Contact Me


Friday, January 3, 2025

Crafty Collaborations Monochromatic Color Challenge 2025 Week 1 - Daffodil Delight

Welcome to a new year of Crafty Collaborations Monochromatic Color Challenge and we are starting with Daffodil Delight to showcase for Week 1. What better way to start 2025 than exploring new ways to use Stampin' Up!'s beautiful colors to create your own wonderful projects. 
With Winter settling in here in Colorado, I felt like I needed to create a card to remind us of warm Spring days that are just a few months away to help chase away the Winter blues. Daffodil Delight is such a pretty, cheerful yellow and I think it is a perfect color to bring some sunshine into our lives. One of my favorite products for creating beautiful clean and simple cards would have to be the Paper Butterfly Accents and I used one of the butterfly die cuts for my focal image for my design. I added soft color using a Blending Brush to customize it to coordinate with the designer series paper background. Which reminds me, the background strips feature a Sneak Peek of a new product from the January-April 2025 Mini Catalog. If you love soft, pretty paper designs in pastel colors, you will love the new Beautiful Bokeh 6"x6" Designer Series Paper from the new Beautiful Bokeh Suite Collection. This pretty paper will be available to order starting January 7th, 2025.
Products Used:
Something Fancy stamp set (item #160416)
Something Fancy Dies (item #160424)
Stylish Shapes Dies (item #159183)
Eyelet 3D Embossing Folder (item #163414)
Beautiful Bokeh 6"x6" Designer Series Paper (item #164607)*
Paper Butterfly Accents (item #162612)
Daffodil Delight Cardstock (item #119883)
Basic White Cardstock (item #159276)
Daffodil Delight Classic Ink Pad (item # 147094)
Glossy Dots Assortment (item #158827)
Stampin' Dimensionals (item #104430)
Blending Brushes (item #153611)
Measurements:
Daffodil Delight Cardstock
Card Base - 5 1/2" x 8 1/2" (Scored at 4 1/4")
Basic White Cardstock
Card Front - 5 1/4" x 4" Embossed with the Eyelet 3D Embossing Folder
Large Circle die cut with the Stylish Shapes Dies
Beautiful Bokeh Designer Series Paper
3 Strips - 1" x 4 1/4"
Birthday cards are one of my favorite all occasion cards to create and I couldn't resist to creating a pretty Spring birthday design using Daffodil Delight. When I think of Spring, I think of butterflies so it was an easy choice to use the Paper Butterfly Accents for my focal design. Using a Blending Brush, I gently applied Daffodil Delight Classic ink to the butterfly die cut to build up soft color. I attached the butterfly die cut to the center of the large circle die cut to give it stability. I added some texture to the background using the Eyelet 3D Embossing Folder and created a fun background with strips of the new Beautiful Bokeh Designer Series Paper. For the sentiment, I stamped the image from the Something Fancy stamp set with Daffodil Delight Classic ink onto the sentiment label die cut with the coordinating Something Fancy Dies. I attached both the sentiment label and the focal circle to the card front using Stampin' Dimensionals to pop them up and add dimension to the design. To complete the card design, I added several Daffodil Delight Glossy Dots for a touch of bling. I love how well this card design showcases the versatility of Daffodil Delight with a variety of products. 
Thank you for taking the time to visit my blog. I hope that my card design will help inspire you to get creative for the New Year and explore the beautiful options that Daffodil Delight has to offer. With the new January-April 2025 Mini Catalog and 2025 Sale-a-bration set to launch on January 7th, 2025, there will be wonderful new products to explore to help spark your creativity.
Please take a moment to visit this week's Monochromatic Insta Hop and see all the amazing projects showcasing Daffodil Delight. Just click here to get started. We would love it if you would leave us a comment and let us know what you liked about our projects. I hope you will come back next week to see what color we will be showcasing for Week 2. 

If you live in the U.S. and do not have a Stampin' Up! Demonstrator, please contact me and I would be happy to help you with your creative projects. You may also visit my Online Store to place your order and have it shipped to you. 

Until Next Time

Happy Stamping,

Tricia Butts
Independent Stampin' Up! Demonstrator

Like What You See? Visit My Online Store Here

Visit My Facebook Business Page for Updates & Ideas

Click here to Contact Me


Wednesday, November 1, 2023

We Create November Blog Hop Gratitude & Gatherings

When I think of the month of November, I think of it being the month of gratitude and giving thanks for the blessings in my life. So, this month's We Create Blog Hop theme was perfect for creating cards to share with the people in my life that I am thankful for. Our Design Team will be sharing their projects and ideas with this month's theme of Gratitude & Gatherings to help inspire you to get creative and share them with the people you care about.
One of my favorite things about the All About Autumn Specialty Designer Series Paper, are the beautiful photo realistic background designs that make perfect card fronts for clean and simple cards. I chose one of these designs for my card today and chose to let this beautiful background be the star of the show. I added a sentiment from the Something Fancy stamp set and heat embossed the image with Gold embossing powder to help step up the design. I would like to think that whoever receives this beautiful card, will feel the love being sent in this paper hug and hopefully display it where they can be reminded each day that someone appreciates them. 
Products Used:
Something Fancy stamp set (item #160416)
Something Fancy Dies (item #160424)
All About Autumn 6"x6" Specialty Designer Series Paper (item #162178)
Copper Clay Cardstock (item #161721)
Early Espresso Cardstock (item #119686)
Versamark Pad (item #102283)
Metallics Embossing Powders (item #155555)
Copper Clay 3/8" Textured Ribbon (item #161629)
Festive Pearls (item #159963)
Stampin' Dimensionals (item #104430)
Measurements:
Copper Clay Cardstock
Card Base - 8 1/2" x 5 1/2" (Scored at 4 1/4")
Early Espresso Cardstock
Layer 1 - 4 1/8" x 5 3/8"
Sentiment Layer die cut with the Something Fancy Dies
All About Autumn Specialty Designer Series Paper
Card Front - 5 1/4" x 4"
This beautiful card design is simple to create and with the wonderful designs in the All About Autumn Specialty Designer Series Paper, you can create a variety of cards suitable for a variety of occasions. I chose to use colors that coordinate with the designer series paper, including Copper Clay cardstock for the card base and Early Espresso for the matte layer and sentiment. The Gold embossing for the sentiment and Gold Festive Pearls help to step up this card design to make it extra special. I also added a piece of Copper Clay Textured Ribbon underneath the sentiment to add some texture to the design. This lovely design would also be perfect for a Fall birthday and works well as a masculine card design. 
Thank you for taking the time to visit my blog. I hope that my card design will help inspire you to create your own beautiful projects to share with family and friends. There are so many wonderful ways that we can share what we love with others.
Now it's time to visit Cheryl's blog and see what she has to share with us. Just click on the Next button below to visit her blog or use the Roll Call List to find your way. We would love it if you would leave us a comment and let us know what you liked about our projects. I hope you enjoy the rest of our blog hop. 

If you live in the U.S. and do not have a Stampin' Up! Demonstrator, please contact me and I would be happy to help you with your creative projects. You may also visit my Online Store to place your order and have it shipped to you. 

Until Next Time

Happy Stamping,

Tricia Butts
Independent Stampin' Up! Demonstrator

Like What You See? Visit My Online Store Here

Visit My Facebook Business Page for Updates & Ideas

Click here to Contact Me


Coming Soon!
New Online Exclusive Products
Available November 7th 

Get Creative For The Holidays
With The September-December 2023 Mini Catalog
Click Below To Visit My Online Store


Saturday, June 10, 2023

Stamping Inkspirations June Blog Hop Tic-Tac-Toe Challenge

Welcome to the Stamping Inkspirations June Blog Hop and this month we have a Tic-Tac-Toe Challenge. Our Design Team members will be choosing a row of 3 items (horizontal, vertical or diagonal) to incorporate into our projects. It's a fun way to spark creativity and try something new. Which row would you choose?
For my card today, I chose to use the bottom horizontal row - Red, Circle, Twine, to create my design. Stampin' Up1 has so many wonderful reds to choose from and in the end I chose to use Sweet Sorbet, one of the 2022-2024 In Colors. I love this bright, vibrant red and I decided to pair it with Basic White and Starry Sky (another 2022-2024 In Color) to create a patriotic themed birthday card that would be perfect for a July birthday. 
Products Used:
Something Fancy stamp set (item #160416)
Beautiful Balloons Dies (item #161456)
Something Fancy Dies (item #160424)
Deckled Rectangles Dies (item #159173)
Stylish Shapes Dies (item #159183)
Stripes & Splatters 3D Embossing Folders (item #157980)
Silver Foil Specialty Pack (item #156457)
2022-2024 In Color 6"x6" Designer Series Paper
Sweet Sorbet Cardstock (item #159268
Starry Sky Cardstock (item #159263)
Basic White Cardstock (item #159276)
Sweet Sorbet Classic Ink Pad (item #159216)
2022-2024 In Color Baker's Twine Pack (item #159195)
2022-2024 In Color Pearls (item #161621)
Stampin' Dimensionals (item #104430)
Mini Glue Dots (item #103683)
Measurements:
Sweet Sorbet Cardstock
Card Base - 8 1/2" x 5 1/2" (Scored at 4 1/4")
Starry Sky Cardstock
Layer 1 die cut with the Deckled Rectangles Dies
Large Circle die cut with the Stylish Shapes Dies
Long Label die cut with the Stylish Shapes Dies 
Basic White Cardstock
Layer 2 die cut with the Deckled Rectangles Dies
Sentiment Label die cut with the Something Fancy Dies
Sweet Sorbet Striped Designer Series Paper 
Large Circle die cut with the Stylish Shapes Dies
Silver Foil
3 Medium Stars die cut with the Beautiful Balloons Dies
To create this fun birthday card, I chose to use a sketch featured in the Demonstrator Planning Place Group, for my inspiration for this card design. I chose to use the Deckled Rectangles Dies for a twist on the standard rectangle shapes to create the frame for the focal design. I embossed the Starry Sky circle with the Splatters 3D Embossing Folder to add some texture and layered it with the Sweet Sorbet striped designer series paper to add contrast. The sentiment has been stamped with Sweet Sorbet Classic ink onto the sentiment label and then layered on top of the Starry Sky label. To step up the design, I added Silver Foil stars with Stampin' Dimensionals and I tied a bow with the Sweet Sorbet Baker's Twine to go underneath the star on the left side of the sentiment. For a touch of bling, I added several Sweet Sorbel In Color Pearls to finish off the design. This bright and cheerful birthday card is a great way to celebrate someone's special day. 
Thank you for taking the time to visit my blog. I hope that my card design will help inspire you to give this Tic-Tac-Toe Challenge a try and see what you can create. There are so many wonderful options to explore using products from the 2023-2024 Annual Catalog.
Now it's time to visit Teri's blog and see what she has created with this month's challenge. Just click on the Next button below to visit her blog or use the Roll Call List to find your way. We would love it if you would leave us a comment and let us know what you liked about our projects. I hope you enjoy the rest of our blog hop. 

Roll Call List

If you live in the U.S. and do not have a Stampin' Up! Demonstrator, please contact me and I would be happy to help you with your creative projects. You may also visit my Online Store to place your order and have it shipped to you. 

Until Next Time

Happy Stamping,

Tricia Butts
Independent Stampin' Up! Demonstrator

Like What You See? Visit My Online Store Here

Visit My Facebook Business Page for Updates & Ideas

Click here to Contact Me


Save 15% On Select Designer Series Paper 
During The Month Of June
Click Below To Shop From My Online Store

Explore Your Creativity
With The 2023-2024 Annual Catalog
Click Below To Visit My Online Store


Sunday, January 1, 2023

We Create January Blog Hop Very Last Chance Plus Sneak Peeks

Welcome to the We Create January Blog Hop as we start off the New Year with the theme "Last Chance Plus Sneak Peeks". With just a few days left to take advantage of the great savings from the Last Chance July-December Mini Catalog Retirement List, we have decided to combine some of our retiring favorites with Sneak Peeks from the new catalogs that will launch January 5th. It's a great opportunity to see how you can combine something old with something new to spark your creativity.
To celebrate the start of 2023, I decided to create a beautiful Wedding card, combining retiring products from the Splendid Day Suite with the new Something Fancy Bundle that will be available beginning January 5th, in the new January-April 2023 Mini Catalog. I love the simple elegance of the lovely foil designs in the Splendid Day Specialty Designer Series Paper and I think it works beautifully with the fonts in the sentiment from the Something Fancy stamp set. I also feel like this sentiment applies to this time of year as we look forward to the New Year and all that it brings us.
Products Used:
Something Fancy Bundle (item #160425) Sneak Peek New Mini
Splendid Stems Dies (item #159676) Retiring 
Splendid Day Specialty Designer Series Paper (item #159666) Retiring
Fresh Freesia Cardstock (item #155613)
Soft Sea Foam Cardstock (item #146988)
Basic White Cardstock (item #159276)
Versamark Pad (item #102283)
Basics Embossing Powders (item #155554)
Soft Sea Foam 3/8" Seam Binding Ribbon (item #159680) Retiring
Basic Rhinestone Jewels (item #144220)
Stampin' Dimensionals (item #104430)
Mini Glue Dots (item #103683)
Measurements:
Fresh Freesia Cardstock
Card Base - 5 1/2" x 8 1/2" (Scored at 4 1/4")
Sentiment Label die cut with the Something Fancy Dies
Basic White Cardstock
Large Label die cut with the Something Fancy Dies
Splendid Day Specialty Designer Series Paper
Card Front - 5 1/4" x 4"
This pretty clean and simple card is easy to create and works well for so many special occasions. I love that the sentiments in the Something Fancy stamp set cover so many of the cards that I create on a regular basis and the coordinating Something Fancy Dies means that I have the right sized dies available to die cut my sentiments without having to search through my stash. The Fresh Freesia foil paper is the star of the show for this card design and I accented it with detailed leaves die cuts from Soft Sea Foam cardstock to help step up the layout. The Soft Sea Foam Seam Binding Ribbon is so soft and is perfect for tying bows as well as an accent underneath the sentiment label. For the sentiment, I heat embossed the image with White embossing powder onto the Fresh Freesia cardstock label and added it to a Basic White label to help it stand out. The Basic Rhinestones add that touch of bling without being too over the top. I hope that you will check out the retiring products from the Splendid Day Suite and take advantage of the great savings on several of the products I used today. They are available only while supplies last or until January 4th when this sale ends.
Thank you for taking the time to visit my blog. I hope that my card design will help inspire you to explore the Last Chance Retirement List and take advantage of the great discounts on select products. Mixing and matching old and new products can help you get creative for all your upcoming occasions. 
Now it's time to visit Cheryl's blog and see what she has to share with us. Just click the Next button below to visit her blog. We would love it if you would leave us a comment and let us know what you liked about our projects. I hope you enjoy the rest of our blog hop. 

Roll Call List

If you live in the U.S. and do not have a Stampin' Up! Demonstrator, please contact me and I would be happy to help you with your creative projects. You may also visit my Online Store to place your order and have it shipped to you. 

Until Next Time

Happy Stamping,

Tricia Butts
Independent Stampin' Up! Demonstrator

Like What You See? Visit My Online Store Here

Visit My Facebook Business Page for Updates & Ideas

Click here to Contact Me


Final Days To Save Up To 60%
During The Last Chance July-December 2022 Mini Catalog Sale
Click Below To Visit My Online Store

Shop The Clearance Rack
Save Up To 60% On Discontinued Products
Available Only While Supplies Last
Click Below To Shop Now

Coming Soon!
Amazing New Products To Start The New Year
With The January-April 2023 Mini Catalog
Beginning January 5th, 2023