Showing posts with label Wedding. Show all posts

Sunday, January 1, 2023

We Create January Blog Hop Very Last Chance Plus Sneak Peeks

Welcome to the We Create January Blog Hop as we start off the New Year with the theme "Last Chance Plus Sneak Peeks". With just a few days left to take advantage of the great savings from the Last Chance July-December Mini Catalog Retirement List, we have decided to combine some of our retiring favorites with Sneak Peeks from the new catalogs that will launch January 5th. It's a great opportunity to see how you can combine something old with something new to spark your creativity.
To celebrate the start of 2023, I decided to create a beautiful Wedding card, combining retiring products from the Splendid Day Suite with the new Something Fancy Bundle that will be available beginning January 5th, in the new January-April 2023 Mini Catalog. I love the simple elegance of the lovely foil designs in the Splendid Day Specialty Designer Series Paper and I think it works beautifully with the fonts in the sentiment from the Something Fancy stamp set. I also feel like this sentiment applies to this time of year as we look forward to the New Year and all that it brings us.
Products Used:
Something Fancy Bundle (item #160425) Sneak Peek New Mini
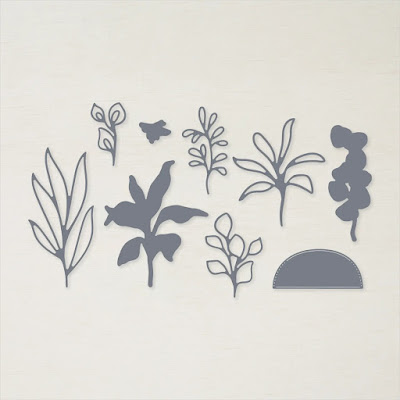
Splendid Stems Dies (item #159676) Retiring 
Splendid Day Specialty Designer Series Paper (item #159666) Retiring
Fresh Freesia Cardstock (item #155613)
Soft Sea Foam Cardstock (item #146988)
Basic White Cardstock (item #159276)
Versamark Pad (item #102283)
Basics Embossing Powders (item #155554)
Soft Sea Foam 3/8" Seam Binding Ribbon (item #159680) Retiring
Basic Rhinestone Jewels (item #144220)
Stampin' Dimensionals (item #104430)
Mini Glue Dots (item #103683)
Measurements:
Fresh Freesia Cardstock
Card Base - 5 1/2" x 8 1/2" (Scored at 4 1/4")
Sentiment Label die cut with the Something Fancy Dies
Basic White Cardstock
Large Label die cut with the Something Fancy Dies
Splendid Day Specialty Designer Series Paper
Card Front - 5 1/4" x 4"
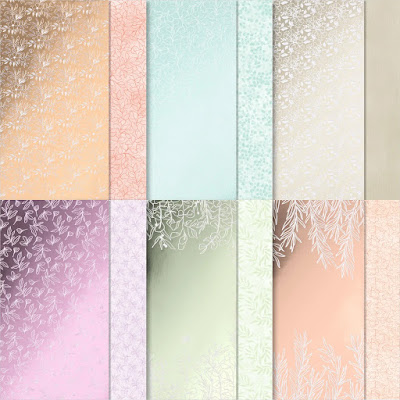
This pretty clean and simple card is easy to create and works well for so many special occasions. I love that the sentiments in the Something Fancy stamp set cover so many of the cards that I create on a regular basis and the coordinating Something Fancy Dies means that I have the right sized dies available to die cut my sentiments without having to search through my stash. The Fresh Freesia foil paper is the star of the show for this card design and I accented it with detailed leaves die cuts from Soft Sea Foam cardstock to help step up the layout. The Soft Sea Foam Seam Binding Ribbon is so soft and is perfect for tying bows as well as an accent underneath the sentiment label. For the sentiment, I heat embossed the image with White embossing powder onto the Fresh Freesia cardstock label and added it to a Basic White label to help it stand out. The Basic Rhinestones add that touch of bling without being too over the top. I hope that you will check out the retiring products from the Splendid Day Suite and take advantage of the great savings on several of the products I used today. They are available only while supplies last or until January 4th when this sale ends.
Thank you for taking the time to visit my blog. I hope that my card design will help inspire you to explore the Last Chance Retirement List and take advantage of the great discounts on select products. Mixing and matching old and new products can help you get creative for all your upcoming occasions. 
Now it's time to visit Cheryl's blog and see what she has to share with us. Just click the Next button below to visit her blog. We would love it if you would leave us a comment and let us know what you liked about our projects. I hope you enjoy the rest of our blog hop. 

Roll Call List

If you live in the U.S. and do not have a Stampin' Up! Demonstrator, please contact me and I would be happy to help you with your creative projects. You may also visit my Online Store to place your order and have it shipped to you. 

Until Next Time

Happy Stamping,

Tricia Butts
Independent Stampin' Up! Demonstrator

Like What You See? Visit My Online Store Here

Visit My Facebook Business Page for Updates & Ideas

Click here to Contact Me


Final Days To Save Up To 60%
During The Last Chance July-December 2022 Mini Catalog Sale
Click Below To Visit My Online Store

Shop The Clearance Rack
Save Up To 60% On Discontinued Products
Available Only While Supplies Last
Click Below To Shop Now

Coming Soon!
Amazing New Products To Start The New Year
With The January-April 2023 Mini Catalog
Beginning January 5th, 2023

Saturday, September 12, 2020

The Joy Of Stamps September Blog Hop Weddings

Welcome to The Joy of Sets September Blog Hop as we showcase Weddings as our theme for this month. You will be visiting with talented stampers from around the world as they share their projects and ideas to help inspire you. 
Today I am sharing an elegant clean and simple Wedding card design featuring the beautiful Ornate Garden Specialty Designer Series Paper (item #152488) paired with the So Sentimental Bundle (item #153828) from the 2020-2021 Annual Catalog. I love the gold foil detail in the pretty designer series paper and it was the inspiration for my card design. The die cut layers have been popped up using Stampin' Dimensionals to step up the design. 
Supplies Used:
Ornate Garden Specialty Designer Series Paper
So Sentimental Bundle
Gold Foil
Gold Embossing Powder
Whisper White 1/2" Faux Linen Ribbon (Flowers For Every Season Ribbon Combo Pack)
Thick Whisper White cardstock
Measurements:
Thick Whisper White cardstock card base - 8 1/2" x 5 1/2" 
(Scored at 4 1/4")
Ornate Garden Specialty Designer Series Paper layer - 5 1/4" x 4"
Gold Foil for Die Cut
Whisper White cardstock for sentiment label die cut
Thank you for taking the time to visit my blog today. I hope that my card design will inspire you to create your own wonderful wedding designs.

Now it's time to visit  Gez's blog and see what she has to share with us. Just click the Next button below or use the Roll Call List to find your way along our blog hop. I hope you enjoy our blog hop this month.  
Gez

If you live in the U.S. and do not already have a Stampin' Up! Demonstrator, please contact me and I would be happy to help you with your creative projects. 
Until Next Time
Happy Stamping,
Tricia Butts
Independent Stampin' Up! Demonstrator
Like What You See? Visit My Online Store Here
Visit My Facebook Business Page for Updates & Ideas
Click here to Contact Me


Saturday, May 23, 2020

3D Paper Trimmer May Blog Hop Wedding

Welcome to the 3D Paper Trimmer May Blog Hop as we showcase the theme of Weddings. You will be visiting with talented Stampin' Up! Demonstrators from around the world as they share their creative projects to help inspire you. 
For my Wedding card, I chose to create a fancy fold using Pool Party cardstock for the card base and I added the retiring Bird Ballad Designer Series Paper (item #149592) for the front panels to decorate. I love the soft pretty colors and I think they are perfect for a wedding card design. 
 I used the retiring Wonderful Moments stamp set (item #147529) for the focal image and stamped the image onto Whisper White cardstock and heat embossed it with Silver Embossing Powder. To color the image, I used Petal Pink, Daffodil Delight and Pool Party Stampin' Blends Markers to add a soft touch of color. I die cut the image using the Layering Ovals Dies (item #151771) and added a scalloped oval die cut from Pool Party cardstock to frame the image. 
 I attached the oval image to the left side of the card front using Snail Adhesive. For the sentiment, I heat embossed the image with Silver Embossing Powder onto Pool Party cardstock and die cut it using the Stitched Nested Labels Dies (item #149638). I attached the sentiment label to the right side of the card front with Mini Stampin' Dimensionals so that it slightly overlaps the focal image. I embellished the sentiment with Basic Rhinestones for a touch of bling. 
For the inside of the card design, I heat embossed the sentiment onto a piece of Whisper White cardstock with Silver Embossing Powder. I love the classic elegance that the embossing adds to this card design. This clean and simple card design is a perfect way to celebrate a special day in a bride's life. 
Thank you for taking the time to visit my blog today. I hope that my card design will help inspire you to create your own beautiful projects to celebrate this very special occasion. 

Now it's time to visit Nicole's blog and see her beautiful project ideas. Just click the Next button below to visit her blog. I hope you enjoy the rest of our blog hop this month. 


 Nicole


If you live in the U.S. and do not already have a Stampin' Up! Demonstrator, please contact me and I would be happy to help you with your creative projects. 

Until Next Time
Happy Stamping,
Tricia Butts
Independent Stampin' Up! Demonstrator

Like What You See? Visit My Online Store Here
Visit My Facebook Business Page for Updates & Ideas
Click here to Contact Me

Sunday, September 8, 2019

2019 Kre8tors Blog Hop Brides & Babies

Welcome to the 2019 Kre8tor's Blog Hop as we celebrate with projects for Brides and Babies. These special occasions can often be a challenge, so I hope the projects and ideas that we have to share with you today will help inspire you to create your own designs for that special occasion. 
Today I thought I would share a Wedding card design created using the beautiful new Feels Like Frost 6"x6" Designer Series Paper (item #150444) from the new 2019 Holiday Catalog. This simply gorgeous paper has photo realistic designs on one side and Silver Foil designs on the other. For today's card, I chose to use this pretty paper to create a classically elegant card design.
 I chose to use Seaside Spray cardstock to create the card base and added another layer of Seaside Spray cardstock that I embossed using the Stylish Scroll Embossing Folder (item #150665) to create a delicate texture to the background. I added a 2" x 5 3/8" strip of the designer series paper to a layer of Whisper White cardstock and attached it to the card front with Snail adhesive. To embellish the card front, I took a piece of the Seaside Spray 1/4" Metallic Ribbon (item #150446) and attached it along the edge of the Whisper White cardstock. I then tied a bow with another piece of the ribbon and attached it with Mini Glue Dots.
For the label, I heat embossed the sentiment from the Flourishing Phrases stamp set (item #151407) using Shimmer White Embossing powder for a touch of sparkle, onto Seaside Spray cardstock. I die cut the label using the Frosted Bouquet Dies (item #151800) and die cut a piece of Silver Foil with the slightly larger die to create the matte for the sentiment. 
 I embellished the card front using several of the dies from the Frosted Bouquet Dies from Sparkle Glimmer Paper (item #146957) and attached them to the back of the label with Snail adhesive. I then attached the label to the card front with Stampin' Dimensionals. To finish off the card, I attached the card front to the card base with Stampin' Dimensionals and added Basic Rhinestones to the sentiment label for a touch of bling. I really love how this beautiful paper transforms this Wedding card into something very special to commemorate a milestone event.

Thank you for taking the time to visit my blog today and I hope that my card design will help inspire you to create your own creation for that someone special. Most of the products I used to create this card design, can be found in the new 2019 Holiday Catalog and it just goes to show that they are suitable for so many wonderful occasions beyond the obvious. If you live in the U.S. and do not already have a demonstrator, please contact me and I would be happy to help you.

Now it's time to visit Su's amazing blog to see what she has to share with us this month. Just click on the Next button below to visit her blog or use the Roll Call List to find your way. I hope that you enjoy the rest of our blog hop.

Roll Call List
Until Next Time
Happy Stamping,


Tricia Butts
Independent Stampin' Up! Demonstrator
Like What You See? Visit My Online Store Here
Visit My Facebook Business Page for Updates & Ideas