Showing posts with label Perennial Postage Dies. Show all posts

Wednesday, April 10, 2024

Around The World On Wednesday April Blog Hop This Or That

Welcome to the Around The World On Wednesday April Blog Hop and this month we are having some fun with a This or That challenge. We have been challenged to create two projects that share some similarities but are different, to see which you prefer - This or That. Our talented Design Team is excited to share their projects to see which one you prefer.
For my two cards, I chose the same layout using the Notes of Nature stamp set, Perennial Postage Dies and Stylish Shapes Dies. Both are clean and simple card designs but one is black and white while the other is a pink monochromatic design. This challenge was so much fun and I loved playing with the different designer series paper and making little changes that helped make one card different from the other. I hope you like them.
Products Used:
This Card
Zoo Crew Designer Series Paper (item #161304) - Retiring
Notes of Nature stamp set (item #162630) - Retiring 
Perennial Postage Dies (item #163607)
Stylish Shapes Dies (item #159183)
Timeworn Type 3D Embossing Folder (item #156505)
Thick Basic White Cardstock (item #159229)
Basic White Cardstock (item #159276)
Basic Black Cardstock (item #121045)
Memento Tuxedo Black Pad (item #132708)
Festive Pearls (item #159963) - Retiring
Stampin' Dimensionals

That Card
Bright & Beautiful 6" x 6" Designer Series Paper (item #151449)
- Retiring
Notes of Nature stamp set (item #162630) - Retiring
Perennial Postage Dies (item #163607)
Stylish Shapes Dies (item #159183)
Berry Burst Cardstock (item #144243)
Versamark Pad (item #102283)
Metallics Embossing Powders (item #155555) - Retiring
Sheer Ribbon Combo Pack (item #161635) - Retiring
Pastel Adhesive Backed Sequins (item #160387) - Retiring
Stampin' Dimensionals
Measurements: 
This Card
Thick Basic White Cardstock
Card Base - 8 1/2" x 5 1/2" (Scored at 4 1/4")
Basic Black Cardstock
Card Front - 5 1/4" x 4" Embossed with the Timeworn Type 3D Embossing Folder 
Basic White Cardstock 
Sentiment Label die cut with the Stylish Shapes Dies
Zoo Crew Designer Series Paper
3 Medium Rectangles die cut with the Perennial Postage Dies
That Card
Berry Burst Cardstock
Card Base - 5 1/2" x 8 1/2" (Scored at 4 1/4")
Sentiment Label die cut with the Stylish Shapes Dies
Bright & Beautiful Designer Series Paper
Card Front - 5 1/4" x 4"
3 Medium Rectangles die cut with the Perennial Postage Dies
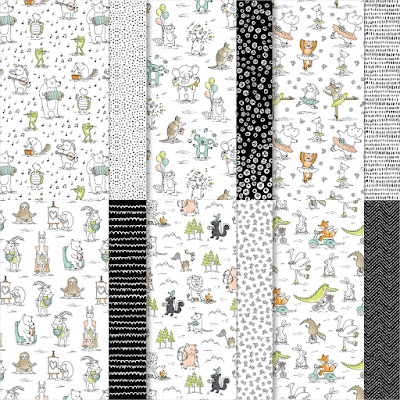
Both of these cards are basically the same layout using different designer series papers to create unique designs. For the "This" card, I chose to emboss the Basic Black cardstock card front with the Timeworn Type 3D Embossing Folder to add some wonderful texture. I chose black and white patterns from the Zoo Crew Designer Series Paper pack to create the focal rectangles and stamped the sentiment from the Notes of Nature stamp set using Memento Tuxedo Black ink. For embellishments, I used the Silver Pearls from the Festive Pearls, to add a touch of bling. 
For the "That" Card, I chose patterns from the Bright & Beautiful 6"x6" Designer Series Paper pack to create an ombre look to the design. I chose one of the Bubble Bath ombre designs for the card front and then three different shades ranging from Bubble Bath to Berry Burst for the three rectangles. For this card, I chose to heat emboss the sentiment with Gold embossing powder onto the Berry Burst sentiment label to make it pop and I added Gold Sequins for a touch of bling. I also added a piece of Bubble Bath Sheer Ribbon underneath the sentiment label to help step up the design. 
So, I am curious. Which do you prefer? The Black & White This card or the Pink Monochromatic That Card? Let me know in the comments. 
Thank you for taking the time to visit my blog. I hope that my card designs will help inspire you to create your own projects that share common elements or products to help you come up with your own unique ideas. There are so many wonderful options to explore. Don't forget to check out the Last Chance Product Sale and save up to 60% off select retiring products from the 2023-2024 Annual Catalog and January-April 2024 Mini Catalog. All retiring products are available while supplies last or until April 30th. Make sure to place your order soon to avoid missing out on your favorite retiring products. 
Now it's time to visit Theresa's blog and see what she has created to share with us. Just click on the Next button to visit her blog or use the Roll Call List to find your way. We would appreciate it if you would leave us a comment and let us know what you liked about our projects. Which do you prefer? This or That?

Roll Call List

Jan Clothier - NZ

Leonie Stuart - AU

Rochelle Laird-Smith - AU

Cheryll Miller - AU

Danielle Kassing - NL

Aurélie Fabre - FR

Angie McKenzie - US

Kelly Taranto - US

Chris Smith - US

Tricia Butts - US

Theresa McEntee - US

Bree Renwick - US

Lori Willcox - CA

Teri West - US

Cheryl Hamilton - US


If you live in the U.S. and do not have a Stampin' Up! Demonstrator, please contact me and I would be happy to help you with your creative projects. You may also visit my Online Store to place your order and have it shipped to you. 

Until Next Time

Happy Stamping,

Tricia Butts
Independent Stampin' Up! Demonstrator

Like What You See? Visit My Online Store Here

Visit My Facebook Business Page for Updates & Ideas

Click here to Contact Me


Save Up To 60%
During the Last Chance Products Sale
Click Below To Shop Now

Explore Your Creativity
With The New Online Exclusives Products
Click Below To Visit My Online Store


Friday, March 29, 2024

Crafty Collaborations Monochromatic Color Challenge Week 13 - Flirty Flamingo

Another week has gone by and it's once again time for the Crafty Collaborations Monochromatic Color Challenge. For Week 13 we are showcasing Flirty Flamingo, from the Brights Collection. 
For this week's card design, I chose to use an old favorite, the Playing In The Rain stamp set and coordinating dies to create a fun clean and simple card design. I paired them with the Perennial Postage Dies to create the layers for this card and had some fun with the Paper Piecing technique to add a touch of color to our little bunny friend.
Products Used:
Playing In the Rain stamp set (item #160542)
Playing In The Rain Dies (item #160550)
Perennial Postage Dies (item #162607)
Brights 6"x6" Designer Series Paper (item #161643)
Flirty Flamingo Cardstock (item #141416)
Thick Basic White Cardstock (item #159229)
Basic White Cardstock (item #159276)
Memento Tuxedo Black Pad (item #132708)
Flirty Flamingo Stampin' Blends Combo Pack (item #154884)
Baker's Twine Three Color Pack (item #162759)
Rainbow Adhesive Backed Dots (item #162758)
Stampin' Dimensionals (item #162758)
Measurements:
Thick Basic White Cardstock
Card Base - 8 1/2" x 5 1/2" (Scored at 4 1/4")
Flirty Flamingo Cardstock
Layer 1 die cut with the Perennial Postage Dies
Basic White Cardstock
Card Front die cut with the Perennial Postage Dies
Rabbit image stamped and die cut with the Playing In The Rain Dies
Flirty Flamingo Designer Series Paper
Jacket image stamped and fussy cut with Paper Snips
For this card design, I started with a Thick Basic White card base to help make the rest of the design pop. I added a layer of Flirty Flamingo cardstock that I die cut using the largest die from the Perennial Postage Dies. I also cut a Basic White cardstock layer using the next size down from the same die set to create the card front. I stamped the sentiment using Memento Tuxedo Black ink towards the bottom of the card front. I tied a piece of Flirty Flamingo Baker's Twine around the middle of the card front, wrapping it around twice before tying a knot on the right side. For the cute bunny, I stamped the image once onto Basic White cardstock and die cut it out with the coordinating die. I colored the nose and inside of the ears with the Dark Flirty Flamingo Stampin' Blends Marker and then gently blended it with the Color Lifter to soften the color. For the jacket, I stamped the image onto a piece of the Flirty Flamingo Designer Series Paper using Memento Black ink and then fussy cut it out with Paper Snips. I attached the jacket to bunny die cut and then attached it to the card front with Stampin' Dimensionals just above the Baker's Twine. To complete the card design, I added several Flirty Flamingo Dots. I love how this card design turned out and how cute this little bunny looks with her custom jacket. Paper Piecing is such a fun technique and a great way to add some color to your images without actually having to color. What do you think of my card this week? Let me know in the comments.
Thank you for taking the time to visit my blog. I hope that my card design will help inspire you to explore using Flirty Flamingo in your future projects. This is such a fun color to work with and there are so many wonderful possibilities to explore. 
Please take a look at this week's Monochromatic Insta Hop to see all the wonderful projects created this week using Flirty Flamingo. Just click here to get started. We would appreciate it if you would leave us a comment and let us know what you think about our projects. 

If you live in the U.S. and do not have a Stampin' Up! Demonstrator, please contact me and I would be happy to help you with your creative projects. You may also visit my Online Store to place your order and have it shipped to you. 

Until Next Time

Happy Stamping,

Tricia Butts
Independent Stampin' Up! Demonstrator

Like What You See? Visit My Online Store Here

Visit My Facebook Business Page for Updates & Ideas

Click here to Contact Me


Saturday, March 2, 2024

Stamping With Friends March Blog Hop Tic-Tac-Toe Challenge

Welcome to the Stamping With Friends March Blog Hop and this month we have a Tic-Tac-Toe Challenge to help spark our creativity. We get to choose 3 in a row either horizontally, vertically or diagonally to help us create our project designs. Our wonderful Design Team will be sharing their ideas and projects to help inspire you to give this challenge a try.
For my card design, I started with the left vertical side to create a Thank You card with embossing and Designer Series Paper but then I realized that I also had the elements for the right vertical side as I also included a butterfly, with floral designer series paper and vellum accents. So I guess you could say I have a 2 for one design. Now that we are in the month of March, Spring is approaching fast, so I decided to create a pretty Spring card design using a color that I don't use very often, Bubble Bath. I am not really a pink girl, so this was an additional challenge for me and I must admit, I do like how it turned out. 
Products Used:
Go To Greetings stamp set (item #15873)
Thoughtful Expressions Dies (item #162821)
Perennial Postage Dies (item #162607)
Delightfully Eclectic Designer Series Paper (item #161640)
Paper Butterfly Accents (item #1621612)
Bubble Bath Cardstock (item #161718)
Basic White Cardstock (item #159276)
Vellum Cardstock (item #101856)
Soft Sea Foam Stampin' Blends Combo Pack (item #154902)
Bubble Bath Classic Ink Refill (item #161670)
Clear Wink of Stella Glitter Brush (item #141897)
Versamark Pad (item #102283)
Metallics Embossing Powders (item #155555)
Sheer Ribbon Combo Pack (item #161635)
Pastel Adhesive Backed Sequins (item #160387)
Stampin' Dimensionals (item #104430)
Measurements:
Bubble Bath Cardstock 
Card Base - 8 1/2" x 5 1/2" (Scored at 4 1/4")
Matte Label die cut with the Thoughtful Expressions Dies
Basic White Cardstock
Layer 1 - 5 3/8" x 4 1/8"
Sentiment Label die cut with the Perennial Postage Dies
Delightfully Eclectic Designer Series Paper
Card Front - 5 1/4" x 4" Center die cut out with the Thoughtful Expressions Dies
Vellum Cardstock 
5 sets of Leaves die cut with the Thoughtful Expressions Dies
This pretty card design is a little more over the top than I would normally create. I loved the Bubble Bath and White striped pattern of the designer series paper and the reverse side had a pretty floral that coordinated perfectly with it. I die cut the center out of the designer series paper card front using one of the Thoughtful Expressions Dies and then flipped it over and so that the floral side was facing up. I then attached it to a Bubble Bath matte layer one size larger, also cut using the Thoughtful Expressions Dies. I attached the striped side of the designer series paper to the Basic White cardstock layer and added a piece of the Bubble Bath Sheer Ribbon around the center, attaching the ends to the back. I then added this layer to my Bubble Bath card base. I added the focal panel to the center of the card front with Stampin' Dimensionals so that it covers the hole in the card front. 
For the butterfly, I colored the die cut using one drop of the Bubble Bath Classic ink refill with the Clear Wink of Stella to give the butterfly a pretty pink shimmer. For the sentiment, I heat embossed the image from the Go To Greetings stamp set with Gold embossing powder onto the Basic White sentiment label and attached it to the bottom of the focal layer with Stampin' Dimensionals. I then added the butterfly die cut above the sentiment label, centering it on the focal panel. For the vellum leaves, I colored them with the Dark Soft Sea Foam Stampin' Blends Marker to add some soft color and then added them to the card front so that the ends tucked underneath the center panel, arranging them at the top left corner and the bottom right corner. For a touch of bling, I added some Pastel Adhesive Backed Sequins to finish off the design. I really love how this pretty card turned out and I had so much fun with this Tic-Tac-Toe Challenge. 
Thank you for taking the time to visit my blog. I hope that my card design will help inspire you to explore the options in the Tic-Tac-Toe Challenge this month to help you create your own beautiful card design. There are so many options to explore.
Please take a trip along our blog hop and visit with the Design Team members to see what they created with this month's challenge. Just click on the links in the Roll Call List below to find your way. We would appreciate it if you would leave us a comment and let us know what you liked about our projects.

If you live in the U.S. and do not have a Stampin' Up! Demonstrator, please contact me and I would be happy to help you with your creative projects. You may also visit my Online Store to place your order and have it shipped to you. 

Until Next Time

Happy Stamping,

Tricia Butts
Independent Stampin' Up! Demonstrator

Like What You See? Visit My Online Store Here

Visit My Facebook Business Page for Updates & Ideas

Click here to Contact Me


New Online Exclusive Products
Coming March 5th
To My Online Store

Get Creative For Spring
With The January-April 2024 Mini Catalog
Click Below To Shop Now


Saturday, February 17, 2024

Stamping With Friends February Hot Air Balloon Birthday

Welcome to the Stamping With Friends February Blog Hop as we celebrate birthdays. It is one of the most popular cards that people send and there are so many wonderful possibilities to explore with this theme. Our wonderful Design Team will be sharing their projects and ideas to help inspire you to create your own beautiful designs to send to family and friends. 
For my birthday card today, I decided to showcase the Hot Air Balloon Bundle to show it's versatility. I paired it with the coordinating Lighter Than Air 6"x6" Designer Series Paper to create the balloon and used the Painted Texture 3D Embossing Folder to create the texture for the background layer. I love how bright and cheerful this card design looks and it is sure to help brighten someone's special day. 
Products Used:
Hot Air Balloon Bundle (item #162755)
Perennial Postage Dies (item #162607)
Painted Texture 3D Embossing Folder (item #154317)
Lighter Than Air 6"x6" Designer Series Paper (item #162747)
Tahitian Tide Cardstock (item #159261)
Flirty Flamingo Cardstock (item #141416)
Thick Basic White Cardstock (item #159229)
Basic White Cardstock (item #159276)
Tahitian Tide Classic Ink Pad (item #159210)
2022-2024 In Color Baker's Twine Pack (item #159195)
Basic Rhinestone Jewels (item #144220)
Stampin' Dimensionals (item #104430)
Mini Glue Dots (item #103683)
Measurements:
Thick Basic White Cardstock
Card Base - 8 1/2" x 5 1/2" (Scored at 4 1/4")
Basic White Cardstock
5 Clouds die cut with the Hot Air Balloon Dies
Sentiment Label die cut with the Hot Air Balloon Dies
Tahitian Tide Cardstock
Card Front - die cut with the Perennial Postage Dies
Flirty Flamingo Cardstock
Banner Label die cut with the Hot Air Balloon Dies
Lighter Than Air Designer Series Paper
Balloon die cut with the Hot Air Balloon Dies
For my card design, I wanted to create a stepped up clean and simple birthday card. I love that the Hot Air Balloon Bundle had what I needed to create a fun design and I chose to use one of the designs from the Lighter Than Air Designer Series Paper to create the pattern for the balloon. The sentiment from the Hot Air Balloon stamp set fits perfectly on the coordinating die and made it easy to layer with the banner die. For the background, I chose to use the Painted Texture 3D Embossing Folder to add texture to the Tahitian Tide cardstock layer that I die cut out using the Perennial Postage Dies. I added some clouds to create the look of the sky and I love the contrast between the white clouds and the Tahitian Tide background. The banner label and basket for the balloon were die cut from Flirty Flamingo cardstock and I added a Tahitian Tide Baker's Twine bow and some Basic Rhinestones to finish off the design. Isn't this card so cute and fun? I think it would look great in a wide variety of colors so that you could personalize it to suit the person you are giving it to. Why not give it a try.
Thank you for taking the time to visit my blog. I hope that my birthday card will help inspire you to create your own beautiful designs to share with family and friends. Everyone deserves to receive a beautiful card on their birthday to make them feel special.
Please take a trip along our blog hop and visit the other Design Team members to see their amazing projects. Just click on the links in the Roll Call List below to visit their blogs. We would love it if you would leave us a comment and let us know what you liked about our projects.
If you live in the U.S. and do not have a Stampin' Up! Demonstrator, please contact me and I would be happy to help you with your creative projects. You may also visit my Online Store to place your order and have it shipped to you. 

Until Next Time

Happy Stamping,

Tricia Butts
Independent Stampin' Up! Demonstrator

Like What You See? Visit My Online Store Here

Visit My Facebook Business Page for Updates & Ideas

Click here to Contact Me


More Sale-a-bration Products Now Available
To Earn Free With A Qualifying Order
Click Below For More Details

Get Creative In 2024
With The January-April 2024 Mini Catalog
Click Below To Shop Now


Saturday, February 10, 2024

Stamping Inkspirations February Blog Hop Color Challenge

Welcome to the Stamping Inkspirations February Blog Hop and this month we have a Color Challenge. We have been challenged to use 3-5 of the following colors: Misty Moonlight, Lemon Lolly, Soft Sea Foam, Real Red and Pretty Peacock, to create our project. Our Design Team will be sharing their ideas and projects to help inspire you to try this color challenge.
For my design, I was able to use all five colors to create my card. I wanted to create a bright and cheerful design that would be perfect for Valentine's Day. I chose to use the Bee My Valentine Bundle to create my focal design and paired it with the Perennial Postage Dies to add a little extra detail. This is the first time I have used Lemon Lolly and I must admit, I was surprised at how bright this color is. I chose to use one of the designs from the Subtles 6"x 6" Designer Series Paper for the background to add some subtle texture.
Products Used:
Bee My Valentine Bundle (item #162554)
Perennial Postage Dies (item #162607)
Subtles 6" x 6" Designer Series Paper (item #161644)
Misty Moonlight Cardstock (item #153081)
Lemon Lolly Cardstock (item #161720)
Real Red Cardstock (item #102482)
Basic White Cardstock (item #159276)
Vellum Cardstock (item #101856)
Pretty Peacock Classic Ink Pad (item #150083)
Soft Sea Foam Classic Ink Pad (item #147102)
Memento Tuxedo Black Pad (item #132708)
Versamark Pad (item #102283)
Metallics Embossing Powders (item #155555)
Festive Pearls (item #159963)
Stampin' Dimensionals (item #104430)
Measurements:
Misty Moonlight Cardstock
Card Base - 8 1/2" x 5 1/2" (Scored at 4 1/4')
Mat Layer - 2 1/4" x 3"
Basic White Cardstock
Focal Layer die cut with the Perennial Postage Dies
Bee antenna stamped and punched out with the Bee My Valentine Bundle
Lemon Lolly Cardstock
Bee body stamped and punched out with the Bee My Valentine Bundle
Vellum Cardstock
2 Wings stamped and punched out with the Bee My Valentine Bundle
Real Red Cardstock
Sentiment Label die cut with the Perennial Postage Dies
2 small hearts punched out with the Bee Builder Punch
Lemon Lolly Designer Series Paper
Card Front - 5 1/4" x 4"
For this card, I chose to create a clean and simple design with the focus being the cute little bee. I just love the Bee My Valentine Bundle and how versatile the Bee Builder Punch is. Rather than stamp the body with Lemon Lolly Classic ink onto Basic White cardstock, I chose to use Lemon Lolly cardstock and stamp the stripes and detail with Memento Tuxedo Black ink to make it pop. For the wings, I stamped them onto Vellum cardstock with Memento Tuxedo Black ink and punched them out with the large heart from the punch to get the wing shape. For the antenna, I stamped the image onto a scrap of Basic White cardstock and used the small heart on the punch to punch it out. I then attached the antenna and wings to the back of the bee body. 
For the focal layer, I die cut the Basic White cardstock layer using the Perennial Postage Dies to add some detail to the panel. I stamped the flight trail, I stamped it at an angle with Memento ink and created the flower on the right side of the panel using Soft Sea Foam Classic ink for the stem and Pretty Peacock Classic ink stamped off once to stamp the flower. I layered the focal panel onto a piece of Misty Moonlight cardstock to coordinate with the card base and provide some contrast against the Lemon Lolly Designer Series Paper background. For the sentiment, I heat embossed the image with Gold embossing powder onto Real Red cardstock and die cut it with one of the dies from the Perennial Postage Dies and attached it to the bottom right corner of the panel. I also added two small Real Red hearts that I punched out using the Bee Builder Punch and added one to the body of the bee and the other just below the sentiment. For a touch of bling, I added several Gold Pearls from the Festive Pearls. Isn't this just the cutest card design? I love how it turned out and how well these colors worked together to create this design. 
Thank you for taking the time to visit my blog. I hope this cute card design will help spark your creativity and encourage you to give this color challenge a try. There are so many wonderful possibilities to explore.
Now it's time to visit Jan's blog and see what she has created with these wonderful colors. Just click on the Next button to visit her blog or use the Roll Call List below to find your way. We would appreciate it if you would leave us a comment and let us know what you liked about our projects. I hope you enjoy our blog hop this month.

Roll Call List

If you live in the U.S. and do not have a Stampin' Up! Demonstrator, please contact me and I would be happy to help you with your creative projects. You may also visit my Online Store to place your order and have it shipped to you. 

Until Next Time

Happy Stamping,

Tricia Butts
Independent Stampin' Up! Demonstrator

Like What You See? Visit My Online Store Here

Visit My Facebook Business Page for Updates & Ideas

Click here to Contact Me


More Sale-a-bration Products Are Now Available
To Earn Free With A Qualifying Order
Click Below For More Details

Explore Your Creativity in 2024
With The January-April 2024 Mini Catalog
Click Below To Shop Now