Showing posts with label Thank You card. Show all posts

Wednesday, June 19, 2024

New At SU June Blog Hop Catalog Sketch Challenge Latte Love

It's time to hop along with the New At SU June Blog Hop and this month we are doing a Sketch Challenge with a bit of twist. If you have seen the new 2024-2025 Annual Catalog, you may have noticed the sketch layouts on the bottom of page 22 that Stampin' Up! has provided for inspiration to help you get creative. For this month's sketch challenge, our wonderful Design Team members have each chosen to use one of these sketch layouts to create their card design using products from the new catalog and Online Exclusives. Sketch layouts provide a great starting point for creating your own unique card designs using the products you have in your crafty stash. 
For my card design today, I chose to use the third sketch shown using the Latte Love Bundle and coordinating A Little Latte Designer Series Paper available in the Online Exclusives. I love how the coffee theme fits with this layout and it was fun using the designer series paper and images from the bundle to recreate the layout. 
Products Used:
Latte Love Bundle (item #163461)
Something Fancy Dies (item #160424)
A Little Latte Designer Series Paper (item #163453)
Early Espresso Cardstock (item #119686)
Pecan Pie Cardstock (item #161717)
Very Vanilla Cardstock (item #101650)
Early Espresso Classic Ink Pad (item #147114)
Pecan Pie Classic Ink Pad (item #161665)
Summer Splash Stampin' Blends Combo Pack (item #163826)
Adhesive Backed Swirl Dots (item #163464)
Linen Thread (item #104199)
Stampin' Dimensionals (item #104430)
Measurements:
Pecan Pie Cardstock 
Card Base - 5 1/2" x 8 1/2" (Scored at 4 1/4")
Early Espresso Cardstock
Card Front - 5 1/4" x 4"
Strip - 1/2" x 4"
Very Vanilla Cardstock
Cup image stamped and die cut with the Latte Love Bundle
Latte image stamped and die cut with the Latte Love Bundle
Sentiment Label die cut with the Something Fancy Dies
A Little Latte Designer Series Paper
3 Strips - 1" x 4 1/4"
This card was so much fun to design and I love how the designer series paper worked to create the three panels for the background design. You may notice that the strips are aligned so that you can see the swirls in the pattern and I love how it pops against the Early Espresso cardstock card front. For the focal circle from the layout, I chose to use one of coffee cup images to replace to circle and I added a strip of Early Espresso cardstock across the card front for it to sit on top of to recreate that part of the sketch. I used a piece of Linen Thread to wrap around the card front twice on top of the Early Espresso strip and then tied a bow on the left side. For the coffee cup image, I colored the cup with Summer Splash Stampin' Blends Markers and I stamped the latte image with Pecan Pie Classic ink to add to the center of the cup. I attached the coffee cup over the top of the strip and Linen Thread with Stampin' Dimensionals to make it pop up. For the sentiment, I stamped the image with Pecan Pie Classic ink onto the label and attached it on the left side of the card, slightly lower than the Early Espresso strip using Stampin' Dimensionals. I attached the completed card front to the Pecan Pie card base with Stampin' Dimensionals for extra dimension. To complete the card design, I added several of the Adhesive Backed Swirl Dots for the perfect finishing touch. I love that the sketch layout provided me with the blueprint to follow for my card design, and with a few simple changes, I was able to make my own unique design. 
Thank you for taking the time to visit my blog. I hope that my card design will help inspire you to explore using the wonderful sketches in the new 2024-2025 Annual Catalog to help spark your creativity. There are so many possibilities to explore. Don't forget to check out the current promotion where you can save an additional 10% on select bundles. The Latte Love Bundle that I chose for my card design, is just one of many currently on sale. 
Please take the time to visit with my fellow Design Team members by clicking on the links in the Roll Call List below. We would love it if you would leave us a comment and let us know what you liked about our projects. 

If you live in the U.S. and do not have a Stampin' Up! Demonstrator, please contact me and I would be happy to help you with your creative projects. You may also visit my Online Store to place your order and have it shipped to you. 

Until Next Time

Happy Stamping,

Tricia Butts
Independent Stampin' Up! Demonstrator

Like What You See? Visit My Online Store Here

Visit My Facebook Business Page for Updates & Ideas

Click here to Contact Me


Save An Extra 10% On Select Bundles
Plus 10% Off Stampin' Cut & Emboss Machines
Click Below To Shop Now


Sunday, April 21, 2024

Stamptastic Friends April Blog Hop Retiring Favorites

It's time to hop along with the Stamptastic Friends April Blog Hop and this month we have the choice to showcase new products from the 2024-2025 Annual Catalog or say a final farewell to some retiring favorites from the Last Chance Products Sale. Our Design Team will be sharing their projects and ideas to help inspire you and hopefully spark your creativity to help you create your own beautiful projects.
Today I thought I would share this cute Thank You card featuring the retiring Silly Goose stamp set and Glorious Gingham 6"x6" Designer Series Paper. I love creating clean and simple card designs and this layout is a great way to create fun cards with your stash of designer series paper. It's been a while since I have used Blueberry Bushel so I decided to show it some love with this monochromatic card design. You could easily create this card design with any of the colors in this designer series paper pack to create a variety of cards to add to your card stash. 
Products Used:
Silly Goose stamp set (item #160866) - Retiring 
Stylish Shapes Dies (item #159183)
Glorious Gingham 6"x6" Designer Series Paper (item #163170) - Retiring 
Blueberry Bushel Cardstock (item #146968)
Basic White Cardstock (item #159276)
Blueberry Bushel Classic Ink Pad (item #147138)
Memento Tuxedo Black Pad (item #132708)
Smoky Slate Stampin' Blends Combo Pack (item #154904)
Balmy Blue Stampin' Bkends Combo Pack (item #154830)
Pumpkin Pie Stampin' Blends Combo Pack (item #154897)
Color Lifter (item #144608)
Tinsel Gems Four Pack (item #161623)
Measurements:
Blueberry Bushel Cardstock
Card Base - 5 1/2" x 8 1/2" (Scored at 4 1/4")
Large Circle die cut with the Stylish Shapes Dies
Large Banner die cut with the Stylish Shapes Dies
Basic White Cardstock
Medium Circle die cut with the Stylish Shapes Dies
Sentiment Banner die cut with the Stylish Shapes Dies
Blueberry Gingham Bushel Designer Series Paper
Card Front - 5 1/4" x 4"
Creating clean and simple cards is a great way to build up a stash of cards to have on hand and one of my favorite ways to do this also helps me use up my some of my designer series paper. I love that the Glorious Gingham Designer Series Paper has a combination of both large and small gingham designs in a variety of colors. I chose to use the Blueberry Bushel small gingham check and paired it with Blueberry Bushel cardstock. To create the focal design, I stamped the goose image with Memento Tuxedo Black ink onto Basic White cardstock and colored it with Stampin' Blends Markers. I die cut the image with the Stylish Shapes Dies and layered it onto a Blueberry Bushel circle. For the sentiment I stamped the image with Blueberry Bushel Classic ink onto a Basic White sentiment label and layered it onto a Blueberry Bushel banner. I adhered both the focal image and sentiment onto the card front and added several Blueberry Bushel Gems to complete the design.
Thank you for taking the time to visit my blog. I hope that my card design will encourage you to take another look at the retiring products from the Last Chance Retiring Products Sale and stock up on your favorites before they disappear. There are so many wonderful options to explore. 
Please take a moment to visit with our Design Team and check out their amazing projects this month. Just click on the links in the Roll Call List to visit their blogs. We would love it if you would leave us a comment and let us know what you liked about our projects.

 
If you live in the U.S. and do not have a Stampin' Up! Demonstrator, please contact me and I would be happy to help you with your creative projects. You may also visit my Online Store to place your order and have it shipped to you. 

Until Next Time

Happy Stamping,

Tricia Butts
Independent Stampin' Up! Demonstrator

Like What You See? Visit My Online Store Here

Visit My Facebook Business Page for Updates & Ideas

Click here to Contact Me


Save Up To 60% Off Retiring Products
During The Last Chance Product Sale
Click Below To Shop Now

Explore Your Creativity
With The Online Exclusives Products
Click Below To Visit My Online Store

Saturday, March 2, 2024

Stamping With Friends March Blog Hop Tic-Tac-Toe Challenge

Welcome to the Stamping With Friends March Blog Hop and this month we have a Tic-Tac-Toe Challenge to help spark our creativity. We get to choose 3 in a row either horizontally, vertically or diagonally to help us create our project designs. Our wonderful Design Team will be sharing their ideas and projects to help inspire you to give this challenge a try.
For my card design, I started with the left vertical side to create a Thank You card with embossing and Designer Series Paper but then I realized that I also had the elements for the right vertical side as I also included a butterfly, with floral designer series paper and vellum accents. So I guess you could say I have a 2 for one design. Now that we are in the month of March, Spring is approaching fast, so I decided to create a pretty Spring card design using a color that I don't use very often, Bubble Bath. I am not really a pink girl, so this was an additional challenge for me and I must admit, I do like how it turned out. 
Products Used:
Go To Greetings stamp set (item #15873)
Thoughtful Expressions Dies (item #162821)
Perennial Postage Dies (item #162607)
Delightfully Eclectic Designer Series Paper (item #161640)
Paper Butterfly Accents (item #1621612)
Bubble Bath Cardstock (item #161718)
Basic White Cardstock (item #159276)
Vellum Cardstock (item #101856)
Soft Sea Foam Stampin' Blends Combo Pack (item #154902)
Bubble Bath Classic Ink Refill (item #161670)
Clear Wink of Stella Glitter Brush (item #141897)
Versamark Pad (item #102283)
Metallics Embossing Powders (item #155555)
Sheer Ribbon Combo Pack (item #161635)
Pastel Adhesive Backed Sequins (item #160387)
Stampin' Dimensionals (item #104430)
Measurements:
Bubble Bath Cardstock 
Card Base - 8 1/2" x 5 1/2" (Scored at 4 1/4")
Matte Label die cut with the Thoughtful Expressions Dies
Basic White Cardstock
Layer 1 - 5 3/8" x 4 1/8"
Sentiment Label die cut with the Perennial Postage Dies
Delightfully Eclectic Designer Series Paper
Card Front - 5 1/4" x 4" Center die cut out with the Thoughtful Expressions Dies
Vellum Cardstock 
5 sets of Leaves die cut with the Thoughtful Expressions Dies
This pretty card design is a little more over the top than I would normally create. I loved the Bubble Bath and White striped pattern of the designer series paper and the reverse side had a pretty floral that coordinated perfectly with it. I die cut the center out of the designer series paper card front using one of the Thoughtful Expressions Dies and then flipped it over and so that the floral side was facing up. I then attached it to a Bubble Bath matte layer one size larger, also cut using the Thoughtful Expressions Dies. I attached the striped side of the designer series paper to the Basic White cardstock layer and added a piece of the Bubble Bath Sheer Ribbon around the center, attaching the ends to the back. I then added this layer to my Bubble Bath card base. I added the focal panel to the center of the card front with Stampin' Dimensionals so that it covers the hole in the card front. 
For the butterfly, I colored the die cut using one drop of the Bubble Bath Classic ink refill with the Clear Wink of Stella to give the butterfly a pretty pink shimmer. For the sentiment, I heat embossed the image from the Go To Greetings stamp set with Gold embossing powder onto the Basic White sentiment label and attached it to the bottom of the focal layer with Stampin' Dimensionals. I then added the butterfly die cut above the sentiment label, centering it on the focal panel. For the vellum leaves, I colored them with the Dark Soft Sea Foam Stampin' Blends Marker to add some soft color and then added them to the card front so that the ends tucked underneath the center panel, arranging them at the top left corner and the bottom right corner. For a touch of bling, I added some Pastel Adhesive Backed Sequins to finish off the design. I really love how this pretty card turned out and I had so much fun with this Tic-Tac-Toe Challenge. 
Thank you for taking the time to visit my blog. I hope that my card design will help inspire you to explore the options in the Tic-Tac-Toe Challenge this month to help you create your own beautiful card design. There are so many options to explore.
Please take a trip along our blog hop and visit with the Design Team members to see what they created with this month's challenge. Just click on the links in the Roll Call List below to find your way. We would appreciate it if you would leave us a comment and let us know what you liked about our projects.

If you live in the U.S. and do not have a Stampin' Up! Demonstrator, please contact me and I would be happy to help you with your creative projects. You may also visit my Online Store to place your order and have it shipped to you. 

Until Next Time

Happy Stamping,

Tricia Butts
Independent Stampin' Up! Demonstrator

Like What You See? Visit My Online Store Here

Visit My Facebook Business Page for Updates & Ideas

Click here to Contact Me


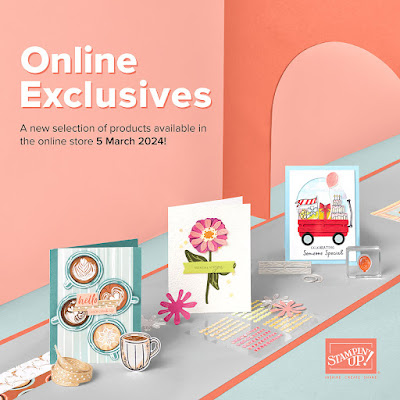
New Online Exclusive Products
Coming March 5th
To My Online Store

Get Creative For Spring
With The January-April 2024 Mini Catalog
Click Below To Shop Now


Monday, August 7, 2023

Kylie Bertucci's August Monthly International Blog Highlights

Welcome to Kylie Bertucci's August Monthly International Blog Highlights as we share projects and ideas with the theme "Thank You". Stampin' Up! Demonstrators from around the world are taking part in this wonderful blog hop and I hope you will take the time to visit their blogs and be inspired by their amazing projects.
My card design today features the Les Shoppes Designer Series Paper to create a masculine Thank You card design. At first glance, you wouldn't think that this designer series paper would be an obvious choice for this style of card. As I looked through the various patterns, I came across a geometric pattern in shades of gray that I thought would be perfect. I paired it with the Stylish Shapes Dies and Nested Essentials Dies to continue the geometric design for my card and used neutral colors for my color palette. I used Copper embossing powder to help step up the design and I love the finished design.
Products Used:
Layering Leaves stamp set (item #161277)
Stylish Shapes Dies (item #159183)
Nested Essentials Dies (item #161597)
Les Shoppes Designer Series Paper (item #161322)
Basic Gray Cardstock (item #121044)
Basic Black Cardstock (item #121045)
Versamark Pad (item #102283)
Metallics Embossing Powders (item #155555)
Copper Clay 3/8" Textured Ribbon (item #161629)
2023-2025 In Color Dots (item #161620)
Stampin' Dimensionals (item #104430)
Measurements:
Basic Gray Cardstock
Card Base - 8 1/2" x 5 1/2" (Scored at 4 1/4")\
Basic Black Cardstock
Card Front - 5" x 3 3/4"
Sentiment Label die cut with the Nested Essentials Dies
Les Shoppes Designer Series Paper
6 Squares die cut with the Stylish Shapes Dies
To create this card design, I die cut six squares using the second smallest square die from the Stylish Shapes Dies. I arranged them so that the patterns were pointing in random directions to create more interest and then adhered them to the Basic Black card front, leaving a space down the center. I added a piece of Copper Clay Textured Ribbon across the center of the card front to add a pop of color. The sentiment was created by heat embossing the image with Copper embossing powder onto the Basic Black label. I love the shape created using the Nested Essentials Dies and the sentiment from the Layering Leaves stamp set fit perfectly. I added the sentiment label to the center of the card front with Stampin' Dimensionals, over the Copper Clay Ribbon. Using Stampin' Dimensionals, I adhered the card front to the Basic Gray card base to add dimension to the design. To complete the design, I added several Copper Clay Dots to the card front.
Thank you for taking the time to visit my blog. I hope that my card design will inspire you to create your own beautiful cards to send to family and friends. Thank you cards are a wonderful way to show the people in our life how much we appreciate them.
Please take the time to vote for my card design as part of this month's International Blog Highlights. Simply click the Vote button below and click on the heart for my card design (#17) to vote for my card. You can vote for up to 5 cards each day over the next week, so please share the love with my fellow Stampin' Up! Demonstrators. We would also appreciate it if you would leave us a comment and let us know what you liked about our projects. 


If you live in the U.S. and do not have a Stampin' Up! Demonstrator, please contact me and I would be happy to help you with your creative projects. You may also visit my Online Store to place your order and have it shipped to you. 

Until Next Time

Happy Stamping,

Tricia Butts
Independent Stampin' Up! Demonstrator

Like What You See? Visit My Online Store Here

Visit My Facebook Business Page for Updates & Ideas

Click here to Contact Me


August's Meaningful Flowers Kit
Includes A Bonus Free Stamp Set
Click Below To Subscribe By August 10th

Save Up To 30% Off Kits
In The Kits Collection
Click Below To Shop From My Online Store

Redeem Your Bonus Days Coupons & Save
During The Month Of August
Click Below To Visit My Online Store


Wednesday, June 28, 2023

Paper Pumpkin Possibilities June Blog Hop Welcome Inn

Welcome to the Paper Pumpkin Possibilities June Blog Hop as we showcase alternative project ideas with the Welcome Inn Kit. Our talented Design Team members are excited to share their wonderful ideas and projects to help inspire you to think outside the box. 
Sadly, my Paper Pumpkin kit did not arrive in time for this blog hop, so I had to get a little creative with my alternative card design. I recently ordered the Welcome Inn Dies, which are a special Add-On for the June Welcome Inn Paper Pumpkin Kit, and I decided to pair them with the Countryside Inn Designer Series Paper, which just happens to coordinate perfectly with this month's kit. I hope that my card design will show you that there are even more possibilities available to you, after you have used up all the supplies in this month's kit. The Countryside Inn Suite Collection in the 2023-2024 Annual Catalog offers coordinating products to help you stretch your kit even further. Also, don't forget, as a Paper Pumpkin subscriber, you can order the Welcome Inn Dies as an Add-On from my Online store while supplies last. 
Products Used:
Welcome Inn Dies (item #163192) Add-On
Welcome Inn Designer Series Paper (item #161467)
Countryside Corners Dies (item #161471)
Timeless Arrangements Bundle (item #161526)
Exposed Brick 3D Embossing Folder (item #161600)
Bough Punch (item #157711)
Boho Blue Cardstock (item #161724)
Lost Lagoon Cardstock (item #133679)
Pecan Pie Cardstock (item #161717)
Basic White Cardstock (item #159276)
Pecan Pie Classic Ink Pad (item #161665)
Versamark Pad (item #102283)
Basics Embossing Powders (item #155554)
Linen Thread (item #104199)
Rustic Metallic Adhesive Backed Dots (item #159082)
Stampin' Dimensionals (item #104430)
Sponge Daubers (item #133773)
Measurements:
Boho Blue Cardstock
Card Base - 8 1/2" x 5 1/2" (Scored at 4 1/4")
Large Matte Layer die cut with the Countryside Corners Dies
Basic White Cardstock
Focal Layer die cut with the Countryside Corners Dies
Pecan Pie Cardstock
Sentiment Label die cut with the Timeless Arrangements Dies
Lost Lagoon Cardstock
2 Leaves die cut with the Welcome Inn Dies
1 Bud Sprig punched out with the Bough Punch
Countryside Inn Designer Series Paper
Card Front - 4" x 5 1/4"
3 Vases die cut with the Welcome Inn Dies 
Normally when I create my alternative cards, I focus on using the exclusive stamp set included in the kit, to create my design. Because I don't have the kit, I had to come up with a new plan for my design and focus on how I could use the Welcome Inn Dies to show their versatility. I also decided to show how you can create a masculine card design using the dies with the Countryside Inn Designer Series Paper, to provide even more options for you to try. For the vases, I used the basic patterns on the reverse sides of the floral designs to create a masculine feel to my design. I chose to use Boho Blue cardstock for the card base and the matte layer to help provide contrast for the Night of Navy designer series paper card front layer. The background of the focal layer has been embossed with the new Exposed Brick 3D Embossing Folder to add texture and I gently added Pecan Pie Classic ink over the raised embossed areas to bring out the detail and give it a distressed, aged look. I layered the embossed layer on onto the Boho Blue matte layer and adhered the two outside vases to the embossed layer. To add some additional texture, I wrapped a piece of Linen Thread around the focal layer twice, tying a knot towards the right side. Using Stampin' Dimensionals, I added the center vase to the focal layer and added the die cut leaves and bud sprig so that the stems are hidden underneath the vase. 
For the sentiment, I heat embossed the image from the Timeless Arrangements stamp set onto Pecan Pie cardstock with White embossing powder and then die cut the label using the coordinating Timeless Arrangements Dies. I adhered the label to the center vase and added two small Rustic Metallic Dots to embellish. To assemble the finished card, I adhered the designer series paper card front to the Boho Blue card base and then added the focal layer with Stampin' Dimensionals, making sure to center it on the card front. I love the detail that the patterns on the vases adds to the card design and the wonderful texture that gives this design a rustic feel to it that is perfect for a masculine design.
Thank you for taking the time to visit my blog. I hope that my card will help inspire you to create your own wonderful designs with the elements in this wonderful kit as well as the Add-on Dies and coordinating products from the Countryside Inn Suite in the 2023-2024 Annual Catalog. The Welcome Inn Dies coordinate with the stamp set in the Welcome Inn Paper Pumpkin Kit and are available to order here while supplies last (must be an Paper Pumpkin subscriber).
Now it's time to visit Melva's blog and see what alternative ideas she has to share with us this month. Just click on the Next button to visit her blog. We would love it if you would leave us a comment and let us know how our projects inspired you. I hope you enjoy the rest of our blog hop. 

If you live in the U.S. and do not have a Stampin' Up! Demonstrator, please contact me and I would be happy to help you with your creative projects. You may also visit my Online Store to place your order and have it shipped to you. 

Until Next Time

Happy Stamping,

Tricia Butts
Independent Stampin' Up! Demonstrator

Like What You See? Visit My Online Store Here

Visit My Facebook Business Page for Updates & Ideas

Click here to Contact Me


Enjoy Some Creative Summer Fun
With The July Paper Pumpkin Kit
Click Below To Subscribe By July 10th

Final Days!
Don't Miss Out On The Designer Series Paper Sale
Ends June 30th
Click Below To Visit My Online Store

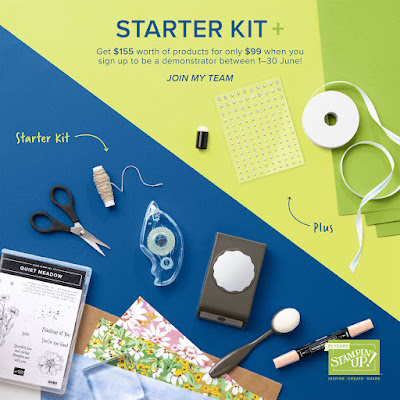
Last Days To Take Advantage Of The Starter Kit+
Choose $155 In Product For Just $99
Promotion Ends June 30th
Click Below For More Details