Showing posts with label Pansy Petals Designer Series Paper. Show all posts

Saturday, April 9, 2022

Stamping Inkspirations April Blog Hop Fun Folds

It's time to hop along with the Stamping Inkspirations April Blog Hop as we showcase beautiful fun fold card designs to help inspire you. Our wonderful Design Team Members will be sharing their amazing projects and ideas to help you step outside your comfort zone and take your cards to the next level. 
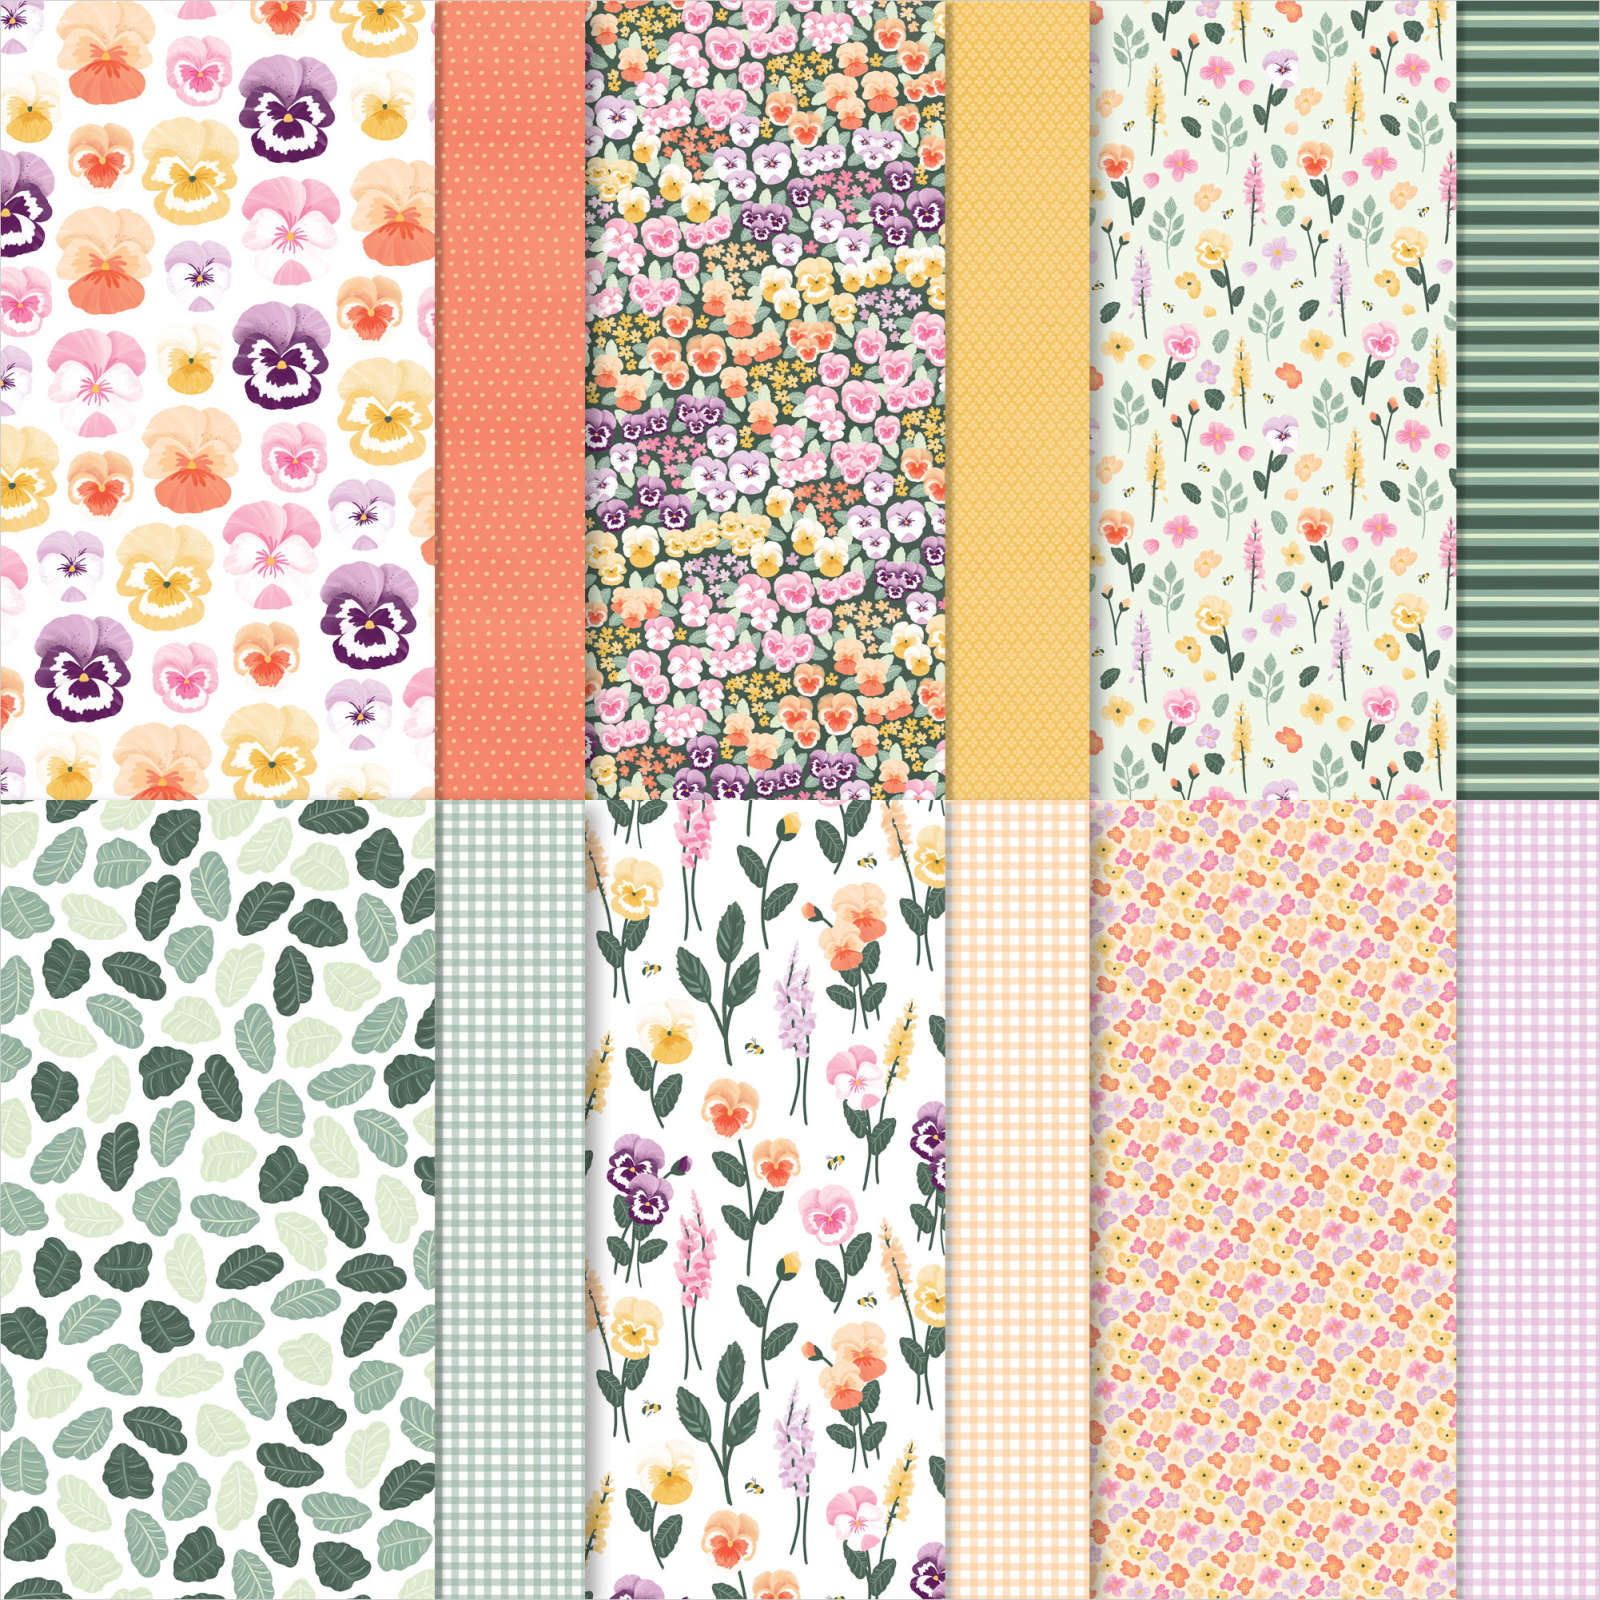
With Easter coming up soon, I thought I would create a simple fun fold to celebrate the occasion. For this card design I chose the Easter Friends stamp set with its wonderful images and sentiments and paired it with the pretty Pansy Petals Designer Series Paper. Isn't the bunny in this stamp set simply adorable? This simple fun fold is easy to create and is a wonderful way to step up a standard card base.
Products Used:
Easter Friends stamp set (item #157737)
Pansy Dies 155680)
Tasteful Labels Dies (item #152886) Retiring
Stitched So Sweetly Dies (item #151690) Retiring
Pansy Petals Designer Series Paper (item #155807) Retiring
Fresh Freesia Cardstock (item #155613)
Basic White Cardstock (item #159276)
Cinnamon Cider Classic Ink Pad (item #153114) Retiring
Soft Sea Foam Classic Ink Pad (item #147102)
Versamark Pad (item #102283)
Metallics Embossing Powders (item #155555)
Brushed Brass Butterflies (item #158136)
Stampin' Dimensionals (item #104430)
Blender Pens (item #102845)
Measurements:
Fresh Freesia Cardstock
Card Base - 5 1/2" x 7 1/2" (Scored at 4 1/4")
Pansy Petals Designer Series Paper
Card Front - 3" x 5 1/4" Side Strip - 1" x 5 1/4"
Two pansies die cut with the Pansy Dies
Basic White Cardstock
Focal Label die cut with the Stitched So Sweetly Dies
Sentiment Label die cut with the Tasteful Labels Dies
This cute fun fold is simple to create using a standard size card base (5 1/2" x 8 1/2") by simply cutting off 1" from the card front so that the base measures 7 1/2" x 5 1/2". You will still score the card base at 4 1/4" to create your fun fold. For the card front, I cut a 5 1/4" x 4" piece of the Pansy Petal Designer Series Paper and then cut a 1" strip off of one side to create two pieces measuring 3" x 5 1/4" and 1" x 51/4". I attached the larger piece to the card front and flipped the strip over so that the reverse side faces up. I attached the strip to the inside Basic White layer along the right side and then attached this layer to the inside of the card base. This way when the card is closed, you have that wonderful contrast between the two designs. For the bunny, I stamped it with Cinnamon Cider Classic ink onto the scalloped rectangle layer and used a Blender Pen to soften and lightly color the image. The Blender Pen helps to reactivate the ink to add that soft color to the image. For the grass, I used Soft Sea Foam Classic ink along the bottom to help ground the image and once again softened it with the Blender Pen. For the sentiment, I heat embossed the image with Gold embossing powder onto the sentiment label. To assemble the card front, I attached both the focal image and the sentiment label with Stampin' Dimensionals. I attached the two die cut pansies (from the designer series paper) to decorate the panels. To finish off the card design, I added several Brushed Brass Butterflies for a touch of bling. 
Thank you for taking the time to visit my blog. I hope that my fun fold card design will help inspire you to create your own beautiful cards and explore the variety of fun fold designs available. There are so many wonderful options to try. 
Now it's time to visit AurĂ©lie's wonderful blog to see what she has created for us. Just click the Next button below to visit her blog or use the Roll Call List to find your way. We would appreciate it if you would leave us a comment and let us know what you liked about our projects. I hope you enjoy the rest of our blog hop.
Roll Call List

If you live in the U.S. and do not have a Stampin' Up! Demonstrator, please contact me and I would be happy to help you with your creative projects. You may also visit my Online Store to place your order and have it shipped to you. 

Until Next Time

Happy Stamping,

Tricia Butts
Independent Stampin' Up! Demonstrator

Like What You See? Visit My Online Store Here

Visit My Facebook Business Page for Updates & Ideas

Click here to Contact Me


Stock Up On Your Favorite Retiring Products
Before They Disappear
Click Below To Visit My Online Store

Final Days To Sign Up
For The April Paper Pumpkin Kit
Click Here To Subscribe By April 10th


Saturday, February 26, 2022

Ink. Stamp. Share. March Monthly Blog Hop Sketch Challenge

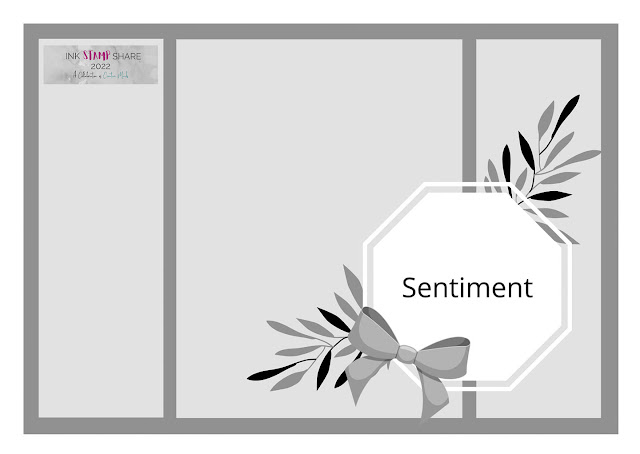
It's time to hop along with the Ink. Stamp. Share. March Monthly Blog Hop with a sketch challenge. You will be visiting with our talented Design Team Members as they share their ideas and projects based on the sketch design below to help inspire you. 

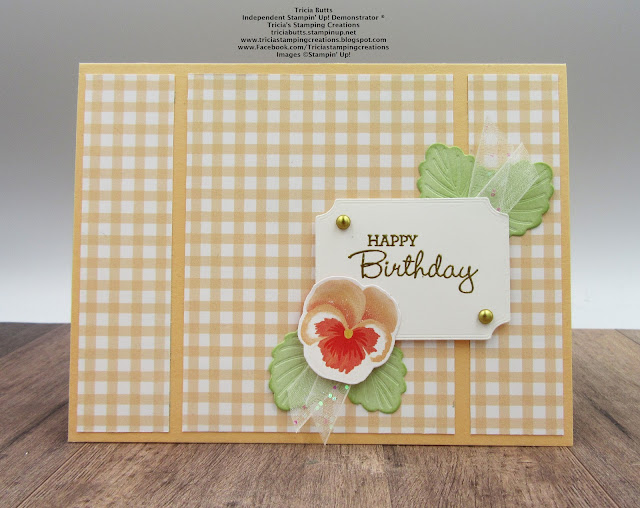
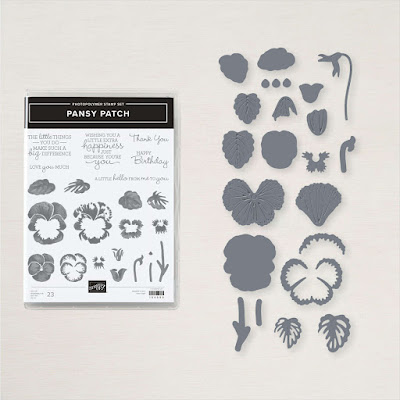
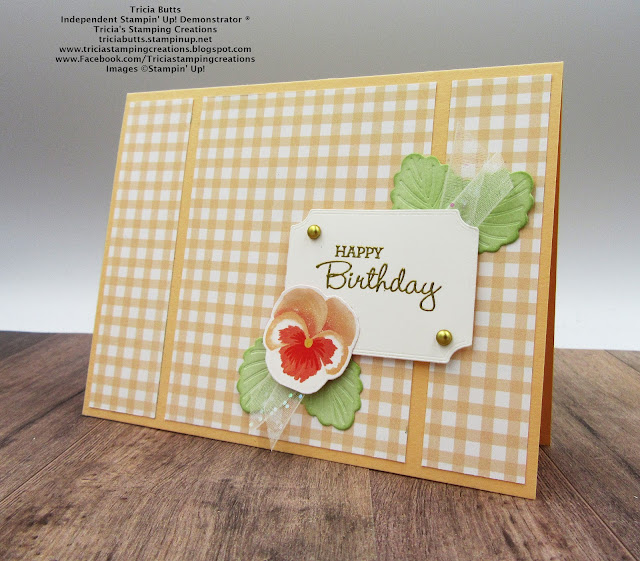
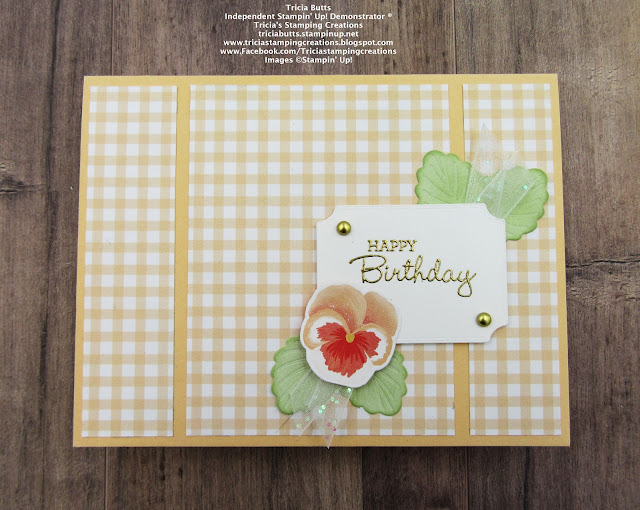
I love participating in Sketch Challenges as it gives me a road map to help me design my card. For this challenge, I chose to use products from the Pansy Petals Suite to create a Spring themed Birthday card. This layout really fits with my style of clean and simple and I love how the pansy elements fit with the sketch to create this pretty card design. The sentiment label was die cut with the Tasteful Labels Dies, which is a wonderful staple for classically elegant designs.
Products Used:
Pansy Patch Bundle (item #155674)
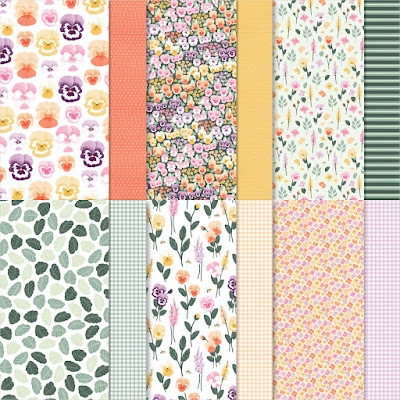
Pansy Petals Designer Series Paper (item #155807)
Tasteful Labels Dies (item #152886)
Pale Papaya Cardstock (item #155668)
Soft Sea Foam Cardstock (item #146988)
Basic White Cardstock (item #159276)
Soft Sea Foam Classic Ink Pad (item #147102)
Versamark Pad (item #102283)
Metallics Embossing Powders (item #155555)
White 3/8" Glittered Organdy Ribbon (item #156408)
Brushed Metallic Adhesive-Backed Dots (item #156506)
Stampin' Dimensionals (item #104430)
Mini Glue Dots (item #103683)
Sponge Daubers (item #133773)
Measurements:
Pale Papaya Cardstock
Card Base - 8 1/2" x 5 1/2" (Scored at 4 1/4")
Pansy Petals Designer Series Petal
Card Front - 3 pieces 
2 strips - 1" x 4" 1 piece - 3" x 4"
Pansy die cut with Pansy Dies
Basic White Cardstock
Sentiment Label die cut with Tasteful Labels Dies
Soft Sea Foam Cardstock
4 leaves die cut with Pansy Dies 
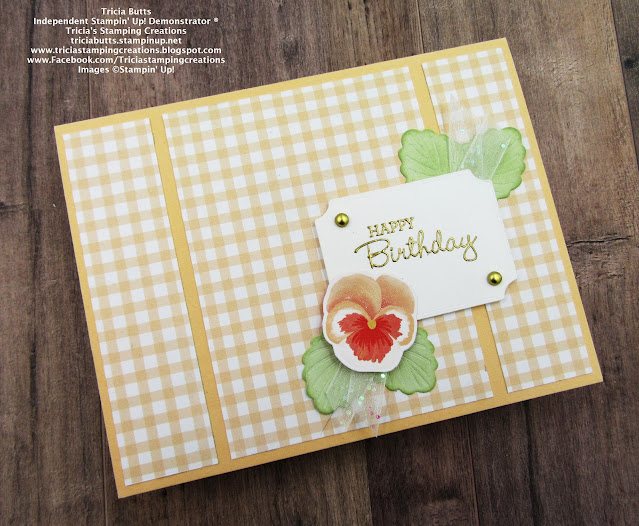
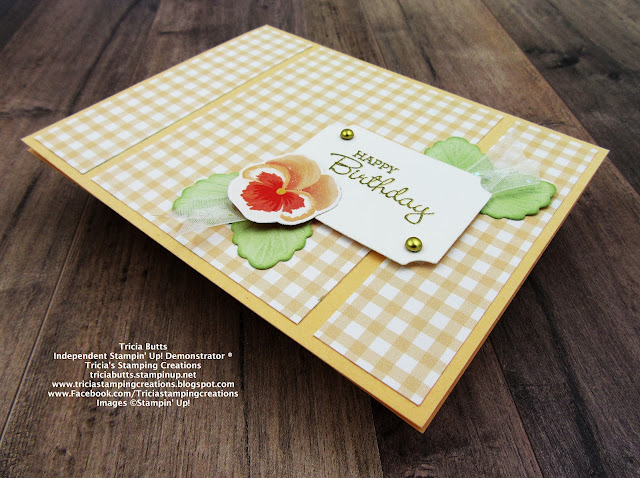
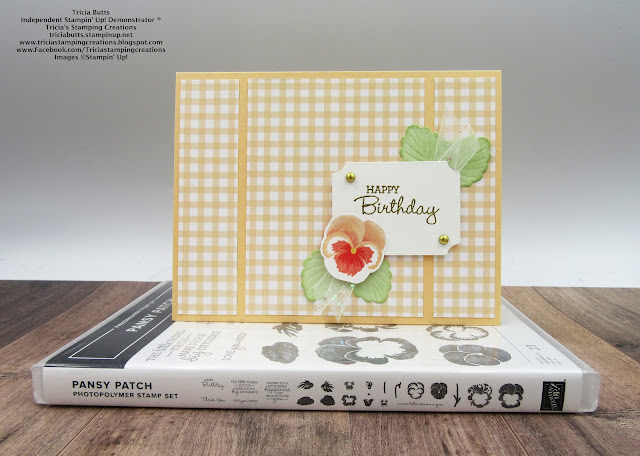
This pretty clean and simple card design showcases the beautiful Pansy Petals Suite in the 2021-2022 Annual Catalog. I used a piece of the Pansy Petals Designer Series Paper to create the card front. Tip: to create the 3 panels, first cut a piece of the designer series paper to measure 5" x 4", then measuring along the 5" side, cut 1" strips from each end, leaving a 3" piece in the middle. Then it is simple to line up the pieces of the designer series paper on the front of the card base and adhere them, making sure the edges line up straight. For the sentiment, I heat embossed the Happy Birthday sentiment with Gold embossing powder and adhered it to the card front towards the right side of the card. I die cut one of the Pale Papaya small pansies from the designer series paper using the Pansy Dies and adhered it to the bottom left corner of the sentiment label. 
To create the leaves, I die cut 4 small leaves from Soft Sea Foam cardstock and sponged them with Soft Sea Foam Classic ink using a Sponge Dauber. I added two of the leaves underneath the pansy and added the other two leaves at the top right corner of the sentiment label. To embellish the card, I added White Glittered Organdy Ribbon underneath the sentiment label on top of the leaves at the top right and bottom left corners. To complete the card design, I added two small Brushed Gold Dots from the Brushed Metallic Adhesive-Backed Dots.  
Thank you for taking the time to visit my blog. I hope that my card design will help inspire you to create your own beautiful cards using this sketch challenge as a starting point for your creativity. Stampin' Up! has so many wonderful suites to choose from that will provide you with coordinating products to help take the stress out of creating your design.
Now it's time to visit with our talented team members as they share their wonderful projects. Please click on the Next or Previous to continue with our blog hop or use the Roll Call List to find your way. We would love it if you would leave us a comment and let us know what you liked about our projects. I hope you enjoy the rest of our blog hop.

If you live in the U.S. and do not have a Stampin' Up! Demonstrator, please contact me and I would be happy to help you with your creative projects. You may also visit my Online Store to place your order and have it shipped to you. 

Until Next Time

Happy Stamping,

Tricia Butts
Independent Stampin' Up! Demonstrator

Like What You See? Visit My Online Store Here

Visit My Facebook Business Page for Updates & Ideas

Click here to Contact Me


Final Days!
Sale-a-Bration ends February 28th
Click Below For More Details

Jump Start Your Spring Projects
With The January-June 2022 Mini Catalog
Click Below To Visit My Online Store

Explore New Possibilities
With The March Beyond The Horizons Paper Pumpkin Kit
Click Below To Subscribe By March 10th


Wednesday, May 12, 2021

New At SU May Blog Hop 2021-2023 In Colors Fun Fold

Welcome to the New At SU May Blog Hop as we showcase the new 2021-2023 In Colors with a variety of Fun Fold ideas. You will be visiting with talented Stampin' Up! Demonstrators from around the world as they share their projects to help inspire you. 
I love clean and simple card designs, so I chose to create a simple fun fold today to showcase the beautiful Pansy Petals Designer Series Paper (item #155807) which features several of the wonderful new 2021-2023 In Colors. Fresh Freesia is one of these amazing new colors and I chose to use it as my main color for this card design. For the focal image, I chose the large detailed butterfly die from the Butterfly Brilliance Bundle (item #155821). This fun fold is perfect as a Spring birthday card to help celebrate someone's special day.
Products Used:
Butterfly Brilliance Bundle (item #155821)
Pansy Petals Designer Series Paper (item #155807)
Pansy Patch stamp set (item #154999)
Stitched So Sweetly Dies (item #151690)
Meadow Moments Embossing Folders (item #153126)
Fresh Freesia Cardstock (item #155613)
Soft Sea Foam Cardstock (item #146988)
Basic White Cardstock (item #159276)
Fresh Freesia Classic Ink Pad (item #155611)
Fresh Freesia 3/8" Open Weave Ribbon (item #155615)
2021-2023 In Color Jewels (item #155571)
Measurements:
Fresh Freesia Cardstock
Card Base - 5 1/2" x 7 1/4" (Scored at 4 1/4")
Front Scalloped Rectangle Label - die cut with Stitched So Sweetly Dies
Large Detailed Butterfly - die cut with the Butterfly Brilliance Bundle
Soft Sea Foam Cardstock
Front Panel - 3 5/8" x 2 1/2" Embossed with the Meadow Moments Embossing Folders
Pansy Petals Designer Series Paper
Front Panel - 2 3/4" x 5 1/4"
Inside Panel - 1 1/8" x 5 1/4" Attach to the right side of the Basic White inside panel
Basic White Cardstock
Inside Panel - 5 1/4" x 4"
Sentiment Label - die cut with Stitched So Sweetly Dies stamped with Pansy Patch stamp set
Fresh Freesia 3/8" Open Weave Ribbon
approx. 6" to wrap around the bottom of the front focal panel
Directions:
1. Attach the front panel of designer series paper to the card front
2. Attach the inside panel of the designer series paper to the right side of the Basic White inside panel and attach to the inside of the card
3. Emboss the Soft Sea Foam cardstock layer with the embossing folder and attach to the Fresh Freesia scalloped rectangle layer. Add the Fresh Freesia Ribbon to the bottom of the panel and attach to the back with adhesive. 
4. Attach to the panel to the card front with Stampin' Dimensionals (on the left side of the panel) 
5. Add the detailed butterfly die cut to the left side of the focal panel. Add basic Rhinestones to the center of the butterfly.
6. Stamp the sentiment onto the Basic White label with Fresh Freesia Classic ink spot and attach to the bottom right corner of the focal panel with Stampin' Dimensionals. Add a small Fresh Freesia Jewel to the bottom of the sentiment
As you can see, this card is very simple to assemble but has so many options when you decorate it. It is suitable for a variety of occasions and it is a great way to showcase designer series paper. The new 2021-2023 In Colors are amazing and I can't wait to experiment with them to create more wonderful projects. 
Thank you for taking the time to visit my blog. I hope that my card design will help inspire you to create your own fun fold card with the new 2021-2023 In Colors. There are so many wonderful new products in the new 2021-2022 Annual Catalog to try.
Now it's time to visit Anke's blog and see what wonderful Fun Fold she has to share with the new In Colors. Just click the Next button below to visit her blog or use the Roll Call List below to find your way. We would love it if you would leave us a comment and let us know what you liked about our projects. I hope you enjoy the rest of our blog hop. 

Blog Hop Roll
If you live in the U.S. and do not have a Stampin' Up! Demonstrator, please contact me and I would be happy to help you with your creative projects. You may also visit my Online Store to place your order and have it shipped to you. 

Until Next Time

Happy Stamping,

Tricia Butts
Independent Stampin' Up! Demonstrator

Like What You See? Visit My Online Store Here

Visit My Facebook Business Page for Updates & Ideas

Click here to Contact Me


Enjoy The Amazing New Products

In The New 2021-2022 Annual Catalog

Click Below To Visit My Online Store


Explore The Amazing New In Colors
With The June Paper Pumpkin Expressions In Color Kit
Click Below To Subscribe By June 10th

Create Your Own Spring Projects
With The January-June 2021 Mini Catalog
Click Below To Visit My Online Store