Showing posts with label Easter Friends stamp set. Show all posts

Saturday, April 9, 2022

Stamping Inkspirations April Blog Hop Fun Folds

It's time to hop along with the Stamping Inkspirations April Blog Hop as we showcase beautiful fun fold card designs to help inspire you. Our wonderful Design Team Members will be sharing their amazing projects and ideas to help you step outside your comfort zone and take your cards to the next level. 
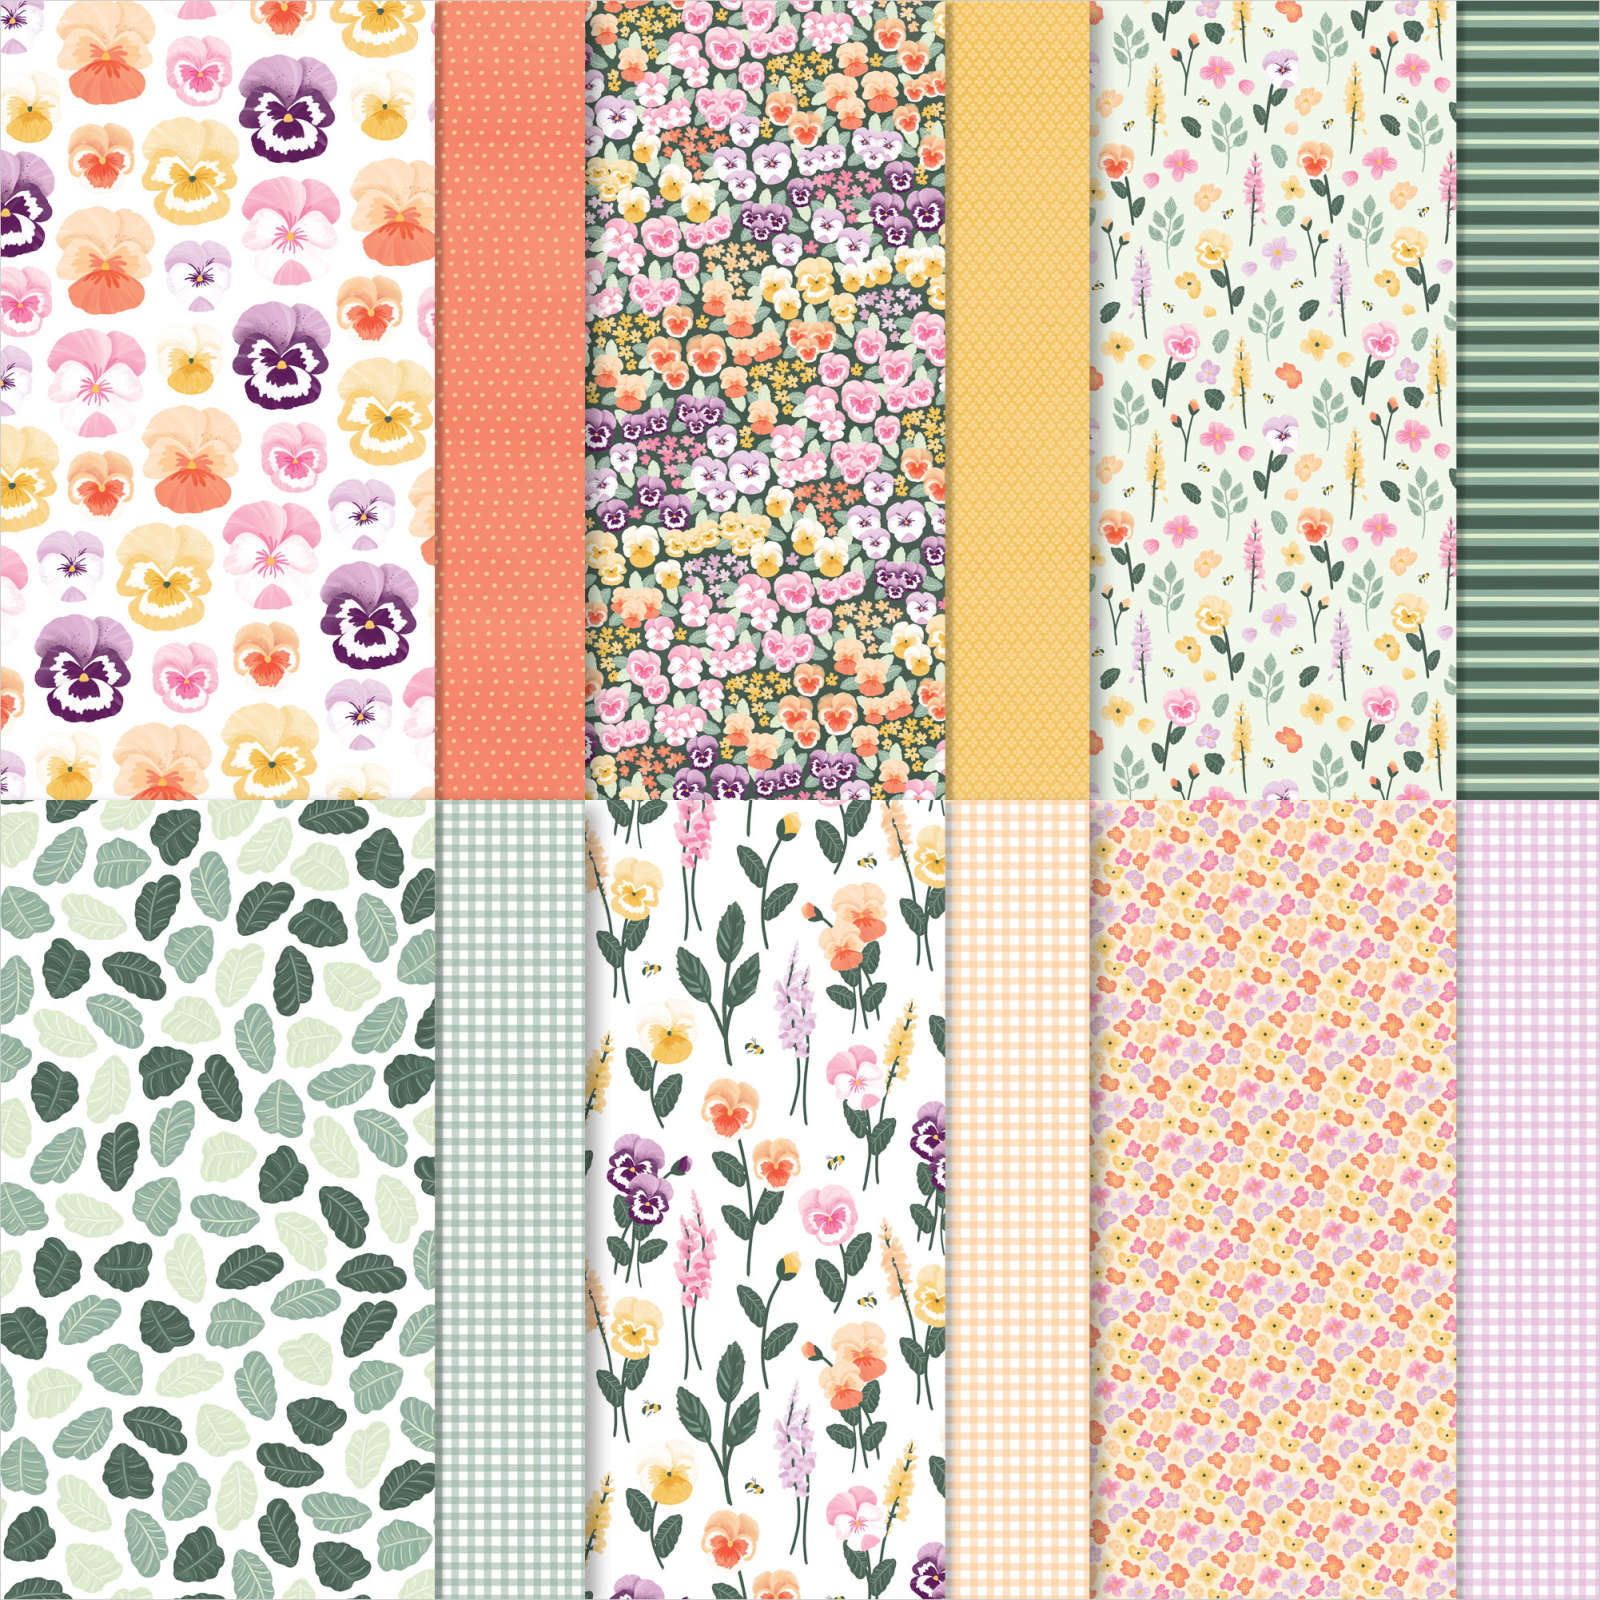
With Easter coming up soon, I thought I would create a simple fun fold to celebrate the occasion. For this card design I chose the Easter Friends stamp set with its wonderful images and sentiments and paired it with the pretty Pansy Petals Designer Series Paper. Isn't the bunny in this stamp set simply adorable? This simple fun fold is easy to create and is a wonderful way to step up a standard card base.
Products Used:
Easter Friends stamp set (item #157737)
Pansy Dies 155680)
Tasteful Labels Dies (item #152886) Retiring
Stitched So Sweetly Dies (item #151690) Retiring
Pansy Petals Designer Series Paper (item #155807) Retiring
Fresh Freesia Cardstock (item #155613)
Basic White Cardstock (item #159276)
Cinnamon Cider Classic Ink Pad (item #153114) Retiring
Soft Sea Foam Classic Ink Pad (item #147102)
Versamark Pad (item #102283)
Metallics Embossing Powders (item #155555)
Brushed Brass Butterflies (item #158136)
Stampin' Dimensionals (item #104430)
Blender Pens (item #102845)
Measurements:
Fresh Freesia Cardstock
Card Base - 5 1/2" x 7 1/2" (Scored at 4 1/4")
Pansy Petals Designer Series Paper
Card Front - 3" x 5 1/4" Side Strip - 1" x 5 1/4"
Two pansies die cut with the Pansy Dies
Basic White Cardstock
Focal Label die cut with the Stitched So Sweetly Dies
Sentiment Label die cut with the Tasteful Labels Dies
This cute fun fold is simple to create using a standard size card base (5 1/2" x 8 1/2") by simply cutting off 1" from the card front so that the base measures 7 1/2" x 5 1/2". You will still score the card base at 4 1/4" to create your fun fold. For the card front, I cut a 5 1/4" x 4" piece of the Pansy Petal Designer Series Paper and then cut a 1" strip off of one side to create two pieces measuring 3" x 5 1/4" and 1" x 51/4". I attached the larger piece to the card front and flipped the strip over so that the reverse side faces up. I attached the strip to the inside Basic White layer along the right side and then attached this layer to the inside of the card base. This way when the card is closed, you have that wonderful contrast between the two designs. For the bunny, I stamped it with Cinnamon Cider Classic ink onto the scalloped rectangle layer and used a Blender Pen to soften and lightly color the image. The Blender Pen helps to reactivate the ink to add that soft color to the image. For the grass, I used Soft Sea Foam Classic ink along the bottom to help ground the image and once again softened it with the Blender Pen. For the sentiment, I heat embossed the image with Gold embossing powder onto the sentiment label. To assemble the card front, I attached both the focal image and the sentiment label with Stampin' Dimensionals. I attached the two die cut pansies (from the designer series paper) to decorate the panels. To finish off the card design, I added several Brushed Brass Butterflies for a touch of bling. 
Thank you for taking the time to visit my blog. I hope that my fun fold card design will help inspire you to create your own beautiful cards and explore the variety of fun fold designs available. There are so many wonderful options to try. 
Now it's time to visit AurĂ©lie's wonderful blog to see what she has created for us. Just click the Next button below to visit her blog or use the Roll Call List to find your way. We would appreciate it if you would leave us a comment and let us know what you liked about our projects. I hope you enjoy the rest of our blog hop.
Roll Call List

If you live in the U.S. and do not have a Stampin' Up! Demonstrator, please contact me and I would be happy to help you with your creative projects. You may also visit my Online Store to place your order and have it shipped to you. 

Until Next Time

Happy Stamping,

Tricia Butts
Independent Stampin' Up! Demonstrator

Like What You See? Visit My Online Store Here

Visit My Facebook Business Page for Updates & Ideas

Click here to Contact Me


Stock Up On Your Favorite Retiring Products
Before They Disappear
Click Below To Visit My Online Store

Final Days To Sign Up
For The April Paper Pumpkin Kit
Click Here To Subscribe By April 10th


Saturday, March 19, 2022

Stamping With Friends Easter/Spring Blog Hop

Welcome to the Stamping With Friends March Blog Hop as we showcase projects for Easter and Spring. Our talented Design Team Members will be sharing their wonderful projects and ideas to help inspire you to create your own beautiful projects for the new season.
For my card design today, I decided to create a Spring themed Easter card using the Easter Friends stamp set from the January-June 2022 Mini Catalog. I paired it with the Color & Contour Bundle, which has some wonderful Spring flower images as well as scalloped rectangles that are perfect for creating the focal layer. For the background, I chose one of the designs from the Hand-Penned Designer Series Paper, which is perfect for soft and pretty cards for Spring. 
Products Used:
Easter Friends stamp set (item #157737)
Color & Contour Bundle (item #158356)
Hand-Penned Designer Series Paper (item #155499)
Thick Basic White Cardstock (item #159229)
Basic White Cardstock (item #159276)
Polished Pink Classic Ink Pad (item #155712)
Pale Papaya Classic Ink Pad (item #155670)
Fresh Freesia Classic Ink Pad (item #155611)
Mint Macaron Classic Ink Pad (item #147106)
Crumb Cake Classic Ink Pad (item #147116)
Daffodil Delight Classic Ink Pad (item #147094)
Memento Tuxedo Black Pad (item #132708)
Versamark Pad (item #102283)
Metallics Embossing Powders (item #155555)
Daffodil Delight Stampin' Blends Combo Pack (item #154883)
Pumpkin Pie Stampin' Blends Combo Pack (item #154897)
Brushed Brass Butterflies (item #158136)
Stampin' Dimensionals (item #104430)
Measurements: 
Thick Basic White Cardstock
Card Base - 8 1/2" x 5 1/2" (Scored at 4 1/4")
Hand-Penned Designer Series Paper
Card Front - 5 1/4" x 4"
Basic White Cardstock
Scalloped Rectangle die cut with Scalloped Contours Dies
4 flowers - 1 each stamped in Pale Papaya, Polished Pink, Fresh Freesia & Daffodil Delight and die cut with the 
Scalloped Contours Dies
Easter chick stamped with Easter Friends stamp set and fussy cut
This cute Easter card is a wonderful way to showcase pretty Spring colors and I love the way the flowers pop against the Mint Macaron striped background created by the Hand-Penned Designer Series Paper. For the focal image, I stamped the cute chick image from the Easter Friends stamp set with Memento Tuxedo Black ink and colored it with the Daffodil Delight and Pumpkin Pie Stampin' Blends Combo Packs. I heat embossed the sentiment with Gold embossing powder onto the scalloped rectangle and stamped the grass with Mint Macaron Classic ink along the bottom left corner to help ground the chick. Using the splatter stamp image from the Color & Contour stamp set, I lightly stamped with Crumb Cake Classic ink, stamping off once to lighten the color, along the bottom edge to create the illusion of the ground. I fussy cut the chick and added it to the bottom left side with Stampin' Dimensionals. To create the card design, I attached the Fresh Freesia and Daffodil Delight flowers to the card front in the top left corner and the Pale Papaya flower to the bottom right corner. I then attached the focal layer to the card front with Stampin' Dimensionals, lining up the the corners with the flowers. I attached the Polished Pink flower to the top left corner of the scalloped rectangle and added a Stampin' Dimensional to attach the top part of the flower to the card front. To complete the card design, I added several of the Brushed Brass Butterflies for a touch of bling. This soft and pretty Easter card is so bright and cheerful and sure to brighten someone's day. 
Thank you for taking the time to visit my blog. I hope that my card design will help inspire you to create your own beautiful projects to celebrate the beginning of Spring. There are so many beautiful products available to help you create your own wonderful designs.
Now it's time to visit Kelly's blog and see what she has created to share with us. Just click the Next button to visit her blog or use the Roll Call List below to find your way. We would appreciate it if you would leave us a comment and let us know what you liked about our projects. I hope you enjoy the rest of our blog hop. 

Roll Call List

If you live in the U.S. and do not have a Stampin' Up! Demonstrator, please contact me and I would be happy to help you with your creative projects. You may also visit my Online Store to place your order and have it shipped to you. 

Until Next Time

Happy Stamping,

Tricia Butts
Independent Stampin' Up! Demonstrator

Like What You See? Visit My Online Store Here

Visit My Facebook Business Page for Updates & Ideas

Click here to Contact Me 


Save 20% With The Savings Are In Bloom Promotion
During The Month Of March
Click Below To Visit My Online Store

Available For A Limited Time
The Amazing Waves Of The Ocean Collection
Click Below For More Details