Wednesday, October 14, 2020

Around The World On Wednesday Blog Hop The World Around Us

It's time to hop along with The Around The World On Wednesday October Blog Hop and this month our theme is "The World Around Us". You will have the opportunity to visit talented Stampin' Up! Demonstrators from around the world as they share their creative projects and ideas to help inspire you.
For my card, I decided to create a mini sampler design featuring the colors and elements of Fall. I used the Beautiful Autumn Bundle and the Gather Together Bundle from the August-December 2020 Mini Catalog. I wanted to create windows with a different Fall element displayed. I used the Pick A Hoot Dies to create the window openings. 
Products Used:
Beautiful Autumn Bundle (item #155189)
Gather Together Bundle (item #153036)
Peek A Hoot Die (item #153573)
Subtle 3D Embossing Folder (item #151775)
Banner Year Bundle (item #155214)
Itty Bitty Greetings stamp set (item #151331)
Early Espresso cardstock
Cinnamon Cider cardstock
Crumb Cake cardstock
Very Vanilla cardstock
Cinnamon Cider Classic Ink Pad
Pear Pizzazz Classic Ink Pad
Cherry Cobbler Classic Ink Pad
Mango Melody Classic Ink Pad
Stampin' Blends Markers
Basic Pearl Jewels
Measurements:
Early Espresso cardstock card base - 8 1/2" x 5 1/2" 
(Scored 4 1/4")
Cinnamon Cider cardstock layer - 5 1/4" X 4"
Crumb Cake cardstock layer - 5" x 3 3/4" 
(die cut with Peek A Hoot Dies and embossed with the Subtle 3D Embossing Folder)
Very Vanilla cardstock layer - 5" x 3 3/4"
Very Vanilla cardstock for stamped images
This card design was a challenge for me and had me thinking outside of my comfort zone. I love the idea that each window shows a different element of Fall, as it reflects the changing view outside of the world outside. It was fun to combine these different bundles with the warm colors of this season. 
Thank you for taking the time to visit my blog today. I hope that my card design helps inspire you to look at the world around you and use it as inspiration for your own projects. There are so many wonderful possibilities to choose from. 

Now it's time to visit Elaine's blog and see what wonderful ideas she has to share with us. Just click the Next button below to visit her blog or use the Roll Call List below to find your way. We would love it if you would leave us a comment and let us know what enjoyed about our projects. I hope you enjoy the rest of our blog hop. 

If you live in the U.S. and do not already have a Stampin' Up! Demonstrator, please contact me and I would be happy to help you with your creative projects. You may also visit my Online Store to place your order and have it shipped to you. 

Until Next Time

Happy Stamping,

Tricia Butts
Independent Stampin' Up! Demonstrator

Like What You See? Visit My Online Store Here

Visit My Facebook Business Page for Updates & Ideas

Click here to Contact Me


Stock Up On Your Favorite Designs
Save 15% On Select Designer Series Paper
During The Month Of October
Click Below To Visit My Online Store

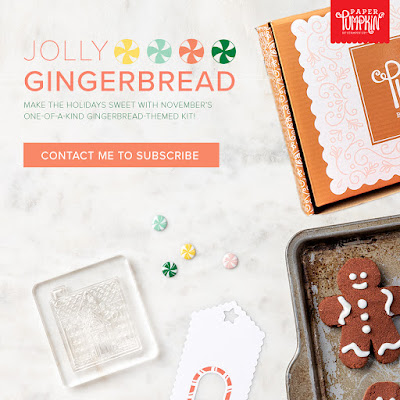
Enjoy Creating With The Sweet November Paper Pumpkin Kit
Click Below To Subscribe By November 10th 


Create Your Own Wonderful Projects For The Holidays
With The August-December 2020 Mini Catalog
Click Below To Visit My Online Store


Tuesday, October 13, 2020

ICS October Blog Hop Designer Series Paper Showcase

Welcome to the ICS October Blog Hop as we showcase the beautiful Designer Series Paper that Stampin' Up! has to offer. You will be visiting with talented Stampin' Up! Demonstrators as they share their projects and ideas to help inspire you. 
For my card design, I have decided to showcase the beautiful Toile Tidings Designer Series Paper (item #150432) combined with the Poinsettia Petals Bundle from the August-December 2020 Mini Catalog. I love the vintage feel of the designs and the traditional Christmas colors that this paper pack has to offer.  
Products Used:
Poinsettia Petals Bundle (item #155148)
Toile Tidings Designer Series Paper (item #150432)
Stitched Shapes Dies (item #152323)
Layering Ovals Dies (item #151771)
Real Red cardstock (item #102482)
Garden Green cardstock (item #102584)
Very Vanilla cardstock (item #101650)
Gold Foil Sheets (item #132622)
Basic Pearl Jewels (item #144219)
Measurements:
Real Red cardstock card base - 8 1/2" x 5 1/2" (Scored at 4 1/4")
Toile Tidings Designer Series Paper layer - 5 1/4" x 4"
Real Red cardstock - For Scalloped Oval and Poinsettia Petals Die Cuts
Garden Green cardstock - For Leaves Die Cuts
Gold Foil - For Poinsettia Center Die Cut
Very Vanilla cardstock - For Stitched Oval Die Cut
The simplicity of this card design is stepped up by the detailed poinsettia petals die cut from Real Red cardstock and leaves die cut from Garden Green cardstock to decorate the sentiment. I added small Basic Pearls to the Gold Foil center of the poinsettia to add a touch of elegance to the design. The sentiment has been heat embossed with Gold Embossing Powder to coordinate with the Gold Foil. This old fashioned Christmas card is easy to duplicate and you also have the option to create it in Garden Green using the opposite side of the designer series paper. During the month of October, you can save 15% on the Toile Tidings Designer Series Paper, during the Designer Series Paper Sale. It is a wonderful opportunity to stock up on your favorite designs or try something new. 
Thank you for taking the time to visit my blog today. I hope that my card design helps inspire you to explore using designer series paper to create your own beautiful projects. Remember that Stampin' Up! is having a sale on select designer series paper during the month of October and the Toile Tidings Designer Series Paper is just one of the beautiful designs that you can save 15%. 

Now it's time to visit Sandra's wonderful blog and see what beautiful designer series paper she is showcasing this month. Just click the Next button below to visit her blog. We would love it if you would leave us a comment and let us know what you enjoyed about our projects. I hope you enjoy the rest of our blog hop. 


If you live in the U.S. and do not already have a Stampin' Demonstrator, please contact me and I would be happy to help you with your creative projects. You may also visit my Online Store to place your order and have it shipped to you. 

Until Next Time

Happy Stamping,

Tricia Butts
Independent Stampin' Up! Demonstrator

Like What You See? Visit My Online Store Here

Visit My Facebook Business Page for Updates & Ideas

Click here to Contact Me


Stock Up On Your Favorite Designs

Save 15% On Select Designer Series Paper

During The Month Of October

Click Below To Visit My Online Store 


Enjoy Creating With The Sweet November Paper Pumpkin Kit

Click Below To Subscribe By November 10th 


Create Your Own Wonderful Projects For The Holidays

With Products From the August-December 2020 Mini Catalog

Click Below To Visit My Online Store


Saturday, October 10, 2020

Colour Combo October Blog Hop


Welcome to the Colour Combo October Blog Hop as we are challenged to use Mossy Meadow, Bermuda Bay and Smoky Slate to create our project this month. You will be visiting with talented Stampin' Up! Demonstrators from around the world as they share their ideas to help inspire you.
This month's color combination was quite a challenge and I decided to create a Winter themed card design using the Snowflake Wishes stamp set from the August-December 2020 Mini Catalog. I combined it with dies from the Snow Globe Scenes Dies and the In The Woods Dies to help create the Winter Scene as the focal image. I think that this design would work well as a masculine card for a variety of occasions. 
Products Used:
Snowflake Wishes stamp set (item #153444)
In The Woods Dies (item #151809)
Snow Globe Scenes Dies (item #150655)
Layering Circles Dies (item #151770)
Bermuda Bay cardstock (item #131197)
Mossy Meadow cardstock (item #133676)
Whisper White cardstock (item #100730)
Smoky Slate Classic Ink Pad (item #131202)
Bermuda Bay Classic Ink Pad (item #147096)
Bermuda Bay Stampin' Blends Combo (item #154878)
Clear Wink Of Stella Glitter Brush (item #141897)
Basic Rhinestone Jewels (item #144220)
Sponge Daubers (item #133773)
Stampin' Dimensionals (item #104430)
Stampin' Seal (item #152813)
Measurements:
Bermuda Bay cardstock card base - 8 1/2" x 51/2" (scored at 4 1/4")
Mossy Meadow cardstock layer - 4" x 5 1/4"
Whisper White cardstock layer - 3 3/4" x 5"
Bermuda Bay cardstock for circle die cut
Whisper White cardstock for snow
Mossy Meadow cardstock for trees die cut
The key to this card design is in the layers. I attached the Whisper White cardstock layer to the Mossy Meadow cardstock layer with Stampin' Seal and then added it to the Bermuda Bay cardstock card base using Stampin' Dimensionals. To create the focal image, I die cut a large circle from Bermuda Bay cardstock using the Layering Circles Dies and then die cut another circle from Whisper White cardstock and used the curved die from the In The Woods Dies to create the two layers for the snow. Using Bermuda Bay Classic ink, I sponged the edges of the snow layers with a Sponge Dauber to add a touch of color. The first layer of snow was attached to the Bermuda Bay circle with Stampin' Seal and then I attached the trees which were die cut from Mossy Meadow cardstock using the Snow Globe Scenes Dies with Stampin' Seal to the snow layer. I attached the second layer of snow with Stampin' Dimensionals to add dimension to the design. The sentiment and snowflakes were stamped with Smoky Slate Classic ink and I added Basic Rhinestones colored with the Light Bermuda Bay Stampin' Blends Marker for a touch of bling and added Clear Wink of Stella to the trees for shimmer. 
Thank you for taking the time to visit my blog today. I hope that my card design will inspire you to try this color combination to help you create your own projects. 

Now it's time to visit Sigrid's blog and see what she has created with this month's color combination. Just click on the Next button below to visit her blog. Please leave us a comment and let us know what you enjoyed about our projects. I hope you enjoy the rest of our blog hop. 


If you live in the U.S. and do not already have a Stampin' Up! Demonstrator, please contact me and I would be happy to help you with your creative projects. You may also visit my Online Store to place your order and have it shipped to you. 

Until Next Time

Happy Stamping,

Tricia Butts
Independent Stampin' Up! Demonstrator

Like What You See? Visit My Online Store Here

Visit My Facebook Business Page for Updates & Ideas

Click here to Contact Me


Stock Up On Your Favorite Designs
Save 15% On Select Designer Series Paper
During The Month Of October
Click Below To Visit My Online Store

The New Stampin' Cut & Emboss Machine
Is Now Available
Click Below To Order

Create Your Own Wonderful Projects For The Holidays
With Projects From The August-December 2020 Mini Catalog
Click Below To Visit My Online Store

The Joy Of Sets October Blog Hop Harvest Time

It's time to hop along with The Joy Of Sets October Blog Hop as we showcase Harvest Time for this month's theme. We will be sharing ideas and projects to inspire you to create your own Autumn and Harvest themed projects to celebrate the new season. 
When I think of Fall I think the changing leaves and fields of pumpkins that are common here in Colorado at this time of year. I decided to create a card design that reflected both of these things using the beautiful Gilded Autumn Specialty Designer Series Paper combined with the Beautiful Autumn stamp set, both from the August-December 2020 Mini Catalog. I love the Gold Foil detail in this pretty paper and the warm colors that are perfect for this season. 
Products Used:
Beautiful Autumn stamp set
Gilded Autumn Specialty Designer Series Paper
Brushed Metallic cardstock 
Cajun Craze cardstock
Very Vanilla cardstock
Layering Circles Dies
Gathered Leaves Dies
Gold Glitter Enamel Dots
Gold Embossing Powder
Measurements:
Cajun Craze cardstock card base - 8 1/2" x 5 1/2" 
(Scored 4 1/4")
Gilded Autumn Specialty Designer Series Paper layer  
5 1/4" x 4"
Very Vanilla cardstock for Circle die cut
Brushed Metallic cardstock (gold)  
for Circle die cut and detailed leaf die cut

This card design is simple to create but has a beautiful, elegant look to it. The Brushed Metallic cardstock coordinates with the foil details in the background paper and really steps up the design. The detailed leaf was die cut with one of the leaf dies from the Gathered Leaves Dies and I die cut it from the center of the Brushed Metallic cardstock circle to save on cardstock. The sentiment is from the Beautiful Autumn stamp set and has been heat embossed with Gold Embossing Powder to coordinate with the rest of the design. I added small Gold Glitter Enamel Dots to add a touch of bling without overwhelming the card design. 
Thank you for taking the time to visit my blog today. I hope that my card design inspires you to create your own wonderful projects to celebrate the season using designer series paper. It is a wonderful way to create beautiful cards quickly and simply. 

Now it's time to visit Nigezza's wonderful blog and see what she has to share with us this month. Just click the Next button below to visit her blog or use the Roll Call List below to find your way. I hope that you will leave us a comment and let us know what you enjoyed about our Harvest projects. Enjoy the rest of our blog hop. 


Until Next Time

Happy Stamping,

Tricia Butts
Independent Stampin' Up! Demonstrator

Like What You See? Visit My Online Store Here

Visit My Facebook Business Page for Updates & Ideas

Click here to Contact Me


Ink. Stamp. Share. October Special Blog Hop Stamper's Choice

Welcome to the Ink. Stamp. Share. October Special Blog Hop as we share what projects we are currently working on. You will be visiting with Stampin' Up! Demonstrators from around the world as they share their ideas to help inspire you. 
Recently we celebrated World Card Making Day and I thought it was a perfect opportunity to create some fun and simple Christmas cards using the Gnome For The Holidays stamp set (item #153322) with the Toile Tidings Designer Series Paper (item #150432) from the August-December 2020 Mini Catalog. These cute gnomes are so much fun to color with Stampin' Blends Markers and this design is easy to duplicate to create multiple cards to send out to family and friends. 
Supplies Used:
Gnome For The Holiday stamp set (item #153322)
Toile Tidings Designer Series Paper (item #150432)
Layering Ovals Dies (item #151771)
Classic Label Punch (item #141491)
Real Red cardstock (item #102482)
Garden Green cardstock (item #102584)
Thick Very Vanilla cardstock (item #144237)
Very Vanilla cardstock (item #101650)
Garden Green Classic Ink Pad (item #147089)
Memento Tuxedo Black Ink Pad (item #132708)
Stampin' Blends Markers (assorted colors)
Measurements (card #1):
Real Red cardstock card base - 8 1/2" x 5 1/2" 
(Scored at 4 1/4")
Toile Tidings Designer Series Paper 
(Garden Green Striped) - 5 1/4" x 4"
Very Vanilla cardstock - for Oval die cuts
Real Red cardstock - for Scalloped Oval die cuts
Measurements (card #2):
Thick Very Vanilla cardstock card base - 8 1/2" x 5 1/2" 
(scored at 4 1/4")
Toile Tidings Designer Series Paper 
(Real Red Striped) - 5 1/4" x 4"
Very Vanilla cardstock - for Oval die cut and sentiment label
Garden Green cardstock - for Scalloped Oval die cut
Both of these clean and simple card designs are created the same with the exception of the sentiment label. The fun thing about the Toile Tidings Designer Series Paper patterns, is that one side is Real Red and the other side is Garden Green. So it is simply a matter of choosing which side you want facing up when creating your card design. The gnome images were stamped onto the Very Vanilla cardstock oval die cuts and colored with Stampin' Blends Marker. I went with traditional Christmas colors to go with the designer series paper. I layered the focal images onto the scalloped oval die cuts and attached them with Stampin' Seal Adhesive and attached them to the card fronts. 

For the sentiments, I chose to stamp them both onto Very Vanilla cardstock with Garden Green Classic ink using images from the Gnome For The Holidays stamp set. I punched out the smaller sentiment using the Classic Label Punch and attached it below the focal image on the Real Red designer series paper. For the other sentiment, I die cut it using the Layering Ovals Dies and added a Garden Green cardstock scalloped oval as a matte. I attached this sentiment to the front of the Garden Green striped designer series paper. I decided not to add any embellishments so that the design would be flat and easy to mail but it would simple to add some Basic Rhinestones or Basic Pearls if  you wanted to add a little bling to decorate. 
Thank you for taking the time to visit my blog today. I hope that my card designs help inspire you to explore creating your own Christmas cards using designer series paper. Don't forget to take advantage of the great sale during October and save 15% on select packs of designer series paper. There are so many wonderful designs and the Toile Tidings Designer Series Paper is just one of the amazing designs to choose from. 

Now it's time to visit Lisa's blog and see what she has to share with us. Just click the Next button below or use the Roll Call List below to find your way. We would love it if you would leave us a comment and let us know what you enjoyed about our projects. I hope that you enjoy the rest of our blog hop. 


Roll Call

Jo Blackman

Gez Carpenter

Kim Price

Libby Fens

Karen Egan

Mo Rootes

Cindy Mitchell-Clark

Laura Mackie

Jill Chapman

Annette Elias

Tricia Butts

Lisa Kmiec

Rebecca-Jo Unwin


If you live in the U.S. and do not already have a Stampin' Up! Demonstrator, please contact me and I would be happy to help you with your creative projects. You may also visit my Online Store to place your order and have it shipped to you. 

Until Next Time

Happy Stamping,

Tricia Butts
Independent Stampin' Up! Demonstrator

Like What You See? Visit My Online Store Here

Visit My Facebook Business Page for Updates & Ideas

Click here to Contact Me


Stock Up On Your Favorite Designs

Save 15% On Select Designer Series Paper

During The Month Of October

Click Below To Visit My Online Store


Last Day To Sign Up!
Get An Early Start On Your Christmas Cards
With The October Paper Pumpkin Kit
Sign Up Before 11:59pm October 10th
To Receive This Kit

Create Your Own Wonderful Projects For The Holidays
With Products From The August-December 2020 Mini Catalog
Click Below To Visit My Online Store