Showing posts with label Watercolor World stamp set. Show all posts

Friday, June 14, 2024

Crafty Collaborations Monochromatic Color Challenge Week 24 - Early Espresso

It's Week 24 of the Crafty Collaborations Monochromatic Color Challenge and this week we are showcasing Early Espresso from the Neutrals Collection. I love this wonderfully rich dark brown and I am so excited to share with you the card design I came up with for this week's challenge.
My card this week is a fun masculine design featuring the Adventurous Sky Bundle. I wanted to create a worn, vintage look to this design and I used the Watercolor World background stamp to create my background and added some texture with the Painted Texture 3D Embossing Folder. I used Early Espresso Classic ink to create the different layers of color that help to showcase the versatility of this wonderful color. This card design would be great for a Father's Day card, masculine birthday or graduation card. 
Products Used:
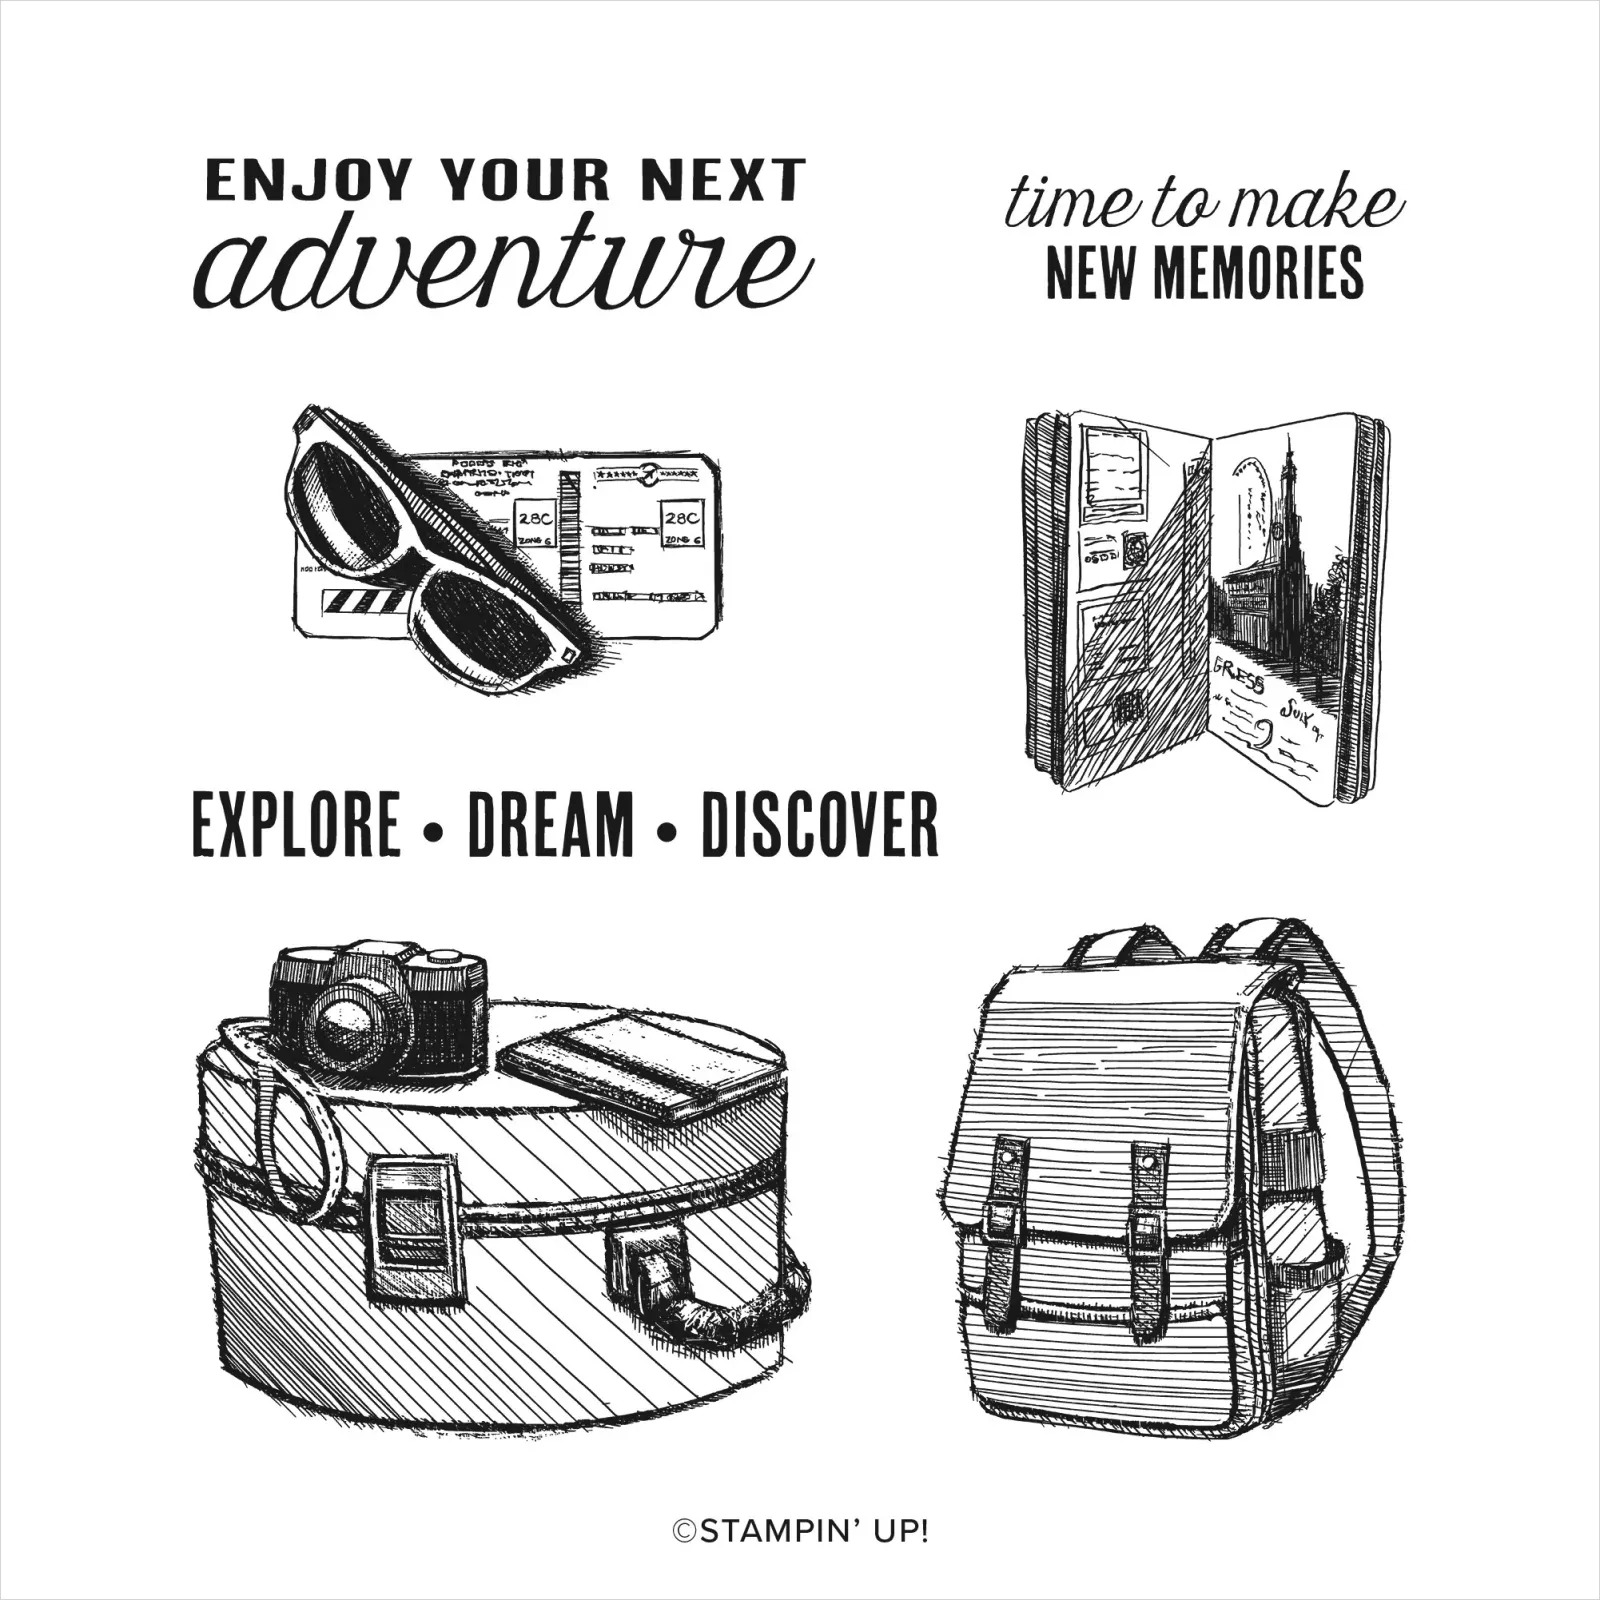
Adventurous Sky Bundle (item #163447)
Watercolor World stamp set (item #160708)
Deckled Circles Dies (item #162286)
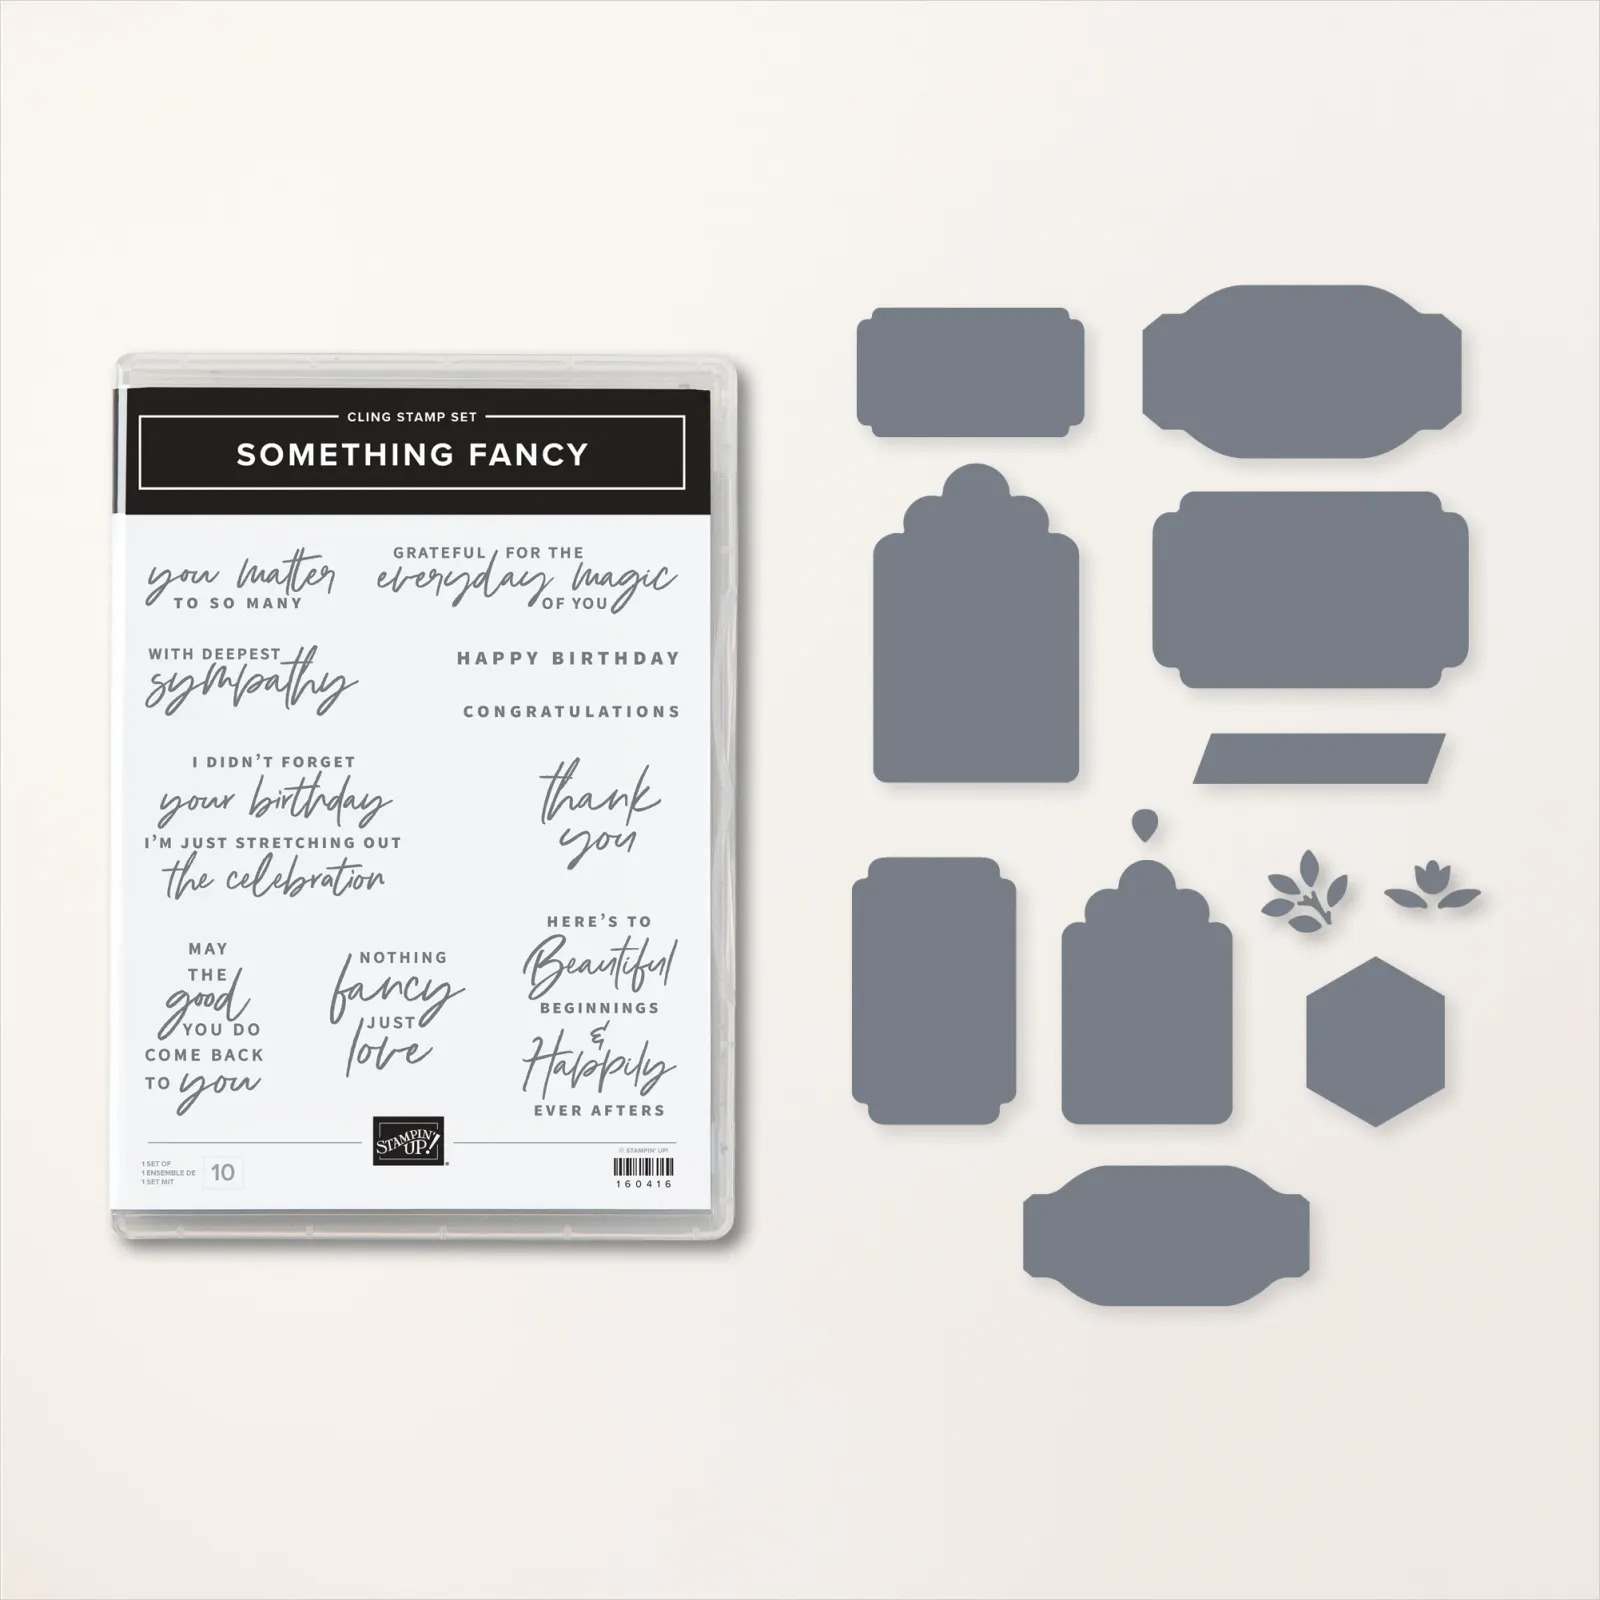
Something Fancy Dies (item #160424)
Painted Texture 3D Embossing Folder (item #154317)
Early Espresso Cardstock (item #119686)
Very Vanilla Cardstock (item #101650)
Early Espresso Classic Ink Pad (item #147114)
Neutrals Adhesive Backed Sequins (item #161627)
Blender Pens (item #102845)
Sponge Daubers (item #133773)
Stampin' Dimensionals (item #104430)
Measurements:
Early Espresso Cardstock
Card Base - 5 1/2" x 8 1/2" (Scored at 4 1/4")
Medium Circle die cut with the Deckled Circles Dies 
Very Vanilla Cardstock
Card Front - 5 1/4" x 4" Embossed with the Painted Texture 3D Embossing Folder
Plane image stamped and die cut with the Adventurous Sky Bundle 
Sentiment Label die cut with the Something Fancy Dies
To create this beautiful card, I chose to use the Watercolor World stamp set for my background and I stamped the image with Early Espresso Classic ink onto the Very Vanilla cardstock card front. I then embossed the layer with the Painted Texture 3D Embossing Folder to give the layer the look of wrinkled parchment paper and then added some Early Espresso ink around the edges and over the raised lines using a Sponge Dauber to give the background a distressed look. For the plane image, I stamped it with Early Espresso Classic ink onto Very Vanilla cardstock and then used a Blender Pen to color the image using the ink from the stamped image to add soft color. I also stamped the sentiment onto the Very Vanilla sentiment label using Early Espresso Classic ink. To assemble to card, I added the Early Espresso Deckled Circle to the card front and the layered the plane and sentiment onto using Stampin' Dimensionals. To complete the card, I added several of the Neutrals Adhesive Backed Sequins for a touch of bling without being overwhelming. I love how Early Espresso works with Very Vanilla, especially when you are looking to create a project with a vintage feel to it. 
Thank you for taking the time to visit my blog. I hope that my card design will help inspire you to explore using Early Espresso in your creative projects in the future. There are so many wonderful options available to help spark your creativity.
Please take the time to check out this week's Monochromatic Insta Hop to see the amazing projects showcasing Early Espresso. You can start here on my Instagram account. We would love it if you would leave us a comment and let us know what you liked about our projects. 

If you live in the U.S. and do not have a Stampin' Up! Demonstrator, please contact me and I would be happy to help you with your creative projects. You may also visit my Online Store to place your order and have it shipped to you. 

Until Next Time

Happy Stamping,

Tricia Butts
Independent Stampin' Up! Demonstrator

Like What You See? Visit My Online Store Here

Visit My Facebook Business Page for Updates & Ideas

Click here to Contact Me


Save An Extra 10% On Select Bundles
Plus 10% Off Stampin' Cut & Emboss Machines 
Click Below To Shop Now


Wednesday, June 14, 2023

Around The World On Wednesday June Blog Hop Let's Go On An Adventure

Welcome to the Around The World On Wednesday June Blog Hop as we go on an adventure to create fun and inspiring projects. Our wonderful Design Team will be sharing their projects and ideas to help spark your creativity and hopefully inspire you to go on your own creative adventure. 
When I think about adventure, my mind goes to traveling and exploring new places. I have been fortunate to have traveled and lived in various places around the world, so this is what influenced my card design. For my card design today, I wanted to use the new Next Destination stamp set in the 2023-2024 Annual Catalog. I love the images and sentiments in this stamp set and I thought it would be perfect for creating cards for Graduations and Retirements. The card design I created has a vintage feel to it and would be a perfect masculine card. I paired it with the Watercolor World stamp to create the background for the card design and used Pecan Pie, Wild Wheat, Early Espresso and Very Vanilla with a touch of Gold to step up the design. 
Products Used:
Next Destination stamp set (item #161427)
Watercolor World stamp set (item #160708)
Stylish Shapes Dies (item #159183)
Early Espresso Cardstock (item #119686)
Pecan Pie Cardstock (item #161717)
Very Vanilla Cardstock (item #101650)
Early Espresso Classic Ink Pad (item #147114)
Pecan Pie Classic Ink Pad (item #161665)
Versamark Pad (item #102283)
Metallics Embossing Powders (item #155555)
Pecan Pie Stampin' Blends Combo Pack (item #161674)
Crumb Cake Stampin' Blends Combo Pack (item #154882)
Smoky Slate Stampin' Blends Combo Pack (item #154904)
Wild Wheat Stampin' Blends Combo Pack (item #161661)
Gray Granite Stampin' Blends Combo Pack (item #154886_
Color Lifter (item #144608)
Brushed Metallic Adhesive Backed Dots (item #156506)
Stampin' Dimensionals (item #104430)
Measurements:
Early Espresso Cardstock
Card Base - 8 1/2" x 5 1/2" (Scored at 4 1/4")
Large Stitched Square die cut with the Stylish Shapes Dies
Sentiment Label die cut with the Stylish Shapes Dies
Pecan Pie Cardstock 
Card Front - 5 1/4" x 4"
Very Vanilla Cardstock 
Square - 2 5/8" x 2 5/8"
The images in the Next Destination stamp set work perfectly for creating a card with theme of going on a journey, starting a new adventure. I love the sketched style of the images and wanted to create an aged, worn look to my card similar to an old notebook with a vintage map on the cover. Pecan Pie is a wonderful, warm brown and it works beautifully with Early Espresso. I stamped the Watercolor World stamp with Pecan Pie Classic ink onto the Pecan Pie card front to create the look of a vintage world map. The focal image was stamped with Early Espresso Classic ink onto a Very Vanilla cardstock square and I colored the image with Stampin' Blends Markers. I used the Light Gray Granite Stampin' Blends Marker to create the background around the image and blended it with the Color Lifter to soften and distress the background. The sentiment was heat embossed with Gold embossing powder onto the Early Espresso cardstock label and I embellished the label with two of the Brushed Metallic Adhesive Backed Dots. I popped both the focal image and the sentiment label up using Stampin' Dimensionals, with the sentiment label overlapping the bottom right side of the focal square. I love how this card design turned out and I feel like it is perfect for someone preparing for the next stage in their life, their next adventure. 
Thank you for taking the time to visit my blog. I hope that my card design will help inspire you to explore creating your own beautiful projects. There are so many wonderful options in the new 2023-2024 Annual Catalog. 
Now it's time to visit Teri's Blog and see what adventures she has to share with us. Just click on the Next button below to visit her blog or use the Roll Call List below to find your way. We would appreciate it if you would leave us a comment and let us know what you enjoyed about our projects. 

Roll Call List

If you live in the U.S. and do not have a Stampin' Up! Demonstrator, please contact me and I would be happy to help you with your creative projects. You may also visit my Online Store to place your order and have it shipped to you. 

Until Next Time

Happy Stamping,

Tricia Butts
Independent Stampin' Up! Demonstrator

Like What You See? Visit My Online Store Here

Visit My Facebook Business Page for Updates & Ideas

Click here to Contact Me


Save 15% on Select Designer Series Paper 
During The Month of June
Click Below To Shop From My Online Store

Take Advantage of the Starter Kit+
Get $155 Worth of Products For Only $99
During The Month of June
Click Below For More Details

Explore Your Creativity
With The 2023-2024 Annual Catalog
Click Below To Visit My Online Store


Saturday, January 7, 2023

Stamping With Friends Emboss Resist Technique Blog Hop

Welcome to the Stamping With Friends Blog Hop as we start off the New Year with a fun technique. This month we have been challenged to create a project using the Emboss Resist technique and I can't wait to see what my fellow Design Team members have to share with us this month. This is one of my favorite techniques and I can't wait to share my project with you.
For my card design, I chose to use the new Watercolor World stamp from the new January-April 2023 Mini Catalog to create my background. My emboss resist has a twist to it, as I stamped the image first with ink and then heat embossed the image with Clear embossing powder to create the resist as I sponged on the ink for the oceans. I love how it turned out and it makes a great masculine card for a variety of occasions.
Products Used:
Watercolor World stamp set (item #160708)
Something Fancy Bundle (item #160425)
Starry Sky Cardstock (item #159263)
Basic White Cardstock (item #159276)
Crumb Cake Classic Ink Pad (item #147116)
Old Olive Classic Ink Pad (item #147090)
Tahitian Tide Classic Ink Pad (item #159210)
Orchid Oasis Classic Ink Pad (item #159214)
Versamark Pad (item #102283)
Basics Embossing Powders (item #155554)
Metallics Embossing Powders (item #155555)
Rustic Metallic Adhesive Backed Dots (item #159082)
Stamparatus (item #146276)
Sponge Daubers (item #133773)
Blending Brushes (item #153611)
Mini Stampin' Dimensionals (item #144108)
Measurements:
Starry Sky Cardstock
Card Base - 8 1/2" x 5 1/2" (Scored at 4 1/4")
Sentiment Label die cut with the Something Fancy Dies
Basic White Cardstock
Card Front - 5 1/4" x 4"
To create the background for this card, I stamped the world image several times to create the emboss resist. I used the Stamparatus so that I could stamp the image multiple times in the same position, using different inks, to create the design. First, I stamped the image using Crumb Cake Classic ink and then I sponged some Old Olive Classic ink onto the lighter areas using a Sponge Dauber, to create more depth and dimension. Next, I stamped the image over the top of the existing Crumb Cake stamped image using Versamark ink and then heat embossed the image with Clear embossing powder. This creates a clear coating over the original stamped image so that it will resist the ink when I sponge the oceans. To create the oceans, I gently sponged some Old Olive ink around the edges of some of the continents to create some contrast. Next, I sponged the card front with Tahitian Tide Classic ink using a Blending Brush, building up layers of color over the embossed image. To finish off the background, I gently sponged some Orchid Oasis Classic ink around the edges of the card front and gently over the embossed area to deepen the color of the oceans. Using a tissue, I wiped the card front to remove the excess ink from the embossed image to make it pop. To create the sentiment, I used my new favorite bundle, Something Fancy, and stamped the sentiment with Versamark onto a scrap of Starry Sky cardstock and then heat embossed it with Gold embossing powder. I die cut the sentiment using the coordinating die from the Something Fancy Dies from the bundle, and attached it to the card front with Mini Stampin' Dimensionals. To complete the card design, I added two small Rustic Metallic Adhesive Backed Dots to embellish the sentiment label. I love how the Starry Sky cardstock makes the card front pop and the Gold embossing for the sentiment just helps step up the design to the next level. 
Thank you for taking the time to visit my blog. I hope that my card design will help inspire you to give this fun technique a try and create your own beautiful projects. There are so many wonderful possibilities to explore. 
Please take the time to visit with my fellow Design Team members and share some love by leaving them a comment, letting them know what you love about their projects. Just click on the links in the Roll Call List to visit their blogs. I hope you enjoy the rest of our blog hop.

If you live in the U.S. and do not have a Stampin' Up! Demonstrator, please contact me and I would be happy to help you with your creative projects. You may also visit my Online Store to place your order and have it shipped to you. 

Until Next Time

Happy Stamping,

Tricia Butts
Independent Stampin' Up! Demonstrator

Like What You See? Visit My Online Store Here

Visit My Facebook Business Page for Updates & Ideas

Click here to Contact Me


Celebrate The New Year
With The January-April 2023 Mini Catalog
Click Below To Visit My Online Store

Earn Free Exclusive Products
During Sale-a-bration 2023
Click Below For More Details

Join The Stampin' Up Family
Choose From 3 Amazing Options
Click Below For More Details