Showing posts with label Snowflake Splendor Designer Series Paper. Show all posts

Wednesday, December 9, 2020

New At SU December Blog Hop Warm & Cozy


Welcome to the New At SU December Blog Hop as we share projects and ideas with the theme, "Warm & Cozy". As the days get colder, it's the perfect theme for creating projects to send to friends and family. You will be visiting with talented Stampin' Up! Demonstrators from around the world as they share their creative ideas and projects to help inspire you.
Today I thought I would share a fun Winter themed card design featuring retiring products from the August-December 2020 Mini Catalog. I love the Freezin' Fun Bundle (item #155176) with its cute little critters and it works perfectly with the beautiful Snowflake Splendor Designer Series Paper (item #153512) to create beautiful clean and simple card designs. 
Products Used:
Freezin' Fun Bundle (item #155176)
Snowflake Splendor Designer Series Paper (item #153512)
Winter Snow Embossing Folder (item #153577)
Stitched Shapes Dies (item #152323)
Layering Circles Dies (item #151770)
Classic Label Punch (item #141491)
Pacific Point Cardstock (item #111350)
Pool Party Cardstock (item #122924)
Whisper White Cardstock (item #100730)
Memento Tuxedo Black Ink Pad (item #132708)
White Embossing Powder (item #109132)
Stampin' Blends Markers
Measurements:
Pacific Point Cardstock Card Base - 8 1/2" x 5 1/2" 
(Scored at 4 1/4")
Snowflake Splendor Designer Series Paper Layer - 5 1/4" x 4"
Pacific Point Cardstock 
- for Scalloped Circle die cut with Layering Circles Dies
- for sentiment label punched with the Classic Label Punch
Pool Party Cardstock - for Stitched Circle die cut with the Stitched Shapes Dies
Whisper White Cardstock - for stamped image
This clean and simple card design is suitable for a variety of occasions and is easy to create in multiples to add to your card stash. The designer series paper layer has been attached to the card base with Stampin' Seal Adhesive. The Pool Party circle has been embossed with the Winter Snow Embossing Folder to add detail to the background and was attached to the Pacific Point scalloped circle with Stampin' Seal Adhesive. The focal image was stamped onto Whisper White cardstock with Memento Tuxedo Black ink and colored with a variety of Stampin' Blends Markers. I used the coordinating dies to die cut the image and attached it to the embossed Pool Party circle with Stampin' Dimensionals. The sentiment was stamped onto a strip of Pacific Point cardstock and heat embossed with White Embossing Powder. I punched it out using the Classic Label Punch. To assemble to card I attached both the focal image and sentiment to the card front with Stampin' Seal Adhesive. I chose not to add any bling or ribbon because I preferred the clean and simple look of this design. The Snowflake Splendor Designer Series Paper, Freezin' Fun Bundle and Winter Snow Embossing Folder are all retiring and are available while supplies last. 
Thank you for taking the time to visit my blog today. I hope that my card design helps inspire you to create your own fun projects to warm the hearts of family and friends during these cold weather months.  Take advantage of the great savings during the Year-End Closeout Sale to stock up on your favorite products before they disappear. 

Now it's time to visit Jeannette's blog and see what she has to share with us. Just click the Next button to visit her blog or use the Roll Call List below to find your way. We would love it if you would leave us a comment and let us know what you enjoyed about our projects. I hope that you enjoy the rest of our blog hop. 


If you live in the U.S. and do not already have a Stampin' Up! Demonstrator, please contact me and I would be happy to help you with your creative projects. You may also visit my Online Store to place your order and have it shipped to you. 

Until Next Time

Happy Stamping,

Tricia Butts
Independent Stampin' Up! Demonstrator

Like What You See? Visit My Online Store Here

Visit My Facebook Business Page for Updates & Ideas

Click here to Contact Me


Stampin' Up!'s Giant Year-End Closeout Sale Has Arrived
Stock Up On Your Favorite Products
From The August-December 2020 Mini Catalog
Before They Disappear
Click Below To Visit My Online Store


The Clearance Rack Has Been Refreshed!
Save Up To 60% On Retired & Discontinued Products
While Supplies Last
Click Below To Visit My Online Store


Last Days To Sign Up
For The December Paper Pumpkin Kit
Click Below To Subscribe By December 10th


Tuesday, November 10, 2020

ICS November Blog Hop Christmas Is Coming

Welcome to the ICS November Blog Hop as we showcase Christmas cards with the theme "Christmas Is Coming". You will be visiting with talented Stampin' Up! Demonstrators as they share their ideas and projects to help inspire you. 
The first time I saw the August-December 2020 Mini Catalog, I fell in love with the Flight of Fancy stamp set (item #153410) and when I was deciding on my card design for this hop, I just knew I had to use this set. The angel image is so sweet and it gives me this feeling of hope, which is something we all need in this crazy year. I paired this stamp set with the Snowflake Splendor Designer Series Paper (item #153512) and I loved how this pretty paper provided me with the color combination for this design. As this stamp set is an image only set, I chose a sentiment from the Poinsettia Petals stamp set (item #153475) and I just love the beautiful fonts in this set. 
Products Used:
Flight Of Fancy stamp set (item #153410)
Snowflake Splendor Designer Series Paper (item #153512)
Poinsettia Petals stamp set (item #153475)
Ornate Frames Dies (item #150664)
Layering Ovals Dies (item #151771)
Snowflake Splendor 1/4" Ribbon (item #153548)
Basic Rhinestone Jewels (item #144220)
Pacific Point Cardstock (item #111350)
Whisper White Cardstock (item #100730)
Smoky Slate Classic Ink Pad (item #131202)
White Embossing Powder (item #109132)
Stampin' Blends Markers 
Measurements:
Pacific Point Cardstock Card Base -  8 1/2" x 5 1/2" 
(Scored at 4 1/4")
Snowflake Splendor Designer Series Paper Layer - 5 1/4" x 4"
Pacific Point Cardstock for Scalloped Oval Die Cut 
and Label Die Cut
Whisper White Cardstock for Oval Die Cut
This fun Christmas card design was so much fun to create. I loved coloring the stamped image with the Stampin' Blends Markers using colors that coordinate with the Snowflake Splendor Designer Series Paper. I stamped the image using Smoky Slate Classic ink so that the lines would not be so harsh. I love that the Snowflake Splendor Ribbon adds just a touch of sparkle to the background and the Basic Rhinestones add a touch of bling. In case you were wondering, I added an extra star near the Angel because I had a small ink mark there that was really bothering me and adding that star meant I had 5 stars all together, which made me feel that it was more balanced. I love that the label fits along the bottom and almost gives a snow globe appearance to the image. This card design just makes me happy when I look at it and I hope that the person that receives it will feel the same way when they receive it. 
Thank you for taking the time to visit my blog today. I hope that my Christmas card design will help inspire you to create your own beautiful cards to send to family and friends. There are so many wonderful products in the August-December 2020 Mini Catalog to choose from to create your own unique design. 
Now it's time to visit Cheryl's wonderful blog and see what ideas she has to share with us this month. Just click the link below to visit her blog. We would love it if you would leave us a comment and let us know what you enjoyed about our projects. I hope that you enjoy the rest of our blog hop. 

If you live in the U.S. and do not already have a Stampin' Up! Demonstrator, please contact me and I would be happy to help you with your creative projects. You may also visit my Online Store to place your order and have it shipped to you. 

Until Next Time

Happy Stamping,

Tricia Butts
Independent Stampin' Up! Demonstrator

Like What You See? Visit My Online Store Here

Visit My Facebook Business Page for Updates & Ideas

Click here to Contact Me


Create Amazing Projects
With Curvy Celebrations
Click Below To Visit My Online Store


Last Day To Sign Up
For The November Paper Pumpkin Kit
Click Below To Subscribe

Create Beautiful Holiday Projects
With Products From The August-December 2020 Mini Catalog
Click Below To Visit My Online Store

Sunday, November 1, 2020

We Create November Blog Hop Bundle Up

It's the start of November which means it's time to hop with the We Create Blog Hop team This month our theme is "Bundle Up" and you will have the opportunity to visit with talented Stampin' Up! Demonstrators as they share their wonderful projects and ideas to help inspire you. 
The weather is cooling down with the changing of the seasons and we have already had two snow storms so far here in Colorado. So I decided to create a fun Winter themed card using the Freezin' Fun Bundle (item #155176) combined with the beautiful Snowflake Splendor Designer Series Paper (item #153512) from the August-December 2020 Mini Catalog. I chose my color combination for the pretty snowflake background and chose Night of Navy, Highland Heather and Whisper White for a crisp clean and simple design. 
Products Used:
Freezin' Fun Bundle (item #155176)
Snowflake Splendor Designer Series Paper (item #153512)
Layering Circles Dies (item #151770)
Layering Ovals Dies (item #151771)
Snowflake Splendor 1/4" Ribbon (item #153548)
Night of Navy cardstock (item #100867)
Whisper White cardstock (item #100730)
Seaside Spray Classic Ink Pad (item #150085)
Highland Heather Classic Ink Pad (item #147103)
Clear Wink of Stella Glitter Brush (item #141897)
Measurements:
Night Of Navy cardstock card base - 8 1/2" x 5 1/2" 
(scored at 4 1/4")
Snowflake Splendor Designer Series Paper layer - 5 1/4" x 4"
Whisper White cardstock - for die cuts and images
Night Of Navy cardstock - for die cuts
This card design is simple to create and I love how easy the images in the Freezin' Fun stamp set are to color and I stamped the skiing bunny image with Memento Tuxedo Black ink onto Whisper White cardstock. I chose to use a variety of Stampin' Blends Markers to color this sweet little bunny and die cut it with the coordinating die from the Freezin' Friends Dies. I sponged the Whisper White circle that I die cut using the Layering Circles Dies, using Seaside Spray and Highland Heather Classic Ink Pads and a Stampin' Sponge. I attached the snow that I created using part of a Whisper White cardstock circle that I die cut using the slope die from the Freezin' Friends Dies and attached to sponged circle. I added the die cut bunny image with Mini Stampin' Dimensionals to give the appearance that that he was skiing. I layered the focal image onto a Night of Navy scalloped circle. I cut two pieces of the Snowflake Splendor Ribbon and attached them to the card front and added the focal image on top using Stampin' Dimensionals.

The sentiment was stamped with Highland Heather Classic ink onto a Whisper White oval that I die cut with the Layering Ovals Dies and I layered it onto a Night of Navy scalloped oval die cut. I added the sentiment layer to the card front with Stampin' Dimensionals below the focal image. I added two small Basic Rhinestone Jewels to the sentiment for a touch of bling. I love how this design turned out and it is a great card to send to someone to brighten their day.  
Thank you for taking the time to visit my blog today. I hope that my card design helps inspire you to get creative with the many wonderful bundles available from Stampin' Up! There are so many amazing options to choose from. 

Now it's time to visit Cheryl's amazing blog and see what she has to share with us. Just click the Next button below to visit her blog. We would love it if you would leave us a comment and let us know what you enjoyed about our projects. I hope you enjoy the rest of our blog hop. 


If you live in the U.S. and do not already have a Stampin' Up! Demonstrator, please contact me and I would be happy to help you with your creative projects. You may also visit my Online Store to place your order and have it shipped to you. 

Until Next Time

Happy Stamping,

Tricia Butts
Independent Stampin' Up! Demonstrator

Like What You See? Visit My Online Store Here

Visit My Facebook Business Page for Updates & Ideas

Click here to Contact Me

  
Coming Soon!
The Amazing Curvy Celebrations Promotion
Begins November 3rd
Click Below For Details

Create Wonderful Holiday Projects
With The November Paper Pumpkin Kit
Click Below To Subscribe By November 10th


Create Beautiful Projects For The Holidays
With Products From The August-December 2020 Mini Catalog
Click Below To Visit My Online Store


Wednesday, October 14, 2020

New At SU October Blog Hop Feeling Festive

Welcome to the New At SU October Blog Hop as we explore this month's theme of Feeling Festive. Now is a wonderful time to create fun projects ready for all the wonderful holidays that we celebrate over the next few months. You will be visiting with wonderful Stampin' Up! Demonstrators as they share their projects and ideas to help inspire you for the upcoming holidays. 
My card today is a fun Winter themed design that could be used for a variety of occasions. I love the whimsy of the images and sentiments in the Don't Stop Believin' stamp set and it pairs beautifully with the designs in the Snowflake Splendor Designer Series Paper.
Products Used:
Don't Stop Believin' stamp set (item #153332)
Snowflake Splendor Designer Series Paper (item #153512)
So Many Snowflakes Dies (item #153560)
Hippo & Friends Dies (item #153585)
Highland Heather cardstock (item #146986)
Pacific Point cardstock (item #111350)
Whisper White cardstock  (item #100730)
Pacific Point Classic Ink Pad (item #147098)
Stampin' Blends Markers
Basic Rhinestone Jewels (item #144220)
Measurements:
Pacific Point cardstock card base - 8 1/2" x 5 1/2" 
(Scored at 4 1/4")
Snowflake Splendor Designer Series Paper layer  
5 1/4" x 4"
Whisper White cardstock 
label die cut (using the Hippo & Friends Dies)
Highland Heather cardstock 
snowflake die cuts (using the So Many Snowflakes Dies)
This clean and simple card design is easy to assemble. The images were stamped onto the Whisper White cardstock label with Pacific Point Classic ink and I colored the image with Stampin' Blends Markers. I attached the snowflakes to the back of the label with Stampin' Seal Adhesive and attached the label to the designer series paper layer with Stampin' Dimensionals. I embellished the snowflakes and the background layer with Basic Rhinestones to add a touch of bling to the design. Most of the products used to create this card can be found in the August-December 2020 Mini Catalog. The Snowflake Splendor Designer Series Paper is currently on sale and you can save 15% during the month of October. 
Thank you for taking the time to visit my blog today. I hope that my card design inspires you to explore the wonderful products in the August-December 2020 Mini Catalog to help you create your own amazing holiday projects.

Now it's time to visit Rochelle's amazing blog to see what she has to share with us this month. Just click the Next button below or use the Roll Call List to find your way. Please leave us a comment and let us know what you enjoyed about our projects. I hope that you enjoy the rest of our blog hop. 

If you live in the U.S. and do not already have a Stampin' Up! Demonstrator, please contact me and I would be happy to help you with your creative projects. You may also visit my Online Store to place your order and have it shipped to you. 

Until Next Time

Happy Stamping,

Tricia Butts
Independent Stampin' Up! Demonstrator

Like What You See? Visit My Online Store Here

Visit My Facebook Business Page for Updates & Ideas

Click here to Contact Me


Stock Up On Your Favorite Designs
Save 15% On Select Designer Series Paper
During The Month Of October
Click Below To Visit My Online Store


Enjoy Creating With The Sweet November Paper Pumpkin Kit
Click Below To Subscribe By November 10th


Create Your Own Wonderful Projects For The Holidays
With Products From The August-December 2020 Mini Catalog
Click Below To Visit My Online Store 


Tuesday, September 8, 2020

ICS September Blog Hop 2020 Mini Catalog Fun Fold

Welcome to the ICS September Blog Hop as we explore sharing Fun Fold card designs using products from the August-December 2020 Mini Catalog. You will be visiting with wonderful Stampin' Up! Demonstrators as they share their ideas and projects to help inspire you to create your own amazing card designs. 
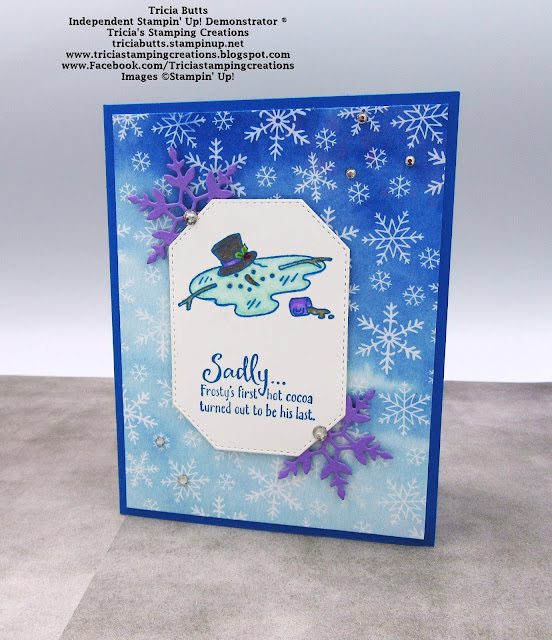
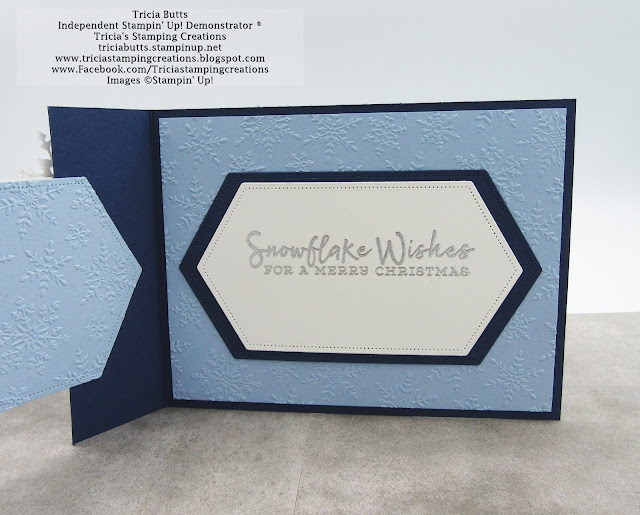
 For my fancy fold card design, I chose to use products from the amazing Snowflake Splendor Suite. I love the way all of these beautiful products coordinate together to make creating projects so much easier. For my card design, I chose to use the Snowflake Wishes Bundle (item #155172) combined with the Snowflake Splendor Designer Series Paper (item #153512) for a non-traditional frosty Christmas card. 
 Products Used:
Snowflake Wishes Bundle (item #155172)
Snowflake Splendor Designer Series Paper (item #153512)
Winter Snow Embossing Folder (item #153577)
Blue Adhesive Backed Gems (item #153547)
Basic Rhinestones (item #144220)
Stitched Nested Label Dies (item #149638)
Silver Foil Sheets (item #132178)
Night of Navy cardstock (item #100867)
Seaside Spray cardstock (item #150883)
Whisper White cardstock (item #100730)
 Measurements:
Night of Navy card base - 4 1/4' x 11" (Scored at 5 1/2")
      Cut at 1 1/2" after the score mark on one side to create top flap
      Cut 1/2" x 4 1/4" piece from remaining piece of Night of Navy        for bottom piece
Snowflake Splendor DSP - 2 pieces  1 1/4" x 4" 
Seaside Spray inside card layer - 4" x 5 1/4" (embossed with the Winter Snow Embossing Folder
Extra Seaside Spray, Whisper White and Night of Navy cardstock for die cut layers
Silver Foil to die cut snowflakes
This fancy fold is simple to assemble and the focal layer has been die cut using dies from the So Many Snowflakes Dies and Stitched Nested Labels Dies. I covered the back of the focal layer with a die cut layer of Seaside Spray cardstock that I embossed with the Winter Snow Embossing Folder. The sentiments from the Snowflake Wishes stamp set have been heat embossed with Silver Embossing Powder to coordinate with the Silver Foil die cut snowflakes. I used the Blue Adhesive Backed Gems to embellish the silver snowflakes and the small Basic Rhinestones to embellish the Night of Navy snowflake detail of the frame on the focal image. I used Tear & Tape Adhesive to attach the focal layer to the top flap and bottom layer of the card front. I wanted to make sure that I had a strong adhesive that would hold the card front together. I love how this card came together to create a sparkly Christmas design for someone special.  
Thank you for taking the time to visit my blog today. I hope that my card design will inspire you to try this fun fold technique and create your own beautiful cards for the people you love. There are so many wonderful Stampin' Up! products to explore to help you with your creativity. 

Now it's time to visit Darla's blog and see what wonderful fun fold technique she has to share with us. Just click on the Next button below to visit her blog. We would love it if you would leave us a comment and let us know what you enjoyed about our projects. I hope you enjoy the rest of our blog hop. 
 Darla


If you live in the U.S. and do not already have a Stampin' Up! Demonstrator, please contact me and I would be happy to help you with your creative projects. You may also visit my Online Store to place your order and have it shipped to you.
Until Next Time
Happy Stamping,
Tricia Butts
Independent Stampin' Up! Demonstrator
Like What You See? Visit My Online Store Here
Visit My Facebook Business Page for Updates & Ideas
Click here to Contact Me


The New Stampin' Cut & Emboss Machine
Is Now Available!
Click Below To Order
 Click Here To Order


Join My Team
Enjoy The Wonderful Benefits
As A Stampin' Up! Demonstrator
Click Below For More Details
 Click Here For Details


The August-December 2020 Mini Catalog
Is Now Available
Start Planning Your Holiday Projects
Click Below To Visit My Online Store
 Click Here To Visit My Online Store