Showing posts with label Layering Diorama Dies. Show all posts

Wednesday, April 12, 2023

Around The World On Wednesday April Blog Hop April Showers Bring May Flowers

Welcome to the Around The World On Wednesday April Blog Hop. It's hard to believe we are celebrating our 4th Anniversary of our little blog hop and to celebrate our theme is, "April Showers Bring May Flowers." Visit with our talented Design Team members as we share projects and ideas to help inspire you. 
For my card design, I just had to use the products in the Rain or Shine Suite Collection in the January-April 2023 Mini Catalog, as they are a perfect fit for this month's theme. I am so sad that the Rain or Shine Specialty Designer Series Paper is retiring, so I decided to use the designs to create my focal design for this card. I love the shine on the raindrops in the background and on the coat and hat that the fox is wearing. I used the Playing In The Rain Dies to die cut the fox and the puddle images from one of the sheets of designer series paper and I fussy cut two of the flower bushes to embellish the frame around the focal image. The colors are so fun and perfect for Spring and the design gives us hope that with a little rain, we will soon be enjoying flowers blooming in our gardens once more. 
Products Used:
Rain Or Shine Suite Collection (item #160556)
 - Playing In The Rain Bundle (item #160551)
 - Raindrops  Embossing Folder (item #160554)
 - Rain Or Shine Specialty Designer Series Paper (item #160540) Retiring
Layering Diorama Dies (item #155565) Retiring
Stylish Shapes Dies (item #159183)
Misty Moonlight Cardstock (item #153081) Returning Color Sneak Peek
Balmy Blue Cardstock (item #146982)
Versamark Pad (item #102283)
Metallics Embossing Powders (item #155555)
Stampin' Dimensionals (item #104430)
Measurements:
Misty Moonlight Cardstock
Card Base - 8 1/2" x 5 1/2" (Scored at 4 1/4")
Sentiment Label die cut with the Stylish Shapes Dies
Balmy Blue Cardstock
Card Front Layer - 5 1/4" x 4" (Opening die cut with the Layering Diorama Dies)
Rain Or Shine Specialty Designer Series Paper 
Background Layer - 5 " x 3 3/4"
Fox and puddle die cut with the Playing In The Rain Dies
2 sets of flowers fussy cut with Paper Snips
I am so excited that Misty Moonlight is returning and couldn't resist using the cardstock for this card design. It works so well with Balmy Blue and felt that it was the perfect combination for this design. I used the Layering Diorama Dies to die cut the opening from the Balmy Blue cardstock layer and then embossed it with the Raindrops Embossing Folder to tie it in with the background layer. I attached the raindrop designer series panel to the center of the Misty Moonlight card base and then added the Balmy Blue die cut layer with Stampin' Dimensionals to pop it up. To create the focal design, I adhered the puddle to the designer series paper layer and added the fox die cut with Stampin' Dimensionals so that it looked like the fox was about to walk through the puddle. I added the flower bushes on either side of the opening to decorate the frame. For the sentiment, I heat embossed the image from the Playing In The Rain stamp set using Silver Embossing Powder and then die cut it out with the Stylish Shapes Dies. I attached it to the top right corner of the Balmy Blue layer to complete the card design. I decided not to add any other embellishments, preferring to let the shimmer of the designer series paper and the Silver embossing powder add a subtle bling to the card.
Thank you for taking the time to visit my blog. I hope that my card design will help inspire you to get creative and explore creating your own beautiful Spring themed projects.
Now it's time to visit Teri's Blog and see what she has created for Spring. Just click the Next button below to visit her blog or use the Roll Call List to find your way. We would appreciate it if you would leave us a comment and let us know what you liked about our projects. I hope you enjoy the rest of our blog hop. 


If you live in the U.S. and do not have a Stampin' Up! Demonstrator, please contact me and I would be happy to help you with your creative projects. You may also visit my Online Store to place your order and have it shipped to you. 

Until Next Time

Happy Stamping,

Tricia Butts
Independent Stampin' Up! Demonstrator

Like What You See? Visit My Online Store Here

Visit My Facebook Business Page for Updates & Ideas

Click here to Contact Me

Save Up To 60% On Select Retiring Products
From The Last Chance Products List
Retiring Products Available Only While Supplies Last
Click Below To Visit My Online Store


Saturday, August 20, 2022

Stamping With Friends August Blog Hop July-December 2022 Mini Catalog

Welcome to the Stamping With Friends August Blog Hop as we showcase our favorite Suites and stamp sets in the July-December 2022 Mini Catalog. Our wonderful Design Team members will be sharing their projects and ideas to help inspire you to get ready for the holidays and the change in the seasons. There is so much to look forward to in the next few months and a perfect time to get creative.
Picking my favorite products from the new July-December 2022 Mini Catalog was not an easy task, as there are so many great suites, bundles and stamp sets in this catalog. However, I must admit, that the Storybook Gnomes Suite was an instant hit with me the moment I saw it. So for today's card design, I decided to use products from this suite to create my Winter themed card. I love that this suite can be used for so much more than Christmas, with possibilities for projects for any season. 
Products Used:
Storybook Gnomes Suite (item #159630)
 - Kindest Gnomes Bundle (item #159626)
 - Storybook Designer Series Paper (item #159615)
Layering Diorama Dies (item #155565)
Tailor Made Tags Dies (item #155563)
Wintry 3D Embossing Folders (item #155433)
Balmy Blue Cardstock (item #146982)
Night of Navy Cardstock (item #100867)
Pacific Point Classic Ink Pad (item #147098)
Clear Wink of Stella Glitter Brush (item #141897)
Basic Rhinestone Jewels (item #144220)
Baker's Twine Essentials Pack (item #155475)
Stampin' Dimensionals (item #104430)
Measurements: 
Balmy Blue Cardstock
Card Base - 8 1/2" x 5 1/2" (Scored at 4 1/4")
Sentiment Tag die cut with the Tailor Made Tags Dies
Night of Navy Cardstock
Card Front 5 1/4" x 4" embossed with the Wintry 3D Embossing Folders. Center opening die cut with the Layering Diorama Dies
Storybook Gnomes Designer Series Paper
Background Layer - 5" x 3 3/4"
Blue Gnome die cut with the Gnomes Dies
This sweet gnome card is so much fun and so easy to create. I love that the pretty designer series paper does the bulk of the work in creating this design. I used one of the snowflake background designs for the background of the opening for the card design and I die cut one of the cute gnomes from another sheet using the coordinating Gnomes Dies, to create the focal image. The embossed snowflakes add wonderful texture to the card front and I love how the Clear Wink of Stella adds a subtle sparkle to the card. The sentiment tag was die cut using the Tailor Made Tag Dies and I added some White Baker's Twine to finish it off. The Basic Rhinestone Jewels add just the right amount of bling to the background to finish off this fun card design. You could use this card for a variety of occasions and this layout would work well for other seasons just by changing the colors and background for the opening. As you can see, this suite is great for so much more than Christmas. 
Thank you for taking the time to visit my blog. I hope that my card design will help inspire you to get creative for the upcoming months with products from the July-December 2022 Mini Catalog. There are so many wonderful possibilities to explore. 
Now it's time to hop along with my fellow Design Team members and check out their amazing projects. Just click on the Roll Call List below to follow along. Please leave us a comment and let us know how our projects inspired you. I hope you enjoy the rest of our blog hop.

If you live in the U.S. and do not have a Stampin' Up! Demonstrator, please contact me and I would be happy to help you with your creative projects. You may also visit my Online Store to place your order and have it shipped to you. 

Until Next Time

Happy Stamping,

Tricia Butts
Independent Stampin' Up! Demonstrator

Like What You See? Visit My Online Store Here

Visit My Facebook Business Page for Updates & Ideas

Click here to Contact Me


Get Ready For The Holidays
With The July-December 2022 Mini Catalog
Click Below To Visit My Online Store

Time Is Running Out
To Take Advantage Of Sale-a-bration
Click Below For More Details


Wednesday, March 16, 2022

New At SU March Blog Hop CASE the 2021-2022 Annual Catalog

Welcome to the New at SU March Blog Hop as we CASE the 2021-2022 Annual Catalog using products from the January-June 2022 Mini Catalog. What is CASE? It stands for Copy And Share Everything and is simply a way to help spark your creativity by using a project to help provide you with a map to create your own beautiful creations. Whether you choose to copy the design exactly or use the layout, the colors, the stamp set or any combination, it is a great starting point to help you get creative.
For my card design, I chose to CASE the above card design from the 2021-2022 Annual Catalog, which can be found on page 51. This card design uses the Layering Diorama Dies with the Sailing Home stamp set and coordinating Smooth Sailing Dies. For my card, I have chosen to use products from the New Horizons Suite from the January-June 2022 Mini Catalog with the Layering Diorama Dies. 
For my card design, I decided to switch it from portrait to landscape and instead of an ocean theme, I chose to showcase the mountains. For the background, I used one of the woodgrain designs from the Heart & Home Designer Series Paper. The Layering Diorama Dies worked perfectly for the opening and I created two layers using the 3rd and 4th largest dies. I love the texture and layers of this design and I think it would work well for a variety of occasions.
Products Used:
On the Horizon Bundle (item #157779)
New Horizons 6"x6" Designer Series Paper (item #157768)
Pebbles Enamel Shapes (item #158141
Layering Diorama Dies (item #155565)
Tailored Tag Punch (item #145667)
Heart & Home Designer Series Paper (item #157928)
Basic Gray Cardstock (item #121044)
Misty Moonlight Cardstock (item #153081)
Rich Razzleberry Cardstock (item #115316)
Garden Green Cardstock (item #102584)
Pear Pizzazz Cardstock (item #131201)
Basic White Cardstock (item #159276)
Misty Moonlight Classic Ink Pad (item #153118)
Versamark Pad (item #102283)
Metallics Embossing Powders (item #155555)
Stampin' Dimensionals (item #104430)
Mini Stampin' Dimensionals (item #144108)
Measurements:
Basic Gray Cardstock 
Card Base - 8 1/2" x 5 1/2" (Scored at 4 1/4")
Rich Razzleberry Cardstock
Layer 1 - 5 1/4" x 4"
Heart & Home Designer Series Paper
Card Front - 5 1/8" x 3 7/8"
New Horizons Designer Series Paper
Background Layer - 3 3/4" x 4 3/4"
Misty Moonlight Cardstock
2 sets of mountains die cut with the Horizon Dies
Basic White Cardstock
1 set of mountain detail (Snow) die cut with the Horizon Dies
Sentiment Tag punched with the Tailored Tag Punch
Garden Green Cardstock
1 set of grass die cut with the Horizons Dies
Pear Pizzazz Cardstock
2 sets of grass die cut with the Horizons Dies
Just like the original card design from the Annual Catalog, I chose to use the Layering Diorama Dies to create the opening for my card design. I liked the way it looked like a window to a scene outside. For my design, I chose to use the Heart & Home Designer Series Paper for my main background design and I layered it with a piece of Rich Razzleberry cardstock. I chose to use two different sizes of the dies to create a framed look for scene inside. I used a piece of the New Horizons Designer Series Paper to create the background scene and attached it to the center of the Basic Gray card base. I added one of Misty Moonlight mountain die cuts to the designer series paper, lining it up along the center of the design. I attached the layered card front over the top of the background using Stampin' Dimensionals to pop it up and give it dimension. I layered the snow die cut layer over the second Misty Moonlight mountain die cut and added it to the card front with Mini Stampin' Dimensionals so that it goes across the opening and slightly offset from the background die cut. I attached the Garden Green grass and one of the Pear Pizzazz grass to the inside of the bottom of the frame to create the foreground of the scene. I punched out a tag using the Tailored Tag Punch from Basic White cardstock and stamped the woodgrain image with Misty Moonlight Classic ink(stamping off once) several times to create the background design on the tag. I heat embossed the sentiment with Silver Embossing Powder and sponged the edges with Misty Moonlight Classic ink using a Sponge Dauber. I attached the {ear Pizzazz grass to the left side of the card front, towards the bottom and then added the sentiment to the bottom of the card front so that it overlaps the opening, using Stampin' Dimensionals. To embellish the card, I added several of the Pebbles Enamel Shapes on either side of the sentiment tag to complete the design. This card design reminds me of the view of the Rocky Mountains that I see each day and I love the softness of the background created by the designer series paper. 
Thank you for taking the time to visit my blog. I hope that my card design will help inspire you to try CASEing to create your own beautiful card designs. Whether you decide to copy the design exactly or use it as a blue print for your own wonderful design, it is a great way to open new doors to your creativity. 
Now it's time to visit Rochelle's wonderful blog and see what she has chosen to CASE for this month's blog hop. Just click on the Next button to visit her blog or use the Roll Call List to find your way. We would appreciate it if you would leave us a comment and let us know what you liked about our projects. I hope you enjoy the rest of our blog hop.

Roll Call List 

If you live in the U.S. and do not have a Stampin' Up! Demonstrator, please contact me and I would be happy to help you with your creative projects. You may also visit my Online Store to place your order and have it shipped to you. 

Until Next Time

Happy Stamping,

Tricia Butts
Independent Stampin' Up! Demonstrator

Like What You See? Visit My Online Store Here

Visit My Facebook Business Page for Updates & Ideas

Click here to Contact Me


Save 20% With The Savings Are In Bloom Promotion
During The Month Of March
Click Below To Visit My Online Store

Available For A Limited Time
The Amazing Waves Of The Ocean Collection
Click Below For More Details


Thursday, January 6, 2022

January-June 2022 Mini Catalog Blog Hop

Welcome to the January-June 2022 Mini Catalog Blog Hop as we showcase products to inspire you explore this wonderful new catalog. There truly is something for everyone and this is a great opportunity to start off the New Year on a new creative journey. 
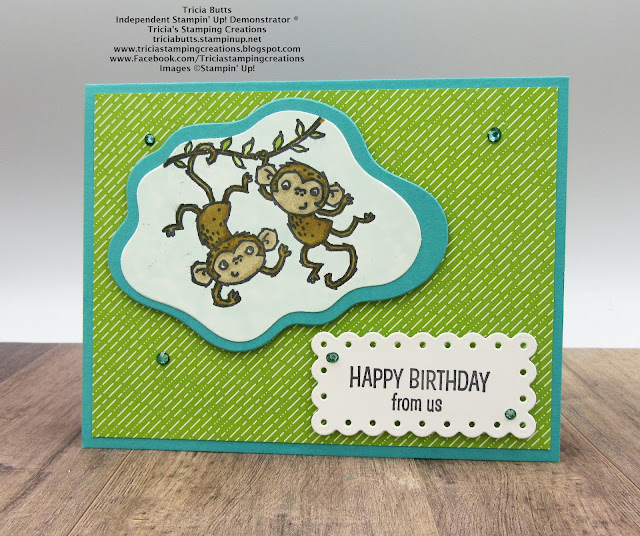
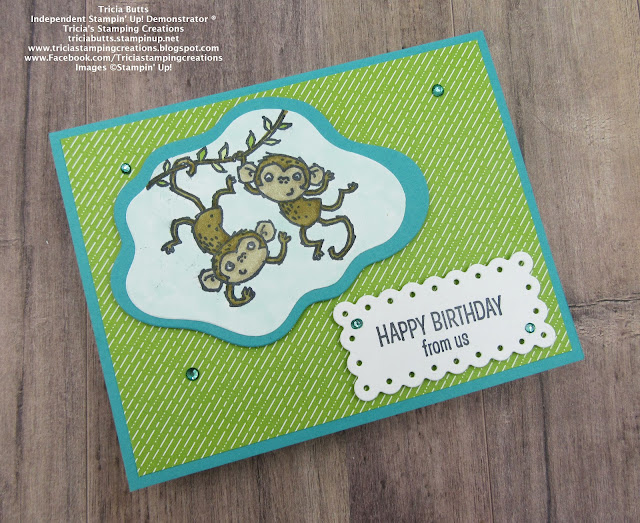
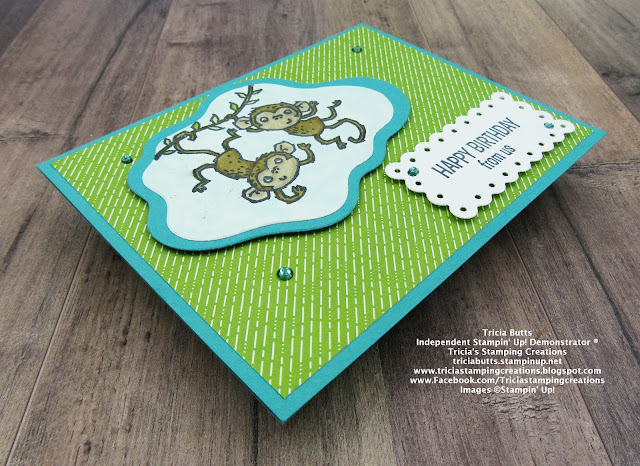
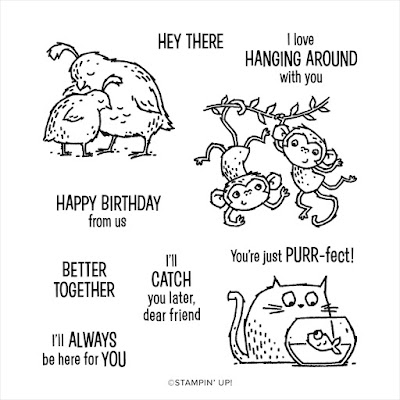
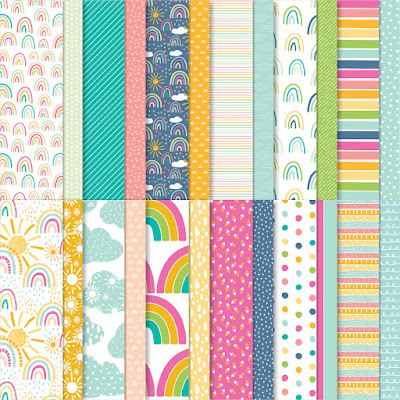
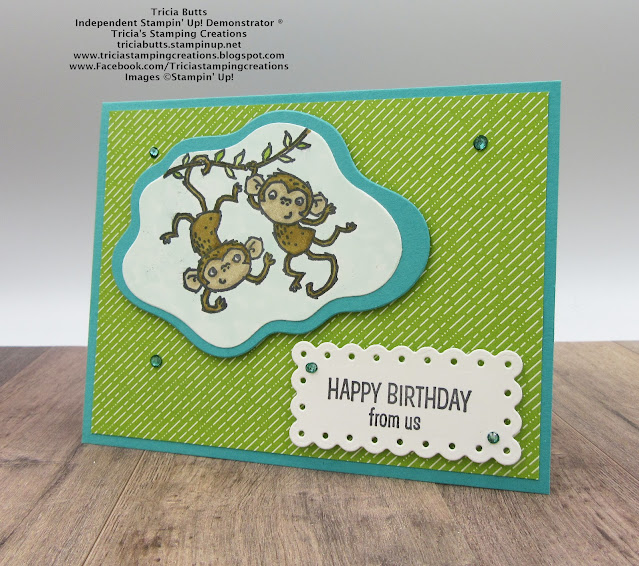
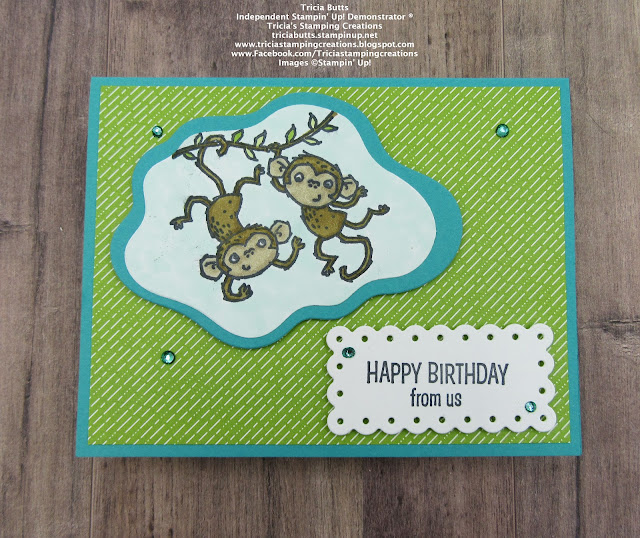
At the start of a New Year, I love to create birthday cards to restock my stash for birthdays throughout the year. In the new mini catalog, there are so many great stamp sets for creating birthday cards and it was hard to choose just one for today's blog hop. In the end, I chose the cute Catch You Later stamp set as it has fun images and sentiments that work well for a variety of occasions. I loved the sweet little monkeys, so I chose that image for my focal point and paired it with the birthday sentiment in the stamp set. I used the Layering Diorama Dies to create the focal label and for the sentiment, I used one of the Scalloped Contours Dies. The background was created with the fun Sunshine & Rainbows 6"x6" Designer Series Paper, which you can earn Free with a qualifying $50 order during Sale-a-bration. 
Products Used:
Catch You Later stamp set (item #158037)
Layering Diorama Dies (item #155565)
Scalloped Contours Dies (item #155560)
Sunshine & Rainbows 6"x6" Designer Series Paper (item #158126)
Bermuda Bay Cardstock (item #131197)
Basic White Cardstock (item #159276)
Memento Tuxedo Black Pad (item #132708)
Crumb Cake Stampin' Blends Combo Pack (item #154882)
Soft Suede Stampin' Blends Combo Pack (item #154906)
Granny Apple Green Stampin' Blends Combo Pack (item #154885)
Pool Party Stampin' Blends Combo Pack (item #154894)
Bermuda Bay Stampin' Blends Combo Pack (item #154878)
Stampin' Dimensionals (item #104430)
Basic Rhinestone Jewels (item #144220)
Measurements:
Bermuda Bay Cardstock
Card Base - 8 1/2" x 5 1/2" (Scored at 4 1/4")
Matte Layer die cut with Layering Diorama Dies
Basic White Cardstock
Focal layer die cut with Layering Diorama Dies
Sentiment Label die cut with Scalloped Contours Dies
Sunshine & Rainbows Designer Series Paper
Card Front - 5 1/4" x 4"
This fun birthday card is simple to create and the bright, cheerful colors work well for all ages. I colored the main image with Stampin' Blends Markers and used Light Pool Party to color the background. To create a frame for the focal image, I layered it onto a slightly larger die cut piece of Bermuda Bay cardstock and added it to the card front with Stampin' Dimensionals. I stamped the sentiment with Tuxedo Black ink onto the Scalloped Contours Label and added it to the bottom right corner of the card front. For a touch of bling, I colored five of the Basic Rhinestone Jewels with the Dark Bermuda Bay Stampin' Blends Marker and added them to the card. I love how this card design came together and how well these colors work together. 
Thank you for taking the time to visit my blog. I hope that my card design will help inspire you to start creating your own stash of birthday cards to send to the people you love throughout the year. There are so many wonderful options to explore in this amazing new catalog.
Now it's time visit my fellow creative stampers as they share their projects and ideas to help inspire you. Just click on the links in the Roll Call List below to visit with them and make sure to leave us a comment to let us know what you liked about our projects. I hope you enjoy the rest of our blog hop.

If you live in the U.S. and do not have a Stampin' Up! Demonstrator, please contact me and I would be happy to help you with your creative projects. You may also visit my Online Store to place your order and have it shipped to you. 

Until Next Time

Happy Stamping,

Tricia Butts
Independent Stampin' Up! Demonstrator

Like What You See? Visit My Online Store Here

Visit My Facebook Business Page for Updates & Ideas

Click here to Contact Me


Get Creative For The New Year
With The January-June 2022 Mini Catalog
Click Below To Visit My Online Store

Earn Amazing Free Products
During Sale-a-bration
Click Here For More Details

Send Kisses & Hugs
With The January Paper Pumpkin Kit 
Click Below To Subscribe By January 10th