Showing posts with label Gift Card Holder. Show all posts

Saturday, November 18, 2023

Stamping With Friends November Blog Hop Anything Christmas

Welcome to the Stamping With Friends November Blog Hop as we celebrate Anything Christmas. Our wonderful Design Team will be sharing their projects and ideas to help you get in the spirit of the season to create your own beautiful cards and projects to share with family and friends. 
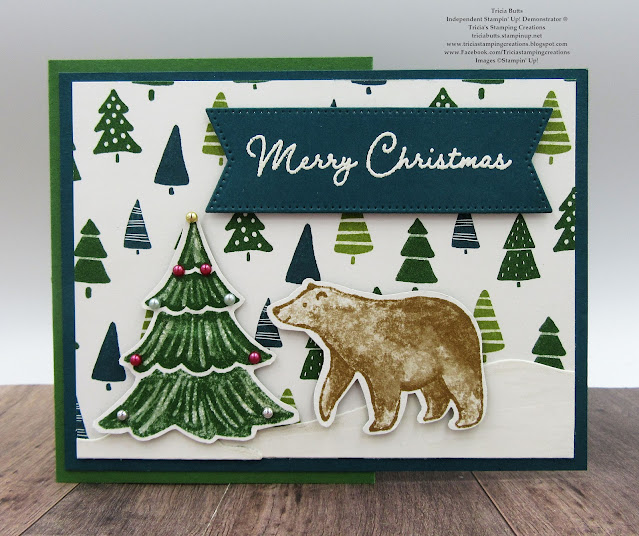
Gift cards are a wonderful idea for the holidays but it can be a bit boring to just put them in an envelope with a normal card. That's why I love creating fun and festive gift card holders for the holidays and today I have another cute design to help spark your creativity. You may remember this card that I created here using the Beary Christmas Suite and I wanted to create another version of this type of gift card holder using the A Walk In The Forest Designer Series Paper to show how versatile this design can be. This beautiful designer series paper is part of Stampin' Up!'s Craft For A Cause and for every pack of A Walk In The Forest Designer Series Paper that is sold, $3 will be donated to the Marines Toys For Tots Charity. 
Products Used:
Beary Cute Bundle (item #162023)
Reindeer Dies (item #159727)
Stylish Shapes Dies (item #159183)
2 3/8" Circle Punch (item #161354)
A Walk In The Forest Designer Series Paper (item #162377)
Garden Green Cardstock (item #102584)
Pretty Peacock Cardstock (item #150880)
Basic White Cardstock (item #159276)
Pecan Pie Classic Ink Pad (item #161665)
Versamark Pad (item #102283)
Basics Embossing Powders (item #155554)
Clear Wink of Stella Glitter Brush (item #141897)
Festive Pearls (item #159963)
Tear & Tape Adhesive (item #154031)
Stampin' Dimensionals (item #104430)
Measurements:
Garden Green Cardstock
Card Base - 4 1/4" x 11" (Score at 2 1/4" & 5 1/2")
Pretty Peacock Cardstock
Card Front - 5 1/4" x 4"
Inside Card Matte - 3 7/8" x 5 1/8"
Sentiment Label die cut with the Stylish Shapes Dies
Basic White Cardstock
Inside Card Layer - 5" x 3 3/4"
A Walk In The Forest Designer Series Paper
Card Front - 5" x 3 3/4"
Christmas Tree fussy cut
Bear punched out with Beary Cute Punch
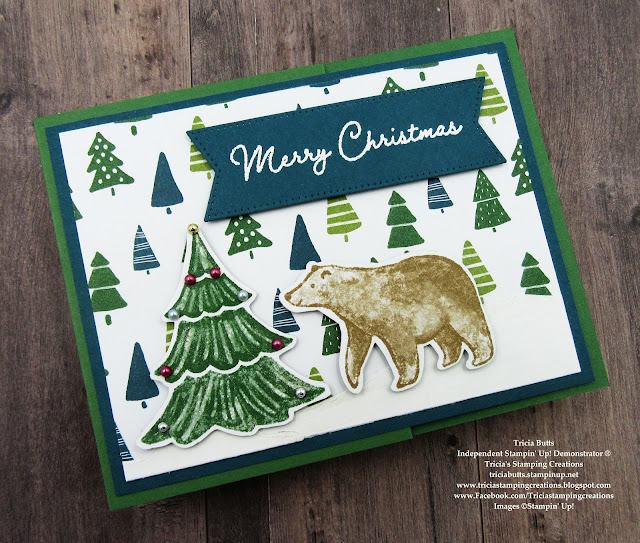
I feel like I have become a bit addicted to creating these gift card holders. I love how easy it is to transform the base into a variety of designs to help make each one special. For this gift card holder, I used one of the A Walk In The Forest designs for the card front and fussy cut out the tree and punched out the bear with the Beary Cute Punch from a different sheet to create the focal image. I also added some snowbanks along the bottom of the card front to help ground the tree and the bear. I added some Clear Wink of Stella to the snow to give it a little sparkle and also to the tree. For the sentiment, I heat embossed the image with White embossing powder onto the Pretty Peacock label and added it to the card front with Stampin' Dimensionals. To decorate the tree, I added some Festive Pearls to give the appearance of ornaments. To create the basic gift card holder, I used the 2 3/8" Circle Punch to create the opening on the end of the card base that holds the gift card. I used Tear & Tape to create the pocket. I added the front panel to the front section of the base, making sure to not add adhesive beyond the half way point. For the inside of the card, I stamped the bear with Pecan Pie Classic ink onto the Basic White insert and then attached it to the Pretty Peacock layer before adding it inside the card. I just love how this cut gift card holder turned out. I think it would be perfect for a masculine card as well.
Thank you for taking the time to visit my blog. I hope that my gift card holder will help inspire you to create your own beautiful projects to send to family and friends for the holidays. There are so many wonderful options to explore in the September-December 2023 Mini Catalog. Remember, for every pack of A Walk In The Forest Designer Series Paper sold, $3 will be donated to the Marines Toys For Tots Charity as part of Stampin' Up!'s Making A Difference Craft For A Cause program. Simply place your order by visiting my Online Store to support this worthy charity. 
Please take a moment to visit with the other Design Team members during our blog hop today by clicking on the links in the Roll Call List below. We would appreciate it if you would leave us a comment and let us know what you enjoyed about our projects. 

If you live in the U.S. and do not have a Stampin' Up! Demonstrator, please contact me and I would be happy to help you with your creative projects. You may also visit my Online Store to place your order and have it shipped to you. 

Until Next Time

Happy Stamping,

Tricia Butts
Independent Stampin' Up! Demonstrator

Like What You See? Visit My Online Store Here

Visit My Facebook Business Page for Updates & Ideas

Click here to Contact Me


New Online Exclusives Products
Available Now While Supplies Last
Click Below To Shop Now

Get Creative For The Holidays
With The September-December 2023 Mini Catalog
Click Below To View These Wonderful Products


Wednesday, November 15, 2023

New At SU November Blog Hop Beary Christmas Gift Card Holder

Christmas is less than 6 weeks away, so why not join the New At SU November Blog Hop as the Design Team shares projects and ideas to help you dress up giving those gift cards and gift certificates. Take a journey along our hop and see all the wonderful ideas to help spark your creativity. I hope our projects will help spark your creativity.
For my Christmas Gift Card Holder, I chose to use products from the Beary Christmas Suite in the September-December 2023 Mini Catalog. I love the whimsy of the designs in the Beary Christmas Designer Series Paper and I thought it would be perfect for a fun card design. I was inspired by fellow Stampin' Up! Demonstrator, Jessica Taylor, after watching her You Tube video here and created a slightly modified version of her design to create my own. 

Products Used:
Beary Cute Bundle (item #162023)
Stylish Shapes Dies (item #159183)
2 3/8" Circle Punch (item #161354)
Beary Christmas Designer Series Paper (item #162015)
Balmy Blue Cardstock (item #146982)
Real Red Cardstock (item #102482)
Basic White Cardstock (item #159276)
Balmy Blue Classic Ink Pad (item #147105)
Versamark Pad (item #102283)
Basics Embossing Powders (item #155554)
Festive Pearls (item #159963)
Tear & Tape Adhesive (item #154031)
Stampin' Dimensionals (item #104430)
Measurements:
Balmy Blue Cardstock
Card Base - 4 1/4" x 11" (Score at 2 1/4" & 5 1/2")
Real Red Cardstock
Card Front Matte - 5 1/4" x 4
Inside Layer Matte - 5 1/8" x 3 7/8"
Sentiment die cut with the Stylish Shapes Dies
Beary Christmas Designer Series Paper
Card Front - 5" x 3 3/4"
Large Bear punched out with the Beary Cute Punch
Small Bear fussy cut with Paper Snips
Basic White Cardstock
Inside Layer - 3 3/4" x 5"
This gift card holder is simple to create and offers so many wonderful possibilities to decorate it and personalize it to suit the person receiving it. From one sheet of 8 1/2" x 11" cardstock, you can create two gift card holders, so it is a great way to create a several designs to have on hand ready for whenever you need them. After scoring the card base at 2 1/4" & 5 1/2", I used the 2 3/8" Circle Punch along the edge of the flap (to make it easier to slide the gift card in and out) before adhering it with Tear & Tape Adhesive to create the pocket for the gift card. To create the card front, I adhered the designer series paper panel to the Real Red cardstock layer. I punched out the larger polar bear from another sheet of the designer series paper, using the Beary Cute Punch. I also fussy cut out one of the small bears to complete the design and added both the bears to the bottom right corner of the card front with Stampin' Dimensionals. For the sentiment, I heat embossed the image from the Beary Cute stamp set using White embossing powder. I used the Stylish Shapes Dies to die cut the sentiment label and adhered it to the top of the card front with Stampin' Dimensionals. I adhered the card front panel to the card base, making sure not to add adhesive on the back of the right side of the card front. For the inside layer, I stamped the snowflakes and small polar bear images onto the Basic White cardstock layer using Balmy Blue Classic ink. I then adhered the layer to the Real Red cardstock matte layer before adhering to the inside of the card, making sure it is hidden behind the card front when it is closed. The only embellishment I added was a small Red Festive Pearl in the center of the bow on the card front. 
Thank you for taking the time to visit my blog. I hope that my gift card holder will help inspire you to create your own wonderful projects to send to family and friends for the holidays. There are so many possibilities to explore in the September-December 2023 Mini Catalog.
Please take a trip along our blog hop and visit my fellow Design Team members by clicking on the links in the Roll Call List. We would love it if you would leave us a comment and let us know what you liked about our projects. 

If you live in the U.S. and do not have a Stampin' Up! Demonstrator, please contact me and I would be happy to help you with your creative projects. You may also visit my Online Store to place your order and have it shipped to you. Don't forget to take advantage of the Seasonal Sale and save on paper, inks and ribbons, November 14-16th.

Until Next Time

Happy Stamping,

Tricia Butts
Independent Stampin' Up! Demonstrator

Like What You See? Visit My Online Store Here

Visit My Facebook Business Page for Updates & Ideas

Click here to Contact Me


Stock Up On Your Favorite Products
During The Seasonal Sale November 14-16
Click Below To Start Shopping

New Online Exclusives Products
Now Available While Supplies Last
Click Below To Visit My Online Store

Get Creative For The Holidays
With The September-December 2023 Mini Catalog 
Click Below To Shop Now


Tuesday, January 3, 2023

Paper Pumpkin Possibilities December Blog Hop Good Things Come In Small Packages

Welcome to the Paper Pumpkin Possibilities December Blog Hop as we showcase alternative projects created with the Good Things Come In Small Packages Kit. Our wonderful Design Team is excited to share with you their creative ideas and projects to help inspire think outside the box. 
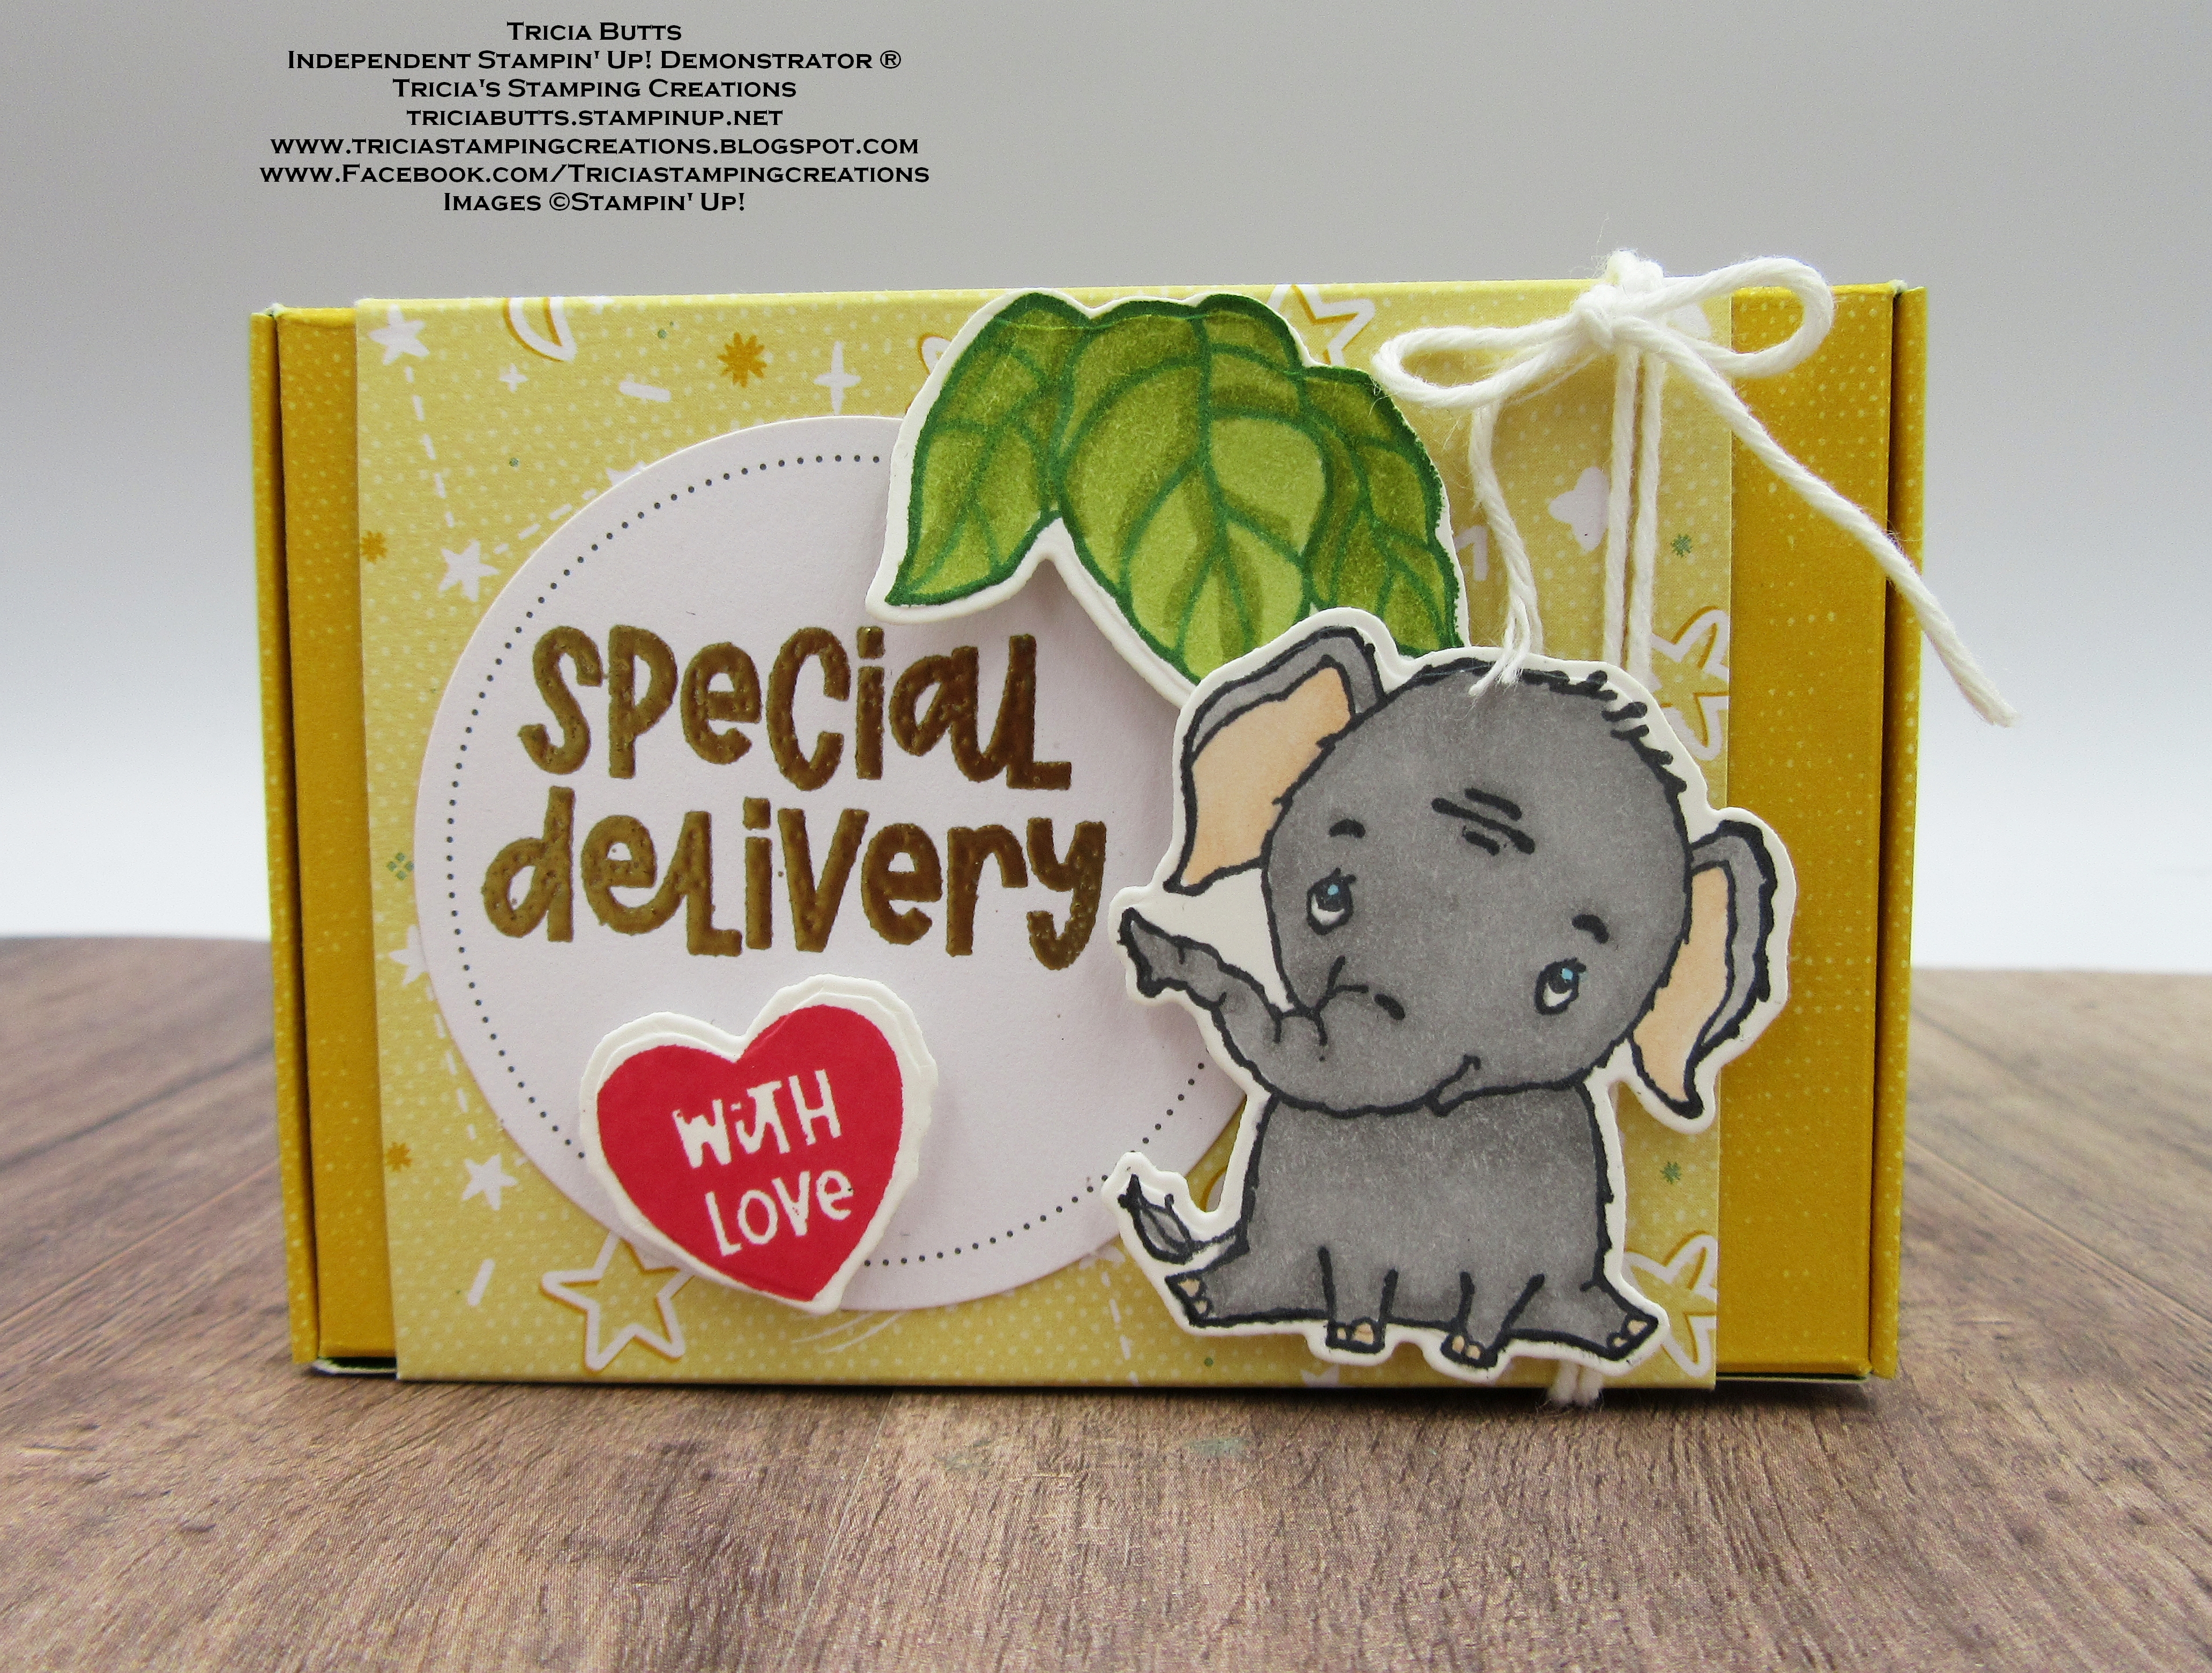
Normally I would create a card design as my alternative, but I really love these cute little boxes and wanted to show how you can transform one of them into something new and fun. I love that you can choose between two colors for each of the boxes, so I wanted to show how the reverse side of the garden green box and combined it with the Elephant Parade Bundle to create a cute Baby Shower Gift Card Holder. I thought the Crushed Curry side of the box was perfect for a baby and the coordinating belly band works perfectly with it. 
Products Used:
Paper Pumpkin December Good Things Come In Small Packages Kit
Elephant Parade Bundle (item #158697)
Yeti Dies (item #160253) - Clearance Rack
Basic White Cardstock (item #159276)
Versamark Pad (item #102283)
Metallics Embossing Powders (item #155555)
Sweet Sorbet Classic Ink Pad (item #159216)
Smoky Slate Stampin' Blends Combo Pack (item #154904)
Petal Pink Stampin' Blends Combo Pack (item #154893)
Old Olive Stampin' Blends Combo Pack (item #154892)
Baker's Twine Essentials Pack (item #155475)
Measurements:
Kit Supplies
Crushed Curry Box Die Cut
Crushed Curry Belly Band Strip - 3" x 7"
Circle Sentiment Label
Basic White Cardstock
Elephant stamped & die cut using the Elephant Parade Bundle
Leaves stamped & die cut using the Elephant Parade Bundle
Heart shape die cut with the Yeti Dies
This cute little box is easy to create and a fun way to explore new possibilities with the supplies in this kit. I assembled the box as per the instructions with the Crushed Curry side facing outwards and added the belly band layer with the Crushed Curry design facing up. I heat embossed the Special Delivery sentiment from the kit using Gold embossing powder and attached it to the left side of the front of the belly band. To create the elephant, I stamped the elephant image with Tuxedo Black ink and colored the image with Smoky Slate and Petal Pink Stampin' Blends Markers. I also stamped the leaves image using the Garden Green ink spot included in the kit and colored them with Old Olive Stampin' Blends Markers. Using the coordinating dies, I die cut the leaves and the elephant to attach to the front of the box with Stampin' Dimensionals. For the heart, I stamped the image with Sweet Sorbet Classic ink and die cut it out with the heart die from the Yeti Dies (available while supplies last on the Clearance Rack). I attached it to the sentiment circle below the embossed sentiment with a Stampin' Dimensional. To finish off the box, I wrapped some White Baker's Twine twice around the right side of the belly band so that it tucks underneath the elephant image, and then tied a bow. This cute little box is perfect for a baby shower and works well for either a boy or a girl. 
Thank you for taking the time to visit my blog. I hope that my alternative Gift Card Holder design will help inspire you to look at this kit and see the wonderful possibilities beyond the original projects. There is a refill kit available while supplies last. Just click here to shop now.
Now it's time to visit Terri's blog and see what she has created with this month's kit. Just click on the Next button below to visit her blog. We would love it if you would leave us a comment and let us know what you liked about our alternate projects. I hope you enjoy the rest of our blog hop. 

If you live in the U.S. and do not have a Stampin' Up! Demonstrator, please contact me and I would be happy to help you with your creative projects. You may also visit my Online Store to place your order and have it shipped to you. Not a Paper Pumpkin subscriber? Click the link below to sign up by January 10th to receive the Key To My Heart Kit. You can also order the Heart Boxes Add On here to add even more possibilities to your kit. 

Until Next Time

Happy Stamping,

Tricia Butts
Independent Stampin' Up! Demonstrator

Like What You See? Visit My Online Store Here

Visit My Facebook Business Page for Updates & Ideas

Click here to Contact Me


Share The Love
With The Key To My Heart Paper Pumpkin Kit
Click Below To Subscribe By January 10th

Don't Forget To Order
The Heart Boxes Add On
For More Creative Options With Your January Kit
Click Below To Visit My Online Store

Final Days!
Take Advantage Of The Last Chance Retirement Sale
Click Below To Visit My Online Store


Wednesday, November 16, 2022

New At SU November Blog Hop Gift Card Holders

Welcome to the New At SU November Blog Hop as we showcase Gift Card Holder ideas to help inspire you. Our Design Team members will be sharing their ideas and projects to help spark your creativity and help you create your own beautiful gift card holders to give to family and friends.
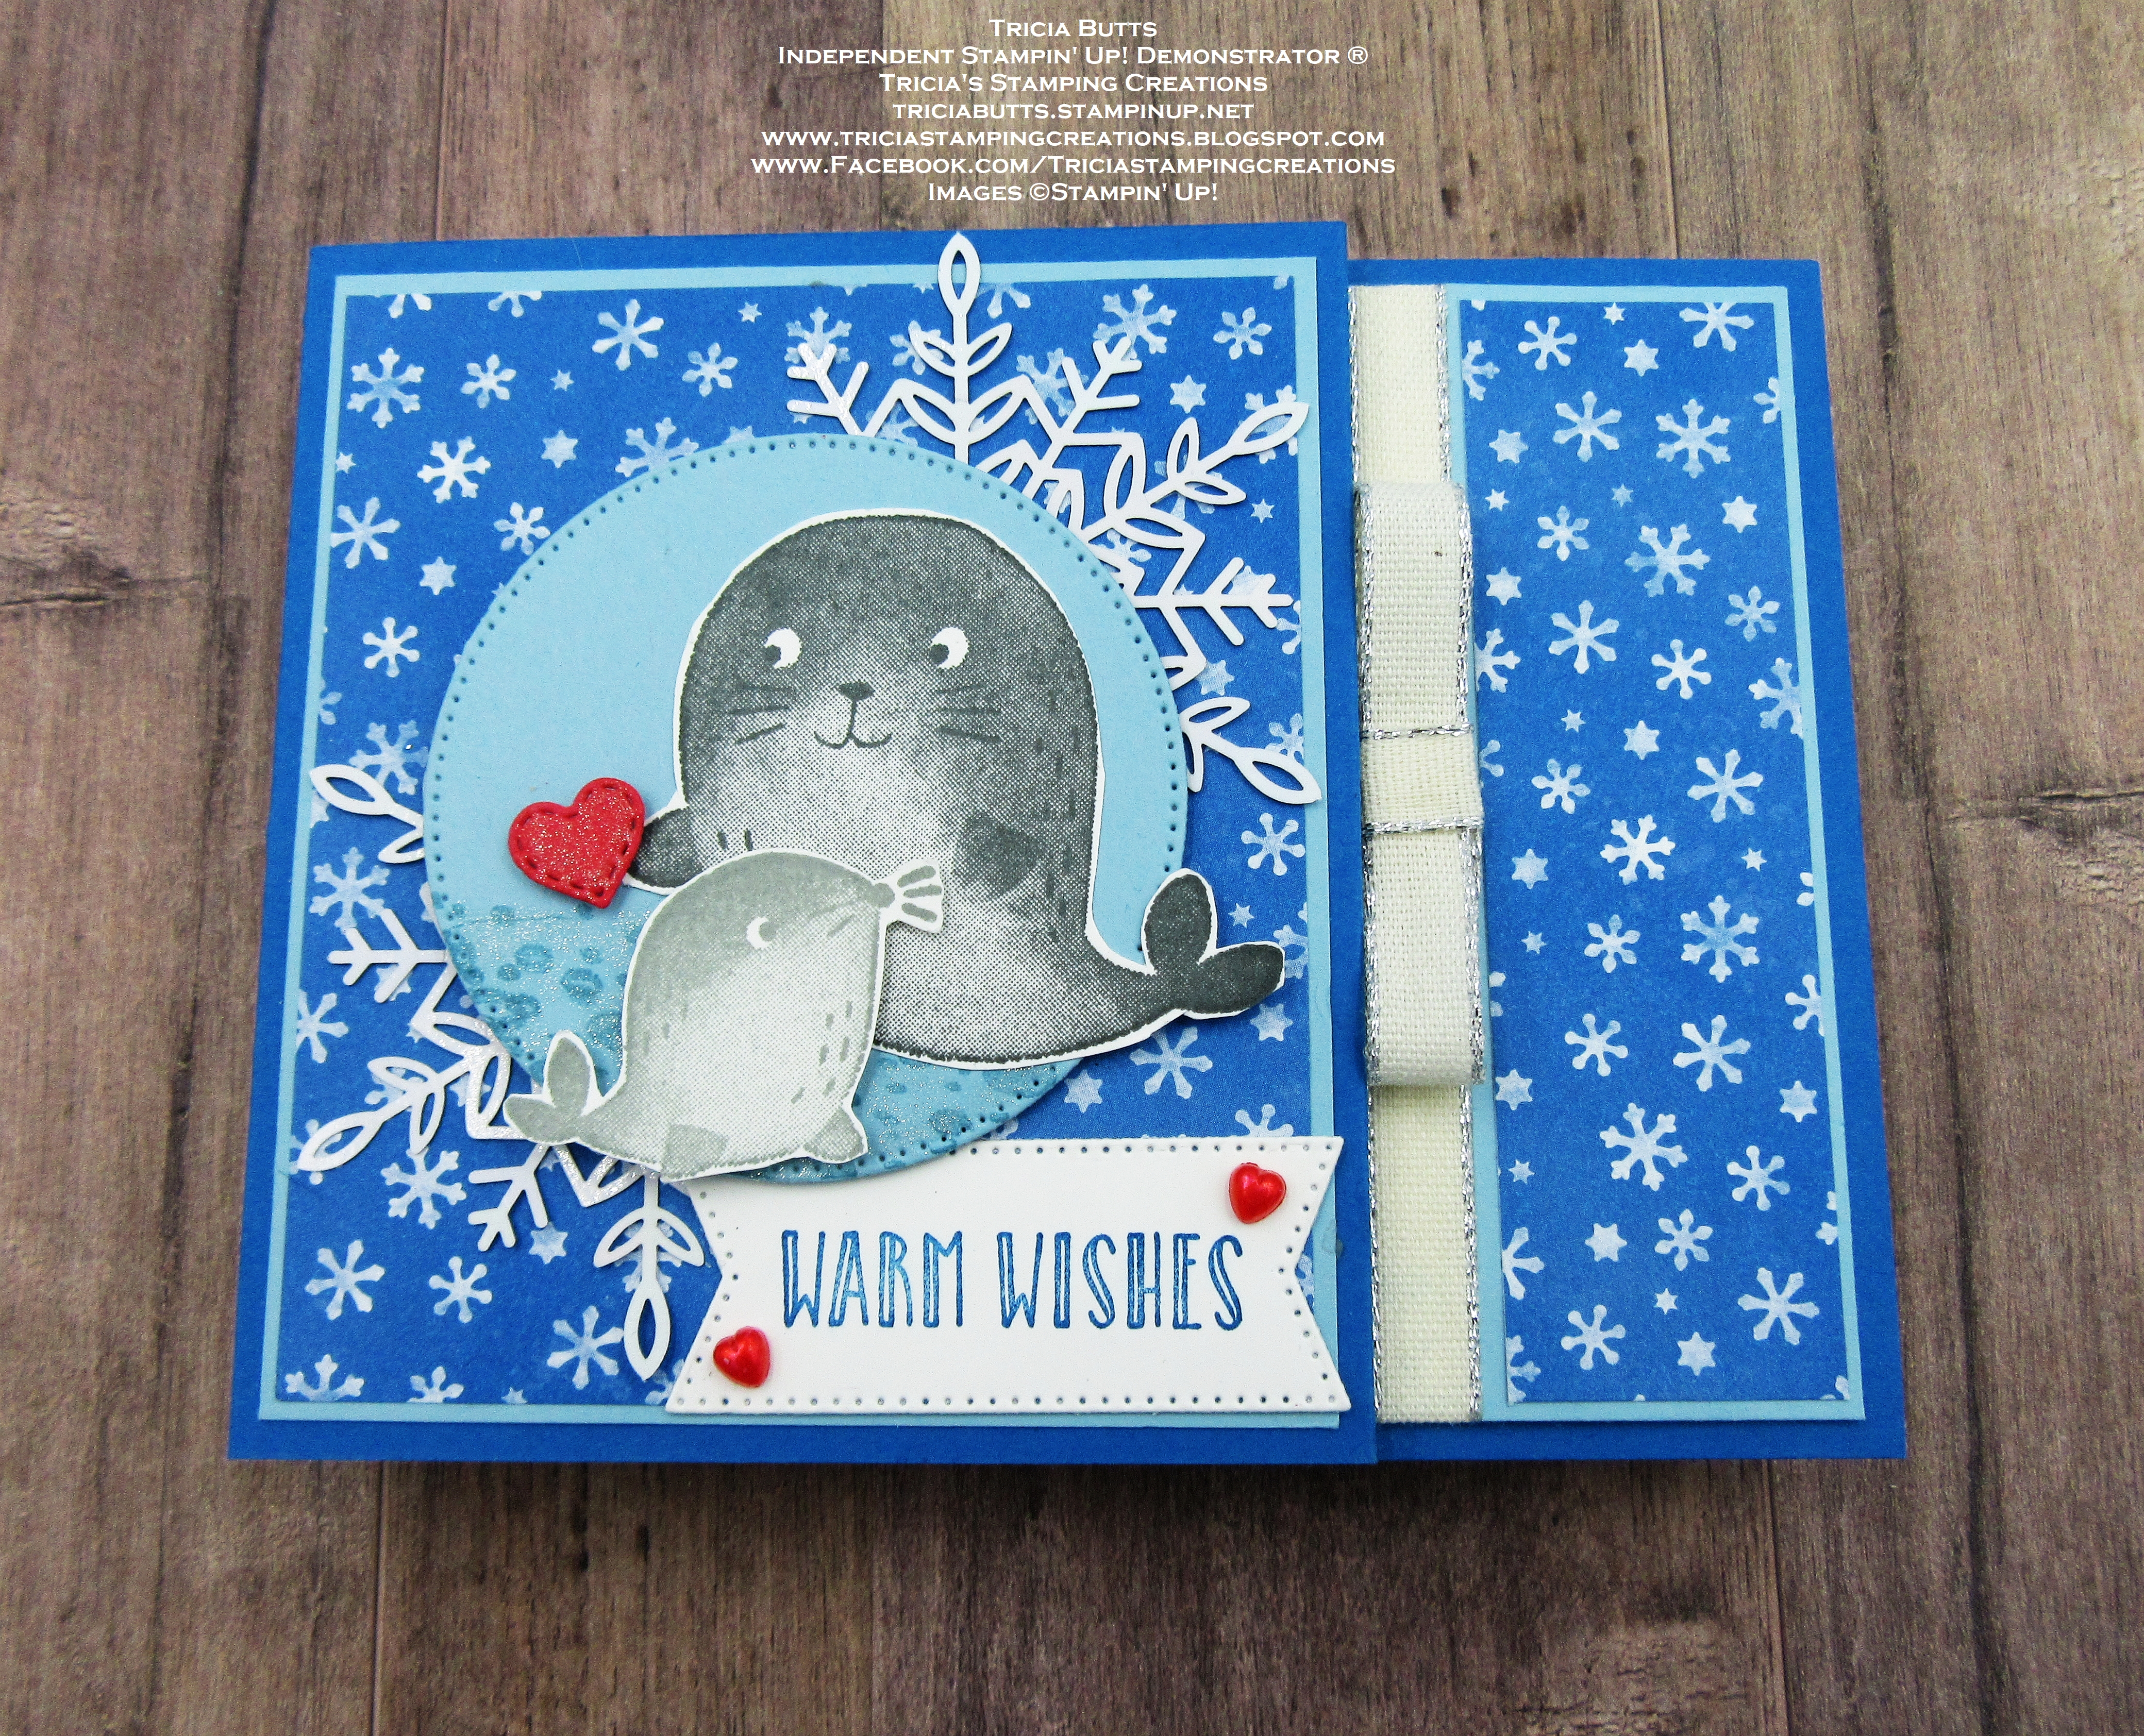
For my Gift Card Holder, I chose to create a simple design that is easy to duplicate. With the holidays approaching quickly, it helps to have a supply on hand in case you need a last minute gift for someone special. For my card design, I chose to use the cute Seal of Approval stamp set and paired it with one of the designs from the Storybook Gnomes Designer Series Paper. This Wintery themed card design would work well as a birthday card as well as for Christmas.
Products Used:
Seal of Approval stamp set (item #159762)
Stylish Shapes Dies (item #159183)
Give It A Whirl Dies (item #154336)
Essential Tag Punch (item #153607)
Storybook Gnomes Designer Series Paper (item #159615)
Pacific Point Cardstock (item #111350)
Balmy Blue Cardstock (item #146982)
Sweet Sorbet Cardstock (item #159268)
Basic White Cardstock (item #159276)
Balmy Blue Classic Ink Pad (item #147105)
Pacific Point Classic Ink Pad (item #147098)
Smoky Slate Classic Ink Pad (item #147113)
Basic Gray Classic Ink Pad (item #149165)
Sweet Sorbet Stampin' Blends Combo Pack (item #159224)
Clear Wink of Stella Glitter Brush (item #141897)
Wonderful Snowflakes (item #156340)
Silver 3/8" Metallic Edge Cotton Ribbon (item #159193)
Heart Pearls (item #159190)
Mini Stampin' Dimensionals (item #144108)
Mini Glue Dots (item #103683)
Tear & Tape Adhesive (item #154031)
Measurements:
Pacific Point Cardstock
Card Base - 4 1/4" x 11" (Scored at 5 1/2" & 9 1/4")
Balmy Blue Cardstock
Front Layer - 3 1/2" x 4"
Side Layer - 1 1/4" x 4"
Medium Circle die cut with the Stylish Shapes Dies
Storybook Gnomes Designer Series Paper
Front Layer - 3 3/8" x 3 7/8"
Side Layer - 1 1/8" x 4"
Front Inside Flap Layer - 1 1/2" x 4" 
Basic White Cardstock
Back Inside Layer - 5 1/4" x 4"
Front Inside Layer - 3 1/2" x 4" 
Sentiment Layer die cut with the Stylish Shapes Dies  
Small seal & large seal, fussy cut with Paper Snips
Sweet Sorbet Cardstock
Small Heart die cut with the Give It A Whirl Dies
This cute Gift Card Holder is so much fun to create and works for a variety of occasions. The basic layout is simple to create by folding the score lines at 5 1/2" & 9 1/4" to create the front and inside flap for the gift card. I used the Essential Tag Punch to create an opening along the edge of the Pacific Point cardstock flap before sticking it down with Tear & Tape. This makes it easier to slide the gift card in and out of the flap. The layers are easy to assemble and help dress up the design to make it special. I used one of the Wonderful Snowflakes to decorate the card front, cutting it in half to go behind the top and bottom of the Stitched Circle. I stamped the large seal with Basic Gray Classic ink and the small seal with Smoky Slate and fussy cut them both out with Paper Snips. For the inside layer, I added the side panel to the inside large Basic White panel, along the right side. I added a piece of the Silver Metallic Edge Cotton Ribbon along the left edge of the Balmy Blued cardstock and added a faux bow to the center. I stamped the front and inside sentiments with Pacific Point Classic ink to coordinate with the card design. The heart on the front was die cut using the Give It A Whirl Dies and I colored the heart with Clear Wink of Stella to give it some shimmer. To embellish the sentiment, I colored two of the Heart Pearls with the Dark Sweet Sorbet Stampin' Blends Marker and added them to the sentiment label. 
Thank you for taking the time to visit my blog. I hope that my gift card holder will inspire you to create your own wonderful projects, whether it's for the upcoming holidays or another special occasion. 
Please take the time to visit with my fellow Design Team members and see the wonderful projects they have to share on their blogs. Click on the links in the Roll Call List below to find your way and we would appreciate it if you would leave us a comment and let us know what you liked about our projects. 

If you live in the U.S. and do not have a Stampin' Up! Demonstrator, please contact me and I would be happy to help you with your creative projects. You may also visit my Online Store to place your order and have it shipped to you. 

Until Next Time

Happy Stamping,

Tricia Butts
Independent Stampin' Up! Demonstrator

Like What You See? Visit My Online Store Here

Visit My Facebook Business Page for Updates & Ideas

Click here to Contact Me


Save Up to 20% On Select Products
In The 2022-2023 Annual Catalog
Click Below To Visit My Online Store

Get Creative For The Holidays
With The July-December 2022 Mini Catalog
Click Below To Visit My Online Store