Showing posts with label Seal of Approval stamp set. Show all posts

Wednesday, November 16, 2022

New At SU November Blog Hop Gift Card Holders

Welcome to the New At SU November Blog Hop as we showcase Gift Card Holder ideas to help inspire you. Our Design Team members will be sharing their ideas and projects to help spark your creativity and help you create your own beautiful gift card holders to give to family and friends.
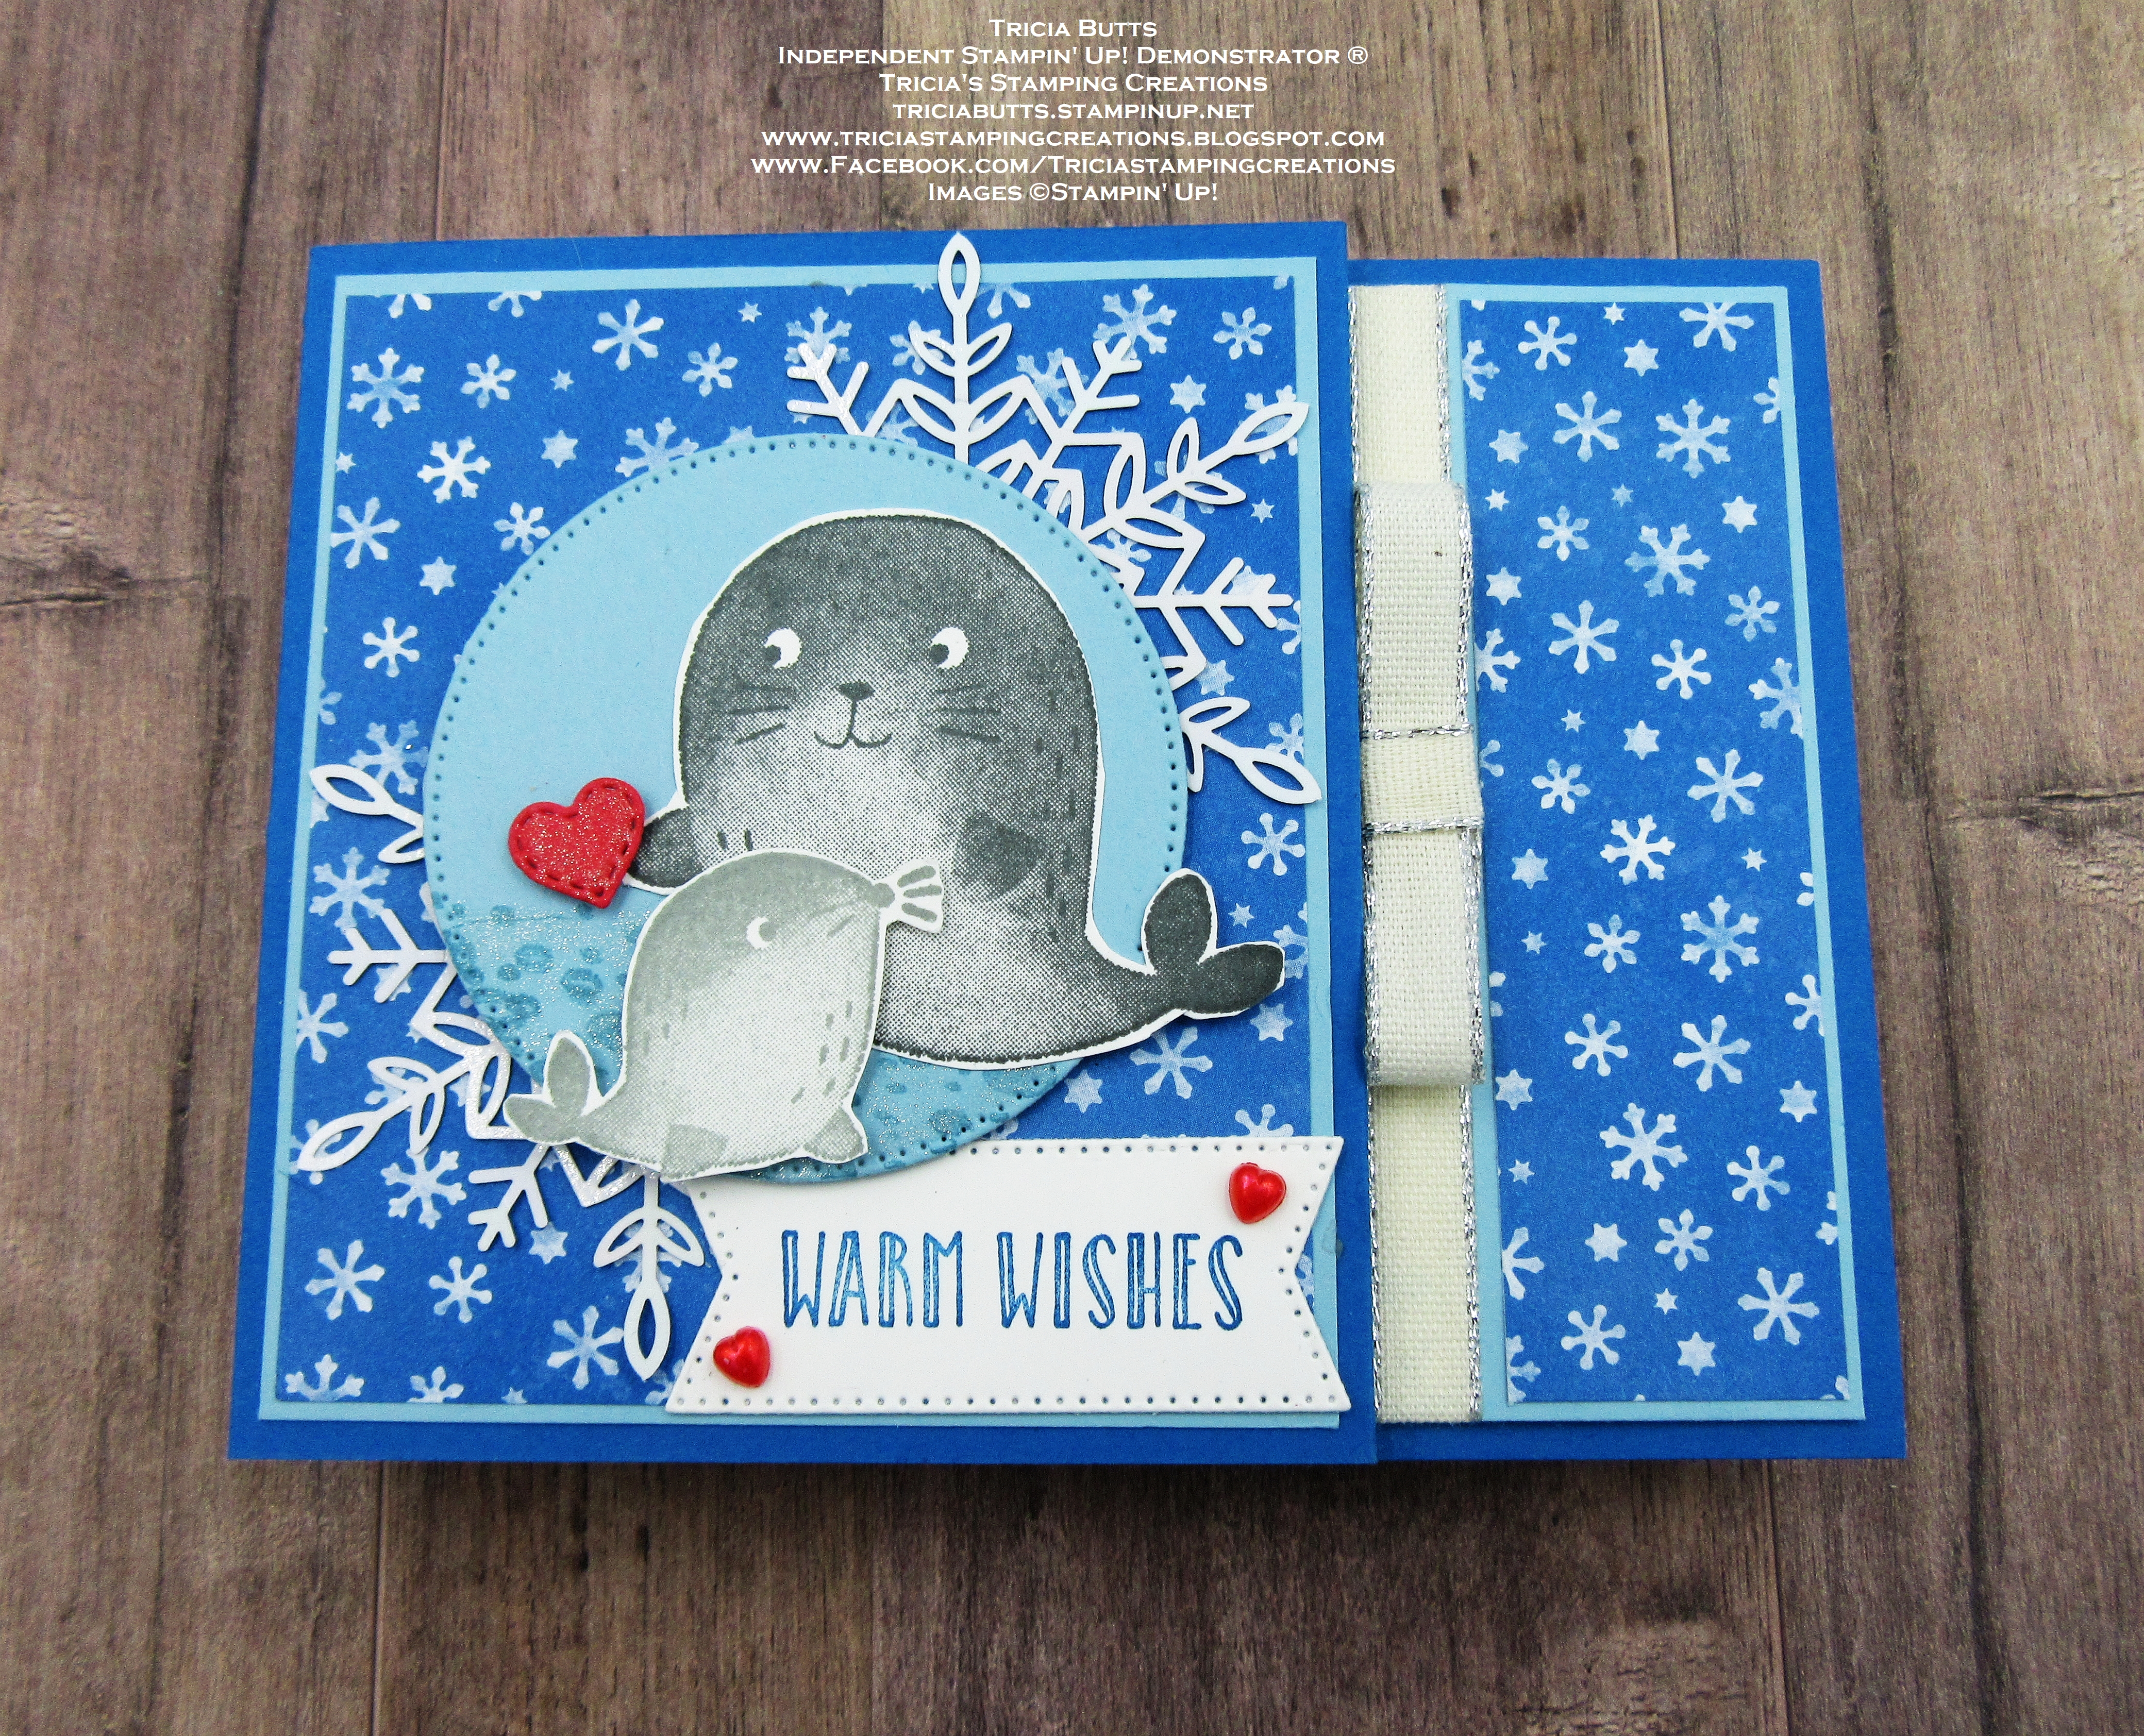
For my Gift Card Holder, I chose to create a simple design that is easy to duplicate. With the holidays approaching quickly, it helps to have a supply on hand in case you need a last minute gift for someone special. For my card design, I chose to use the cute Seal of Approval stamp set and paired it with one of the designs from the Storybook Gnomes Designer Series Paper. This Wintery themed card design would work well as a birthday card as well as for Christmas.
Products Used:
Seal of Approval stamp set (item #159762)
Stylish Shapes Dies (item #159183)
Give It A Whirl Dies (item #154336)
Essential Tag Punch (item #153607)
Storybook Gnomes Designer Series Paper (item #159615)
Pacific Point Cardstock (item #111350)
Balmy Blue Cardstock (item #146982)
Sweet Sorbet Cardstock (item #159268)
Basic White Cardstock (item #159276)
Balmy Blue Classic Ink Pad (item #147105)
Pacific Point Classic Ink Pad (item #147098)
Smoky Slate Classic Ink Pad (item #147113)
Basic Gray Classic Ink Pad (item #149165)
Sweet Sorbet Stampin' Blends Combo Pack (item #159224)
Clear Wink of Stella Glitter Brush (item #141897)
Wonderful Snowflakes (item #156340)
Silver 3/8" Metallic Edge Cotton Ribbon (item #159193)
Heart Pearls (item #159190)
Mini Stampin' Dimensionals (item #144108)
Mini Glue Dots (item #103683)
Tear & Tape Adhesive (item #154031)
Measurements:
Pacific Point Cardstock
Card Base - 4 1/4" x 11" (Scored at 5 1/2" & 9 1/4")
Balmy Blue Cardstock
Front Layer - 3 1/2" x 4"
Side Layer - 1 1/4" x 4"
Medium Circle die cut with the Stylish Shapes Dies
Storybook Gnomes Designer Series Paper
Front Layer - 3 3/8" x 3 7/8"
Side Layer - 1 1/8" x 4"
Front Inside Flap Layer - 1 1/2" x 4" 
Basic White Cardstock
Back Inside Layer - 5 1/4" x 4"
Front Inside Layer - 3 1/2" x 4" 
Sentiment Layer die cut with the Stylish Shapes Dies  
Small seal & large seal, fussy cut with Paper Snips
Sweet Sorbet Cardstock
Small Heart die cut with the Give It A Whirl Dies
This cute Gift Card Holder is so much fun to create and works for a variety of occasions. The basic layout is simple to create by folding the score lines at 5 1/2" & 9 1/4" to create the front and inside flap for the gift card. I used the Essential Tag Punch to create an opening along the edge of the Pacific Point cardstock flap before sticking it down with Tear & Tape. This makes it easier to slide the gift card in and out of the flap. The layers are easy to assemble and help dress up the design to make it special. I used one of the Wonderful Snowflakes to decorate the card front, cutting it in half to go behind the top and bottom of the Stitched Circle. I stamped the large seal with Basic Gray Classic ink and the small seal with Smoky Slate and fussy cut them both out with Paper Snips. For the inside layer, I added the side panel to the inside large Basic White panel, along the right side. I added a piece of the Silver Metallic Edge Cotton Ribbon along the left edge of the Balmy Blued cardstock and added a faux bow to the center. I stamped the front and inside sentiments with Pacific Point Classic ink to coordinate with the card design. The heart on the front was die cut using the Give It A Whirl Dies and I colored the heart with Clear Wink of Stella to give it some shimmer. To embellish the sentiment, I colored two of the Heart Pearls with the Dark Sweet Sorbet Stampin' Blends Marker and added them to the sentiment label. 
Thank you for taking the time to visit my blog. I hope that my gift card holder will inspire you to create your own wonderful projects, whether it's for the upcoming holidays or another special occasion. 
Please take the time to visit with my fellow Design Team members and see the wonderful projects they have to share on their blogs. Click on the links in the Roll Call List below to find your way and we would appreciate it if you would leave us a comment and let us know what you liked about our projects. 

If you live in the U.S. and do not have a Stampin' Up! Demonstrator, please contact me and I would be happy to help you with your creative projects. You may also visit my Online Store to place your order and have it shipped to you. 
Until Next Time

Happy Stamping,

Tricia Butts
Independent Stampin' Up! Demonstrator

Like What You See? Visit My Online Store Here

Visit My Facebook Business Page for Updates & Ideas

Click here to Contact Me


Save Up to 20% On Select Products
In The 2022-2023 Annual Catalog
Click Below To Visit My Online Store

Get Creative For The Holidays
With The July-December 2022 Mini Catalog
Click Below To Visit My Online Store


Saturday, October 8, 2022

Stamping Inkspiration October Blog Hop Sketch Challenge

Welcome to the Stamping Inkspiration October Blog Hop as we have fun with a Sketch Challenge this month. We have been challenged to create a card or 3D project using the sketch below to share with you all. Our wonderful Design Team members will be sharing their projects and ideas to help spark your creativity. 
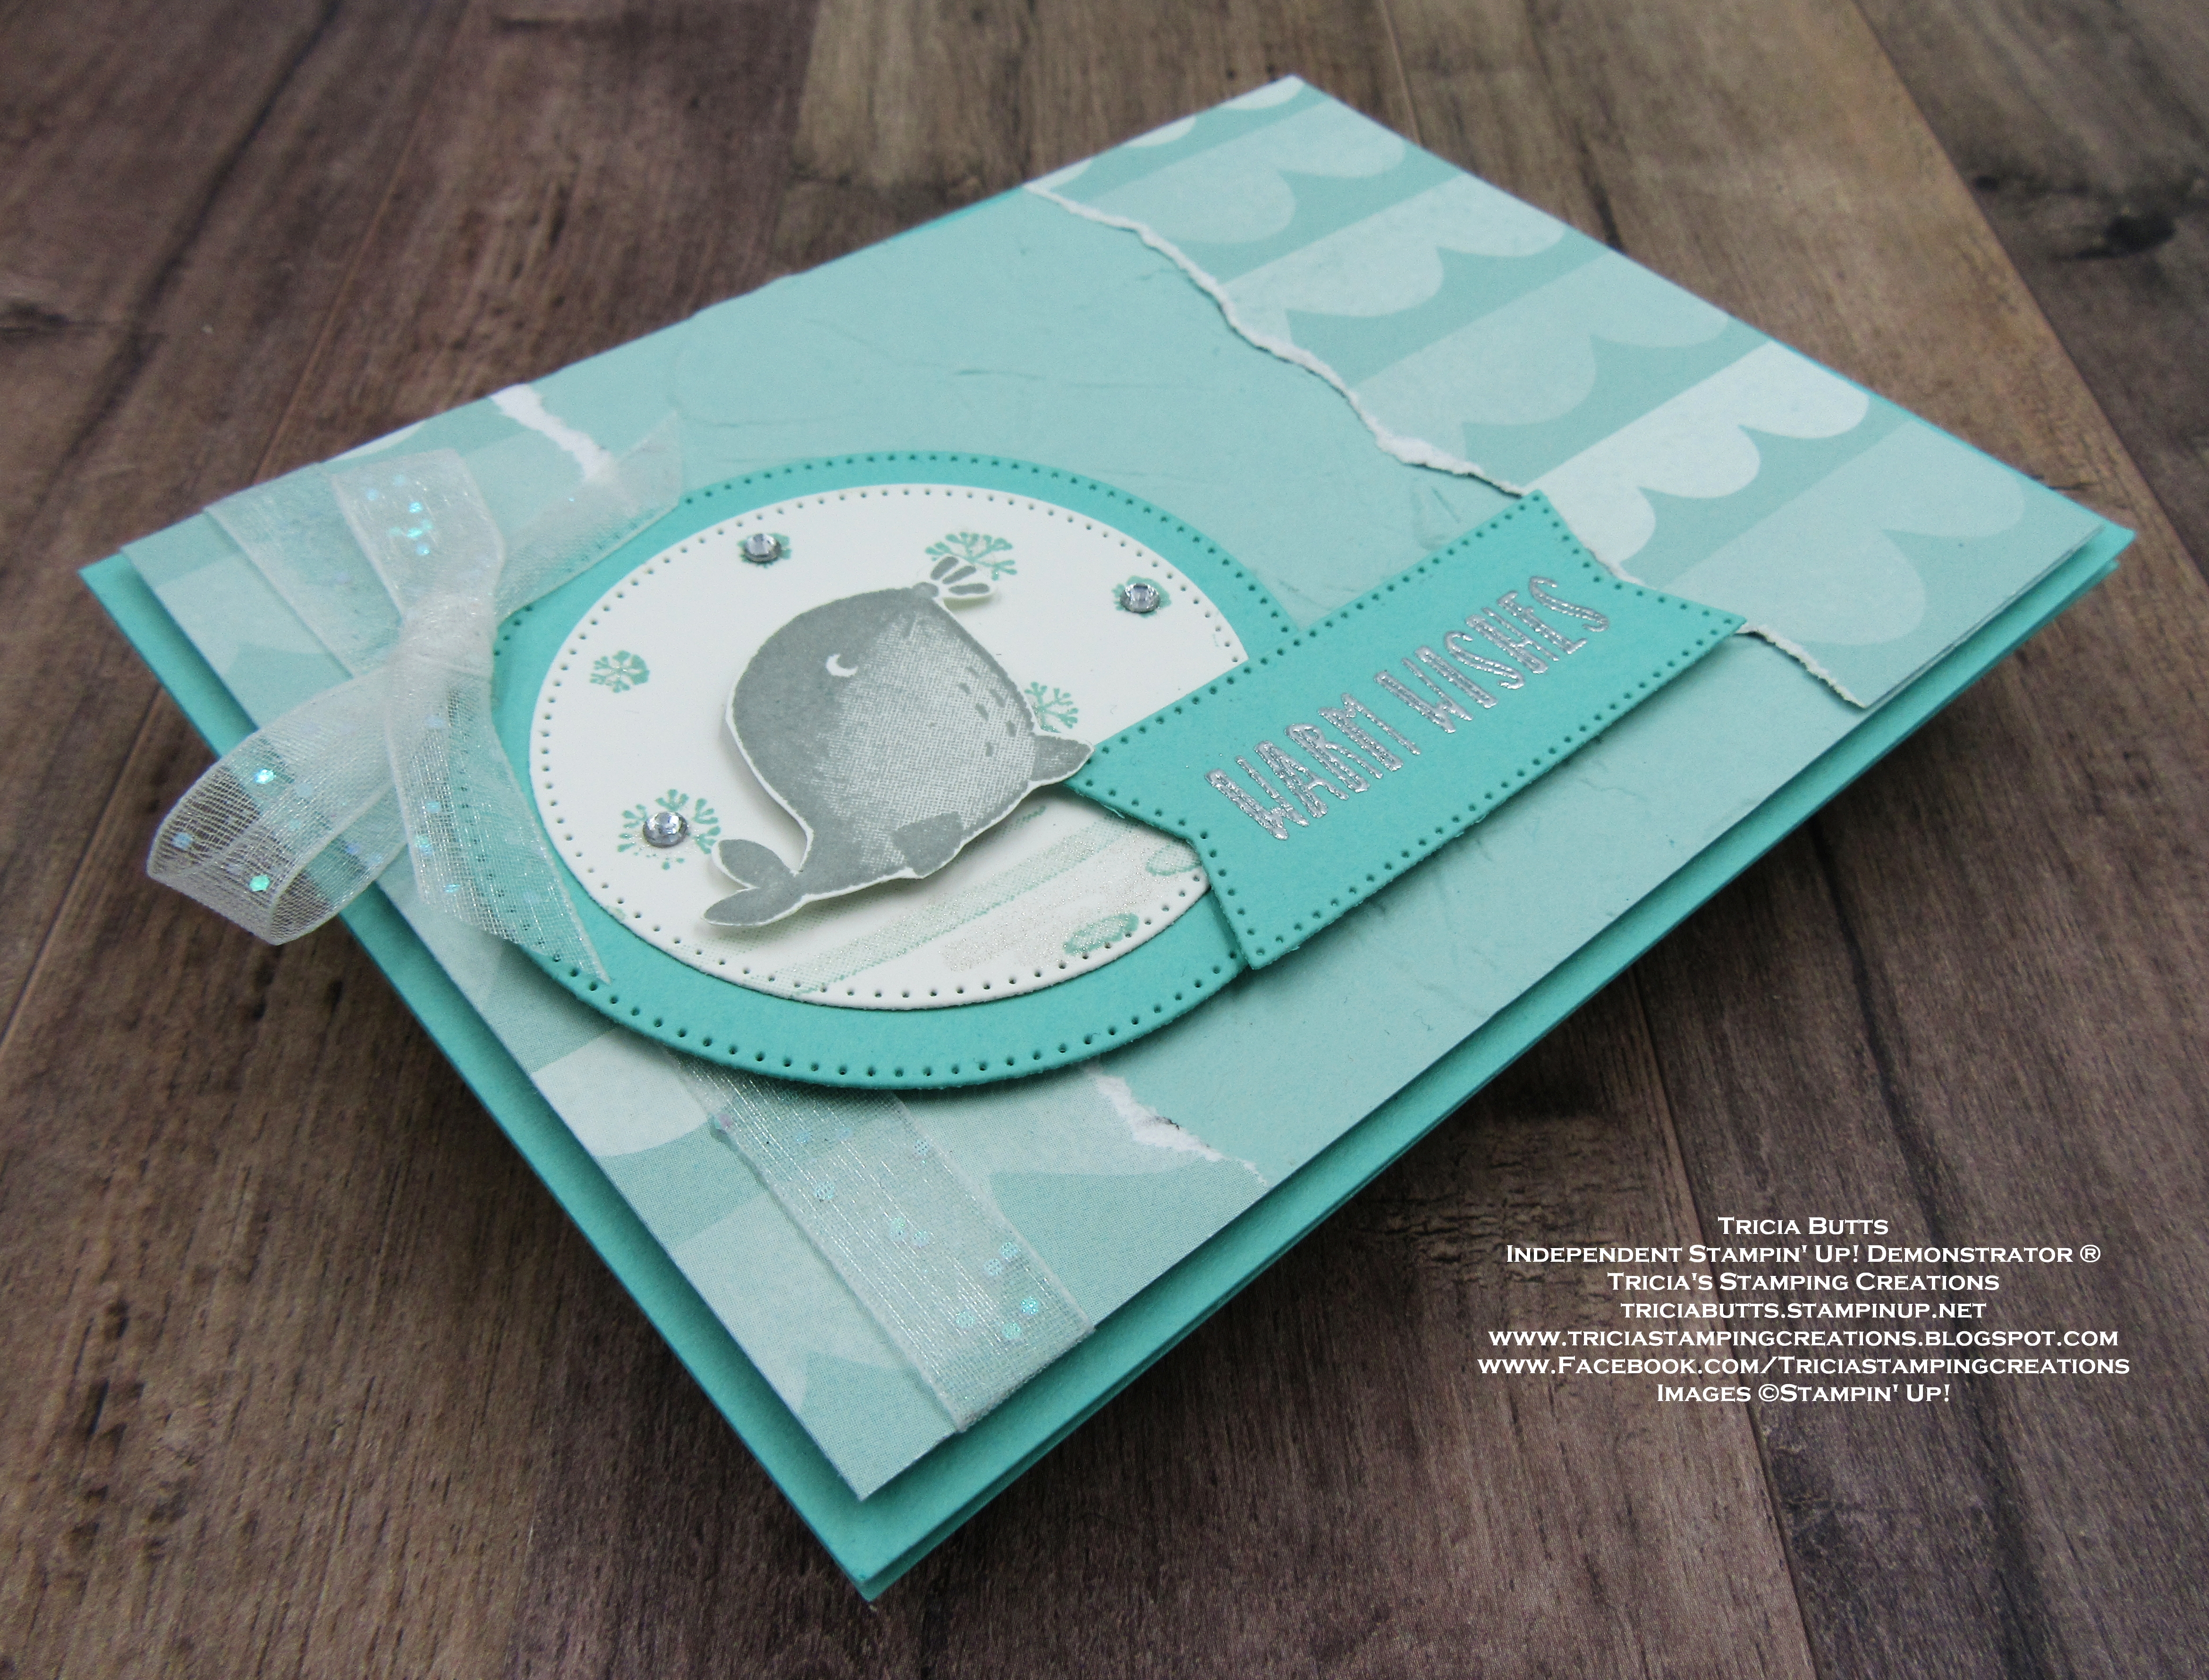
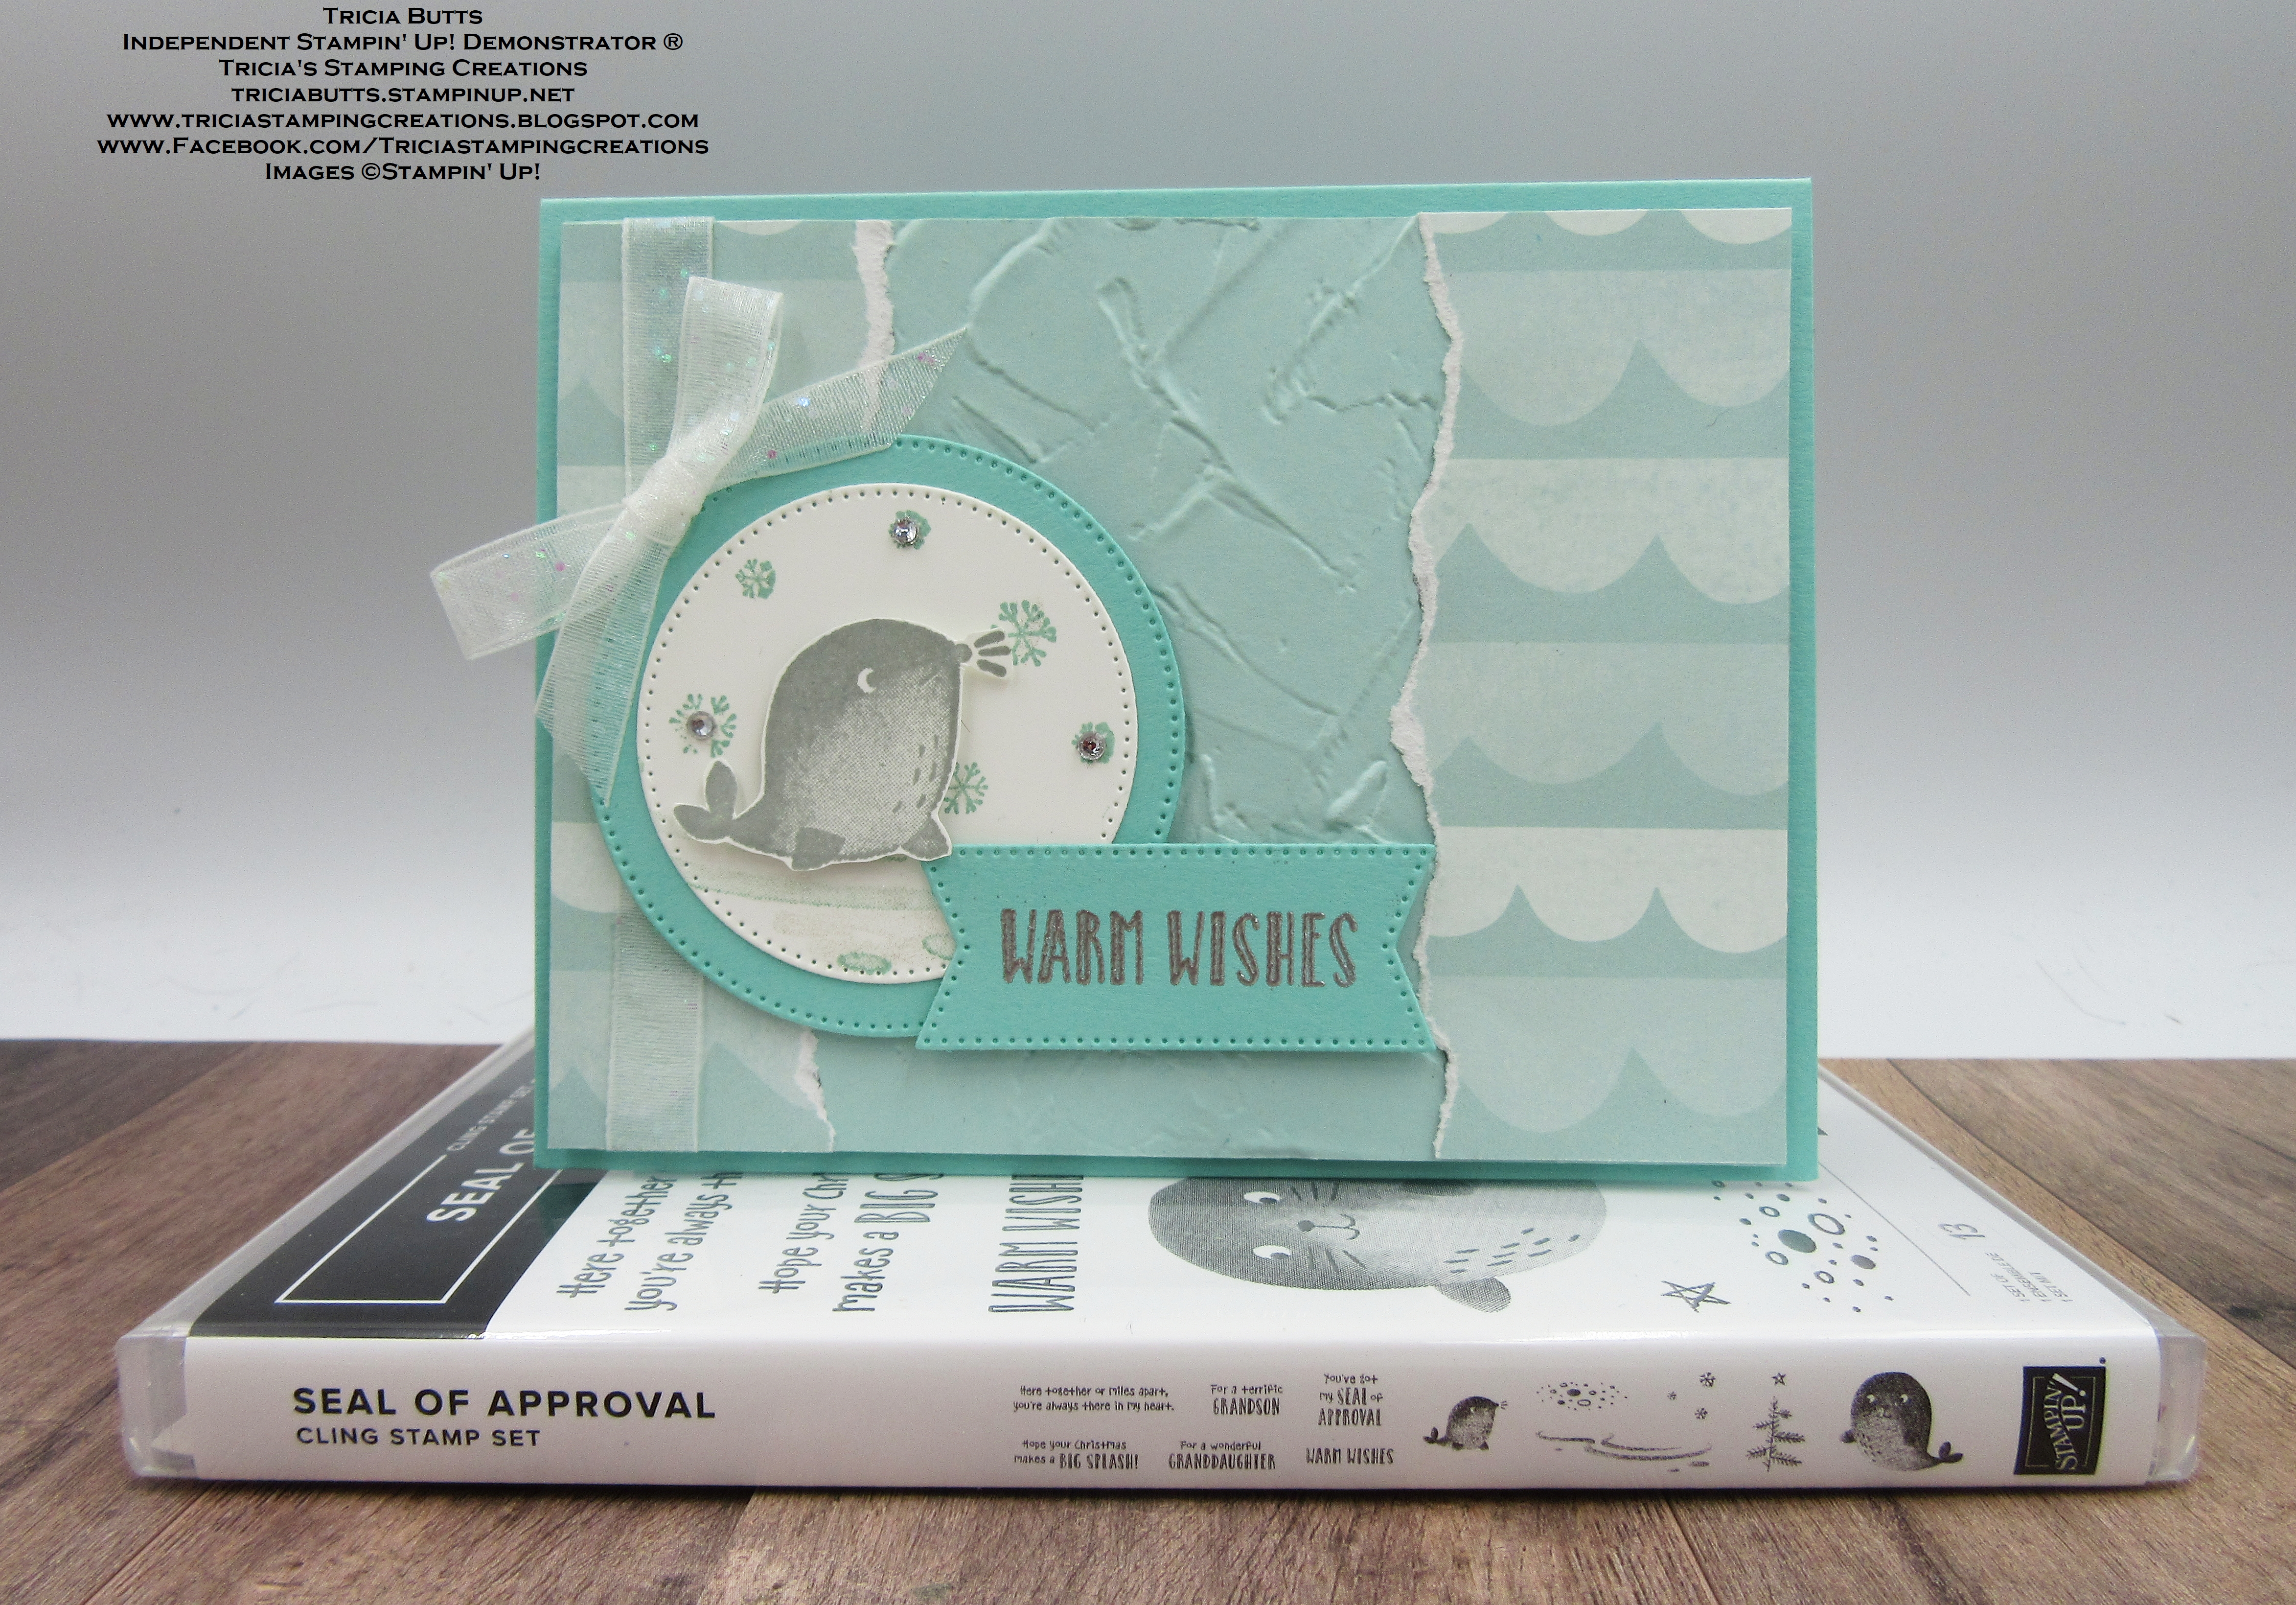
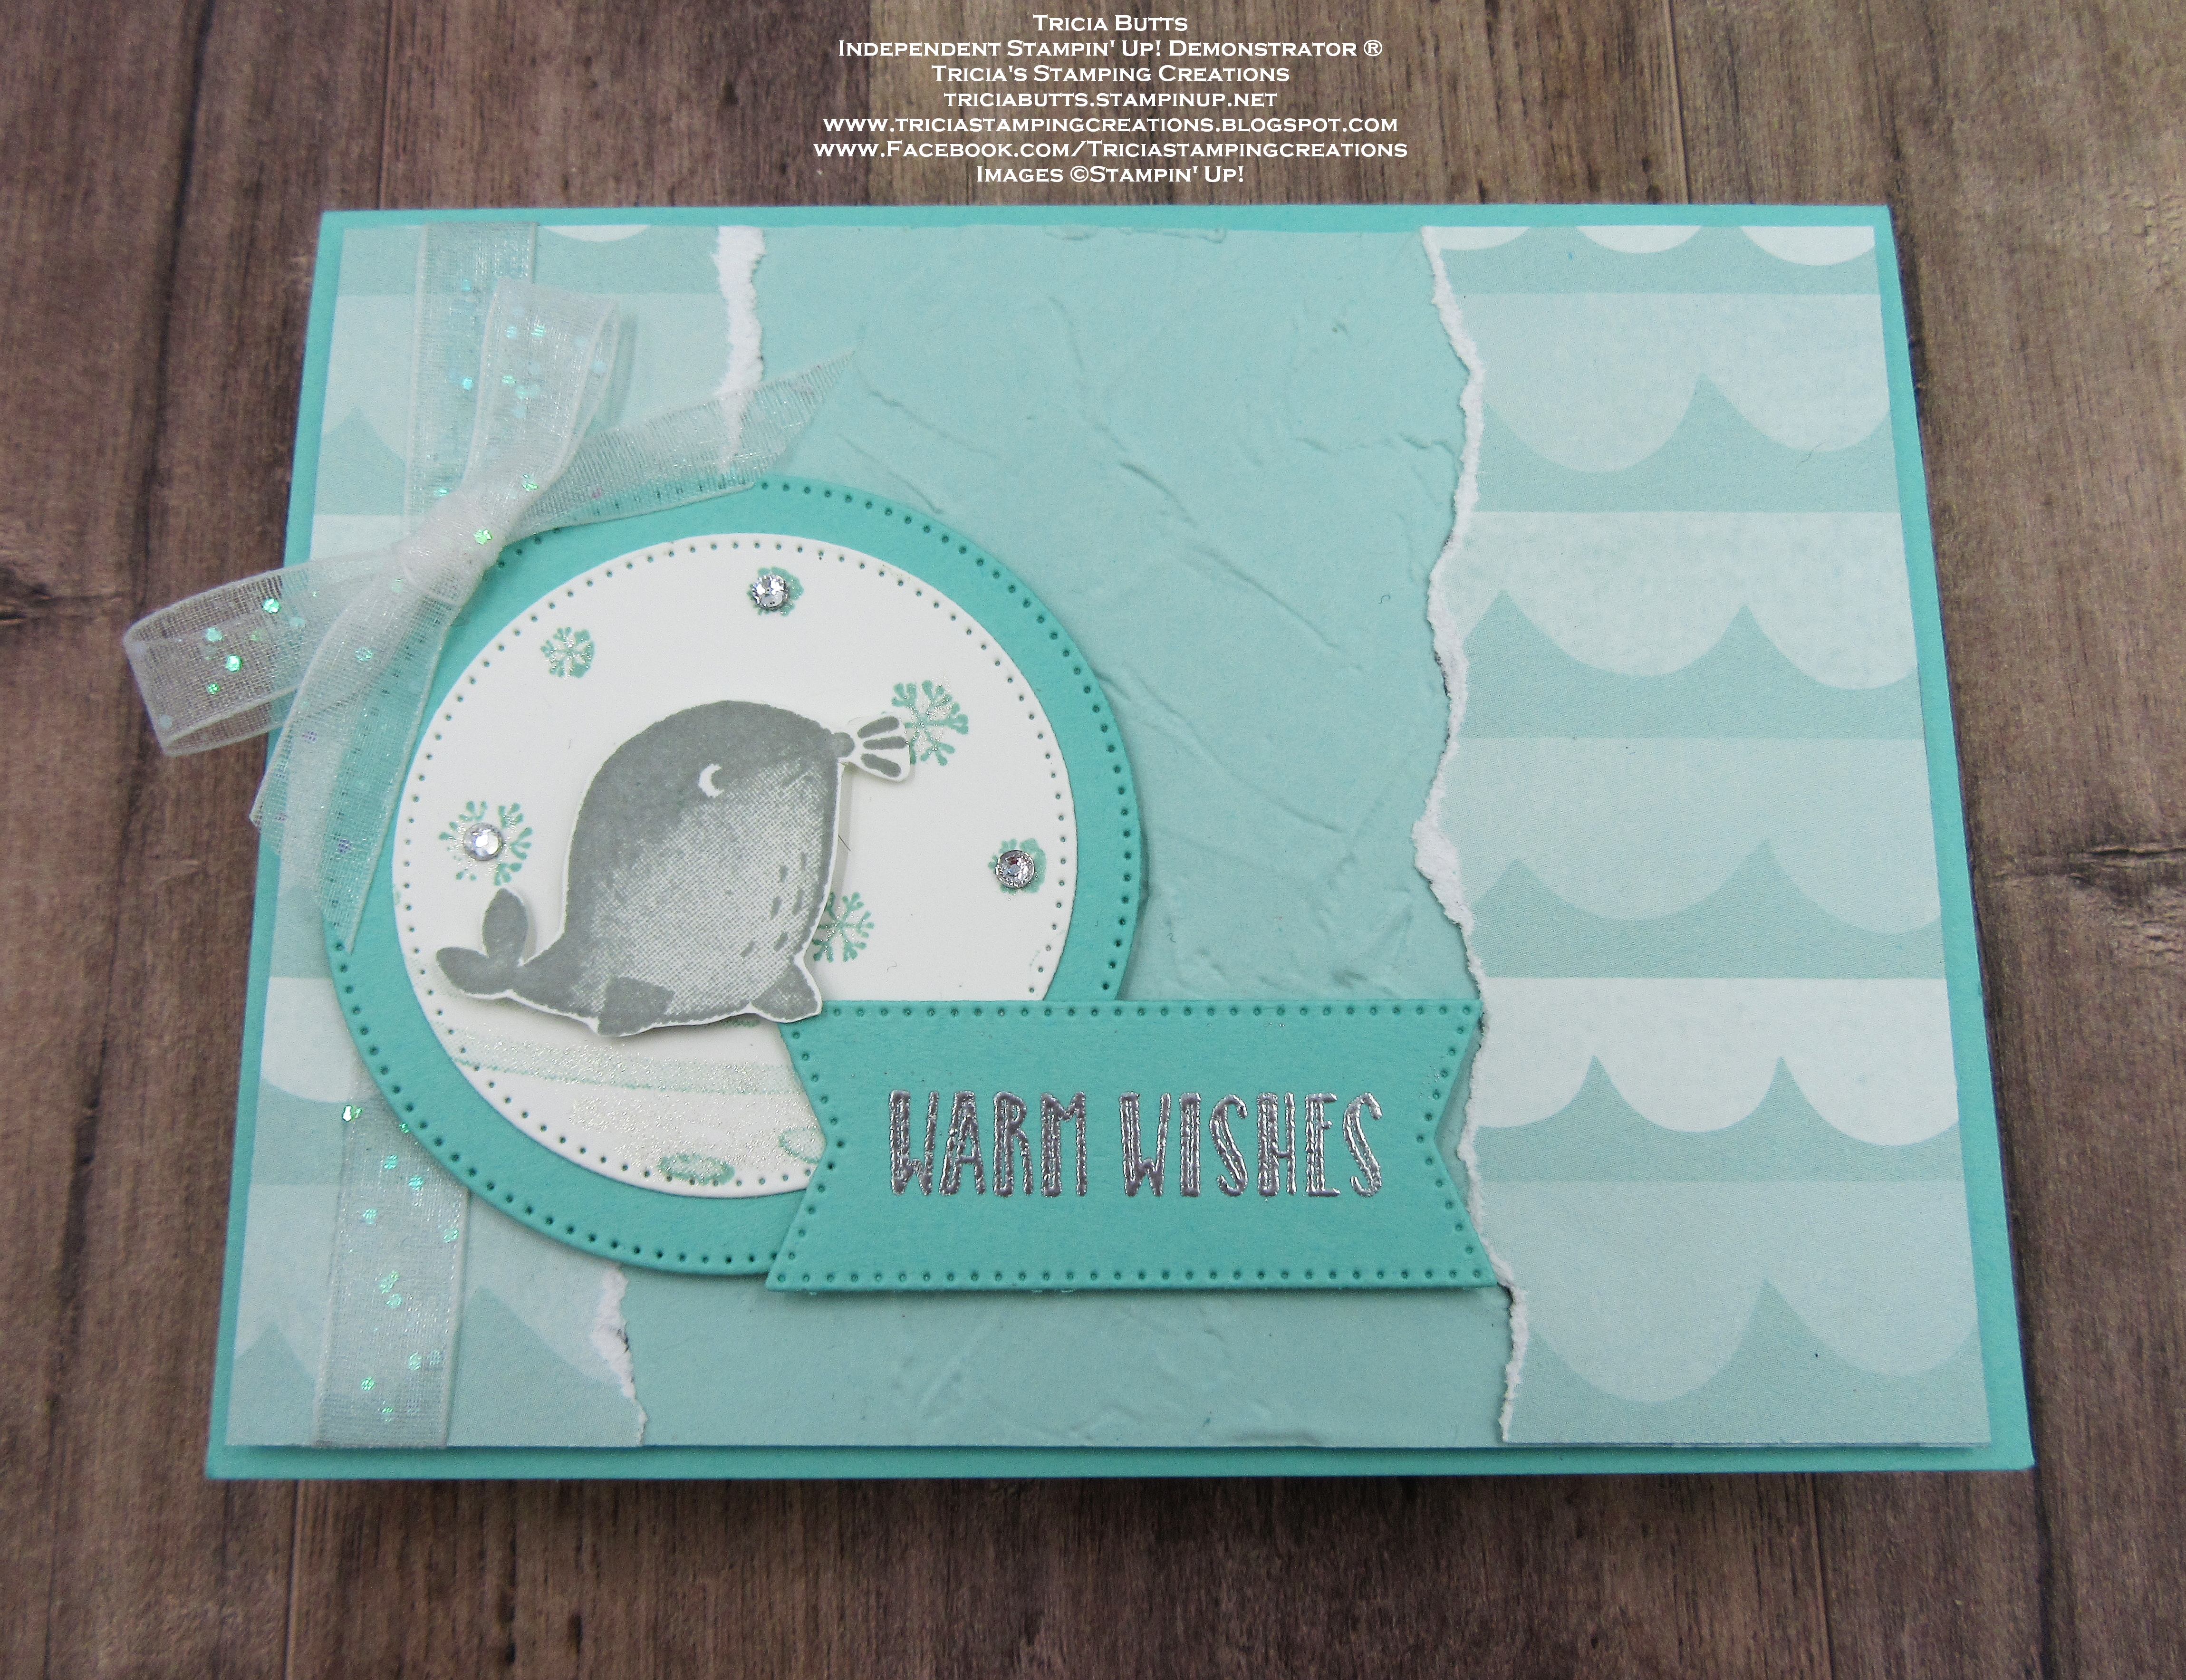
Today's card design is a fun design featuring the Seal of Approval stamp set from the July-December 2022 Mini Catalog. I paired it with one of the designs from the Celebrate Everything Designer Series Paper Host Reward, which you can earn Free with a qualifying order or party. The scalloped design made me think of waves, which works well with the cute seals in the stamp set. My card is more of an all occasion design, but you could easily change the sentiment to create a non-traditional holiday card. 
Products Used:
Seal of Approval stamp set (item #159762)
Celebrate Everything Designer Series Paper Host Reward 
(item #159913)
Stylish Shapes Dies (item #159183)
Painted Texture 3D Embossing Folder (item #154317)
Pool Party Cardstock (item #122924)
Coastal Cabana Cardstock (item #131297)
Basic White Cardstock (item #159276)
Pool Party Classic Ink Pad (item #147107)
Smoky Slate Classic Ink Pad (item #147113)
Versamark Pad (item #102283)
Metallics Embossing Powders (item #155555)
Clear Wink of Stella Glitter Brush (item #141897)
White 3/8" Glittered Organdy Ribbon (item #156408)
Basic Rhinestone Jewels (item #144220)
Stampin' Dimensionals (item #104430)
Measurements:
Coastal Cabana Cardstock
Card Base - 8 1/2" x 5 1/2" (Scored at 4 1/4")
Large Circle die cut with the Stylish Shapes Dies
Sentiment Label die cut with the Stylish Shapes Dies
Basic White Cardstock
Medium Circle die cut with the Stylish Shapes Dies
Pool Party Cardstock
Card Front - 5 1/4" x 4" Embossed with the Painted Texture Embossing Folder
Celebrate Everything Designer Series Paper
1 piece - 3" x 4" (tear vertically down approx half way on the 3" side to create two pieces approx. 1 1/2" x 4")
This card was so much fun to design and I love the non-traditional theme of this Christmas stamp set. I wanted to create the look and feel of the ocean for my background, so I used the Painted Texture 3D Embossing Folder to add texture to the Pool Party cardstock layer. I attached the torn pieces of the designer series paper to either side of the embossed Pool Party layer, to create the look of waves to coordinate with my focal image. For the cute seal image, I stamped it with Smoky Slate Classic ink onto a piece of Basic White cardstock and fussy cut it out with Paper Snips. I stamped the snowflakes and water image onto the Basic White circle using Pool Party Classic ink, stamping off once on a scrap piece of paper. I attached the seal onto the circle with Stampin' Dimensionals and added several Basic Rhinestones to the centers of three of the snowflakes. For the sentiment, I heat embossed the image with Silver embossing powder. I added a piece of the White Glittered Organdy Ribbon on the left side of the card front, over the designer series paper. 
To assemble the card design, I attached the Basic White circle to the Coastal Cabana circle and added it to the card front on the left side with Stampin' Dimensionals, slightly overlapping the ribbon. I then added the sentiment to the right side of the circle, so that it slightly overlaps the focal circle. To complete the design, I tied a bow with the Glittered Organdy Ribbon and attached it to the top left side of the circle. For a touch of sparkle, I added some Clear Wink of Stella to the stamped snowflakes and water on the focal circle. I love how this card design turned out. This design is so versatile and can be used for so many occasions. 
Thank you for taking the time to visit my blog. I hope that my card design will help inspire you to create your own wonderful projects using this fun sketch challenge. There are so many wonderful possibilities to explore to create your own beautiful projects. 
Now it's time to visit Jan's blog and see what wonderful projects she has to share with us. Just click on the Next button below to visit her blog or use the Roll Call List below to find your way. We would love it if you would leave us a comment and let us know what you liked about our projects. I hope you enjoy the rest of our blog hop. 

Roll Call List

If you live in the U.S. and do not have a Stampin' Up! Demonstrator, please contact me and I would be happy to help you with your creative projects. You may also visit my Online Store to place your order and have it shipped to you. 

Until Next Time

Happy Stamping,

Tricia Butts
Independent Stampin' Up! Demonstrator

Like What You See? Visit My Online Store Here

Visit My Facebook Business Page for Updates & Ideas

Click here to Contact Me


Last Days To Sign Up
For The Ho Ho Ho Paper Pumpkin Card Kit
Click Below To Subscribe By October 10th

Get Creative For The Holidays
With The July-December 2022 Mini Catalog
Click Below To Visit My Online Store