Tuesday, December 28, 2021

Paper Pumpkin Possibilities December Blog Hop Lots of Pun

Welcome to the Paper Pumpkin Possibilities December Blog Hop as we showcase fun alternative projects using the Lots of Pun Kit. You will be visiting with our talented Design Team Members as they share their projects and ideas to help you think outside the box. 
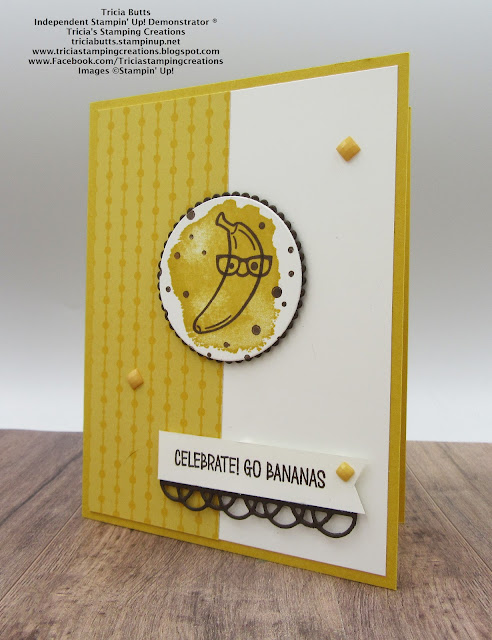
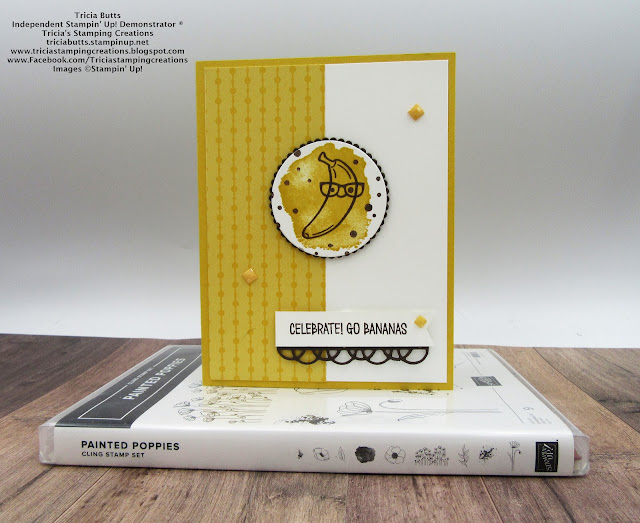
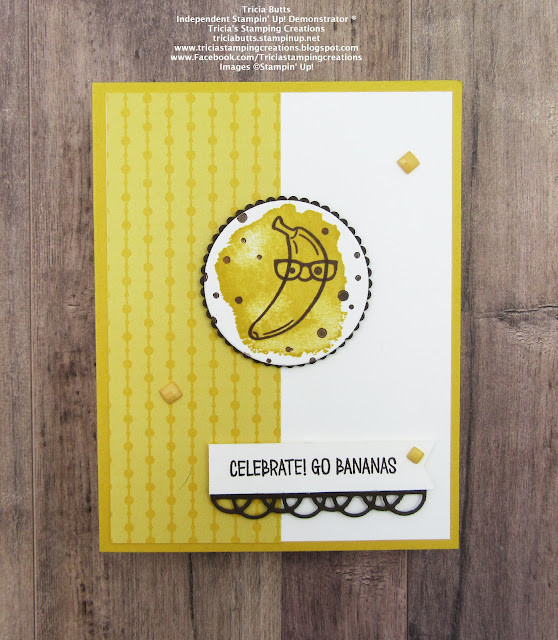
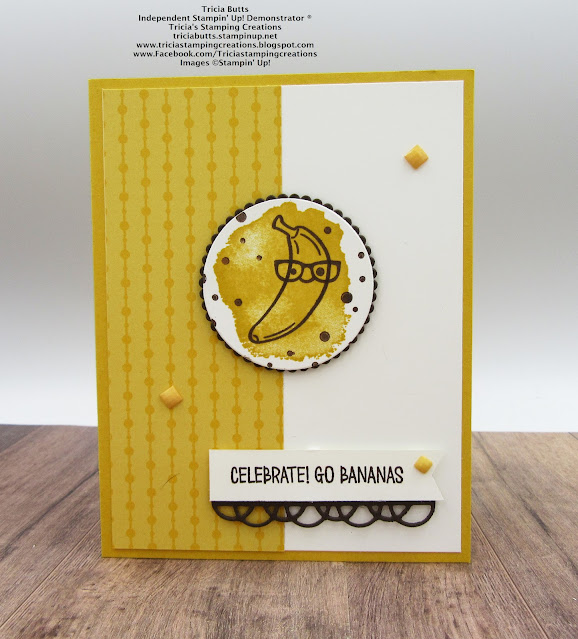
This fun Paper Pumpkin has so many wonderful possibilities and I wanted to try creating a cute alternative card design with the exclusive stamp set. The images in this stamp set are perfect for funny Valentine's Day cards or quirky all occasion cards. For today's card, I decided to create a celebration card using the banana image and coordinating sentiment. 
Products Used:
Paper Pumpkin December 2021 Lots of Pun Kit
Painted Poppies stamp set (item #151599)
Painted Labels Dies (item #151605)
Layering Circles Dies (item #151770)
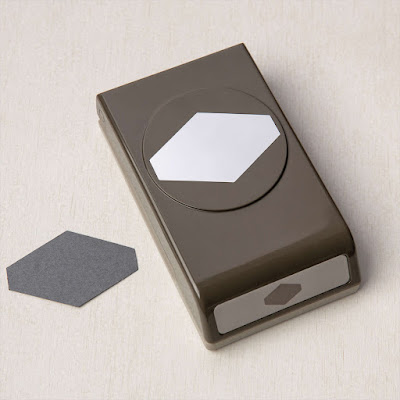
Tailored Tag Punch (item #145667)
2020-2022 In Color 6"x6" Designer Series Paper (item #155230)
Bumblebee Cardstock (item #153077)
Early Espresso Cardstock (item #119686)
Basic White Cardstock (item #159276)
Bumblebee Classic Ink Pad (item #153116)
Early Espresso Classic Ink Pad (item #147114)
2020-2022 In Color Square Gems (item #155572)
Stampin' Dimensionals
Measurements:
Bumblebee Cardstock
Card Base - 8 1/2" x 5 1/2" (Scored at 4 1/4")
Basic White Cardstock
Card Front - 5 1/4" x 4"
Focal circle die cut with the Layering Circles Dies 
Sentiment Label strip - 5/8" x 3"
Bumblebee Designer Series Paper
1 Strip - 2" x 5 1/4"
Early Espresso Cardstock
Scalloped Circle die cut with Layering Circles Dies
Border die cut with Painted Labels Dies
This card layout can be used with any of the images and sentiments from this wonderful stamp set to create punny cards to send to family and friends. For my card design, I chose to use Bumblebee cardstock for the card base to tie in with the color of a ripe banana. I added a piece of the Bumblebee designer series paper to the left side of the Basic White card front to help step up the card design. For the focal image, I stamped the background using the large splotch stamp in the Painted Poppies stamp set onto the Basic White circle using Bumblebee Classic ink. I then stamped the banana, face and glasses images with Early Espresso Classic ink onto the Bumblebee stamped background. This is great for adding color to the image. I added some dots with Early Espresso for the background to add a bit of texture to the design. I layered the focal image onto the Early Espresso scalloped circle and attached it to the center of the card front with Stampin' Dimensionals. For the sentiment, I stamped the image onto a strip of Basic White cardstock with Early Espresso cardstock and flagged the right end with the Tailored Tag Punch to create a banner. I added the Early Espresso border to the bottom of the sentiment label and added it to the card front with Stampin' Dimensionals To finish off the card design, I added some Bumblebee Square Gems for a touch of bling. Doesn't this card just make you want to smile? I love making happy cards and I can see so many wonderful possibilities with the stamp set in this kit. 
Thank you for taking the time to visit my blog. I hope that my card design will help you explore creating your own amazing alternative projects. The exclusive stamp set in this kit will provide you with endless opportunities to create fun projects long after the other supplies have been used up.
Now it's time to visit Mary's blog and see what she has created with this wonderful kit. Just click the Next button to visit her blog. We would love it if you would leave us a comment and let us know what you enjoyed about our projects. I hope our blog hop inspires you to create your own beautiful projects. 

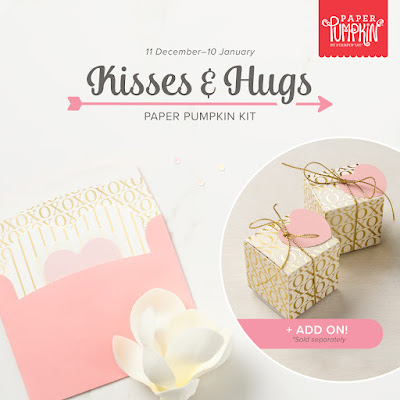
If you live in the U.S. and do not have a Stampin' Up! Demonstrator, please contact me and I would be happy to help you with your creative projects. You may also visit my Online Store to place your order and have it shipped to you. If you are not already a Paper Pumpkin subscriber, make sure to sign up by January 10th to receive the January Kisses & Hugs Kit. 

Until Next Time

Happy Stamping,

Tricia Butts
Independent Stampin' Up! Demonstrator

Like What You See? Visit My Online Store Here

Visit My Facebook Business Page for Updates & Ideas

Click here to Contact Me


Stock Up On Your Favorite Retiring Products
From The July-December 2021 Mini Catalog
Click Below To Visit My Online Store

Send Kisses & Hugs
With The January Paper Pumpkin Kit
Click Below To Subscribe By January 10th, 2022

Saturday, December 25, 2021

3D Paper Trimmer Blog Hop Celebrate Sale-a-bration

Welcome to the 3D Paper Trimmer December Blog Hop as we showcase products from the new 2022 Sale-a-bration Catalog. You will be visiting with talented Stampin' Up! Demonstrators as they share their projects and ideas to help inspire you. There are so many wonderful new products that you can earn Free with a qualifying order beginning January 4th, 2022.
So when I created my project, I was in a hurry and missed that the theme was for the new Sale-a-bration Catalog products and chose to use one of the new suites in the January-June 2022 Mini Catalog. Oops, my bad. The good news is that you get a wonderful project to create for Valentine's Day and if you order at least $50 in products during Sale-a-bration, you can choose a Free Sale-a-bration product. So with that in mind, for my project today, I chose a cute treat box from the new January-June 2022 Mini Catalog that is already precut and scored for you and even has the adhesive strips on the sides for easy assembly. They are great for Valetine's Day but would also be perfect for any occasion as a way to show someone you care.
Products Used:
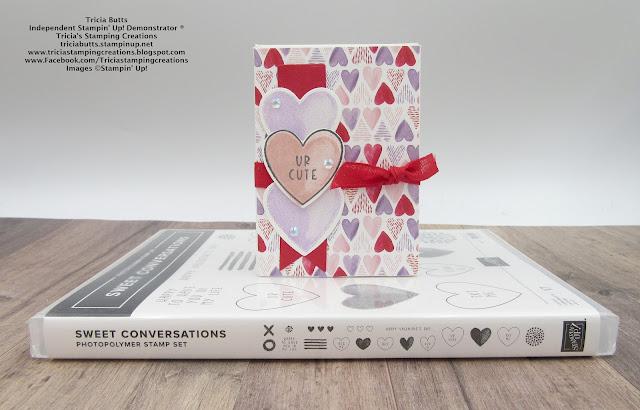
Sweet Conversations Bundle (item #157624)
Sweet Little Boxes (item #157628)
Sweet Talk Designer Series Paper (item #157616)
Real Red Cardstock (item #102482)
Blushing Bride Classic Ink Pad (item #147100)
Highland Heather Classic Ink Pad (item #147103)
Memento Tuxedo Black Pad (item #132708)
Basic White Cardstock (item #159276)
Real Red 3/8" Faux Linen Ribbon (item #158129)
Iridescent Rhinestones Basic Jewels (item #158130)
Stampin' Dimensionals (item #104430)
Measurements:
Sweet Talk Designer Series Paper
2 Pieces - 2 1/2" x 3 1/2"
Basic White Cardstock
3 hearts stamped and die cut with the Sweet Conversations Bundle
Real Red Cardstock
Banner die cut with Sweet Conversations Bundle
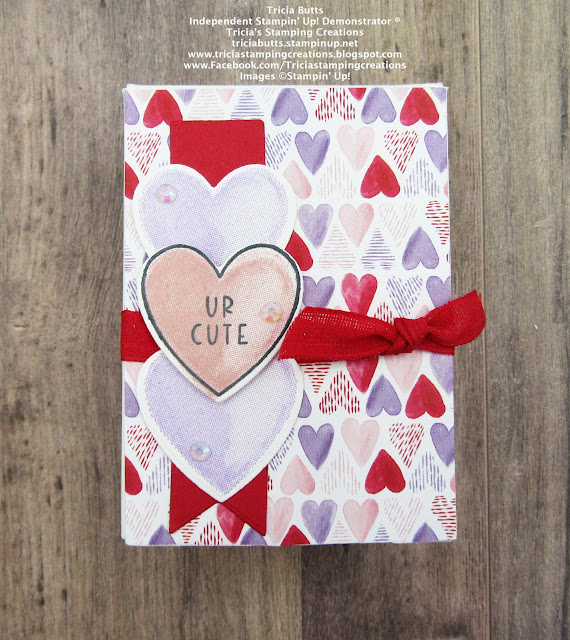
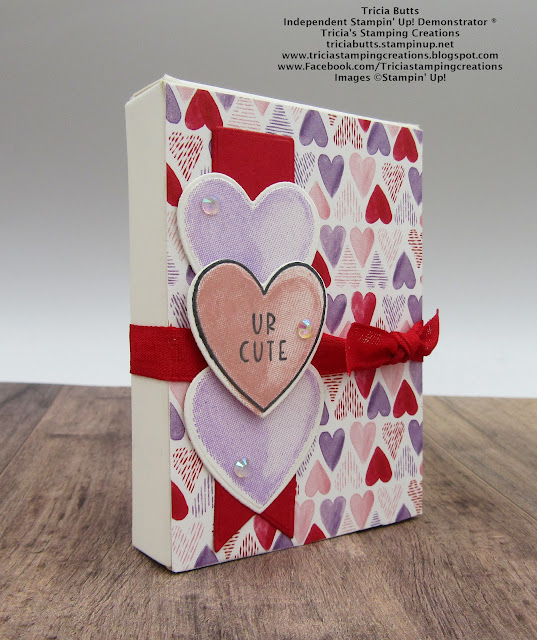
This adorable little treat box measures 3 1/2' x 2 1/2" x 5/8" and is easy to decorate. I used products from the new Sweet Talk Suite Collection as they all coordinate beautifully to make decorating stress free and simple. I added the two pieces of designer series paper to the box, one on the front and one on the back. I tied a piece of the pretty Real Red Faux Linen around the middle of the box and tied a knot on the right side of the front of the box. I stamped three hearts onto a piece of Basic White cardstock - 2 with Highland Heather Classic ink and one with the Memento Tuxedo Black ink for the outline with sentiment and then with the Blushing Bride Classic ink to color the inside. I die cut them with the coordinating Sweet Hearts Dies from the bundle and also die cut a banner using Real Red cardstock. I cut the banner in half and attached one half above the ribbon and one half below the ribbon. I then attached the two Highland Heather hearts to cover the open area and added the Blushing Bride heart with Stampin' Dimensionals in the middle. To embellish, I used the wonderful Iridescent Rhinestones to add a touch of bling to each of the hearts. This pretty little box would be a wonderful treat to give out for Valentine's Day and with 10 boxes in the pack, you could create multiple designs to make them extra special. 
Thank you for taking the time to visit my blog. I hope that my project will help inspire you to create your own fun treat boxes and I encourage you to explore the wonderful new Sale-a-bration Catalog to personalize your projects. There are so many beautiful designer series paper packs in the Sale-a-bration Catalog that would look great with these cute treat boxes. 
Now it's time to visit Sonja's blog and see what she has to share with us from the Sale-a-bration Catalog. Just click the Next button to visit her blog. We would appreciate it if you would leave us a comment and let us know what you liked about our projects. I hope you enjoy the rest of our blog hop. 


If you live in the U.S. and do not have a Stampin' Up! Demonstrator, please contact me and I would be happy to help you with your creative projects. You may also visit my Online Store to place your order and have it shipped to you. 

Until Next Time

Happy Stamping,

Tricia Butts
Independent Stampin' Up! Demonstrator

Like What You See? Visit My Online Store Here

Visit My Facebook Business Page for Updates & Ideas

Click here to Contact Me 


Stock Up On Your Favorite Retiring Products
From The July-December 2021 Mini Catalog
Click Below To Visit My Online Store

Send Messages of Love 
With The Kisses & Hugs January Paper Pumpkin Kit
Click Below To Subscribe By January 10th, 2022


Friday, December 24, 2021

Ink. Stamp. Share. December Monthly Blog Hop New Catalog Sneak Peeks

Welcome to the Ink. Stamp. Share. December Monthly Blog Hop as we share Sneak Peeks from the upcoming January-June 2022 Mini Catalog and 2022 Sale-a-bration Catalog. You will be visiting with talented Stampin' Up! Demonstrators from around the world as they share their projects and ideas to help inspire you.
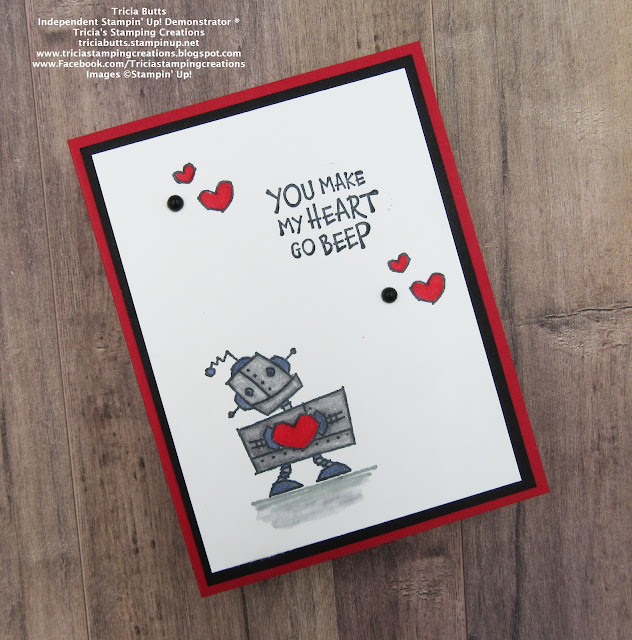
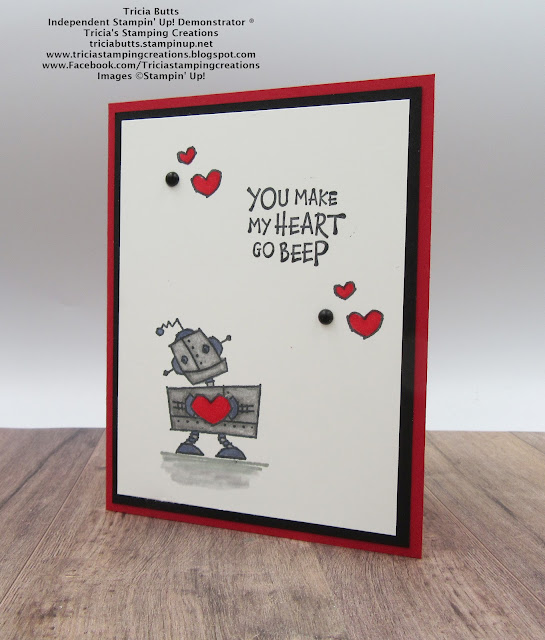
The new January-June 2022 Mini Catalog is full of amazing new products and it was hard to choose one to share as my Sneak Peek for today's hop. With Valentine's Day being the next big holiday on the horizon, I thought I would share a cute Valentine's Day card using the cute Nuts & Bolts stamp set. This stamp set is perfect for creating clean and simple card designs using simple stamping with stamps, paper and ink. 
Products Used:
Nuts & Bolts stamp set (item #157550) Sneak Peek
Real Red Cardstock (item #102482)
Basic Black Cardstock (item #121045)
Basic White Cardstock (item #159276)
Memento Tuxedo Black Pad (item #132708)
Smoky Slate Classic Ink Pad (item #147113)
Smoky Slate Stampin' Blends Combo Pack (item #154904)
Real Red Stampin' Blends Combo Pack (item #154899)
Misty Moonlight Stampin' Blends Combo Pack (item #153108)
Color Lifter (item #144608)
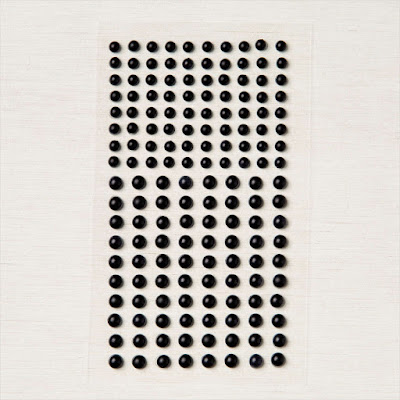
Matte Black Dots (item #154284)
Measurements:
Real Red Cardstock
Card Base - 8 1/2" x 5 1/2" (Scored at 4 1/4")
Basic Black Cardstock
Layer 1 - 5 1/4" x 4"
Basic White Cardstock 
Card Front - 5" x 3 3/4"
This card design is so simple to create and with just a little coloring with Stampin' Blends Markers you can transform a cute stamped image into something special. It's so hard to create fun masculine card designs, which is why I love this stamp set so much. The sentiments are wonderful and "punny" and work for guys of all ages. I went with a black, white and red color combination with a little gray for this heart felt Valentine's Day card. There are so many adorable images and sentiments that you could create a whole set of these cute cards. 
Thank you for taking the time to visit my blog. I hope that my card design will help inspire you to explore the amazing new products in the upcoming new catalogs. There are so many wonderful possibilities to help you create projects for the upcoming holidays. 
Now it's time to visit Victoria's blog and see what wonderful products she is featuring in her Sneak Peek projects. Just click on the Next button to visit her blog or use the Roll Call List to find your way. We would love it if you would leave us a comment and let us know what you liked about our projects. I hope you enjoy the rest of our blog hop. 

Roll Call
If you live in the U.S. and do not have a Stampin' Up! Demonstrator, please contact me and I would be happy to help you with your creative projects. You may also visit my Online Store to place your order and have it shipped to you. 

Until Next Time

Happy Stamping,

Tricia Butts
Independent Stampin' Up! Demonstrator

Like What You See? Visit My Online Store Here

Visit My Facebook Business Page for Updates & Ideas

Click here to Contact Me


Stock Up On Your Favorite Retiring Products

From The July-December 2021 Mini Catalog

Click Below To Visit My Online Store


Send Kisses & Hugs 
With The January Paper Pumpkin Kit
Click Below To Subscribe By January 10th, 2022


Saturday, December 18, 2021

Stamping With Friends December Blog Hop Mini/Sale-a-bration 2022 Sneak Peeks

Welcome to the Stamping With Friends December Blog Hop, as we showcase Sneak Peek projects, featuring products from the January-June 2022 Mini Catalog and 2022 Sale-a-bration Catalog. Our wonderful Design Team Members will be sharing projects and ideas to help you get excited about these amazing new catalogs. 
One of my favorite things to do with new products is to mix and match them to create projects. For today's card design, I decided to showcase the Sweet Conversations Bundle from the Sweet Talk Suite in the January-June 2022 Mini Catalog with the cute Awesome Otters stamp set from the 2022 Sale-a-bration Catalog. I love creating sweet Valentine's Day cards using animal images and the cute otters in this stamp set work perfectly with the hearts in the Sweet Conversations stamp set. The variety of dies in the coordinating Sweet Hearts Dies are so much fun and provide a lot of possibilities for embellishing projects. 
Products Used:
Sweet Conversations Bundle (item #157524)
Awesome Otters stamp set (item #158087) 
Painted Texture 3D Embossing Folder (item #1054317)
Layering Circles Dies (item #151770)
Tailored Tag Punch (item #145667)
Real Red Cardstock (item #102482)
Blushing Bride Cardstock (item #131198)
Basic White Cardstock (item #159276)
Gold Foil Sheets (item #132622)
Blushing Bride Classic Ink Pad (item #147100)
Memento Tuxedo Black Pad (item #132708)
Crumb Cake Stampin' Blends Combo Pack (item #154882)
Cinnamon Cider Stampin' Blends Combo Pack (item #153105)
Mini Stampin' Dimensionals (item #144108)
Measurements:
Real Red Cardstock 
Card Base - 8 1/2" x 5 1/2" (Scored at 4 1/4") 
Framed Hearts die cut with Sweet Hearts Dies 
Blushing Bride Cardstock 
Card Front - 5 1/4" x 4" embossed with the Painted Texture 3D Embossing Folder
Basic White Cardstock
Medium circle die cut with Layering Circles Dies 
Otter image stamped and fussy cut with Paper Snips
Heart image stamped and die cut with the Sweet Conversations Bundle
Sentiment strip - 1/2" x 3 1/2" ends flagged with the Tailored Tag Punch
Gold Foil Sheet
Circle die cut with Layering Circles Dies
This cute card design is so much fun for Valentine's Day. I chose Blushing Bride, Real Red, Basic White and Gold Foil for my color combination. I added texture to the card front with the Painted Texture 3D Embossing Folder. To color the otter image, I used Crumb Cake and Cinnamon Cider Stampin' Blends Markers and stamped the heart image with Tuxedo Black ink and Blushing Bride Classic ink. The framed hearts worked well for a border below the sentiment and I popped up a couple of the hearts with Mini Stampin' Dimensionals. Instead of adding bling to this card design, I decided to keep it simple, using Gold Foil for the circle framing the focal image and Clear Wink of Stella on the heart image. It was so much fun creating this card and I can't wait to try combining these products to create new projects. Remember, you can earn the Awesome Otters stamp set for Free during Sale-a-bration, beginning January 4th, 2022. 
Thank you for taking the time to visit my blog. I hope that my card design will help inspire you to explore the wonderful new products in the January-July 2022 Mini Catalog and 2022 Sale-a-bration Catalog to create your own beautiful projects. These catalogs will launch January 4th, 2022.
Now it's time to visit Karen's blog and see what wonderful projects she has to share with us. Just click the Next button to visit her blog or use the Roll Call List below to find your way. We would appreciate it if you would leave us a comment and let us know what you liked about our projects. I hope you enjoy the rest of our blog hop. 


If you live in the U.S. and do not have a Stampin' Up! Demonstrator, please contact me and I would be happy to help you with your creative projects. You may also visit my Online Store to place your order and have it shipped to you.

Until Next Time

Happy Stamping,

Tricia Butts
Independent Stampin' Up! Demonstrator

Like What You See? Visit My Online Store Here

Visit My Facebook Business Page for Updates & Ideas

Click here to Contact Me


Stock Up On Your Favorite Retiring Products
From The July-December 2021 Mini Catalog
Click Below To Visit My Online Store

Create Your Own Beautiful Messages Of Love
With The Kisses & Hugs January Paper Pumpkin Kit
Click Below To Subscribe By January 10th, 2022


Wednesday, December 15, 2021

New At SU December Blog Hop Anything But A Card

Welcome to the New At SU December Blog Hop as we showcase fun project ideas with the theme "Anything But A Card". There are so many wonderful ways to share your creativity beyond making cards and today our Design Team Members will share their ideas and projects to help spark your creativity.
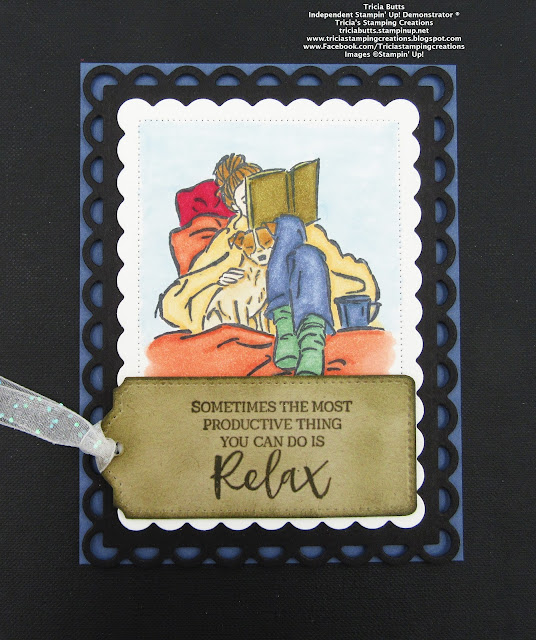
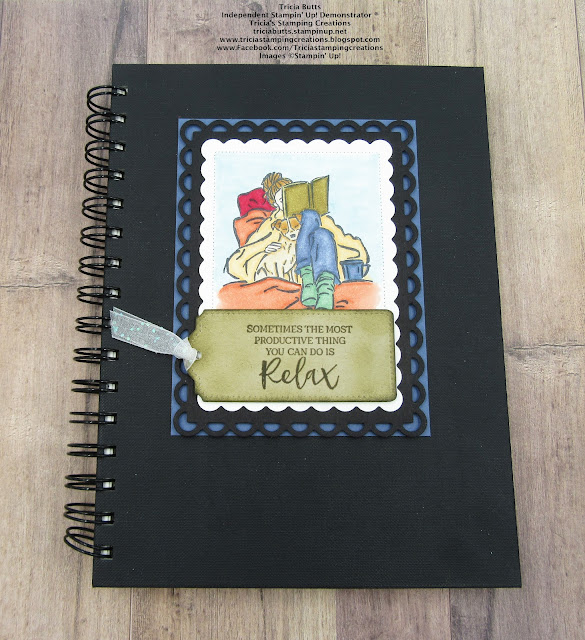
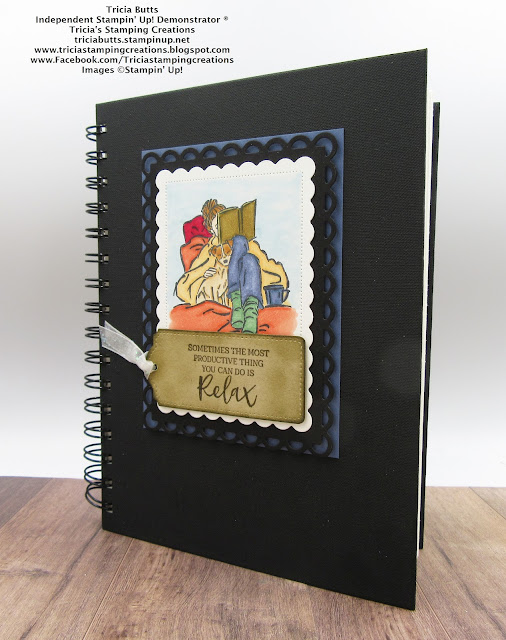
One of my favorite ways to relax is coloring. I recently decided to get myself a watercolor notebook so that I could have all my designs in one place. I love to experiment with different color combinations and techniques and I thought that this notebook would be the perfect size. To personalize it and make it special, I decided to decorate it using the In The Moment stamp set from the upcoming January-June 2022 Mini Catalog. I colored the image with Stampin' Blends Markers and tried to create a watercolor feel to the image. I layered the focal layer with Basic Black and Misty Moonlight cardstock to create a frame for the design. The tag was created with the Tailor Made Tags Dies using one of the sentiments from the stamp set. I love this sentiment and thought it worked well for my watercolor journal.
Products Used;
In The Moment stamp set (item #157987) Sneak Peek
Scalloped Contours Dies (item #155560)
Tailor Made Tags Dies (item #155563)
Misty Moonlight Cardstock (item #153081)
Basic Black Cardstock (item #121045)
Crumb Cake Cardstock (item #120953)
Basic White Cardstock (item #159276)
Soft Suede Classic Ink Pad (item #147115)
Memento Tuxedo Black Pad (item #132708)
Versamark Pad (item #102283)
Basics Embossing Powders (item #155554)
Stampin' Blends Markers (Variety of colors)
White 3/8" Glittered Organdy Ribbon (item #156408)
Stampin' Dimensionals (item #104430)
Measurements:
Misty Moonlight Cardstock
Layer 1 - 5 1/4" x 4"
Basic Black Cardstock 
Large Detailed Scallop Rectangle die cut with Scalloped Contours Dies
Basic White Cardstock
Large Scallop Rectangle die cut with Scalloped Contours Dies
Crumb Cake Cardstock
Medium Tag die cut with Tailor Made Tags Dies
The great thing about this notebook is that it has a solid black background that is really sturdy, so I didn't have to worry about covering the front cover before adding my design. The image I chose has special meaning for me as I love to read and the dog in the image reminds me of our Jack Russell Terrier, Belle, who passed away several years ago. I chose warm colors for the blanket and pillows and cool colors for the clothing, mug and background to create a nice contrast. The Scalloped Contours Dies were perfect for creating my layers and I added a Misty Moonlight cardstock layer behind the Basic Black frame so that it would stand out against the black background of the notebook. For the sentiment, I wanted something that had a vintage feel to it, so I created a tag with Crumb Cake cardstock and I heat embossed the sentiment using Versamark and Soft Suede Classic ink with Clear embossing powder. I sponged the edges of the tag and distressed the background using a Sponge Dauber and Soft Suede ink. I added a piece of the White Organdy Ribbon to the tag to embellish it but otherwise I kept the design clean and simple. To add dimension to my design, I popped up the Basic Black frame onto the Misty Moonlight layer with Stampin' Dimensionals and I did the same with the sentiment tag on the focal layer. I love how this turned out and I can't wait to try decorating more of my notebooks to personalize them. 
Thank you for taking the time to visit my blog. I hope my project will inspire you to look at decorating your own notebooks and personalizing them with your paper crafting supplies. There are so many great coloring techniques that you can use to create your own beautiful designs.
Now it's time to visit Joni's wonderful blog and see what she has created for us this month. Just click on the Next button below to visit her blog or use the Roll Call List to find your way. Please leave us a comment and let us know what you liked about our projects. I hope you enjoy the rest of our blog hop. 

If you live in the U.S. and do not have a Stampin' Up! Demonstrator, please contact me and I would be happy to help you with your creative projects. You may also visit my Online Store to place your order and have it shipped to you. Remember to take advantage of the Last Chance Sale and stock up on your favorite retiring products from the July-December 2021 Mini Catalog before they disappear. 

Until Next Time

Happy Stamping,

Tricia Butts
Independent Stampin' Up! Demonstrator

Like What You See? Visit My Online Store Here

Visit My Facebook Business Page for Updates & Ideas

Click here to Contact Me 


Stock Up On Your Favorite Retiring Products
From The July-June 2021 Mini Catalog
Click Below To Visit My Online Store