Showing posts with label simple stamping. Show all posts

Sunday, December 15, 2024

Stamptastic Friends December Blog Hop Simple Stamping

It's time to hop along with the Stamptastic Friends December Blog Hop and this month we are focusing on Simple Stamping. Our wonderful Design Team will be sharing their projects and ideas to help spark your creativity and hopefully inspire you to try this fun technique. 
Simple Stamping is a great technique for when you are getting started with stamping because you need just a few basic supplies to create your project. So what is Simple Stamping? It is basically creating a simple card design using just paper, ink and stamps. For my card design, I chose to use the Simply Zinnia stamp set which has beautiful images and wonderful sentiments all in one set. I chose to create a monochromatic card using Peach Pie cardstock and Peach Pie Classic ink and combined them with Basic White cardstock and Memento Tuxedo Black ink, which are staples you need in your crafting tool kit. To add color to my floral image, I chose to use the Reverse Masking technique to create the circle of color using a Blending Brush and the Peach Pie Classic ink. It's a simple technique where you punch or die cut out a circle in a piece of scrap paper and layer it over your card front. Then you gently apply the ink inside the circle opening with a blending brush. Once that has had a chance to dry, you then stamp the focal image on top with the Memento Tuxedo Black ink and the effect is striking in its simplicity. 
Products Used:
Simply Zinnia stamp set (item #163472)
Stylish Shapes Dies (item #159183)
Peach Pie Cardstock (item #163799)
Basic White Cardstock (item #159276)
Peach Pie Classic Ink Pad (item #163810)
Memento Tuxedo Black Pad (item #132708)
2024-2026 In Color Shimmer Gems (item #163781)
Blending Brushes (item #153611)
Scrap Paper (for Mask)
Measurements:
Peach Pie Cardstock
Card Base - 5 1/2" x 8 1/2" (Scored at 4 1/4")
Basic White Cardstock
Card Front - 5 1/4" x 4"
Printer Paper 
Mask Layer - 5 1/4" x 4" Circle die cut out of the center with the Stylish Shapes Dies
Sometimes it can be challenging for experienced stampers to go back to the basics and create a project using Simple Stamping. I must admit, I had to think about it a little bit before I started to work out the best way to create a beautiful card with minimal supplies and not take a lot of time to create. Reverse Masking has always been one of my favorite techniques and I love how it can be used to add color to images, especially if you are not a fan of coloring. I chose to use a circle for my background area but you could easily chose a square or any other shape that would be large enough to fit your focal image. Blending Brushes are great tools for adding soft color to your projects and allow you to build up layers of color to get the intensity you are looking for. I wanted the Peach Pie background to be dark enough for the focal image to pop without it being to deep. I like that the blending of the ink is slightly uneven so it adds texture to the design. For a touch of bling, I added several of the Peach Pie Shimmer Gems to complete the card design. I love the simplicity of this design and it is a layout that you can use for a variety of colors and for all occasions. 
Thank you for taking the time to visit my blog. I hope that my card design will help inspire you to try Simple Stamping when creating your own projects. It can be a wonderful way to explore your creativity with stamps, paper and ink. The Simply Zinnia stamp set is one of the products on the Last Chance Products List and is available only while supplies last. If you love this stamp set, I would recommend ordering it soon to avoid missing out.  
Please take the time to visit with my fellow Design Team members to see what they have created using this fun technique. Just click on the links in the Roll Call List below. We would appreciate it if you would leave us a comment and let us know what you liked about our projects.

If you live in the U.S. and do not have a Stampin' Up! Demonstrator, please contact me and I would be happy to help you with your creative projects. You may also visit my Online Store to place your order and have it shipped to you. 

Until Next Time

Happy Stamping,

Tricia Butts
Independent Stampin' Up! Demonstrator

Like What You See? Visit My Online Store Here

Visit My Facebook Business Page for Updates & Ideas

Click here to Contact Me


Wednesday, February 21, 2024

New At SU February Blog Hop Perennial Lavender Suite

 
Welcome to the New At SU February Blog Hop and this month we are sharing with you how to create projects that are simple and then show you how to step it up to the next level. Our wonderful Design Team will be sharing their projects and ideas using products from the January-April 2024 Mini Catalog to help inspire you to get creative and make your own beautiful projects.
For my cards, I chose to use products from the Perennial Lavender Suite Collection, to help show you the versatility of these products. I love how these products all coordinate to make it simple for you to mix and match to come up with your own unique designs. For my simple design, it is all about ink, paper and stamps and for my stepped up design, I added die cutting and designer series paper to take it to the next level. As you can see, I used elements from my simple card to create my stepped up card design. Both designs are a great way to create beautiful cards to send to the people we care about.
Products Used:
Painted Lavender Bundle (item #162597)
Perennial Postage Bundle (item #162608)
Perennial Lavender Designer Series Paper (item #162593)
Paper Butterfly Accents (item #162612)
Crumb Cake Cardstock (item #120953)
Lost Lagoon Cardstock (item #133679)
Fresh Freesia Cardstock (item #155613)
Basic White Cardstock (item #159276)
Fresh Freesia Classic Ink Pad (item #155611)
Highland Heather Classic Ink Pad (item #147103)
Gorgeous Grape Classic Ink Pad (item #147099)
Lost Lagoon Classic Ink Pad (item #161678)
Highland Heather Classic Ink Refill (item #147167)
Clear Wink of Stella Glitter Brush (item #141897)
Purple Fine Shimmer Gems (item #162611)
Linen Thread (item #104199)
Stampin' Dimensionals (item #104430)
Mini Glue Dots (item #103683)
Measurements:
Simple Card Design
Crumb Cake Cardstock
Card Base - 8 1/2" x 5 1/2" (Scored at 4 1/4")
Fresh Freesia Cardstock
Layer 1 - 5 1/4" x 4"
Basic White Cardstock
Card Front - 5" x 3 3/4"
Stepped Up Card Design
Crumb Cake Cardstock
Card Base - 8 1/2" x 5 1/2" (Scored at 4 1/4")
Perennial Lavender Designer Series Paper 
Card Front - 5 1/4" x 4"
Basic White Cardstock
Focal Layer die cut with the Perennial Postage Dies
Sentiment Layer die cut with the Perennial Postage Dies
3 Lavender Sprays stamped and die cut with the Painted Lavender Bundle
Stems stamped and die cut with the Painted Lavender Bundle
Lost Lagoon Cardstock
2 Greenery stems die cut with the Painted Lavender Dies
Fresh Freesia Cardstock
2 Floral stems die cut with the Painted Lavender Dies 
For the Simple card design, I chose start with a Crumb Cake cardstock card base to help offset the different purples. I used Fresh Freesia cardstock as a matte layer to add a pop of color between the card base and the focal layer that helps tie everything together. To create my focal layer, I stamped the lavender using Fresh Freesia, Highland Heather and Gorgeous Grape Classic inks to create the different layers of color. As you can see, some of the florals have been stamped using 2nd Generation stamping to create depth and dimension and an almost watercolor look. For the stems, I stamped the image using Lost Lagoon Classic ink, lining it up with the bottom of the floral images. I stamped the sentiment and the small butterflies using Gorgeous Grape Classic ink to add a nice contrast with the softness of the lavender bouquet. To embellish the card, I added a Linen Thread bow and several of the beautiful Purple Fine Shimmer Gems to complete the card design. 
For my Stepped Up card design, I once again chose to use Crumb Cake cardstock for my card base. It is a wonderful neutral that works well with all the purples in this design. This time, I used one of the pretty designs from the Perennial Lavender Designer Series Paper for my card front to add some wonderful texture and color to the background. I die cut the focal background using the Perennial Postage Dies from Basic White cardstock to use it to help make the Lavender Bouquet pop and attached it to the card front on the upper left side. To create the bouquet, I stamped three of the lavender sprays, 1 Fresh Freesia and 2 Highland Heather, onto Basic White cardstock to create a soft watercolor look. I then die cut these out with the coordinating die. I also stamped the stems using Lost Lagoon Classic ink onto Basic White cardstock and die cut them out as well. In addition, I die cut 2 of the leaves die cuts from Lost Lagoon cardstock and 2 of the florals die cuts from Fresh Freesia cardstock to add some color and texture to the bouquet. To start with, I added the stems die cut so that it layered slightly over the bottom of the Basic White layer, ready to build the bouquet. I added the leaves and floral die cuts first to the Basic White layer and then added the stamped lavender, using Stampin' Dimensionals to pop up the tops while adhere the bases directly to the focal layer. Using a drop of Highland Heather Classic ink refill, I mixed it in with Clear Wink of Stella to color one of the Paper Butterfly Accents. Once dry, I attached it to the center of the bouquet with a Mini Glue Dot and embellished it with several of the Purple Fine Shimmer Gems. For the sentiment, I stamped the image with Fresh Freesia Classic ink onto the Basic White sentiment label and added it to the bottom right corner of the card front with Stampin' Dimensionals. To finish off the card design, I added a Linen Thread bow to the stems of the bouquet. I love how both of these card designs turned out. They are so different yet use so many of the same supplies. 
Thank you for taking the time to visit my blog. I hope that my examples of a simple and stepped up card design will help inspire you to create your own beautiful projects. It is a great way to create a variety of designs using similar supplies.
Please take the time to visit with our Design Team to see their amazing projects. Just click on the links in the Roll Call List below to visit their blogs. We would appreciate it if you would leave us a comment and let us know what you liked about our projects. Do you prefer simple or stepped up? We would love to hear from you.
If you live in the U.S. and do not have a Stampin' Up! Demonstrator, please contact me and I would be happy to help you with your creative projects. You may also visit my Online Store to place your order and have it shipped to you. 

Until Next Time

Happy Stamping,

Tricia Butts
Independent Stampin' Up! Demonstrator

Like What You See? Visit My Online Store Here

Visit My Facebook Business Page for Updates & Ideas

Click here to Contact Me


More Sale-a-bration Products Now Available
To Earn Free With A Qualifying Order
Click Below For Details

Get Creative In 2024
With The January-April 2024 Mini Catalog
Click Below To Shop Now


Saturday, November 12, 2022

Colour Combo November Blog Hop

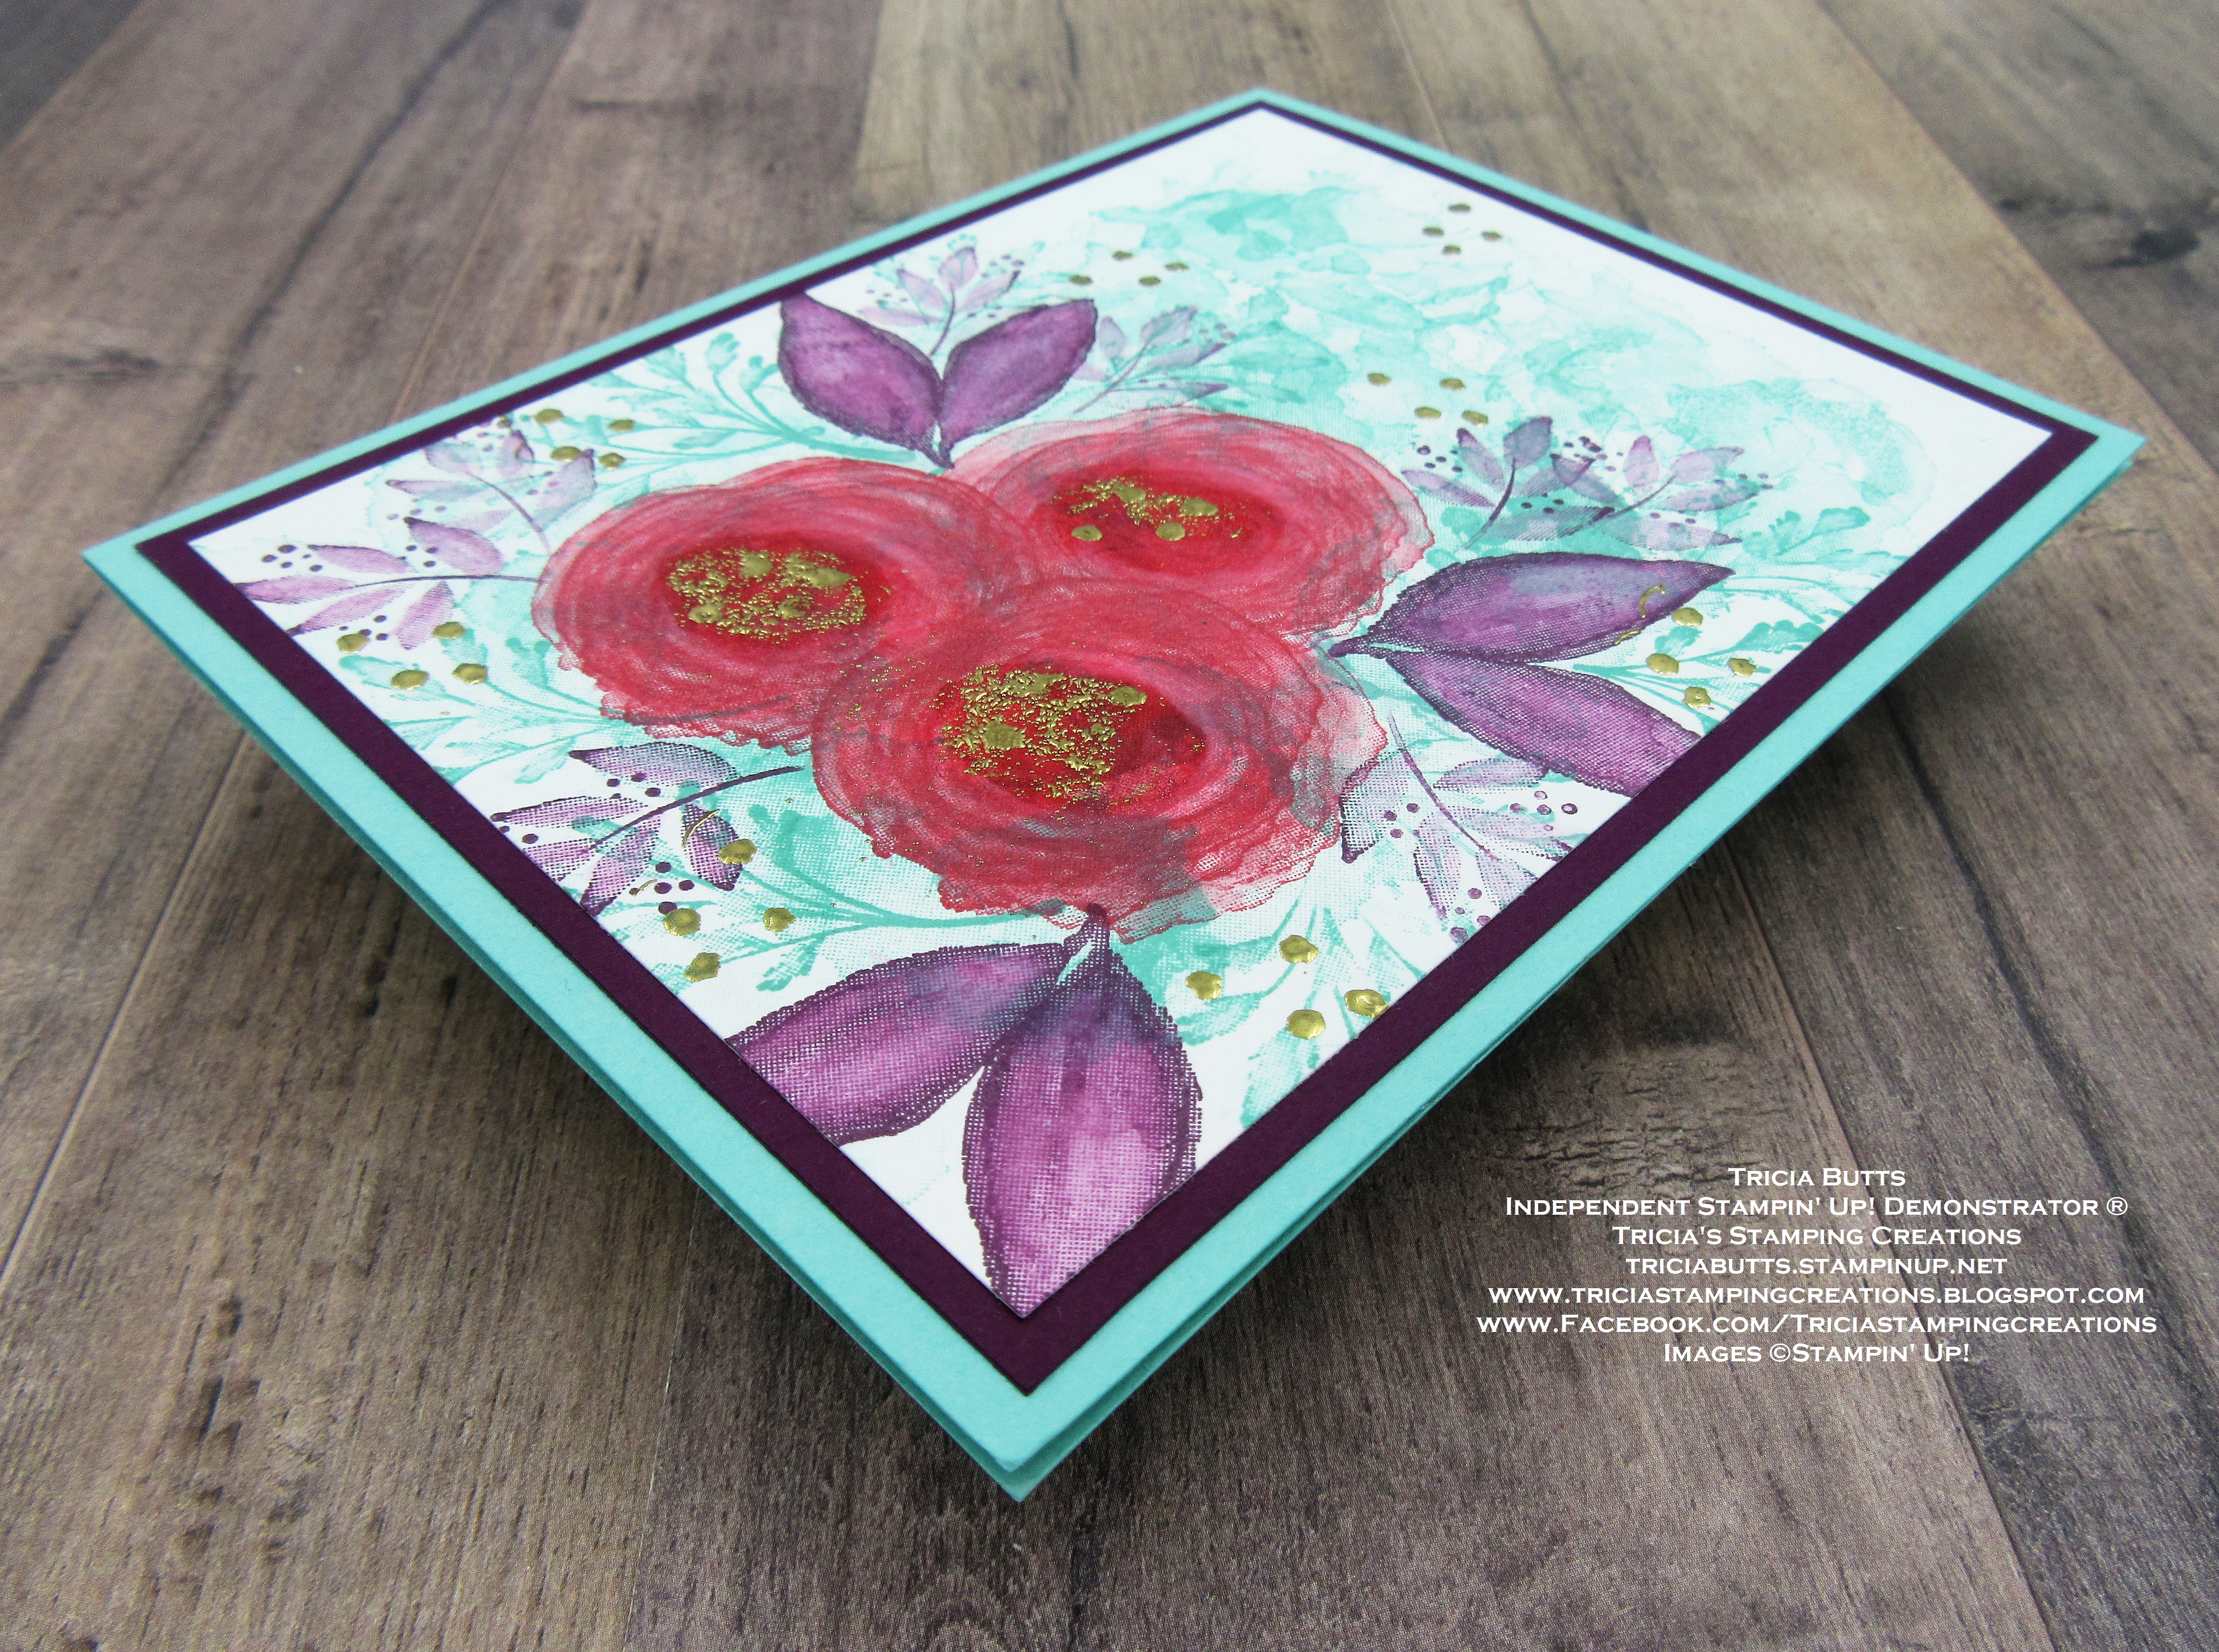
Welcome to the Colour Combo November Blog Hop with this month's color challenge using Coastal Cabana, Real Red and Blackberry Bliss. Our wonderful Design Team members will be sharing their projects and ideas to help inspire you to try this color combination to create your own beautiful projects.
My card design today is a slightly stepped up version of Simple Stamping. I used this month's colors to create the design on the card front using images from the Artistically Inked stamp set and Eden's Garden stamp set, with just a touch of Gold embossing to add a touch of bling. I decided not to add a sentiment to the front, instead letting the design be the star. This card design is a great example of how you can create a beautiful card without a lot of supplies and just some simple stamping. 
Products Used:
Artistically Inked stamp set (item #154542)
Eden's Garden stamp set (item #157823)
Coastal Cabana Cardstock (item #131297)
Blackberry Bliss Cardstock (item #133675)
Basic White Cardstock (item #159276)
Coastal Cabana Classic Ink Pad (item #147097)
Real Red Classic Ink Pad (item #147084)
Blackberry Bliss Classic Ink Pad (item #147092)
Versamark Pad (item #102283)
Metallics Embossing Powders (item #155555)
Clear Wink of Stella Glitter Brush (item #141897)
Blender Pens (item #102845)
Measurements:
Coastal Cabana Cardstock
Card Base - 8 1/2" x 5 1/2" (Scored at 4 1/4")
Blackberry Bliss Cardstock
Card Layer 1 - 5 1/4" x 4"
Basic White Cardstock
Card Front - 5" x 3 3/4"
For this card design, I chose Coastal Cabana cardstock for my card base and added a layer of Blackberry Bliss cardstock to help frame the focal design. I stamped the large background image from the Artistically Inked stamp set randomly over the Basic White cardstock layer using Coastal Cabana ink. This created a layer of variated color for the background for me to build my design. I stamped the roses image, 3 times, with Real Red Classic ink and then added the larger leaves with Blackberry Bliss Classic ink. Both of these images are also from the Artistically Inked stamp set, and they provide a bold design to the card front. Using Clear Wink of Stella, I colored the roses to blend the Real Red and add a touch of shimmer. Next I stamped the smaller leaf images from the Eden's Garden stamp set using Coastal Cabana and Blackberry Bliss Classic ink. I blended the color on the leaves with a Blender Pen to soften them and help them stand out against the stamped background. For the final touch, I stamped the dots image with Versamark ink randomly over the background and heat embossed with Gold embossing powder and also in the center of the roses, several times. I love the soft watercolor feel of this card design and how pretty these colors look together.  
Thank you for taking the time to visit my blog. I hope that my card design will help spark your creativity and help you to create your own beautiful projects with this color combination. There are so many options to explore. 
Now it's time to visit Mo's blog and see what she has to share with us using this color combination. Just click the Next button below or use the Roll Call List to find your way. We would love it if you would leave us a comment and let us know what you liked about our projects. I hope you enjoy the rest of our blog hop. 

Roll Call List
  1. Little Lizzy's Crafts- Elisabeth Pirolt (AT) -

  1. TheSpecialView- Natalie Albers (D)

  1. Tricia Butts (US) 
  2.  
  3. Mo Rootes (UK) 

  4. creative-with-sonja- Sonja Kindler (D)

  5. Annette Elias - De Kijkkast - (NL)

If you live in the U.S. and do not have a Stampin' Up! Demonstrator, please contact me and I would be happy to help you with your creative projects. You may also visit my Online Store to place your order and have it shipped to you. 

Until Next Time

Happy Stamping,

Tricia Butts
Independent Stampin' Up! Demonstrator

Like What You See? Visit My Online Store Here

Visit My Facebook Business Page for Updates & Ideas

Click here to Contact Me


Add A Touch Of Elegance To Your Projects
With The Fitting Florets Collection Available For A Limited Time
Click Below For More Details

Get Creative For The Holidays
With The July-December 2022 Mini Catalog 
Click Below To Visit My Online Store


Saturday, November 5, 2022

Stamping With Friends Simple Stamping Blog Hop

Welcome to the Stamping With Friends Simple Stamping Blog Hop. You will be visiting with our talented Design Team members as they share their projects and ideas using this fun technique, that is perfect whether you are a beginner or an experienced stamper. For our Simple Stamping Challenge, we will be using stamps, ink and paper plus we can use a punch to create our projects. 
For my Simple Stamping project, I decided to create a Fall themed card using the Soft Seedlings stamp set and Perched In A Tree stamp set. The punch I chose for my design is the Decorative Circle Punch and it worked perfectly for my sentiment label. The colors I chose for my design are Crushed Curry, Pumpkin Pie, Cajun Craze, Crumb Cake, Very Vanilla and Early Espresso. This simple card design would work well for a variety of occasions to help brighten someone's day.
Products Used:
Soft Seedlings stamp set (item #1599905)
Perched In A Tree stamp set (item #159791)
Decorative Circle Punch (item #159174)
Crumb Cake Cardstock (item #120953)
Very Vanilla Cardstock (item #101650)
Crushed Curry Classic Ink Pad (item #147087)
Crumb Cake Classic Ink Pad (item #147116)
Pumpkin Pie Classic Ink Pad (item #147086)
Cajun Craze Classic Ink Pad (item #147085)
Early Espresso Classic Ink Pad (item #147114)
Measurements:
Crumb Cake Cardstock 
Card Base - 8 1/2" x 5 1/2" (Scored at 4 1/4")
Decorative Circle punched out with the Decorative Circle Punch
Very Vanilla Cardstock
Card Front - 5 1/4" x 4"
Sentiment Label punched out with the Decorative Circle Punch
Simple Stamping is a fun way to create cards and a great way to explore different color combinations with your stamps. I love the images in the Soft Seedlings stamp set and wanted to create the look of Fall leaves for my card design. I chose Pumpkin Pie, Crushed Curry and Cajun Craze to create the leaves for the background design and I added some subtle background detail using Crumb Cake Classic ink with the dots image from the Perched In A Tree stamp set. To create the sentiment label, I stamped the sentiment image with Early Espresso Classic ink onto Very Vanilla cardstock and punched it out with the Decorative Circle Punch. I layered it by punching out a Crumb Cake Decorative Circle and cutting it in half, before attaching it to the back of the Very Vanilla sentiment label. Using Paper Snips, I trimmed away any excess cardstock. I used Stampin' Dimensionals to attach it to the card front to complete the card design. 
Thank you for taking the time to visit my blog. I hope that my card design will help inspire you to explore using Paper, Stamps and Ink to create your own Simple Stamping projects. 
Now it's time to visit my fellow Design Team members to see their wonderful Simple Stamping projects. Just click on the links in the Roll Call List below to find your way. We would love it if you would leave us a comment and let us know what you like about our projects. I hope you enjoy the rest of our blog hop.

If you live in the U.S. and do not have a Stampin' Up! Demonstrator, please contact me and I would be happy to help you with your creative projects. You may also visit my Online Store to place your order and have it shipped to you. 

Until Next Time

Happy Stamping,

Tricia Butts
Independent Stampin' Up! Demonstrator

Like What You See? Visit My Online Store Here

Visit My Facebook Business Page for Updates & Ideas

Click here to Contact Me


Get Creative For The Holidays
With The July-December 2022 Mini Catalog
Click Below To Visit My Online Store

Add A Touch Of Elegance To Your Projects
With The Fitting Florets Collection Available For A Limited Time
Click Below To View The Collection


Saturday, February 12, 2022

Colour Combo February Blog Hop

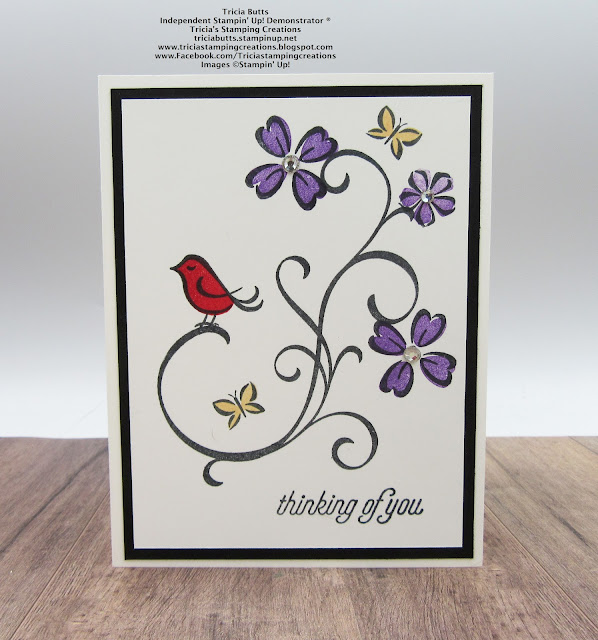
It's time to hop with the Colour Combo February Blog Hop and this month our color challenge features Real Red, Gorgeous Grape and Pale Papaya. Our Design Team Members will be sharing wonderful projects and ideas to help inspire you to create your own projects with these colors. 
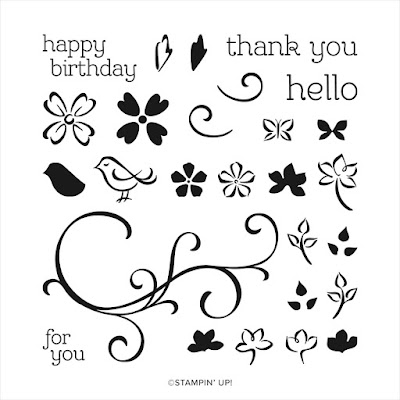
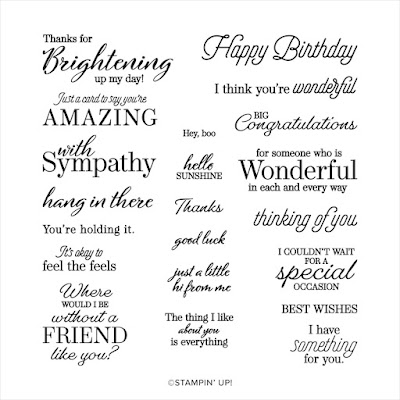
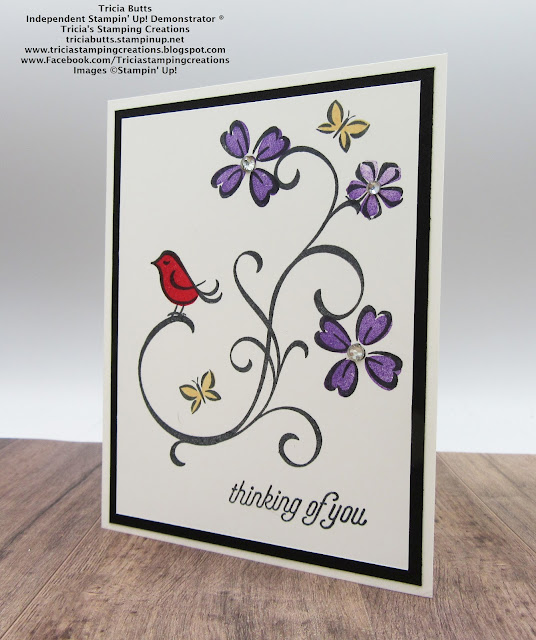
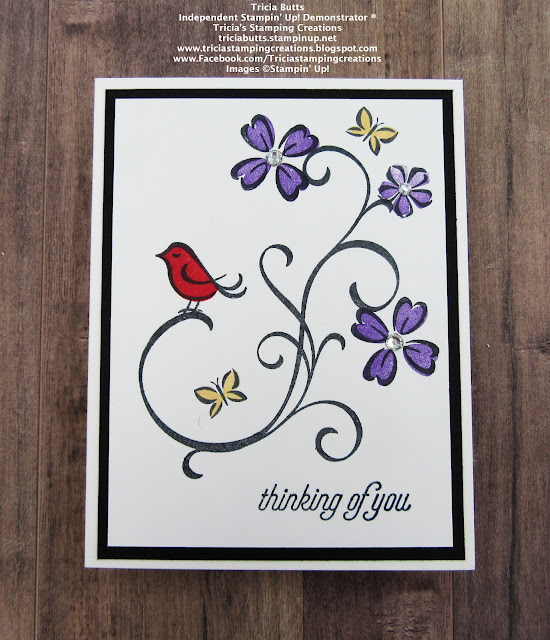
For my card design today, I wanted to create a clean and simple card to showcase the bold, bright colors. I chose to use the Sentimental Swirls stamp set from the January-June 2022 Mini Catalog and paired it with the Special Moments stamp set, which is a Level 2 Sale-a-Bration Reward you can earn free with a qualifying order. Simple Stamping is a wonderful way to create a card design and I chose to use Black and White and let the colors for our challenge provide the pop of color. 
Products Used:
Sentimental Swirls stamp set (item #157996)
Special Moments stamp set (item #158081) 
Level 2 Sale-a-Bration Reward
Thick Basic White Cardstock (item #159229)
Basic White Cardstock (item #159276)
Basic Black Cardstock (item #121045)
Memento Tuxedo Black Pad (item #132708)
Gorgeous Grape Classic Ink Pad (item #147099)
Real Red Classic Ink Pad (item #147084)
Pale Papaya Classic Ink Pad (item #155670)
Basic Rhinestone Jewels (item #144220)
Measurements:
Thick Basic White Cardstock
Card Base - 8 1/2" x 5 1/2" (Scored at 4 1/4")
Basic White Cardstock
Card Front - 5" x 3 3/4"
Basic Black Cardstock
Layer 1 - 5 1/4" x 4"
This card design is simple to create and I started by stamping the large swirl image with Memento Tuxedo Black ink. I then began to build the design, adding the bird, then the large and small flowers and finally the butterflies. Next, I stamped the bird body image with Real Red Classic ink, the flowers with Gorgeous Grape and the butterflies with Pale Papaya Classic ink. I stamped the sentiment image from the Special Moments stamp set across the bottom with Memento Tuxedo Black ink. I layered the card front onto the Basic Black cardstock layer and then added it to the card base. To complete the design, I added Basic Rhinestone Jewels to the centers of the flowers for a touch of bling. 
Thank you for taking the time to visit my blog. I hope that my clean and simple card design will help inspire you to explore using these colors in your own creative projects. There are so many wonderful possibilities to explore. 
Now it's time to visit Cheryl's blog and see what she has created for this month's color challenge. Just click the Next button to visit her blog. We would appreciate it if you would leave us a comment and let us know what liked about our projects. I hope you enjoy the rest of our blog hop. 


If you live in the U.S. and do not have a Stampin' Up! Demonstrator, please contact me and I would be happy to help you with your creative projects. You may also visit my Online Store to place your order and have it shipped to you. 

Until Next Time

Happy Stamping,

Tricia Butts
Independent Stampin' Up! Demonstrator

Like What You See? Visit My Online Store Here

Visit My Facebook Business Page for Updates & Ideas

Click here to Contact Me


Time Is Running Out
To Earn Exclusive Free Sale-a-Bration Products
Click Below For More Details

Explore Your Creativity
With The January-June 2022 Mini Catalog
Click Below To Visit My Online Store

Get Creative
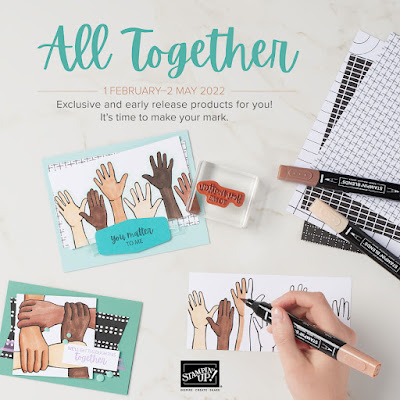
With The All Together Collection
Click Below To View These Amazing New Products