Showing posts with label Valentine's Day. Show all posts

Friday, January 3, 2025

Global Stamping Friends January Blog Hop Coming Soon

It's time to the start 2025 off with the Global Stamping Friends January Blog Hop and take a Sneak Peek at what is coming soon from the January-April 2025 Mini Catalog and 2025 Sale-a-bration, which launches January 7th, 2025. Our wonderful Design Team will be sharing their projects and ideas to help inspire you to get creative for the New Year.
I love new catalog time and I feel a bit like a kid in a candy store looking through the pages to find those hidden gems that speak to me. One of the new bundles that caught my eye is the Hugs For Love Bundle, which has a wonderful stamp set and coordinating punch that are perfect for creating fun clean and simple card designs. While the theme is aimed at Valentine's Day, I like that the sentiments and images work well for all occasion cards and that is what drew me to order it. I paired this new bundle with the Full of Life 6"x6" Designer Series Paper to create a sweet card that will help brighten someone's day and chase away the Winter Blues. 
Products Used:
Hugs For Love Bundle (item #165738)
Full of Life 6"x6" Designer Series Paper (item #163357)
Berry Burst Cardstock (item #144243)
Basic White Cardstock (item #159276)
Berry Burst Classic Ink Pad (item #147143)
Pretty In Pink Classic Ink Pad (item #163807)
Tinsel Gems Four Pack (item #161623)
Stampin' Dimensionals (item #161623)
Measurements:
Berry Burst Cardstock
Card Base - 5 1/2" x 8 1/2" (Scored at 4 1/4")
Matte Layer punched out with the To The Point Label Punch
Basic White Cardstock
Sentiment Label stamped and punched out with the Hugs For Love Bundle
Full of Life Designer Series Paper
Card Front - 45 1/4" x 4"
With the holidays over and Winter settling in, it is a time when people can feel alone and isolated from family and friends. So with this in mind, I wanted to design a card that could be sent out to help brighten someone's day and let them know that I was thinking of them and sending them a paper hug. The new Hugs For Love Bundle is the perfect fit for this type of card and I wanted the colors for this design to be warm and cheerful. I chose one of the designs from the Full of Life 6"x6" Designer Series Paper for the card front and I love the combination of pinks and yellows. I stamped the sentiment image with Berry Burst Classic ink and the border image around it and then added the heart image over the top stamped with Pretty In Pink to add some interest to the design. I punched out the image with the coordinating To The Point Label Punch and layered it onto a 
Berry Burst label that I cut in half to create a frame around the sentiment label. I added the label to the card front with Stampin' Dimensionals to pop it up and then added several Berry Burst Gems for a touch of bling to complete the design. I love the simplicity of this design and how you could create a variety of cards with these supplies to send out to the people you care about. 
Thank you for taking the time to visit my blog today. I hope that my card design will help get you excited about the new January-April 2025 Mini Catalog and get creative for the New Year. There are so many amazing options to explore.
Now it's time to visit Jan's blog and see what she has to share with us this month. Just click on the Next button below to visit her blog or use the Roll Call List to find your way. We would appreciate it if you would leave us a comment and let us know what you liked about our projects. 

Roll Call List

If you live in the U.S. and do not have a Stampin' Up! Demonstrator, please contact me and I would be happy to help you with your creative projects. You may also visit my Online Store to place your order and have it shipped to you. 

Until Next Time

Happy Stamping,

Tricia Butts
Independent Stampin' Up! Demonstrator

Like What You See? Visit My Online Store Here

Visit My Facebook Business Page for Updates & Ideas

Click here to Contact Me


Tuesday, January 31, 2023

Paper Pumpkin Possibilities January Blog Hop Key To My Heart


Welcome to the Paper Pumpkin Possibilities January Blog Hop as we share alternate projects created with the Key To My Heart Kit. Our talented Design Team members are excited to share with you how they have used the supplies in this wonderful kit to create projects to help inspire you to think outside the box. 
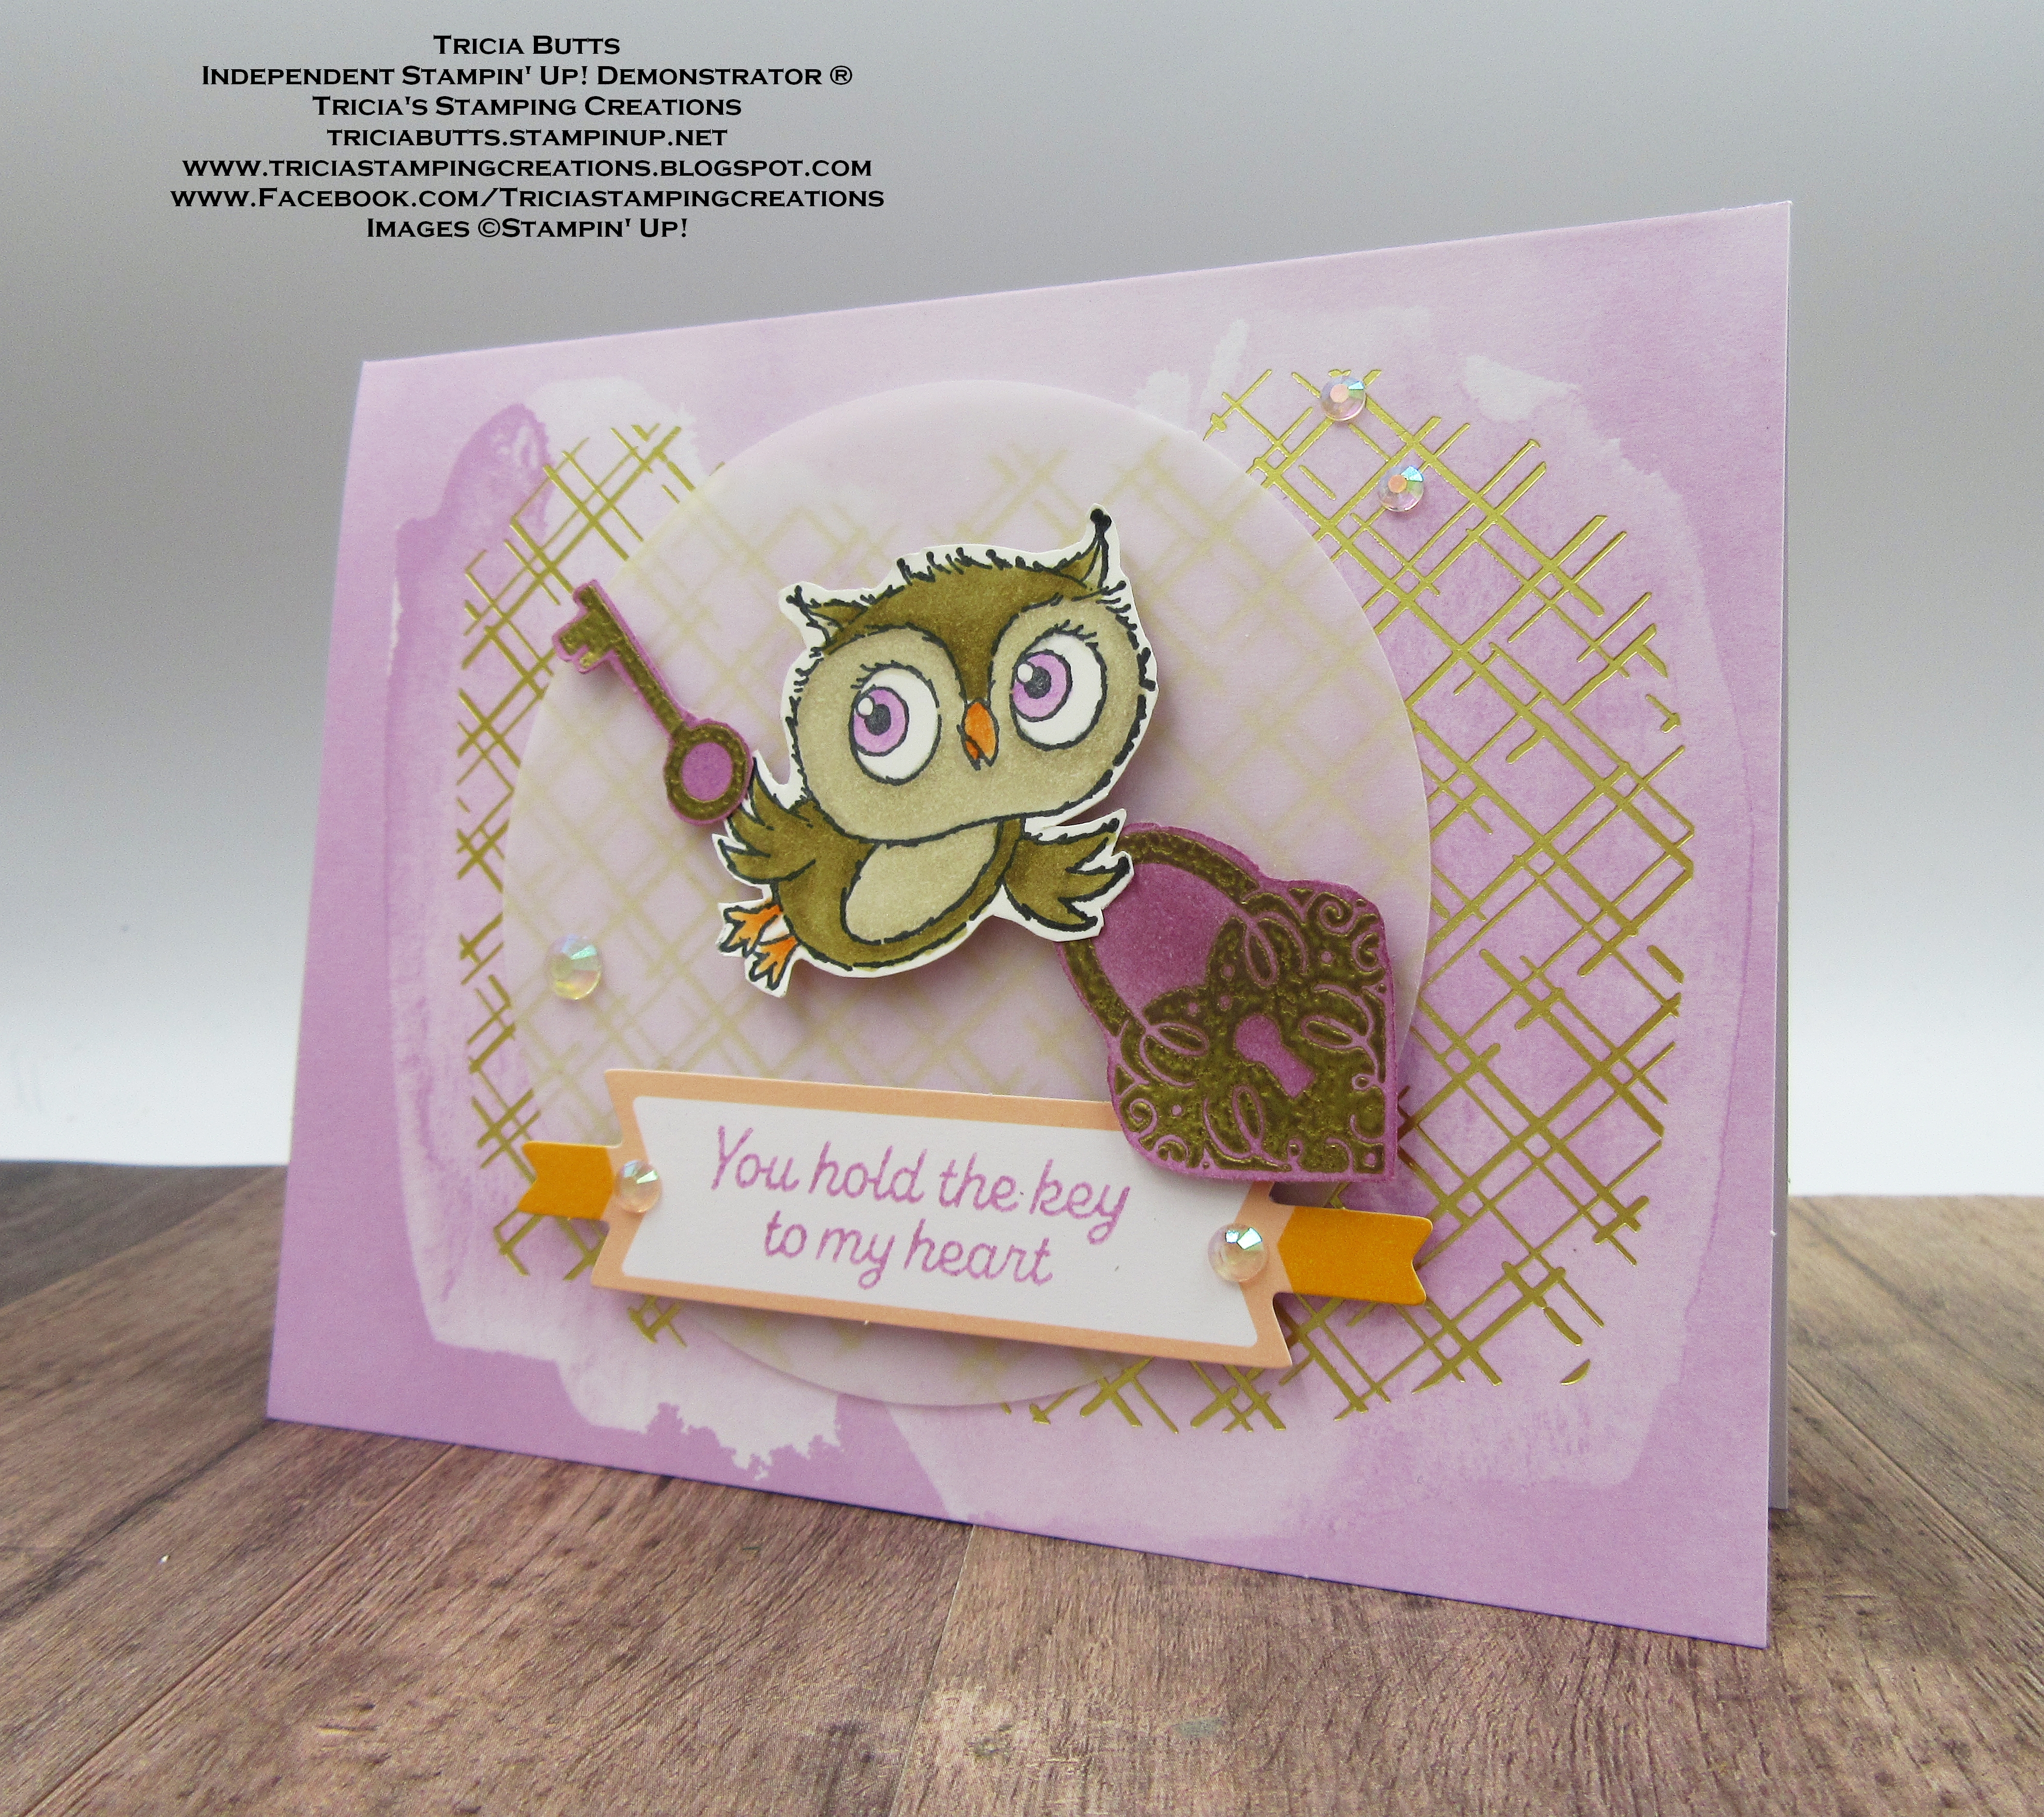
For my alternative card design, I decided to pair the Adorable Owls stamp set (Level 1 Sale-a-bration Reward) with the supplies in the Key To My Heart Kit. I love the whimsy of this cute stamp set, which you can earn free during Sale-a-bration with a qualifying order, and thought it would fit perfectly with the pretty Fresh Freesia card base in the kit. Most of the supplies I used came from the kit and I chose to heat emboss two of the images from the exclusive stamp set with Gold embossing powder. 
Products Used:
Paper Pumpkin January 2023 Kit
Adorable Owls stamp set (item #160269) Sale-a-bration 
Level 1 Reward
Versamark Pad (item #102283)
Metallics Embossing Powders (item #155555)
Memento Tuxedo Black Pad (item #132708)
Crumb Cake Stampin' Blends Combo Pack (item #154882)
Soft Suede Stampin' Blends Combo Pack (item #154906)
Pumpkin Pie Stampin' Blends Combo Pack (item #154897)
Fresh Freesia Stampin' Blends Combo Pack (item #155518)
Sponge Daubers (item #133773)
Iridescent Rhinestones Basic Jewels (item #158130)
Measurements:
From The Paper Pumpkin Kit
Fresh Freesia Card Base
Large Vellum Circle
Sentiment Label
Basic White Cardstock
Stamped Owl image from the Adorable Owls stamp set fussy cut
Fresh Freesia Cardstock
Stamped and heat embossed heart and key images from the exclusive stamp set in the kit, fussy cut
To create this card design, I added the large vellum circle to the center of the card front using several of the Mini Glue Dots from the kit. I stamped the owl image using Memento Tuxedo Black ink onto a scrap of Basic White cardstock and colored the image with Stampin' Blends Markers. I then fussy cut the image out with Paper Snips. For the heart shaped lock and key, I stamped the images onto a scrap of Fresh Freesia cardstock with Versamark ink and heat embossed the images with Gold embossing powder, before fussy cutting the images out. I then used the Fresh Freesia ink spot from the kit with a Sponge Dauber and gently sponged over the the lock and key to add some shading. For the sentiment, I stamped the image using the Fresh Freesia ink spot onto one of the labels from the kit. to assemble the kit, I added Stampin' Dimensionals to the back of the owl, lock and key and attached them to the Vellum circle, with the lock and key placed slightly under each of the wings. For the sentiment label, I attached it to the bottom of the Vellum circle with Stampin' Dimensionals, centering it on the front of the card. For a touch of bling, I added several Iridescent Rhinestones Basic Jewels to the card front to finish off the design. I love how soft and pretty this card design looks and how well this stamp set combines with this kit. If you wanted to, you could choose to use one of the sentiments from the Adorable Owls stamp set as an option for this card design.
Thank you for taking the time to visit my blog. I hope that my card design will help inspire you to explore this amazing kit and create your own unique alternative projects. There are so many ways to mix and match other products with this kit to create fun designs. 
Now it's time to visit Debbi's blog and see what she has created with this kit. Just click the Next button below to visit her blog. We would love it if you would leave us a comment and let us know what you liked about our alternative projects. I hope you enjoy the rest of our blog hop. 

If you live in the U.S. and do not have a Stampin' Up! Demonstrator, please contact me and I would be happy to help you with your creative projects. You may also visit my Online Store to place your order and have it shipped to you. Not a Paper Pumpkin subscriber? Click on the link below this post to sign up to receive the February Sunshine & Smiles Kit by February 10th. This sweet kit coordinates with the Rain or Shine Suite Collection in the January-April 2023 Mini Catalog for even more creative options. 

Until Next Time

Happy Stamping,

Tricia Butts
Independent Stampin' Up! Demonstrator

Like What You See? Visit My Online Store Here

Visit My Facebook Business Page for Updates & Ideas

Click here to Contact Me


Send A Little Sunshine
With The Sunshine & Smiles Paper Pumpkin Kit
Click Below To Subscribe By February 10th

Earn Free Sale-a-bration Products
With Qualifying Prepaid Paper Pumpkin Subscriptions
Click Below For More Details


Wednesday, December 14, 2022

Around The World On Wednesday December Blog Hop Something New Something Used

Welcome to the Around the World On Wednesday December Blog Hop as we share projects with the theme, "Something New, Something Used". It's hard to believe this is our last hop for 2022 but I think you will love the wonderful projects and ideas that our Design Team members will be sharing to help inspire you to get creative. 
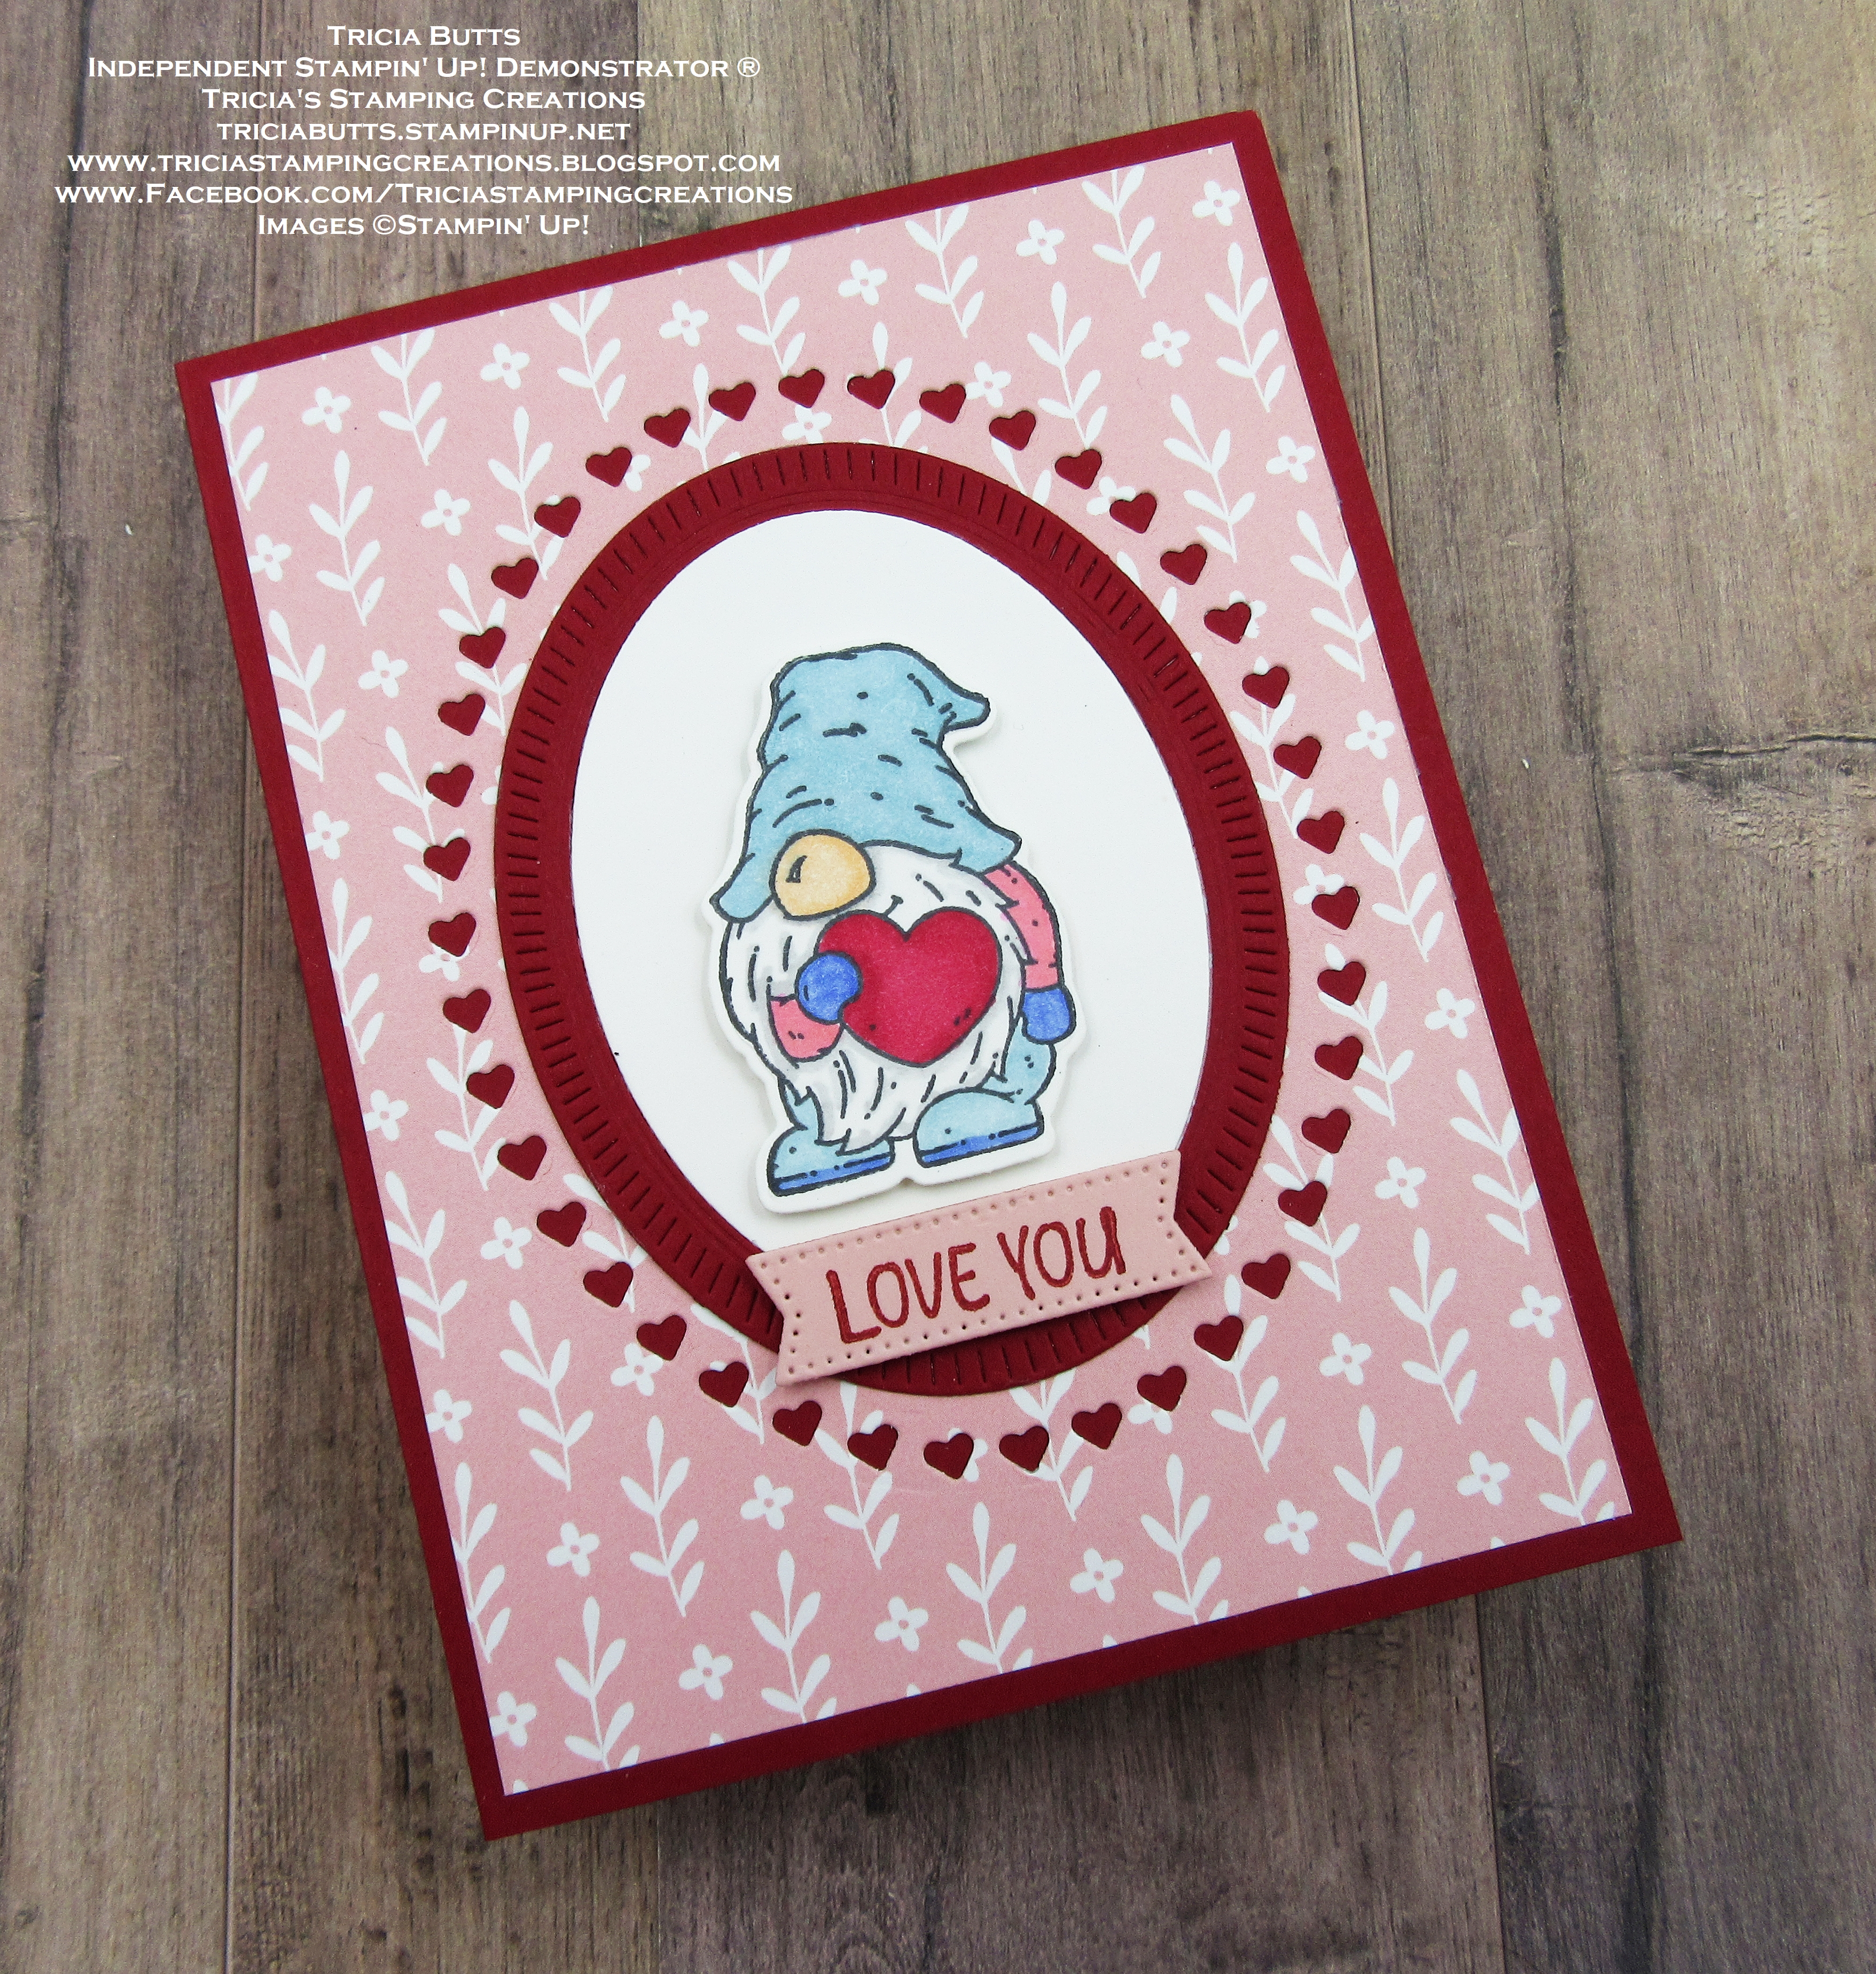
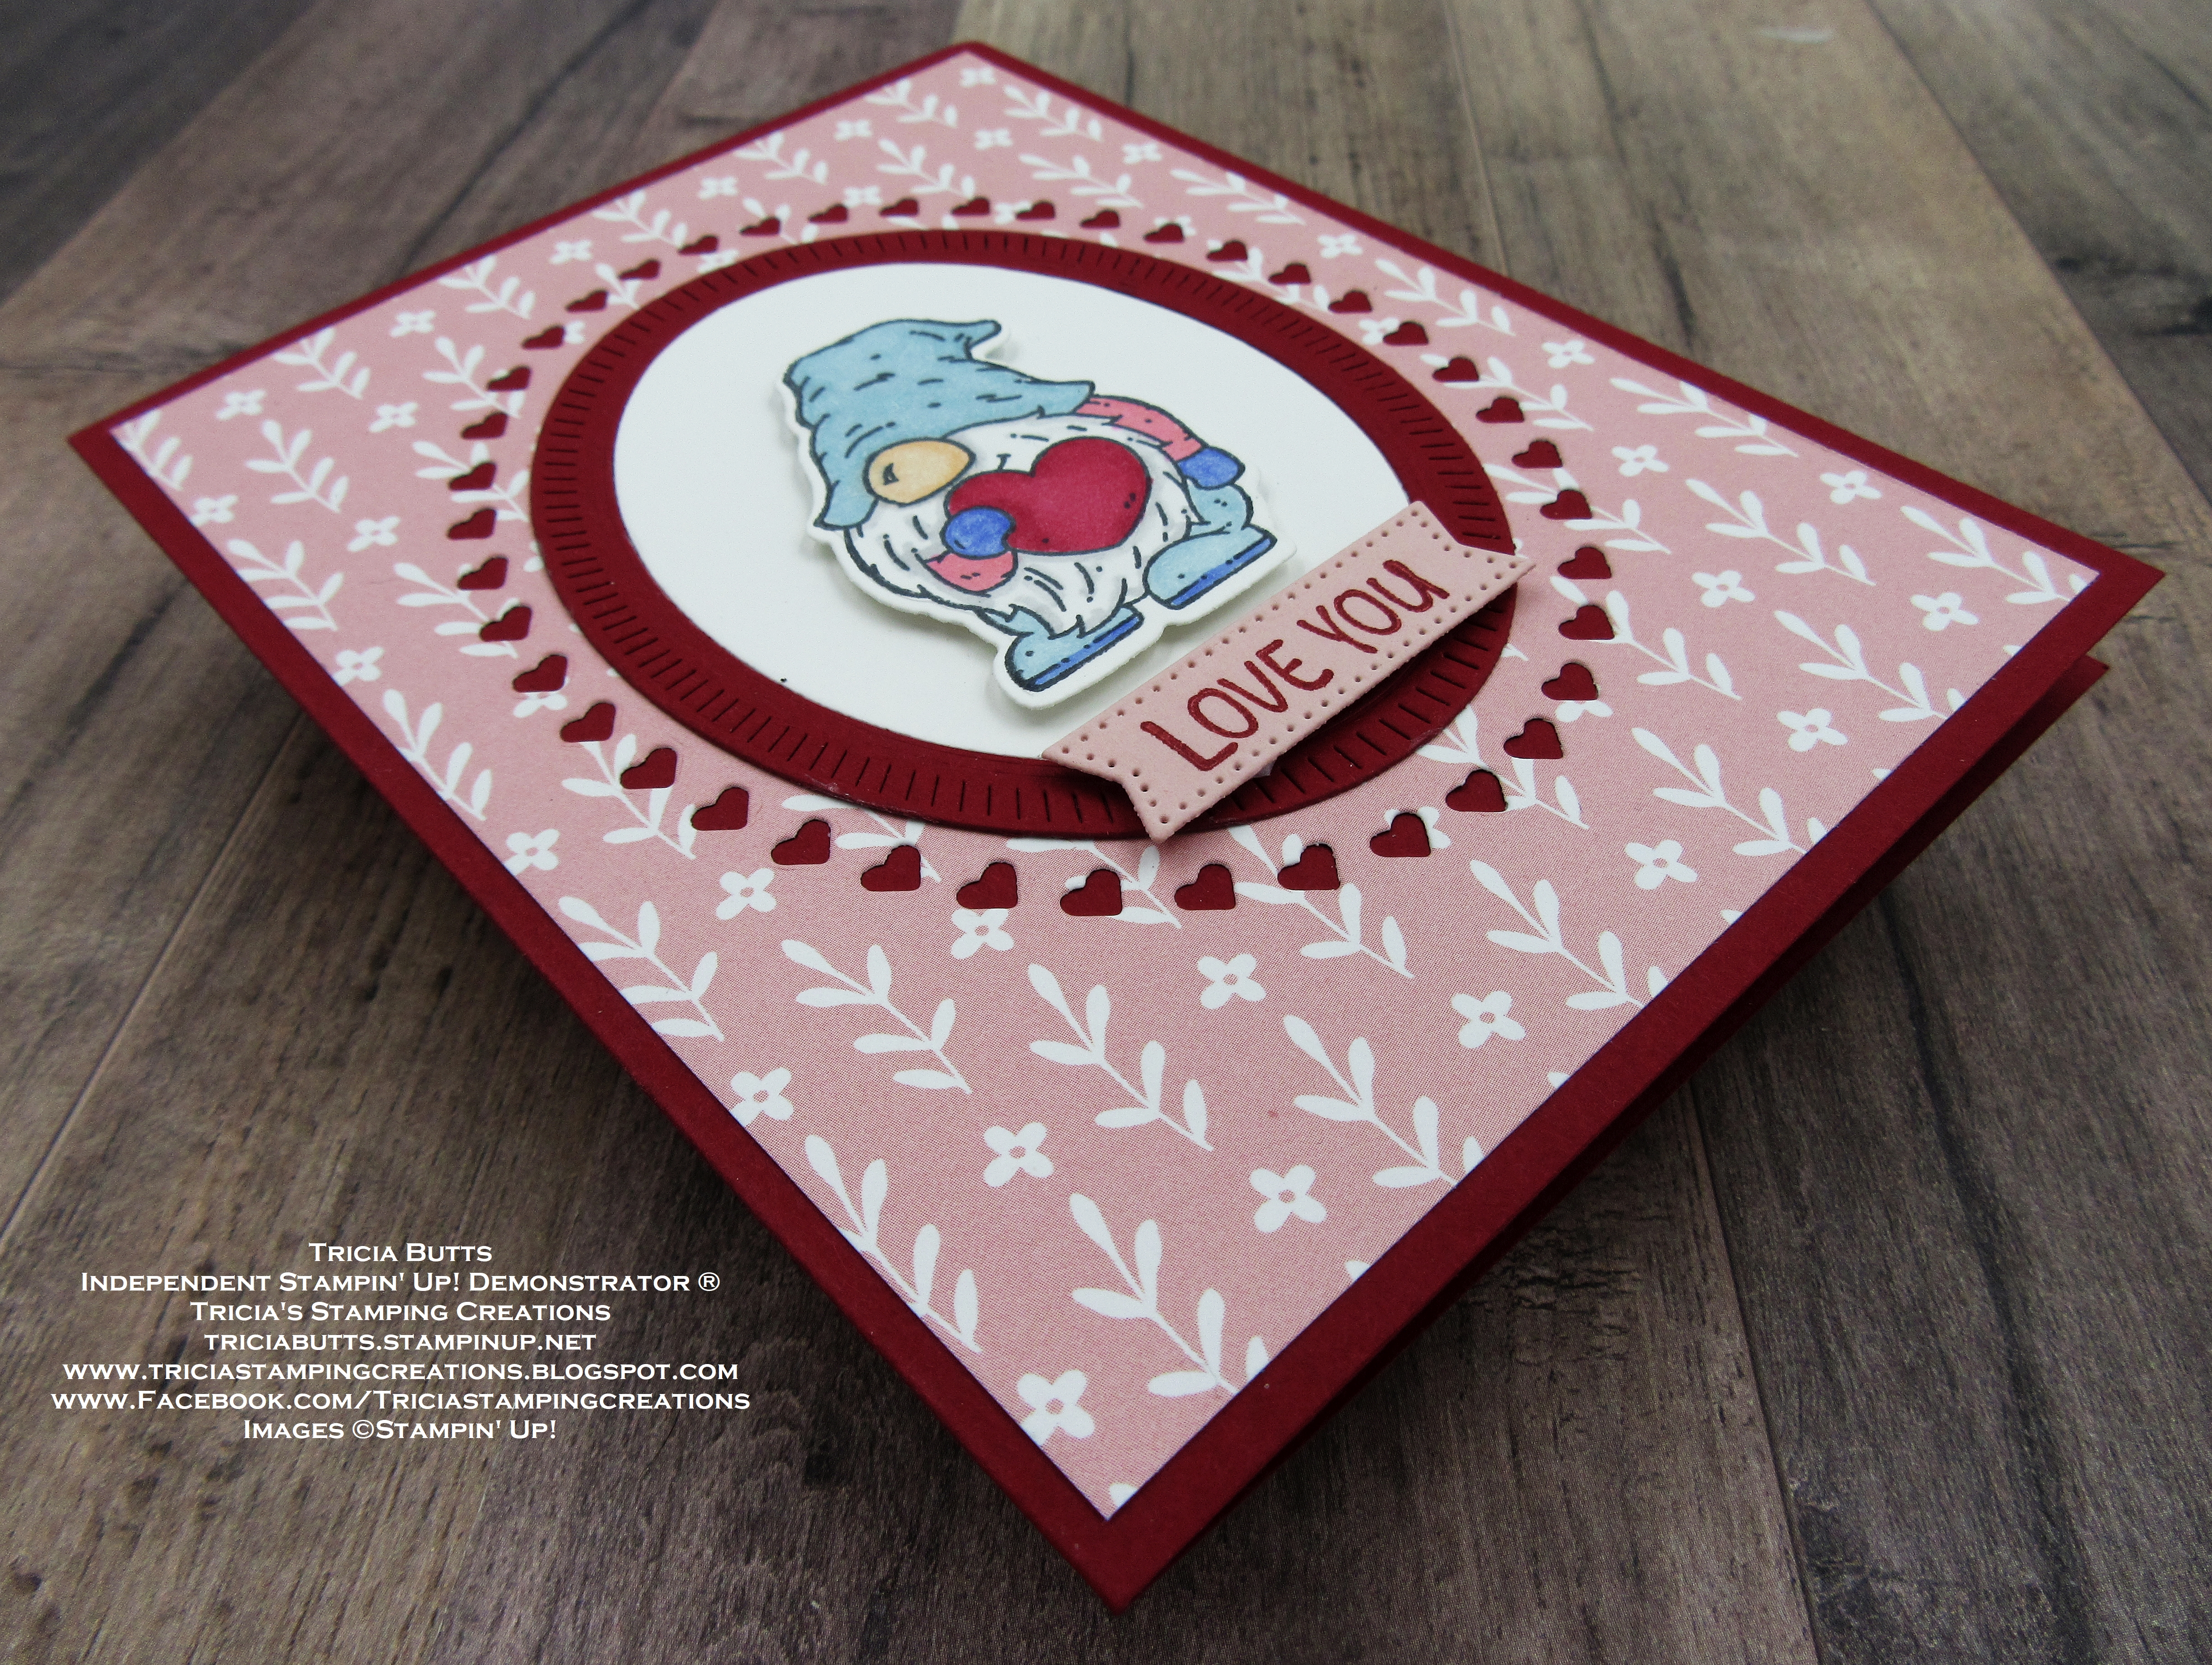
For my card design, I decided to pair the new Friendly Gnomes stamp set from the January-April 2023 Mini Catalog, with the Gnomes Dies which are carrying over from the July-December 2022 Mini Catalog. I love that the several of the dies fit the cute gnomes in the new Friendly Gnomes stamp set. For my design, I wanted to create a cute Valentine's Day card using one of the cute gnome images and the Love You sentiment. To create the layout, I used the Framed Florets Dies with one of the designs from the Fitting Florets Designer Series Paper. These products are very definitely something I have "used" a lot to create projects over the past two months and I love how they fit with my card theme. This card design is a wonderful example of how you can combine something new, with products that you already own to create new projects. 
Products Used:
Friendly Gnomes stamp set (item #160714) Sneak Peek 
Gnomes Dies (item #159625)
Framed Florets Dies (item #160623)
Stylish Shapes Dies (item #159183)
Fitting Florets Designer Series Paper (item #161814)
Cherry Cobbler Cardstock (item #119685)
Blushing Bride Cardstock (item #131198)
Basic White Cardstock (item #159276)
Cherry Cobbler Classic Ink Pad (item #147083)
Memento Tuxedo Black Pad (item #132708)
Balmy Blue Stampin' Blends Combo Pack (item #154830)
Cherry Cobbler Stampin' Blends Combo Pack (item #154880)
Petal Pink Stampin' Blends Combo Pack (item #154893)
Flirty Flamingo Stampin' Blends Combo Pack (item #154884)
Orchid Oasis Stampin' Blends Combo Pack (item #159223)
Smoky Slate Stampin' Blends Combo Pack (item #154904)
Color Lifter (item #144608)
Stampin' Dimensionals (item #104430)
Measurements:
Cherry Cobbler Cardstock
Card Base - 8 1/2" x 5 1/2" (Scored at 4 1/4")
Oval Detailed Frame die cut with the Framed Florets Dies 
Basic White Cardstock
Oval die cut with the Framed Florets Dies 
Stamped Gnome die cut with the Gnomes Dies
Fitting Florets Designer Series Paper
Card Front - 5 1/4" x 4"
Blushing Bride Cardstock
Sentiment Label die cut with the Stylish Shapes Dies
This cute Valentine's Day card was so much fun to create and I love that one of the designs in the Fitting Florets Designer Series Paper, worked perfectly for this card design. I used the detailed hearts die to create the frame in the designer series paper with the cute little hearts and added the Cherry Cobbler Oval frame to the center to frame the focal oval. For the gnome, I stamped the image with Memento Tuxedo Black ink onto Basic White cardstock and colored it with Stampin' Blends Markers. I die cut the image out with the coordinating die from the Gnomes Dies and attached it to the Basic White focal oval with Stampin' Dimensionals. to create the sentiment, I stamped the image with Cherry Cobbler Classic ink onto the Blushing Bride sentiment label and attached it to the bottom of the oval with Stampin' Dimensionals, just below the gnome's feet. I decided not to add any embellishments to my card design, preferring to let the hearts frame stand out. 
Thank you for taking the time to visit my blog. I hope that my card design will help inspire you to combine some of your old favorites with new products coming soon in the January-April 2023 Mini Catalog. It's a great way to show some love to some of the products you already have and give them new life when combined with new options. 
Now it's time to visit Teri's blog and see what she has to share with us this month. Just click on the Next button below to visit her blog or use the Roll Call List to find your way. We would appreciate it if you would leave us a comment and let us know what you liked about our projects. I hope you enjoy the rest of our blog hop. 

Roll Call List
If you live in the U.S. and do not have a Stampin' Up! Demonstrator, please contact me and I would be happy to help you with your creative projects. You may also visit my Online Store to place your order and have it shipped to you. 

Until Next Time

Happy Stamping,

Tricia Butts
Independent Stampin' Up! Demonstrator

Like What You See? Visit My Online Store Here

Visit My Facebook Business Page for Updates & Ideas

Click here to Contact Me 


Free Shipping Coming Soon
One Day Only - December 15th
Visit My Online Store To Place Your Order 

Save Up To 60% On Retiring Products
From The July-December 2022 Mini Catalog
While Supplies Last
Click Below To Shop From My Online Store 

Save Up To 60% On Discontinued Products
From the Clearance Rack Refresh
Click Below To Visit My Online Store


Saturday, January 8, 2022

Ink. Stamp. Share. January Showcase Blog Hop

Welcome to the Ink. Stamp. Share. January Showcase Blog Hop as we start off the New Year with projects we are currently working on. With the new January-June 2022 Mini Catalog and 2022 Sale-a-bration Catalog launching on January 4th, there are so many wonderful new products to create with to help spark your creativity. You will be visiting with talented Stampin' Up! Demonstrators from around the world as they share their wonderful projects and ideas to help inspire you to get creative for the New Year.
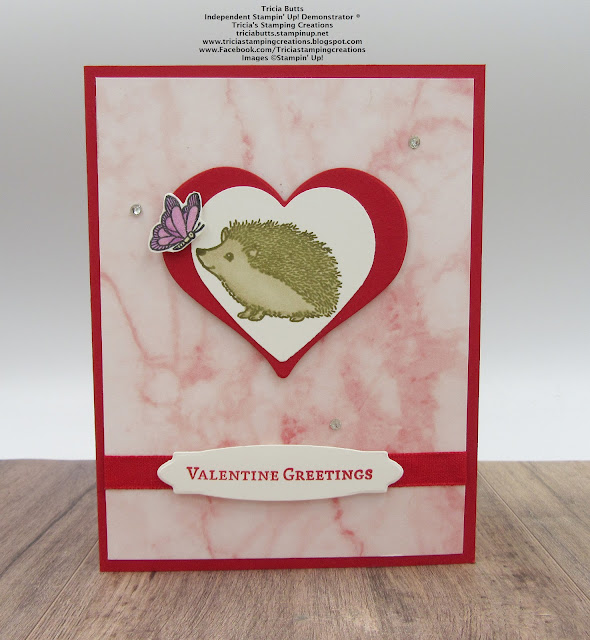
With the start of a New Year, it's the perfect time to create Valentine's Day cards. For my card design today, I paired the new Happy Hedgehogs stamp set from the January-June 2022 Mini Catalog with the beautiful Simply Marbleous 6"x6" Designer Series Paper, which is one of the Sale-a-bration Rewards you can earn free with a qualifying $50 order. I love the soft, pretty background the Blushing Bride designer series paper adds to the card design, and the Real Red cardstock and ribbon provide a wonderful contrast. 
Products Used:
Happy Hedgehogs stamp set (item #157983)
Love & Happiness Bundle (item #157642)
Heart Punch Pack (item #151292)
Simply Marbleous 6"x6" Designer Series Paper (item #158128)
Real Red Cardstock (item #102482)
Basic White Cardstock (item #159276)
Soft Suede Classic Ink Pad (item #147115)
Real Red Classic Ink Pad (item #147084)
Memento Tuxedo Black Pad (item #132708)
Crumb Cake Stampin' Blends Combo Pack (item #154882)
Fresh Freesia Stampin' Blends Combo Pack (item #155518)
So Saffron Stampin' Blends Combo Pack (item #154905)
Clear Wink of Stella Glitter Brush (item #141897)
Real Red 3/8" Faux Linen Ribbon (item #158129)
Basic Rhinestone Jewels (item #144220)
Mini Stampin' Dimensionals (item #144108)
Measurements:
Real Red Cardstock
Card Base - 8 1/2" x 5 1/2" (Scored at 4 1/4")
Large Heart die cut with the Bouquet of Love Hybrid Embossing Folder (Dies)
Blushing Bride Simply Marbleous Designer Series Paper
Card Front - 5 1/4" x 4"
Basic White Cardstock
Focal Heart punched out with the plain Heart Punch from the Heart Punch Pack
Sentiment Label die cut with the Bouquet of Love Hybrid Embossing Folder (Dies)
This sweet Valentine's Day card is simple to create. The cute hedgehog stamp image was stamped onto the Basic White heart with Soft Suede Classic ink and I colored the image with the Crumb Cake Stampin' Blends Combo Pack. I attached the Basic White heart to the center of the Real Red cardstock heart that I die cut with the large heart die from the Bouquet of Love Hybrid Embossing Folder Dies.  For the butterfly, I stamped the image onto a scrap of Basic White cardstock and colored the wings with the Fresh Freesia Stampin' Blends Combo Pack and the body with the Dark So Saffron Stampin' Blends Marker. For a touch of shimmer, I colored the butterfly with Clear Wink of Stella. I fussy cut the butterfly out and attached it to the hearts with two Mini Stampin' Dimensionals. Using Mini Stampin' Dimensionals, I attached the hearts to the center of the card front with Mini Stampin' Dimensionals to pop it up. For the sentiment, I stamped the image from the Love & Happiness stamp set, onto the sentiment label with Real Red Classic ink. I added a piece of the Real Red Faux Linen Ribbon around the bottom of the card front and attached the sentiment over the center of the ribbon with Mini Stampin' Dimensionals. To complete the card, I attached the card front to the Real Red card base and added Basic Rhinestones for a touch of bling. This sweet Valentine's Day card would be a wonderful way to brighten someone's day. 
Thank you for taking the time to visit my blog. I hope that my card design will help inspire you to explore the amazing new products in the January-June 2022 Mini Catalog and 2022 Sale-a-bration Catalog. There are so many wonderful options to choose from. 
Now it's time to visit Jill's blog and see what wonderful projects she has to share with us. Just click the Next button below to visit her blog or use the Roll Call List below to find your way. Please leave us a comment and let us know what you liked about our projects. I hope you enjoy the rest of our blog hop. 

Roll Call
If you live in the U.S. and do not have a Stampin' Demonstrator, please contact me and I would be happy to help you with your creative projects. You may also visit my Online Store to place your order and have it shipped to you. 

Until Next Time

Happy Stamping,

Tricia Butts
Independent Stampin' Up! Demonstrator

Like What You See? Visit My Online Store Here

Visit My Facebook Business Page for Updates & Ideas

Click here to Contact Me


Get Creative For The New Year
With The January-June 2022 Mini Catalog
Click Below To Visit My Online Store

Earn Amazing Free Products 
During Sale-a-bration
Click Below For More Details

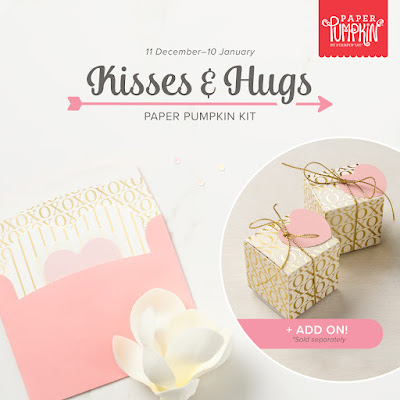
Send Kisses & Hugs
With The January Paper Pumpkin Kit
Click Below To Subscribe By January 10th


Saturday, December 25, 2021

3D Paper Trimmer Blog Hop Celebrate Sale-a-bration

Welcome to the 3D Paper Trimmer December Blog Hop as we showcase products from the new 2022 Sale-a-bration Catalog. You will be visiting with talented Stampin' Up! Demonstrators as they share their projects and ideas to help inspire you. There are so many wonderful new products that you can earn Free with a qualifying order beginning January 4th, 2022.
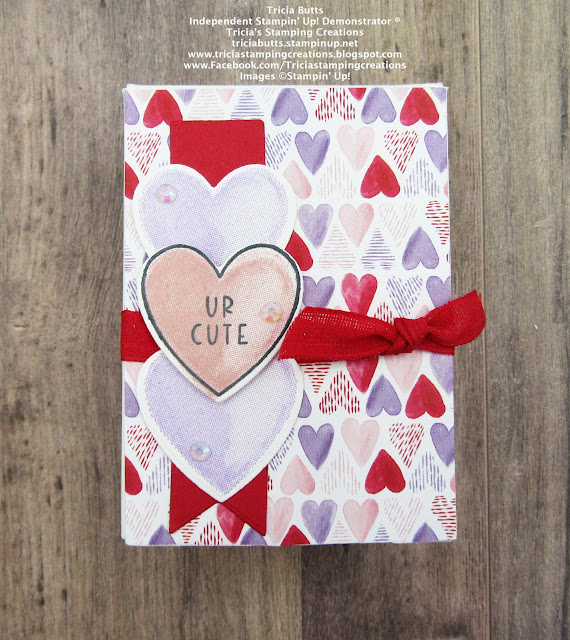
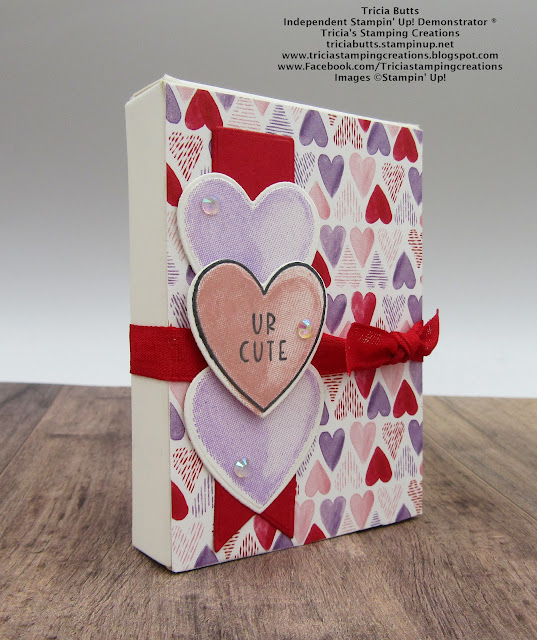
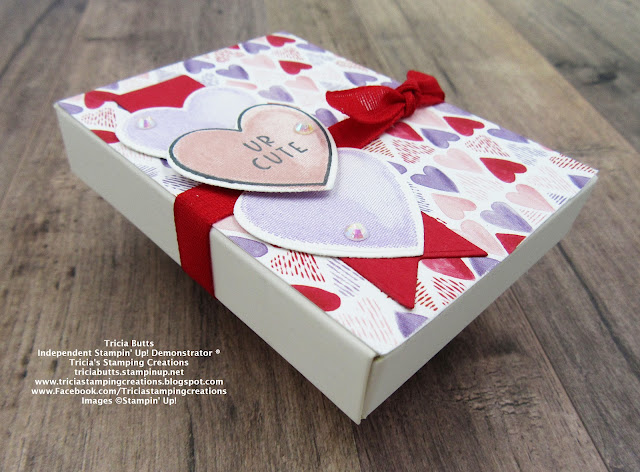
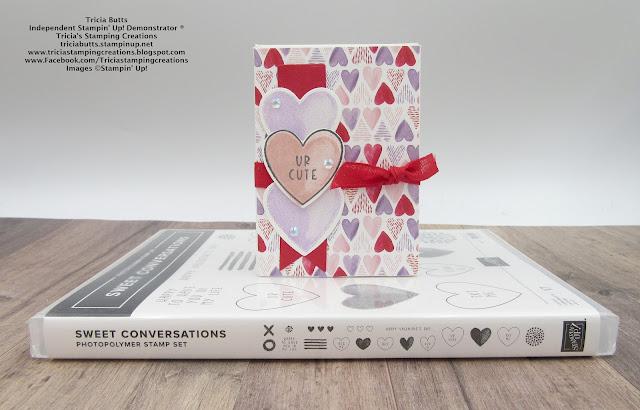
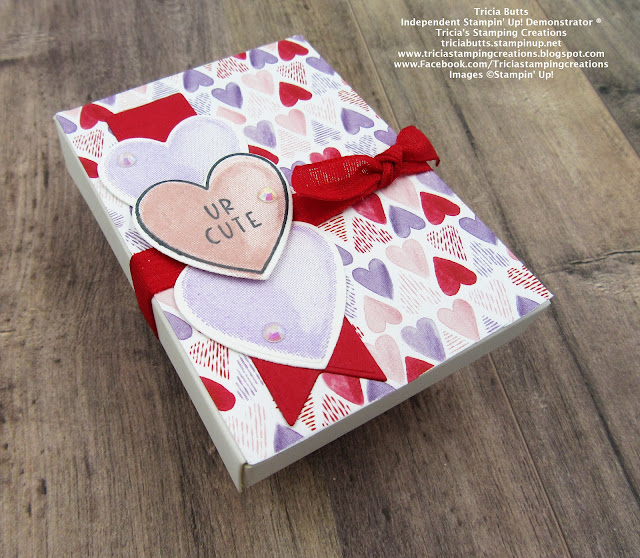
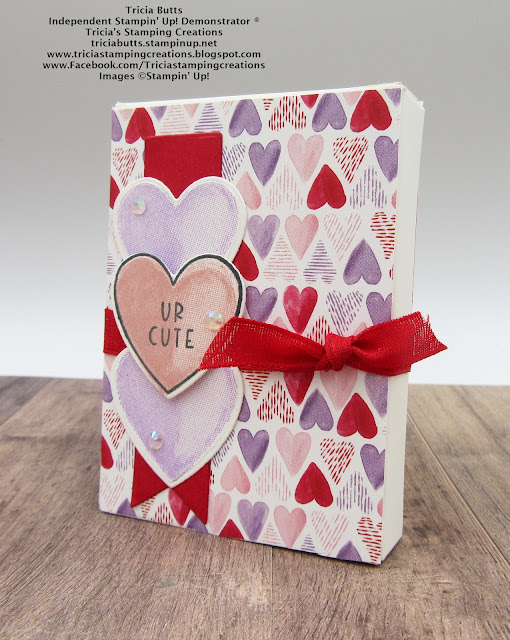
So when I created my project, I was in a hurry and missed that the theme was for the new Sale-a-bration Catalog products and chose to use one of the new suites in the January-June 2022 Mini Catalog. Oops, my bad. The good news is that you get a wonderful project to create for Valentine's Day and if you order at least $50 in products during Sale-a-bration, you can choose a Free Sale-a-bration product. So with that in mind, for my project today, I chose a cute treat box from the new January-June 2022 Mini Catalog that is already precut and scored for you and even has the adhesive strips on the sides for easy assembly. They are great for Valetine's Day but would also be perfect for any occasion as a way to show someone you care.
Products Used:
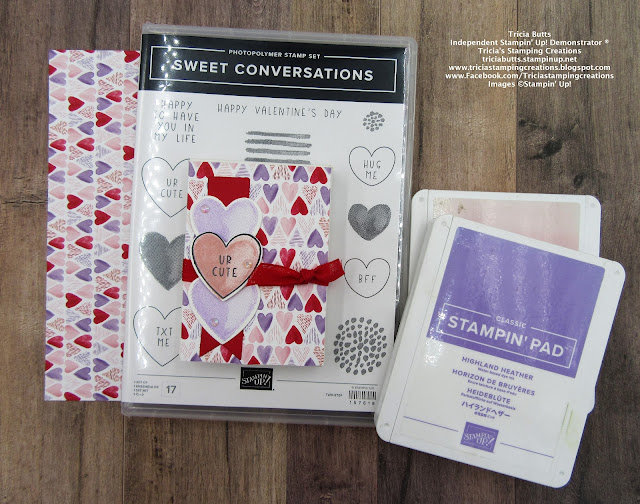
Sweet Conversations Bundle (item #157624)
Sweet Little Boxes (item #157628)
Sweet Talk Designer Series Paper (item #157616)
Real Red Cardstock (item #102482)
Blushing Bride Classic Ink Pad (item #147100)
Highland Heather Classic Ink Pad (item #147103)
Memento Tuxedo Black Pad (item #132708)
Basic White Cardstock (item #159276)
Real Red 3/8" Faux Linen Ribbon (item #158129)
Iridescent Rhinestones Basic Jewels (item #158130)
Stampin' Dimensionals (item #104430)
Measurements:
Sweet Talk Designer Series Paper
2 Pieces - 2 1/2" x 3 1/2"
Basic White Cardstock
3 hearts stamped and die cut with the Sweet Conversations Bundle
Real Red Cardstock
Banner die cut with Sweet Conversations Bundle
This adorable little treat box measures 3 1/2' x 2 1/2" x 5/8" and is easy to decorate. I used products from the new Sweet Talk Suite Collection as they all coordinate beautifully to make decorating stress free and simple. I added the two pieces of designer series paper to the box, one on the front and one on the back. I tied a piece of the pretty Real Red Faux Linen around the middle of the box and tied a knot on the right side of the front of the box. I stamped three hearts onto a piece of Basic White cardstock - 2 with Highland Heather Classic ink and one with the Memento Tuxedo Black ink for the outline with sentiment and then with the Blushing Bride Classic ink to color the inside. I die cut them with the coordinating Sweet Hearts Dies from the bundle and also die cut a banner using Real Red cardstock. I cut the banner in half and attached one half above the ribbon and one half below the ribbon. I then attached the two Highland Heather hearts to cover the open area and added the Blushing Bride heart with Stampin' Dimensionals in the middle. To embellish, I used the wonderful Iridescent Rhinestones to add a touch of bling to each of the hearts. This pretty little box would be a wonderful treat to give out for Valentine's Day and with 10 boxes in the pack, you could create multiple designs to make them extra special. 
Thank you for taking the time to visit my blog. I hope that my project will help inspire you to create your own fun treat boxes and I encourage you to explore the wonderful new Sale-a-bration Catalog to personalize your projects. There are so many beautiful designer series paper packs in the Sale-a-bration Catalog that would look great with these cute treat boxes. 
Now it's time to visit Sonja's blog and see what she has to share with us from the Sale-a-bration Catalog. Just click the Next button to visit her blog. We would appreciate it if you would leave us a comment and let us know what you liked about our projects. I hope you enjoy the rest of our blog hop. 


If you live in the U.S. and do not have a Stampin' Up! Demonstrator, please contact me and I would be happy to help you with your creative projects. You may also visit my Online Store to place your order and have it shipped to you. 

Until Next Time

Happy Stamping,

Tricia Butts
Independent Stampin' Up! Demonstrator

Like What You See? Visit My Online Store Here

Visit My Facebook Business Page for Updates & Ideas

Click here to Contact Me 

Stock Up On Your Favorite Retiring Products
From The July-December 2021 Mini Catalog
Click Below To Visit My Online Store

Send Messages of Love 
With The Kisses & Hugs January Paper Pumpkin Kit
Click Below To Subscribe By January 10th, 2022