Showing posts with label Macramé 3D Embossing Folder. Show all posts

Wednesday, November 10, 2021

Around The World On Wednesday November Blog Hop Favorite Month

Welcome to the Around The World On Wednesday November Blog Hop and our theme this month is our Favorite Month. You will be visiting with talented Stampin' Up! Demonstrators from around the world as they share their projects and ideas to help inspire you.
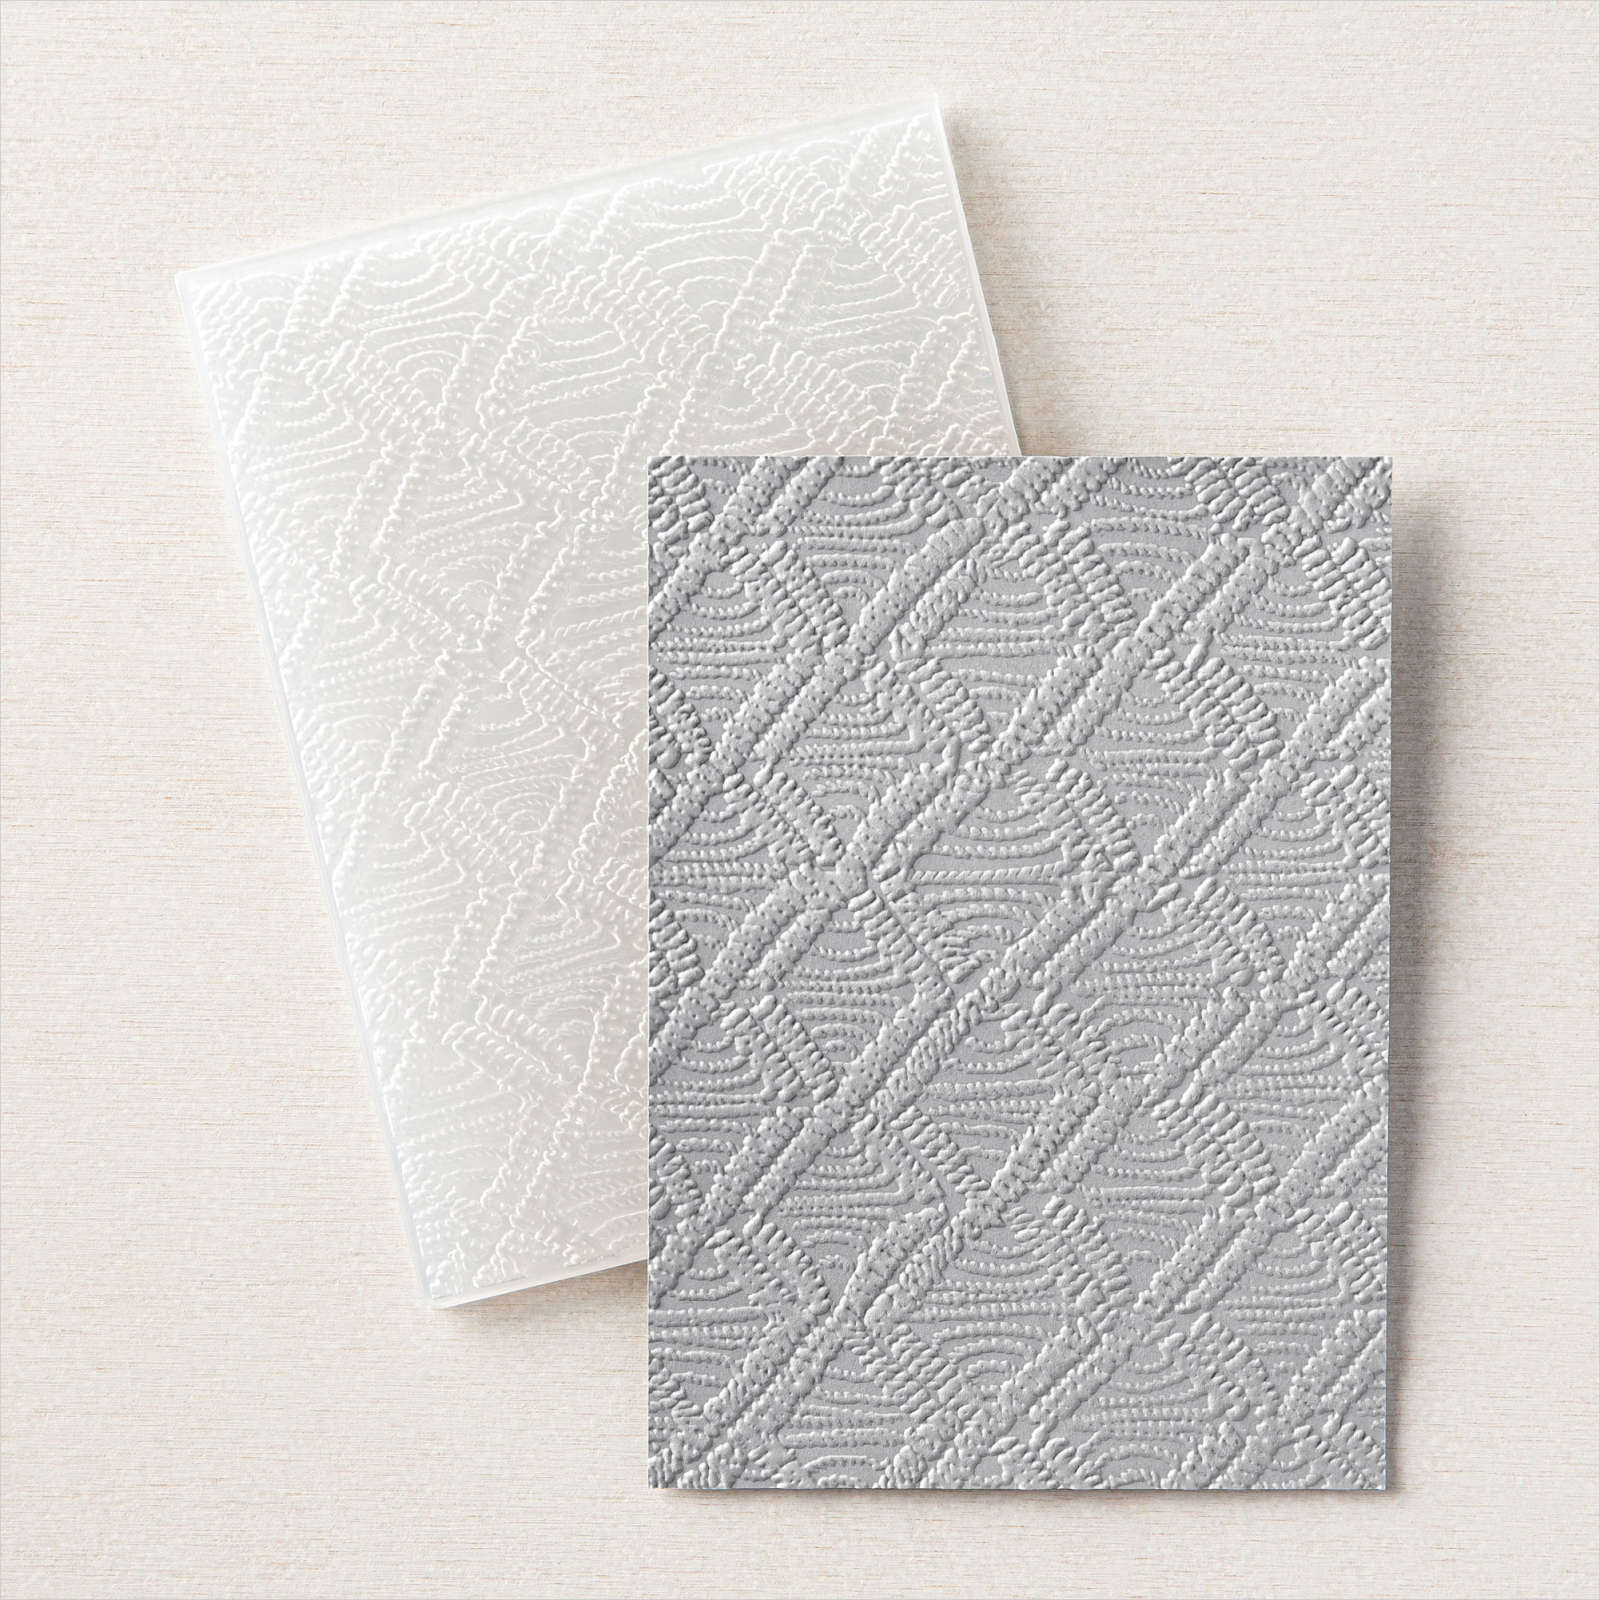
It was a hard decision coming up with my favorite month. After much consideration, I decided that December is my favorite because I love Christmas and Christmas is a time for family. Ten years ago, just a few days before Christmas, we adopted two kittens from our local animal shelter and along with our Black Lab, they are an important part of our family. So I decided that I would use the Sweet Little Stockings Bundle to create my Christmas card design to celebrate our furbabies. I used the Macramé 3D Embossing Folder to add texture to the background and the Picture This Dies to create the windows for my card design. 
Products Used:
Sweet Little Stockings Bundle (item #156798)
Picture This Dies (item #155559) 
Macrame 3D Embossing Folder (item #155435)
Real Red Cardstock (item #102482)
Just Jade Cardstock (item #153079)
Basic White Cardstock (item #159276)
Memento Tuxedo Black Pad (item #132708)
Versamark Pad (item #102283)
Basics Embossing Powders (item #155554)
Smoky Slate Stampin' Blends Combo Pack (item #154904)
Basic Black Stampin' Blends Combo Pack (item #154843)
Real Red Stampin' Blends Combo Pack (item #154899)
Crumb Cake Stampin' Blends Combo Pack (item #154882)
Stampin' Dimensionals (item #104430)
Basic Rhinestone Jewels (item #144220)
Measurements:
Real Red Cardstock
Card Base - 8 1/2" x 5 1/2'" (Scored at 4 1/4")
Sentiment Label die cut with the Stockings Dies
Basic White Cardstock
Layer 1 - 5 1/4" x 4"
2 Cats die cut with the Stockings Dies
1 Dog die cut with the Stockings Dies
3 Santa Hats die cut with the Stockings Dies
1 Present die cut with the Stockings Dies
1 Candy Cane die cut with the Stockings Dies
Just Jade Cardstock
Window Layer - 5" x 3 3/4"
This cute Christmas card has wonderful texture created by the Macramé 3D Embossing Folder. It reminds me of a cable knit sweater, which I love to wear on cold December days. The windows created by the Picture This Dies are perfect for the sweet cats and dog from the Sweet Little Stockings Bundle and I had so much fun coloring the images with Stampin' Blends Markers. I popped up the Just Jade layer with Stampin' Dimensionals to create depth in the design and attached the images with Stampin' Dimensionals inside the windows. The sentiment has been heat embossed with White embossing powder onto the Real Red label and ties in with the Real Red, Just Jade and Basic White color combination. I added a couple of Basic Rhinestone Jewels for a touch of bling to finish off the card design. 
Thank you for taking the time to visit my blog. I hope that my card design will help inspire you to create your own beautiful projects. Inspiration can come from anywhere, even something as simple as your favorite month. There are so many wonderful possibilities to explore.  
Now it's time to visit Elaine's blog and see what she has to share with us. Just click on the Next button to visit her blog or use the Roll Call List below to find your way. We would appreciate it if you would leave us a comment and let us know what you liked about our projects. I hope you enjoy the rest of our blog hop.

Roll Call List
If you live in the U.S. and do not have a Stampin' Up! Demonstrator, please contact me and I would be happy to help you with your creative projects. You may also visit my Online Store to place your order and have it shipped to you.

Until Next Time

Happy Stamping,

Tricia Butts
Independent Stampin' Up! Demonstrator

Like What You See? Visit My Online Store Here

Visit My Facebook Business Page for Updates & Ideas

Click here to Contact Me


Monday, August 9, 2021

Kylie Bertucci's Monthly International Blog Highlights August 2021

Welcome to Kylie Bertucci's Monthly International Blog Highlights for the month of August. We are a group of Stampin' Up! Demonstrators sharing our projects and ideas to help inspire you to get creative. Our theme is Thank You and who doesn't need Thank You cards to send out to people to show how much we appreciate them. 
Fall is just around the corner, so I decided to create this Fall themed Thank You card using the Gorgeous Leaves Bundle from the July-December 2021 Mini Catalog. For the background, I used the Macramé 3D Embossing Folder to add some wonderful texture. This clean and simple card would be great for a masculine design. 
Products Used:
Gorgeous Leaves Bundle (item #158609) New
Macramé 3D Embossing Folder (item #155435)
Layering Circles Dies (item #151770)
Pansy Patch stamp set (item #154999)
Double Oval Punch (item #154242)
Cajun Craze Cardstock (item #119684)
Early Espresso Cardstock (item #119686)
Sahara Sand Cardstock (item #121043)
Gold Foil Sheets (item #132622)
Versamark Pad (item #102283)
Metallic Embossing Powders (item #155555)
Stampin' Dimensionals (item #104430)
Measurements:
Cajun Craze Cardstock
Card Base - 8 1/2" x 5 1/2" (Scored at 4 1/4")
Early Espresso Cardstock
Layer 1 - 5 1/4" x 4"
Large Circle die cut with Layering Circles Dies
Sentiment Oval die cut with Double Ovals Punch
Sahara Sand Cardstock
Background Layer - 5" x 3 3/4" Embossed with Macramé 3D Embossing Folder
Gold Foil Sheet
Detailed Leaf die cut with Intricate Leaves Dies (from Gorgeous Leaves Bundle)
For this card design, I chose warm colors suitable for Fall. I love the way that the Early Espresso, Cajun Craze and Sahara Sand work together and the touch of Gold foil and Gold embossing helps step up the card design. To create this card, I embossed the Sahara Sand cardstock layer with the Macrame 3D Embossing Folder. I heat embossed the sentiment from the Pansy Patch stamp set onto the Early Espresso oval and also heat embossed the splatter image from the Gorgeous Leaves stamp set randomly onto the large Early Espresso circle. I attached the Gold foil leaf onto the Early Espresso circle and attached both the circle and the sentiment oval to the embossed Sahara Sand cardstock layer. I attached the Sahara Sand cardstock layer to the Early Espresso layer and then attached it to the card front with Stampin' Dimensionals. I decided not to add any embellishments to the design, preferring to keep it nice and simple. 
Thank you for taking the time to visit my blog. I hope that my card design will help inspire you to create your own wonderful Thank You cards. There are so many wonderful products to explore in the new July-December 2021 Mini Catalog. 
I would love it if you would take the time to vote for my card design as part of this month's Blog Highlights. Just click the button below to vote by clicking on the small heart on the thumbnail for my card design (#32). You can vote for 5 different projects each day over the next week. I hope you will take the time to click through and visit with each of the wonderful demonstrators taking part this month. 

If you live in the U.S. and do not have a Stampin' Up! Demonstrator, please contact me and I would be happy to help you with your creative projects. You may also visit my Online Store to place your order and have it shipped to you.

Until Next Time

Happy Stamping,

Tricia Butts
Independent Stampin' Up! Demonstrator

Like What You See? Visit My Online Store Here

Visit My Facebook Business Page for Updates & Ideas

Click here to Contact Me


Earn Exclusive Free Products

During Sale-a-bration

Click Below For More Details


Explore Your Creativity
With The New July-December 2021 Mini Catalog
Click Below To Visit My Online Store

Last Days To Get Your Box Of Hope
With The August Paper Pumpkin Kit
Click Below To Subscribe By August 10th


Saturday, August 7, 2021

Colour Combo August Blog Hop


Welcome to the Colour Combo August Blog Hop and this month we have been challenged to create a project using Gray Granite, Bermuda Bay and Gorgeous Grape. I hope you will take a trip along our blog hop this month and see the amazing projects created by these wonderful Stampin' Up! Demonstrators from around the world.
For today's card, I decided to add some fun texture and dimension to the design. For the background layer, I embossed the Gray Granite layer with the Macramé 3D Embossing Folder to create a wonderful geometric design. For the tags, I used two different sizes from the Tailor Made Tags Dies and used Stampin' Dimensionals to pop them up. I love the big bold sentiments in the Biggest Wish stamp set and decided to use the two different font styles for this card design. 
Products Used:
Biggest Wish stamp set (item #155052)
Tailor Made Tags Dies (item #155563)
Macramé 3D Embossing Folder (item #155435)
Bermuda Bay Cardstock (item #131197)
Gorgeous Grape Cardstock (item #146987)
Gray Granite Cardstock (item #146983)
Basic White Cardstock (item #159276)
Bermuda Bay Classic Stamp Pad (item #147096)
Versamark Pad (item #102283)
Basics Embossing Powders (item #155554)
Gorgeous Grape 3/8" Sheer Ribbon (item #154572)
Baker's Twine Essentials Pack (item #155475)
Basic Rhinestone Jewels (item #144220)
Stampin' Dimensionals (item #104430) 
Measurements:
Bermuda Bay Cardstock
Card Base - 8 1/2" x 5 1/2" (Scored at 4 1/4")
Hole Ring Reinforcers die cut with Tailor Made Tags Dies
Gorgeous Grape Cardstock
Layer 1 - 5 1/4" x 4"
Small tag die cut with Tailor Made Tags Dies
Gray Granite Cardstock
Background Layer - 5" x 3 3/4" Embossed with the Macramé 3D Embossing Folder
Basic White Cardstock
Large tag die cut with Tailor Made Tags Dies
This clean and simple card is easy to create and is all about layers and texture. I love the geometric detail created by the Macramé embossing folder as well as the wonderful texture. It makes a wonderful contrast for the tags for the sentiments. I stamped the large Birthday sentiment onto the large Basic White tag with Bermuda Bay Classic ink and I heat embossed the scripted Happy sentiment onto the smaller Gorgeous Grape tag with White embossing powder. I added the Bermuda Bay hole reinforcers to both tags to add contrast and then tied a piece of Gorgeous Grape Sheer Ribbon through the hole of the large Basic White tag and a piece of the Gray Granite Baker's Twine (from the Essentials Pack) through the hole of the smaller Gorgeous Grape Tag. To assemble the card, I attached the embossed Gray Granite cardstock layer to the Gorgeous Grape layer and then added it to the Bermuda Bay card base with Stampin' Dimensionals. I added the tags to the card front with Stampin' Dimensionals so that the Gorgeous Grape tag slightly overlaps the top of the Basic White tag. To complete the card design, I added Basic Rhinestones for a touch of bling.  
Thank you for taking the time to visit my blog. I hope that my card design helps inspire you to explore creating with these wonderful colors. There are so many wonderful possibilities to explore with the amazing products in the 2021-2022 Annual Catalog. 
Now it's time to visit Nigezza's blog and see what amazing projects she has to share with us. Just click the Next button below to visit her blog. We would appreciate it if you would leave us a comment and let us know what you liked about our projects. I hope you enjoy the rest of our blog hop. 

If you live in the U.S. and do not have a Stampin' Up! Demonstrator, please contact me and I would be happy to help you with your creative projects. You may also visit my Online Store to place your order and have it shipped to you. 

Until Next Time

Happy Stamping,

Tricia Butts
Independent Stampin' Up! Demonstrator

Like What You See? Visit My Online Store Here

Visit My Facebook Business Page for Updates & Ideas

Click here to Contact Me


Earn Exclusive Free Products

During Sale-a-bration

Click Below For More Details


The New July-December 2021 Mini Catalog
Has Arrived
Click Below To Visit My Online Store

Share A Box Of Hope
With The August Paper Pumpkin Kit
Click Below To Subscribe By August 10th