Showing posts with label Harvest Dies. Show all posts

Saturday, April 22, 2023

Ink. Stamp. Share. April Blog Hop Showcase

Welcome to the Ink. Stamp. Share. April Monthly Blog Hop as we showcase projects we are currently working on. You will be visiting with our talented Design Team members as they share their projects and ideas, which may include Sneak Peeks of new products from the upcoming 2023-2024 Annual Catalog as well as projects featuring retiring products that we are saying goodbye to. 
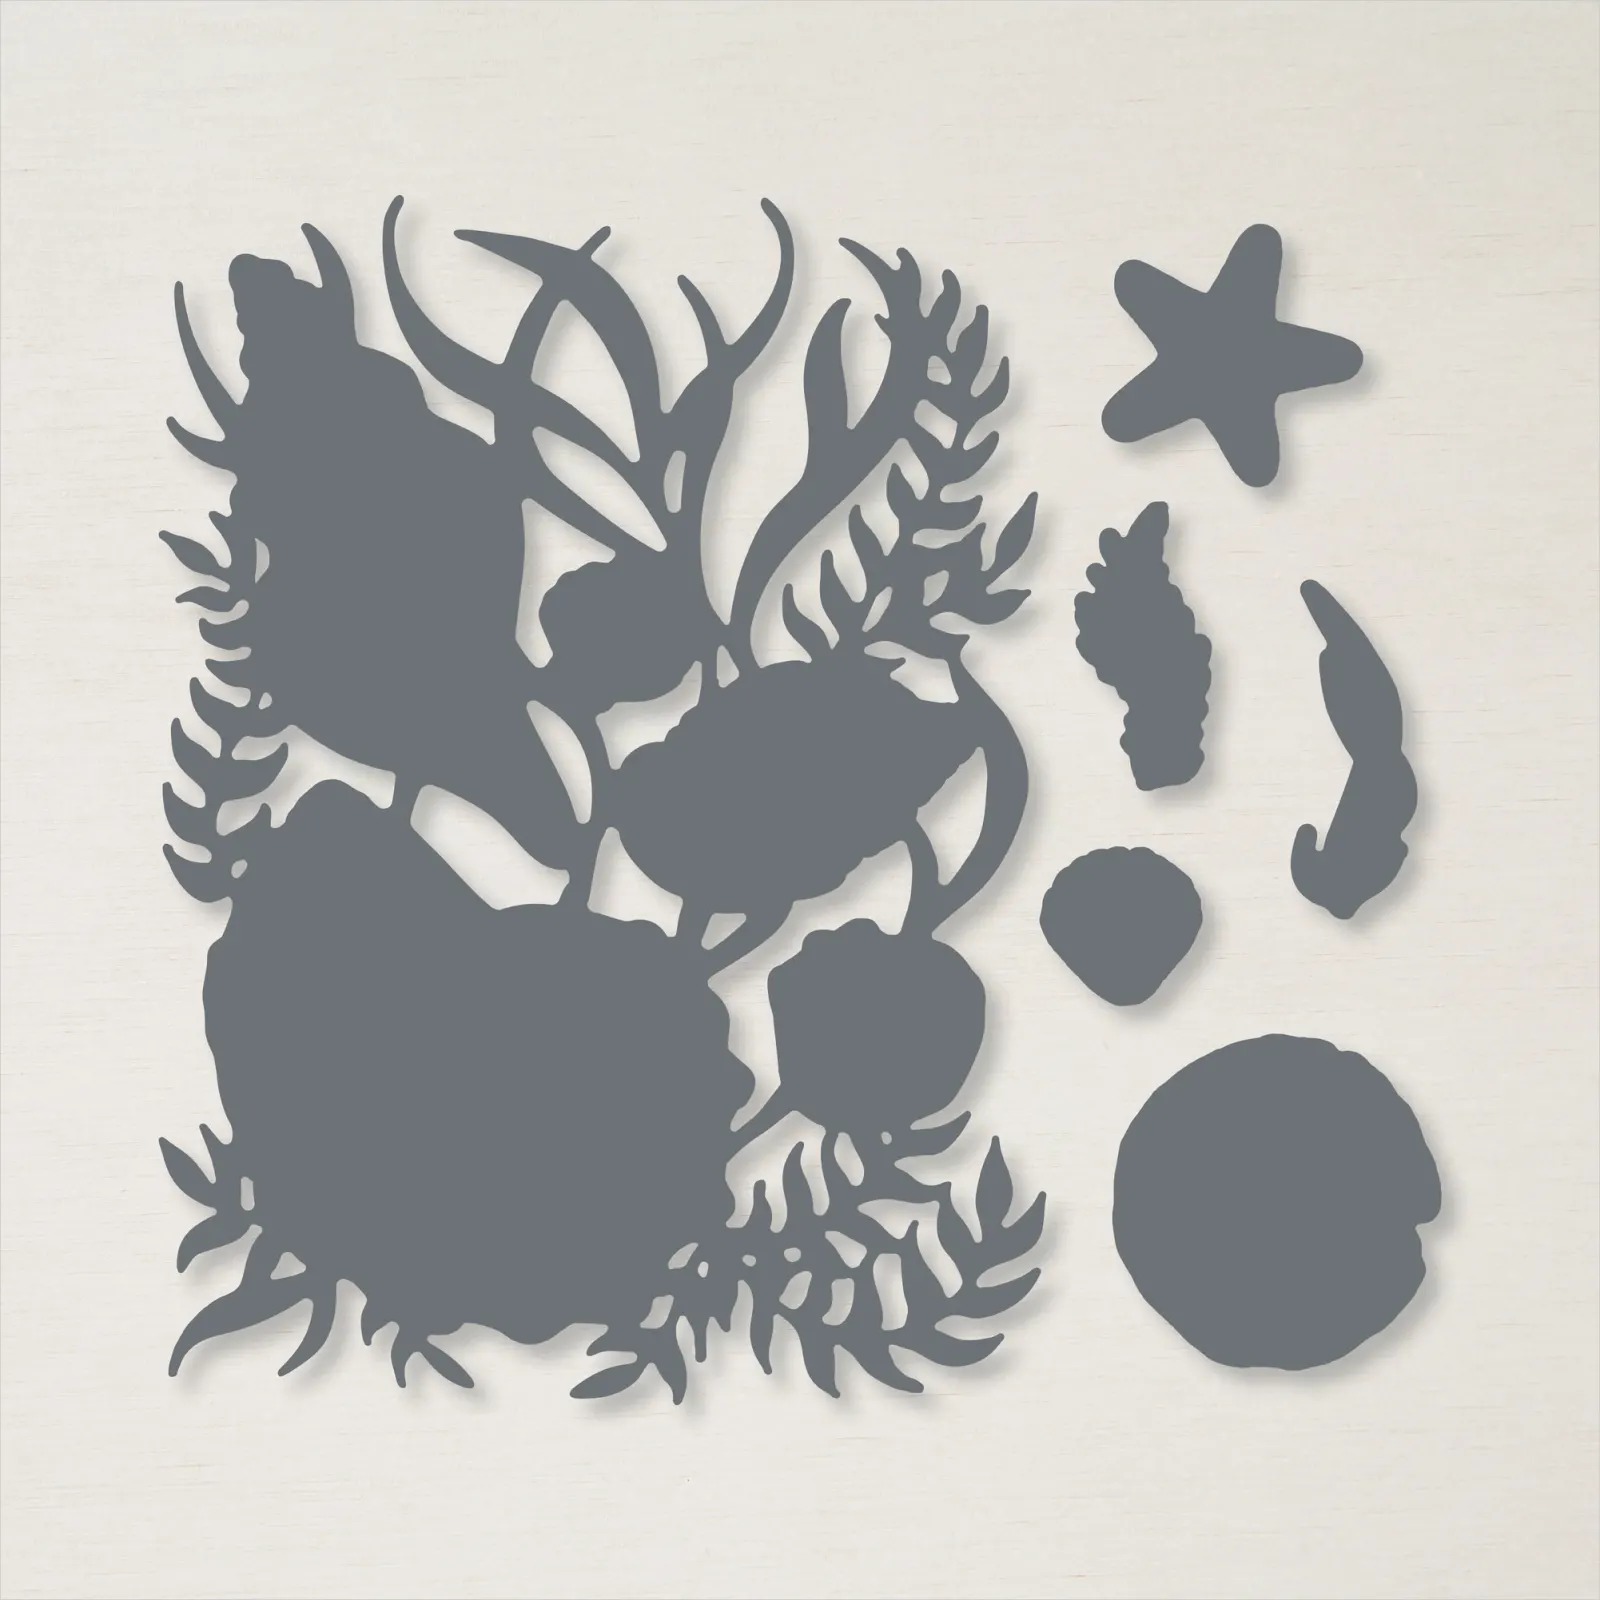
Today's card design features some of my retiring favorites from both the 2022-2023 Annual Catalog and January-April 2023 Mini Catalog. I love the ocean and going to the beach, so I wanted to create a design reflecting these places. The Friends Are Like Seashells stamp set and coordinating Seaside Seashells Dies are wonderful for beach theme cards and I paired them with the beautiful By The Bay 6"x 6" Specialty Designer Series Paper to create that had a calm, peaceful feel to it. I love this soft color combination and the subtle shimmer of the Clear Wink of Stella on the seashells adds a touch of sparkle. 
Products Used:
Friends Are Like Seashells stamp set (item #154368) Retiring
Seaside Seashells Dies (item #156095) Retiring
Harvest Dies (item #156504) Retiring 
By The Bay 6"x 6" Specialty Designer Series Paper (item #160434) Retiring 
Pool Party Cardstock (item #154894) 
Basic White Cardstock (item #159276)
Sahara Sand Cardstock (item #121043) Retiring
Pool Party Classic Ink Pad (item #147107)
Petal Pink Classic Ink Pad (item #147108)
Sahara Sand Classic Ink Pad (item #147117) Retiring
Versamark Pad (item #102283)
Metallics Embossing Powders (item #155555)
Clear Wink of Stella Glitter Brush (item #141897)
Basic Pearl Jewels (item #144219) Retiring
Stampin' Dimensionals (item #104430)
Measurements:
Pool Party Cardstock
Card Base - 8 1/2" x 5 1/2" (Scored at 4 1/4")
Sentiment Label die cut with the Harvest Dies
Basic White Cardstock
Background Layer - 3 1/4" x 4 5/8"
Seashells stamped and die cut with the Seaside Seashells Dies
Sahara Sand Cardstock
Sand Dollar image stamped and die cut with the Seaside Seashells Dies
By The Bay Specialty Designer Series Paper
4 Strips - 1" x 3"
This strip technique is a great way to use up scraps for designer series paper and I was able to cut 4 strips of 1"x 3" from a scrap piece of the designer series paper that I had left over from another project. I attached them to the Basic White cardstock layer, spacing them evenly before adhering them. I stamped the Pool Party card base with the "sand" image stamp around the edge of the front of the card using Pool Party Classic ink for a tone on tone design to add some texture. I attached the focal layer to the center of the card base with Stampin' Dimensionals to pop it up. For the sentiment, I heat embossed the image with Gold embossing powder onto Pool Party cardstock, to coordinate with the Gold accents on the designer series paper strips. I used a die from the Harvest Dies to die cut the long sentiment. I stamped the Sand Dollar stamp image onto Sahara Sand cardstock with Sahara Sand ink and then die cut it with the coordinating dies. I also stamped the seashells, one in Petal Pink Classic ink and one in Sahara Sand Classic ink onto Basic White cardstock and then fussy cut them both out. To create the design on the card front, I added the long sentiment label towards the bottom of the focal layer. I added the shells to the card front, popping the Petal Pink seashell up with Stampin' Dimensionals, overlapping them slightly over the sentiment label. Using Clear Wink of Stella, I added some shimmer to the seashells. To finish off the design, I added some Basic Pearls for a touch of bling. 
Thank you for taking the time to visit my blog. I hope that my card design will inspire you to take another look at the retiring products from the 2022-2023 Annual Catalog and January-April 2023 Mini Catalog. You will love the way they mix and match to help you create your own beautiful projects. 
Now it's time to visit with my fellow Design Team members and see what they have to share with us. Just use the Roll Call List below to visit their blogs to see their wonderful projects. We would appreciate it if you would leave us a comment and let us know what you liked about our projects. I hope you enjoy the rest of our blog hop.

If you live in the U.S. and do not have a Stampin' Up! Demonstrator, please contact me and I would be happy to help you with your creative projects. You may also visit my Online Store to place your order and have it shipped to you. Don't forget to check the Last Chance Retiring Products Sale and take advantage of up to 60% off select retiring products. These products are available only while supplies last, so don't delay in placing your order. 

Until Next Time

Happy Stamping,

Tricia Butts
Independent Stampin' Up! Demonstrator

Like What You See? Visit My Online Store Here

Visit My Facebook Business Page for Updates & Ideas

Click here to Contact Me


Save Up To 60% Off Select Retiring Products
From The Last Chance Products Sale
Click Below To Shop From My Online Store

Saturday, October 8, 2022

Colour Combo October Blog Hop

Welcome to the Colour Combo October Blog Hop as we showcase projects created using this month's color combination of Pumpkin Pie, Mossy Meadow and Starry Sky. Our Design Team members will be sharing their projects and ideas to help inspire you to try creating your own beautiful projects with this color combination. 
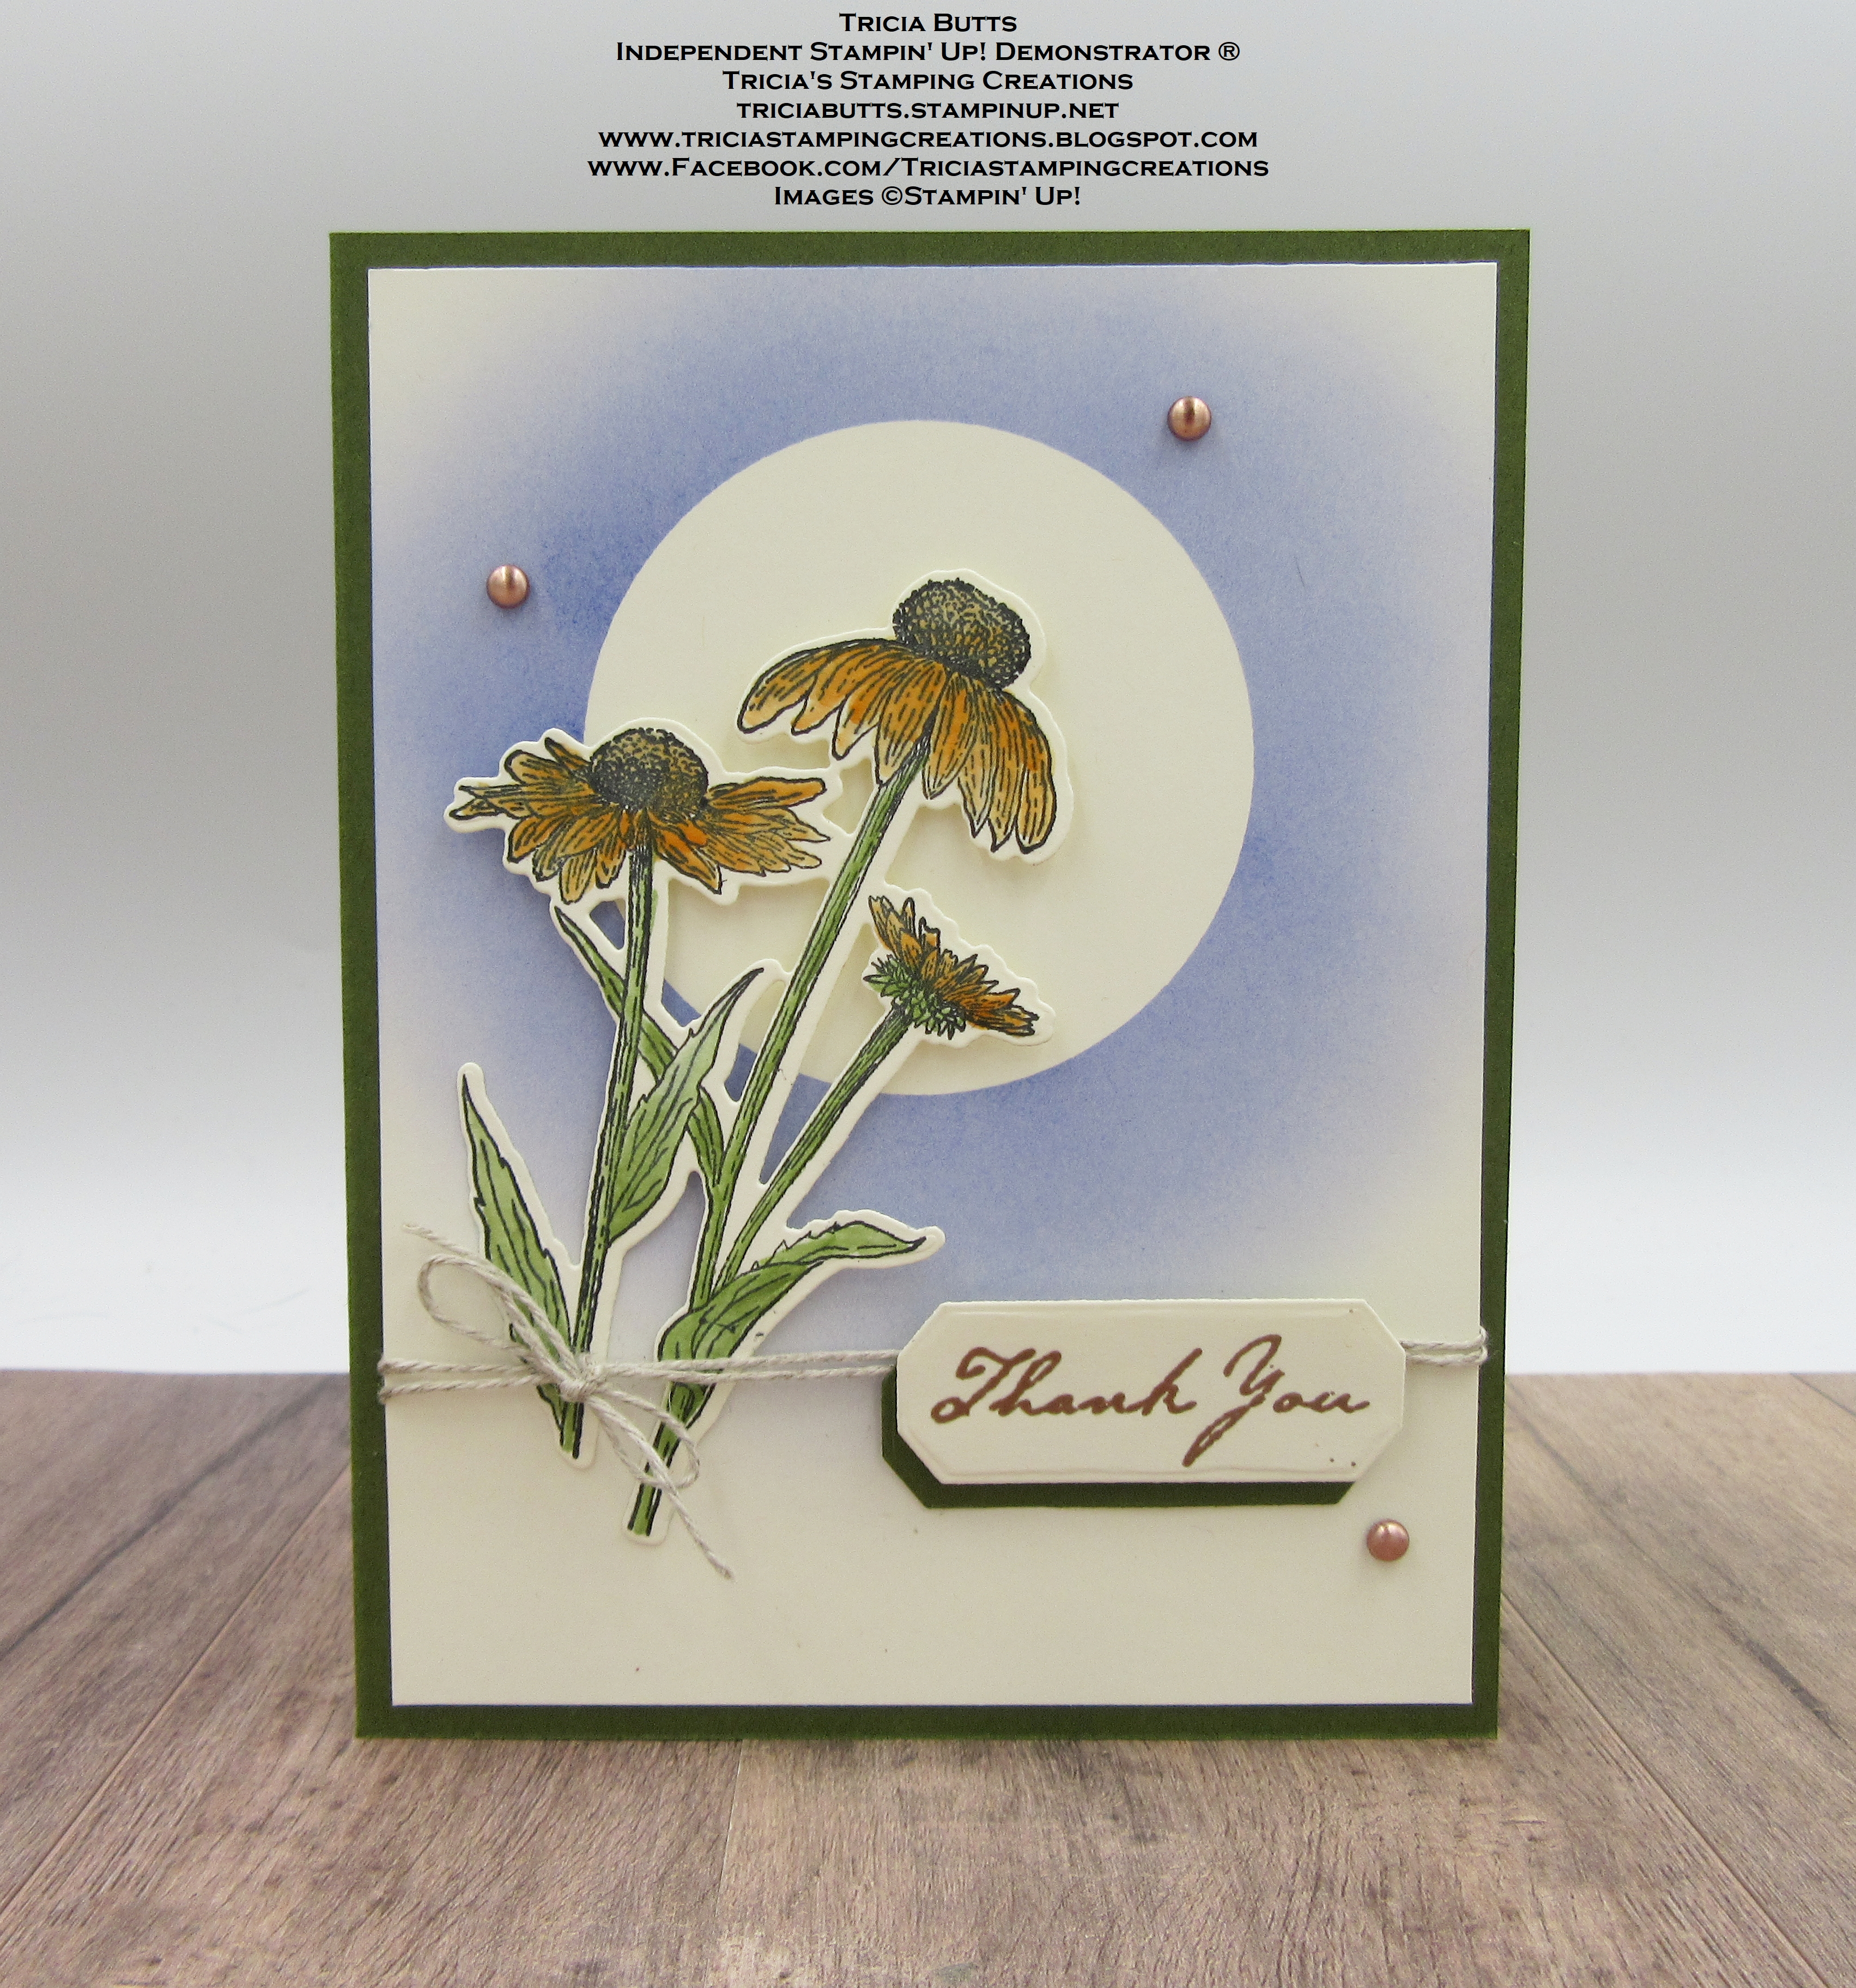
For my card design, I decided to do a little reverse masking to create a soft background for my focal design. I chose to use the Nature's Harvest Bundle, as it has a wonderful range of images and sentiments and the coordinating dies take the stress out of creating. 
Products Used:
Nature's Harvest Bundle (item #156813)
Layering Circles Dies (item #151770(
Mossy Meadow Cardstock (item #133676)
Very Vanilla Cardstock (item #101650)
Mossy Meadow Classic Ink Pad (item #147111)
Pumpkin Pie Classic Ink Pad (item #147086)
Starry Sky Classic Ink Pad (item #159212)
Memento Tuxedo Black Pad (item #132708)
Versamark Pad (item #102283)
Metallics Embossing Powders (item #155555)
Blending Brushes (item #153611)
Blender Pens (item #102845)
Brushed Metallic Adhesive Backed Dots (item #156506)
Linen Thread (item #104199)
Stampin' Dimensionals (item #104430)
Measurements:
Mossy Meadow Cardstock
Card Base - 8 1/2" x 5 1/2" (Scored at 4 1/4")
Small Label die cut with the Harvest Dies
Very Vanilla Cardstock
Card Front - 5 1/4" x 4"
Sentiment Label die cut with the Harvest Dies
Stamped and die cut floral image using the Nature's Harvest Bundle
This clean and simple card design is simple to create and I love that I only need one bundle to create this card. The background is easy to create by die cutting a circle from a Post It Note and applying it to the Very Vanilla cardstock layer and then applying Starry Sky Classic around it with a Blending Brush to create this beautiful background. When you remove the Post It Note, you are left with a circle of Very Vanilla that adds wonderful contrast to the card and is a perfect spotlight for the floral image. To create the floral image, I stamped the image with Memento Tuxedo Black ink onto Very Vanilla cardstock and I die cut it with the coordinating die. I colored the image using Classic inks and a Blender Pen. I attached the floral image to the card front using Stampin' Dimensionals so that the flowers are inside the Very Vanilla circle. I wrapped a piece of Linen Thread around the card front twice and tied a bow over the stems of the floral image. The sentiment was heat embossed with Copper embossing powder onto the Very Vanilla Label and I attached it to the Mossy Meadow Label with Stampin' Dimensionals, slightly off setting it. I added the sentiment to the card front so that it overlaps the Linen Thread on the right side of the card front. To finish off the design, I added three of the small Copper Brushed Metallic Dots to the card front. 
Thank you for taking the time to visit my blog. I hope that my card design will help inspire you to create your own wonderful projects using this color combination.
Now it's time to visit Sonja's blog and see what she has created with this month's color combination. Just click the Next button below to visit her blog. We would appreciate it if you would leave us a comment and let us know what you liked about our projects. I hope you enjoy the rest of our blog hop. 


If you live in the U.S. and do not have a Stampin' Up! Demonstrator, please contact me and I would be happy to help you with your creative projects. You may also visit my Online Store to place your order and have it shipped to you. 

Until Next Time

Happy Stamping,

Tricia Butts
Independent Stampin' Up! Demonstrator

Like What You See? Visit My Online Store Here

Visit My Facebook Business Page for Updates & Ideas

Click here to Contact Me


Get Creative For The Holidays 
With The July-December 2022 Mini Catalog
Click Below To Visit My Online Store

Last Days To Sign Up
For The Ho Ho Ho Paper Pumpkin Card Kit
Click Below To Subscribe By October 10th


Saturday, September 17, 2022

Stamping With Friends September Blog Hop Blogger's Choice - Annual Catalog

Welcome to the Stamping With Friends September Blog Hop as we explore the wonderful products in the 2022-2023 Annual Catalog with a Blogger's Choice theme. We will be sharing our projects and ideas to help inspire you to create your own beautiful projects with these amazing products.
Summer is almost over and we begin the transition to a new season. For my card design today, I wanted to create a card that showcased the beautiful Nature's Harvest stamp set and coordinating Harvest Dies, to create a design that shows that transition into Fall. The colors I chose to use are Old Olive, Cajun Craze and Whisper White and I added texture using the Timeworn Type 3D embossing folder to add a rustic feel to the design. The background paper is a design from the Design A Daydream Designer Series Paper, which is a Host Reward you can earn for Free with a qualifying order or party. This design works well for a variety of occasions and by changing the color combination, you can personalize the look and feel of the card.
Products Used:
Nature's Harvest stamp set (item #156495)
Harvest Dies (item #156504)
Tailor Made Tags Dies (item #155563)
Timeworn Type 3D Embossing Folder (item #156505)
Old Olive Cardstock (item #100702)
Cajun Craze (item #119684)
Basic White Cardstock (item #159276)
Old Olive Classic Ink Pad (item #147090)
Pear Pizzazz Classic Ink Pad (item #14)7
Memento Tuxedo Black Pad (item #132708)
Versamark Pad (item #102283)
Metallics Embossing Powders (item #155555)
Old Olive Stampin' Blends Combo Pack (item #154892)
Pale Papaya Stampin' Blends Combo Pack (item #155519)
Calypso Coral Stampin' Blends Combo Pack (item #154881)
Cajun Craze Stampin' Blends Combo Pack (item #154879)
Brushed Metallic Adhesive Backed Dots (item #156506)
Gold 3/8" Satine Edged Ribbon (item #159555)
Parakeet Party 1/8" Metallic Woven Ribbon (item #159196)
Sponge Daubers (item #133773)
Stampin' Dimensionals (item #104430)
Measurements:
Old Olive Cardstock
Card Base - 8 1/2" x 5 1/2" (Scored at 4 1/4")
Strip - 1" x 5 1/4" Embossed with the Timeworn Type 3D Embossing Folder
Sentiment Label die cut with the Harvest Dies
Cajun Craze Cardstock
Large Tag die cut with the Tailor Made Tags Dies
Basic White Tag
Large Tag die cut with the Tailor Made Tags Dies
Floral image stamped and die cut using the Nature's Harvest stamp set and Harvest Dies
Design A Daydream Designer Series Paper
Card Front - 5 1/4" x 4"
This pretty card design is a wonderful combination of color and texture and I love how it all came together. For the background, I used a piece of the Design A Daydream Designer Series Paper to add some contrast and texture to the design.  The Timeworn Type 3D Embossing Folder was used to add texture to the tags and the side panel on the card front and I added Pear Pizzazz Classic ink to the embossed Basic White tag to give it some soft color using a Sponge Dauber. For the Old Olive side panel, I sponged the embossed areas with Old Olive Classic ink to bring out the texture and add dimension to the design. The tags were tied together using a piece of the Gold Satin Edged Ribbon and the Party Parakeet Metallic Woven Ribbon to step up the card design. The floral image was colored with Stampin' Blends Markers and die cut with the Harvest Dies. For a touch of bling, I added Gold Brushed Metallic Adhesive Backed Dots to finish off the design. 
Thank you for taking the time to visit my blog. I hope that my card design will help inspire you to get creative with the wonderful products in the 2022-2023 Annual Catalog. There are so many possibilities to explore.
Please take the time to visit with my fellow Design Team members by using the Roll Call List below. We would appreciate it if you would leave us a comment and let us know what you enjoyed about our projects.

If you live in the U.S. and do not have a Stampin' Up! Demonstrator, please contact me and I would be happy to help you with your creative projects. You may also visit my Online Store to place your order and have it shipped to you. 

Until Next Time

Happy Stamping,

Tricia Butts
Independent Stampin' Up! Demonstrator

Like What You See? Visit My Online Store Here

Visit My Facebook Business Page for Updates & Ideas

Click here to Contact Me


Weekly Deals Are Here For The Month Of September
Available For A Limited Time
Click Below To View This Week's Deals

Perfect Partners Exclusive Dies
Available Only While Supplies Last
Click Below To Shop In My Online Store

Create Beautiful Christmas Cards
With The Exclusive Ho Ho Ho Paper Pumpkin Kit
Click Below To Subscribe By October 10th


Friday, December 3, 2021

Global Stamping Friends December Blog Hop Regals Collection


Welcome to the Gobal Stamping Friends December Blog Hop as we showcase projects created using the Regals Collection. You will be visiting with talented Stampin' Up! Demonstrators as they share their ideas and projects to help inspire you.
The Regals Collection has a wonderful assortment of colors that I love to use for late Summer and Fall card designs. The colors are warm and rich and have a muted hue to them that helps them work well together to create projects. For my card design today, I chose to use the new Blessings of Home stamp set combined with the new Gingham Embossing Folder, both from the upcoming January-June 2022 Mini Catalog that launches January 4th, 2022. I love the texture that the embossing folder adds to the Old Olive cardstock background and I chose to color the floral image with Stampin' Blends Markers to create a bright, bold look for the focal design. 
Products Used:
Blessings of Home stamp set (item #157930) Sneak Peek
Gingham Embossing Folder (item #157627) Sneak Peek
Harvest Dies (item #156504)
Stitched So Sweetly Dies (item #151690)
Garden Green Cardstock (item #102584) 
Old Olive Cardstock (item #100702)
Basic White Cardstock (item #159276)
Memento Tuxedo Black Pad (item #132708)
Versamark Pad (item #102283)
Metallics Embossing Powders (item #155555)
Real Red Stampin' Blends Combo Pack (item #154899)
Pumpkin Pie Stampin' Blends Combo Pack (item #154897)
Old Olive Stampin' Blends Combo Pack (item #154892)
Cajun Craze Stampin' Blends Combo Pack (item #154879)
Basic Rhinestone Jewels (item #144220)
Measurements:
Garden Green Cardstock
Card Base - 8 1/2" x 5 1/2" (Scored at 4 1/4")
Old Olive Cardstock
Card Front - 5 1/4" x 4" Embossed with the Gingham Embossing Folder
Basic White Cardstock
Scalloped Rectangle die cut with Stitched So Sweetly Dies
Sentiment Label die cut with Harvest Dies
This clean and simple card design has an almost vintage feel to it. I love the way the Stampin' Blends Markers bring the floral image to life and make it pop against the Basic White cardstock. To step up the design, I embossed the Old Olive card front with the new Gingham Embossing Folder to add texture to the design and I heat embossed the sentiment with Gold embossing powder to add a touch of elegance. I added two small Basic Rhinestone Jewels to finish off the card and add a touch of bling. It was so much fun to create this card with some of the new products from the upcoming January-June 2022 Mini Catalog. These products will be available for customers to order beginning January 4th, 2022. Can't wait that long to get your hands on the new products? If you sign up to become a Stampin' Up! Demonstrator, you can choose products from the new mini catalog as part of your Starter Kit. Please contact me if you would like to learn more about this amazing opportunity. 
Thank you for taking the time to visit my blog. I hope that my card design will help you explore the beautiful colors in the Regals Collection and create your own wonderful projects.
Now it's time to visit Jan's wonderful blog and see what she has to share with us. Just click the Next button below to visit her blog or use the Roll Call List below. We would appreciate it if you would leave us a comment and let us know what you enjoyed about our projects. I hope you enjoy the rest of our blog hop. 

Blog Hop Roll Call
If you live in the U.S. and do not have a Stampin' Up! Demonstrator, please contact me and I would be happy to help you with your creative projects. You may also visit my Online Store to place your order and have it shipped to you. 

Until Next Time

Happy Stamping,

Tricia Butts
Independent Stampin' Up! Demonstrator

Like What You See? Visit My Online Store Here

Visit My Facebook Business Page for Updates & Ideas

Click here to Contact Me


Stock Up On Your Favorite Retiring Products
From The July-December 2021 Mini Catalog
Click Below To Visit My Online Store

Have Lots of Pun
With The December Paper Pumpkin Kit
Click Below To Subscribe By December 10th