Showing posts with label Hand-Penned Designer Series Paper. Show all posts

Sunday, March 20, 2022

Kre8tors 2022 March Blog Hop Sketch Challenge

Welcome to the Kre8tors 2022 March Blog Hop and this month we have a Sketch Challenge to help us with our card designs. You will be visiting with talented Stampin' Up! Demonstrators as they share their projects and ideas to help inspire you to create your own wonderful designs using the sketch layout below.
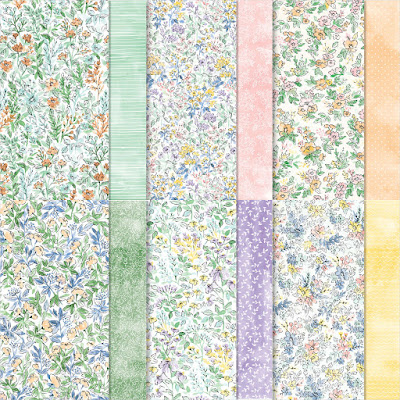
For my card design, I followed the measurements and placement of the sketch pretty closely. With the 2021-2022 Annual Catalog retiring soon, I wanted to revisit some old favorites to create my card design. I chose to use the beautiful Hand-Penned Designer Series Paper to create my background and used one of the small butterfly die cuts from the Brilliant Wings Dies for my focal image. I love the soft and pretty colors in this designer series paper and I think it makes for a lovely Spring themed Thank You card.
Products Used:
Celebrating You stamp set (item #158028)
Brilliant Wings Dies (item #155523)
Tasteful Labels Dies (item #152886)
Hand-Penned Designer Series Paper (item #155499)
Pale Papaya Cardstock (item #155668)
Soft Sea Foam Cardstock (item #146988)
Basic White Cardstock (item #159276)
Gold Foil Sheets (item #132622)
Versamark Pad (item #102283)
Metallics Embossing Powders (item #155555)
Pale Papaya 3/8" Open Weave Ribbon (item #155672)
Basic Rhinestone Jewels (item #144220)
Stampin' Dimensionals (item #104430)
Mini Glue Dots (item #103683)
Measurements:
Pale Papaya Cardstock
Card Base - 8 1/2" x 5 1/2" (Scored at 4 1/4")
Soft Sea Foam Cardstock
Layer 1 - 5" x 3 3/4"
Focal Circle die cut with the Tasteful Labels Dies 
Hand-Penned Designer Series Paper
Background Layer - 4 3/4" x 3 1/2" cut into two pieces
- 1 1/4" x 3 1/2" & 3 1/2" x 3 1/2" (Flip one of the pieces over)
Basic White Cardstock
Sentiment Label die cut with the Tasteful Layers Dies
The secret to this card design is the designer series paper. I cut one piece of the Hand-Penned Designer Series measuring 4 3/4" x 3 1/2" and then cut it into two pieces measuring 1 1/4" x 3 1/2" and 3 1/2" x 3 1/2". I flipped over one of the pieces so that I have two coordinating yet contrasting designs. I adhered them to the Soft Sea Foam layer, lining them up so that they appear to create one piece. For the focal design, I die cut one of the small butterflies from Gold Foil using the Brilliant Wings Dies. I also die cut the larger circle from the Tasteful Labels Dies to create the background and attached the center of the butterfly to it with Mini Glue Dots. The sentiment was created by heat embossing the image with Gold embossing onto the sentiment label. 
To assemble to card design, I wrapped a piece of the Pale Papaya Open Weave Ribbon around the card front to hide the seam for the two pieces of the designer series paper, and attached the ends to the back of the card front. I attached the card front to the card base using Stampin' Dimensionals to pop it up and add dimension to the card. Using Stampin' Dimensionals, I attached the butterfly focal image to the right side of the card, over the top of the ribbon. I added the sentiment label so that it slightly overlaps the top of the ribbon and the end hides underneath the focal image. To finish off the card design, I added Basic Rhinestone Jewels to embellish the butterfly and the sentiment label for a touch of bling.  
Thank you for taking the time to visit my blog. I hope that my card design will help inspire you to explore creating your own project using this sketch layout. There are so many wonderful Stampin' Up! products to choose from to help you create card designs for all occasions. 
Now it's time to visit Sandra's blog and see what she has created with this month's sketch challenge. Just click the Next button below to visit her blog or use the Roll Call List below to find your way. We would love it if you would leave us a comment and let us know what you liked about our projects. I hope you enjoy the rest of our blog hop. 


If you live in the U.S. and do not have a Stampin' Up! Demonstrator, please contact me and I would be happy to help you with your creative projects. You may also visit my Online Store to place your order and have it shipped to you. 

Until Next Time

Happy Stamping,

Tricia Butts
Independent Stampin' Up! Demonstrator

Like What You See? Visit My Online Store Here

Visit My Facebook Business Page for Updates & Ideas

Click here to Contact Me 


Save 20% With The Savings Are In Bloom Promotion
During The Month Of March
Click Below To Visit My Online Store

Available For A Limited Time
The Amazing Waves Of The Ocean Collection
Click Below For More Details


Saturday, March 19, 2022

Stamping With Friends Easter/Spring Blog Hop

Welcome to the Stamping With Friends March Blog Hop as we showcase projects for Easter and Spring. Our talented Design Team Members will be sharing their wonderful projects and ideas to help inspire you to create your own beautiful projects for the new season.
For my card design today, I decided to create a Spring themed Easter card using the Easter Friends stamp set from the January-June 2022 Mini Catalog. I paired it with the Color & Contour Bundle, which has some wonderful Spring flower images as well as scalloped rectangles that are perfect for creating the focal layer. For the background, I chose one of the designs from the Hand-Penned Designer Series Paper, which is perfect for soft and pretty cards for Spring. 
Products Used:
Easter Friends stamp set (item #157737)
Color & Contour Bundle (item #158356)
Hand-Penned Designer Series Paper (item #155499)
Thick Basic White Cardstock (item #159229)
Basic White Cardstock (item #159276)
Polished Pink Classic Ink Pad (item #155712)
Pale Papaya Classic Ink Pad (item #155670)
Fresh Freesia Classic Ink Pad (item #155611)
Mint Macaron Classic Ink Pad (item #147106)
Crumb Cake Classic Ink Pad (item #147116)
Daffodil Delight Classic Ink Pad (item #147094)
Memento Tuxedo Black Pad (item #132708)
Versamark Pad (item #102283)
Metallics Embossing Powders (item #155555)
Daffodil Delight Stampin' Blends Combo Pack (item #154883)
Pumpkin Pie Stampin' Blends Combo Pack (item #154897)
Brushed Brass Butterflies (item #158136)
Stampin' Dimensionals (item #104430)
Measurements: 
Thick Basic White Cardstock
Card Base - 8 1/2" x 5 1/2" (Scored at 4 1/4")
Hand-Penned Designer Series Paper
Card Front - 5 1/4" x 4"
Basic White Cardstock
Scalloped Rectangle die cut with Scalloped Contours Dies
4 flowers - 1 each stamped in Pale Papaya, Polished Pink, Fresh Freesia & Daffodil Delight and die cut with the 
Scalloped Contours Dies
Easter chick stamped with Easter Friends stamp set and fussy cut
This cute Easter card is a wonderful way to showcase pretty Spring colors and I love the way the flowers pop against the Mint Macaron striped background created by the Hand-Penned Designer Series Paper. For the focal image, I stamped the cute chick image from the Easter Friends stamp set with Memento Tuxedo Black ink and colored it with the Daffodil Delight and Pumpkin Pie Stampin' Blends Combo Packs. I heat embossed the sentiment with Gold embossing powder onto the scalloped rectangle and stamped the grass with Mint Macaron Classic ink along the bottom left corner to help ground the chick. Using the splatter stamp image from the Color & Contour stamp set, I lightly stamped with Crumb Cake Classic ink, stamping off once to lighten the color, along the bottom edge to create the illusion of the ground. I fussy cut the chick and added it to the bottom left side with Stampin' Dimensionals. To create the card design, I attached the Fresh Freesia and Daffodil Delight flowers to the card front in the top left corner and the Pale Papaya flower to the bottom right corner. I then attached the focal layer to the card front with Stampin' Dimensionals, lining up the the corners with the flowers. I attached the Polished Pink flower to the top left corner of the scalloped rectangle and added a Stampin' Dimensional to attach the top part of the flower to the card front. To complete the card design, I added several of the Brushed Brass Butterflies for a touch of bling. This soft and pretty Easter card is so bright and cheerful and sure to brighten someone's day. 
Thank you for taking the time to visit my blog. I hope that my card design will help inspire you to create your own beautiful projects to celebrate the beginning of Spring. There are so many beautiful products available to help you create your own wonderful designs.
Now it's time to visit Kelly's blog and see what she has created to share with us. Just click the Next button to visit her blog or use the Roll Call List below to find your way. We would appreciate it if you would leave us a comment and let us know what you liked about our projects. I hope you enjoy the rest of our blog hop. 

Roll Call List

If you live in the U.S. and do not have a Stampin' Up! Demonstrator, please contact me and I would be happy to help you with your creative projects. You may also visit my Online Store to place your order and have it shipped to you. 

Until Next Time

Happy Stamping,

Tricia Butts
Independent Stampin' Up! Demonstrator

Like What You See? Visit My Online Store Here

Visit My Facebook Business Page for Updates & Ideas

Click here to Contact Me 


Save 20% With The Savings Are In Bloom Promotion
During The Month Of March
Click Below To Visit My Online Store

Available For A Limited Time
The Amazing Waves Of The Ocean Collection
Click Below For More Details


Saturday, March 5, 2022

Stamping With Friends Mini Album or Loaded Envelope Blog Hop

Welcome to the Stamping With Friends March Blog Hop as we are challenged to create a Mini Album or Loaded Envelope to share with you. Our talented Design Team Members will be sharing their projects and ideas to help inspire you to step outside your comfort zone and try something new. 
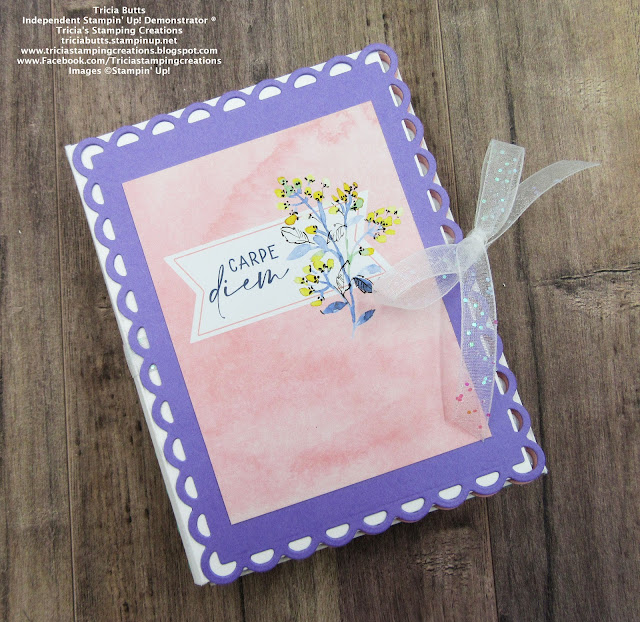
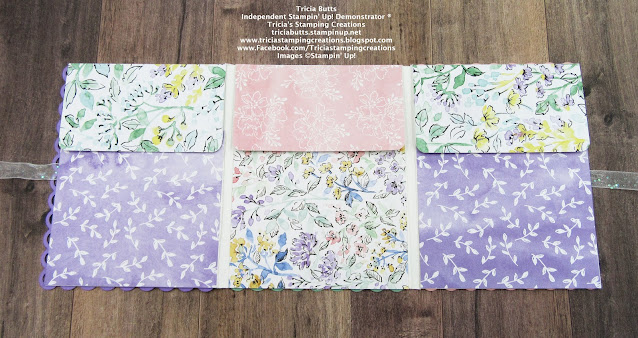
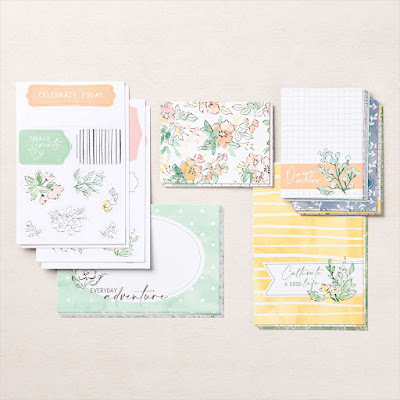
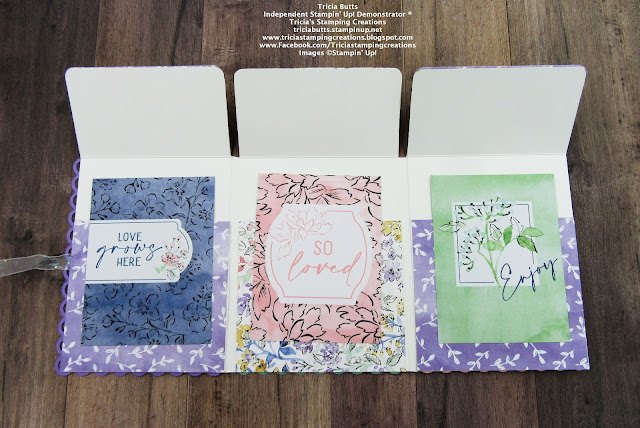
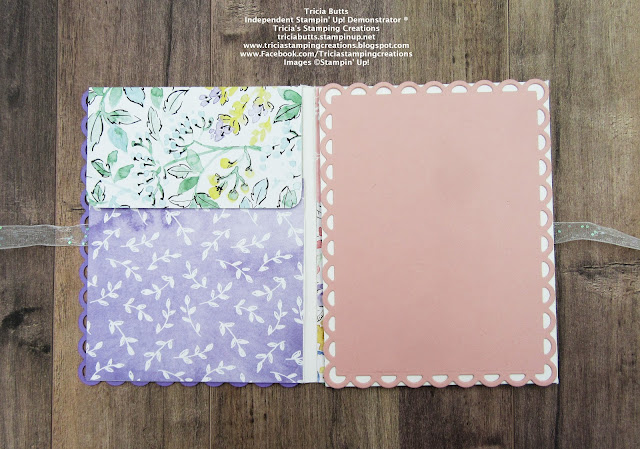
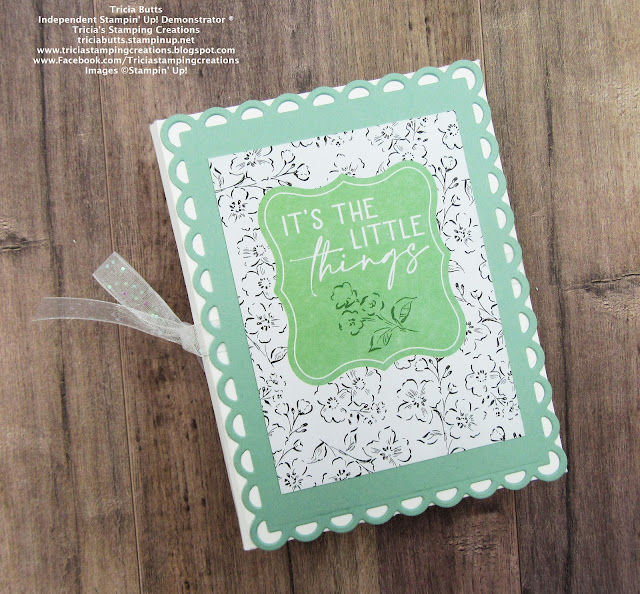
This month's challenge really stretched me as I don't often create 3D projects. I decided to try creating a Mini Album and I used the measurements from a You Tube video from fellow Stampin' Up! Demonstrator, Traci Cornelius, to create the basic template for my album. You can find her video here. For my design, I chose to use the beautiful Hand-Penned Designer Series Paper with the Hand-Penned Memories & More Card Pack to create a Spring themed album. To create this album, I need 12"x12" cardstock and as I only have Basic White cardstock in this size, that is what I used to create the base for this project. Note that if you use any of Stampin' Up!'s colored 12"x12" cardstock from any of the color collections, you will find that it has more weight and will be easier to work with when scoring and folding. 
Products Used:
Hand-Penned Memories & More Card Pack (item #155505)
Hand-Penned Designer Series Paper (item #155499)
Scalloped Contours Dies (item #155560)
Detailed Trio Punch (item #146320)
Basic White 12"x12" Cardstock (item #159231)
Highland Heather Cardstock (item #146986)
Blushing Bride Cardstock (item #131198)
Mint Macaron Cardstock (item #138337)
White 3/8" Glittered Organdy Ribbon (item #156408)
Tear & Tape (item #154031)
Measurements:
Basic White 12"x12" Cardstock
Score one side at 3 3/4", 4", 7 7/8" & 8 1/8"
Rotate cardstock 90 degrees 
Score at 2 1/8" & 7 1/4"
Cut the narrow channels from the top down to the first scored line and then from the bottom up to the next score line.
Line up the cardstock in your trimmer with the straight uncut edge along the measurement guide at 10 3/4" and cut along the bottom to remove 1 1/4" off each of the flaps. Use Tear & Tape to create the pockets.
Hand-Penned Designer Series Paper
Cut panels to fit the front of each pocket and the top flaps using coordinating designs (measurements may vary depending on your project)
Mint Macaron, Highland Heather, Blushing Bride Cardstock
Die Cut 1 large Scalloped Rectangle in each of these colors using the largest die from the Scalloped Contours Dies
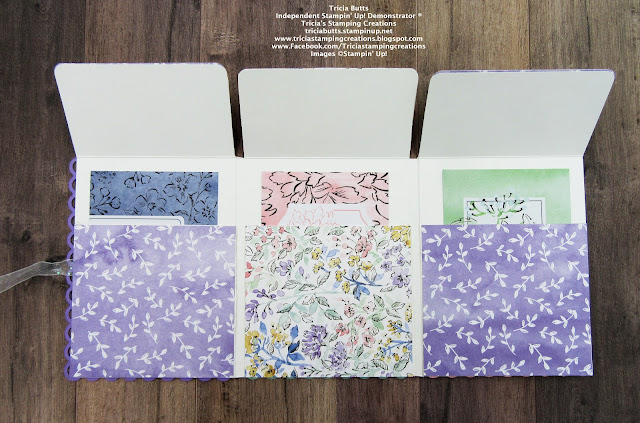
To create this mini album, I would recommend that you watch the short video that I referenced above that can be found here as it really does help to see the visual instructions for cutting and assembling the album. To decorate the album, I used several of the small 3"x4" cards from the Hand-Penned Memories & More Card Pack to decorate the front and back panel of my album and I used the scalloped rectangles on the large panels of the albums to create the decorative backgrounds. In each of the pockets, I included one of the cards but you could also cut cardstock to fit in each pocket to add photos or journaling. This project was really outside my comfort zone and I learned a lot from my first time trying this mini album. I hope that you will give this mini album a try and personalize it to suit your needs. 
Thank you for taking the time to visit my blog. I hope that my mini album design will help inspire you to try creating your own 3D projects and explore using the wonderful products that Stampin' Up! has to offer. I love how their products coordinate to help take out the guess work and make creating a stress free experience.
Now it's time to visit Diane's wonderful blog and see what she has create for this month's challenge. Just click the Next button below to visit her blog or use the Roll Call List to find your way. We would love it if you would leave us a comment and let us know what you like about our projects. I hope you enjoy the rest of our blog hop.


If you live in the U.S. and do not have a Stampin' Up! Demonstrator, please contact me and I would be happy to help you with your creative projects. You may also visit my Online Store to place your order and have it shipped to you. 

Until Next Time

Happy Stamping,

Tricia Butts
Independent Stampin' Up! Demonstrator

Like What You See? Visit My Online Store Here

Visit My Facebook Business Page for Updates & Ideas

Click here to Contact Me

Save 20% With The Savings Are In Bloom Promotion
During The Month Of March
Click Below To Visit My Online Store

Available For A Limited Time
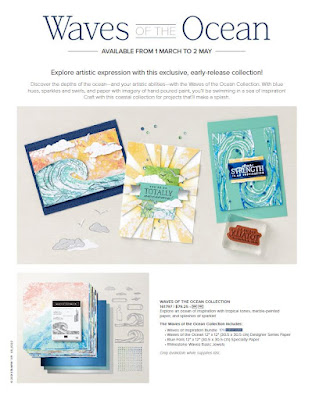
The Waves Of The Ocean Collection
Click Below For More Details