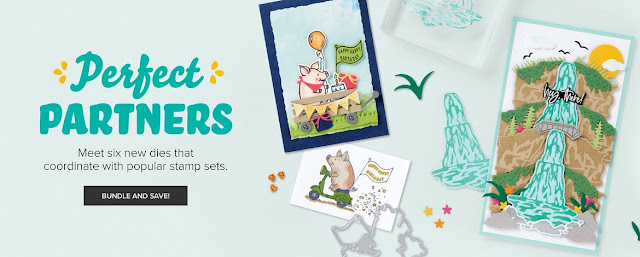
Welcome to the New At SU September Blog Hop and this month we are showcasing Perfect Partners - Stamps & Coordinating Dies. Our wonderful Design Team Members will be sharing their projects and ideas to help inspire you to create your own beautiful projects using bundles featuring stamp sets with coordinating dies. During September, we have The Perfect Partners Promotion, which has a wonderful selection of coordinating Dies that are available for a limited time only during the month of September to provide you with even more options to get creative.

One of my favorite bundles from the Perfect Partners Promotion would have to be the adorable This Birthday Piggy bundle. This stamp set is currently available in the 2022-2023 Annual Catalog, but during the month of September, you can also order coordinating dies for this stamp set separately or as a bundle and save 10%. This stamp set has such cute images and wonderful sentiments and the coordinating dies provide so many additional options to help you create your projects. I paired this bundle with the beautiful Gingham Cottage Designer Series Paper from the July-December 2022 Mini Catalog and I also used the Stylish Shapes Dies to create the focal image and sentiment tag. I love this pretty color combination of Blushing Bride, Smoky Slate and Basic White and how the colored image pops against the background.

Products Used:
This Birthday Piggy Bundle (item #162521) Perfect Partners Promotion
Stylish Shapes Dies (item #159183)
Gingham Cottage Designer Series Paper (item #159651)
Smoky Slate Cardstock (item #131202)
Basic White Cardstock (item #159276)
Balmy Blue Classic Ink Pad (item #146982)
Memento Tuxedo Black Pad (item #132708)
Versamark Pad (item #102283)
Basics Embossing Powders (item #155554)
Flirty Flamingo Stampin' Blends Combo Pack (item #154884)
Balmy Blue Stampin' Blends Combo Pack (item #154830)
Mint Macaron Stampin' Blends Combo Pack (item #154889)
Daffodil Delight Stampin' Blends Combo Pack (item #154883)
Clear Wink of Stella Glitter Brush (item #141897)
Classic Matte Dots (item #158146)
Stampin' Dimensionals (item #104430)

Smoky Slate Cardstock
Card Base - 8 1/2" x 5 1/2" (Scored at 4 1/4")
Large Square die cut with the Stylish Shapes Dies
Sentiment Label die cut with the Stylish Shapes Dies
Basic White Cardstock
Medium Square die cut with the Stylish Shapes Dies
Piece for the stamped and die cut pig image using the This Birthday Piggy Bundle
Gingham Cottage Designer Series Paper
Card Front - 5 1/4" x 4"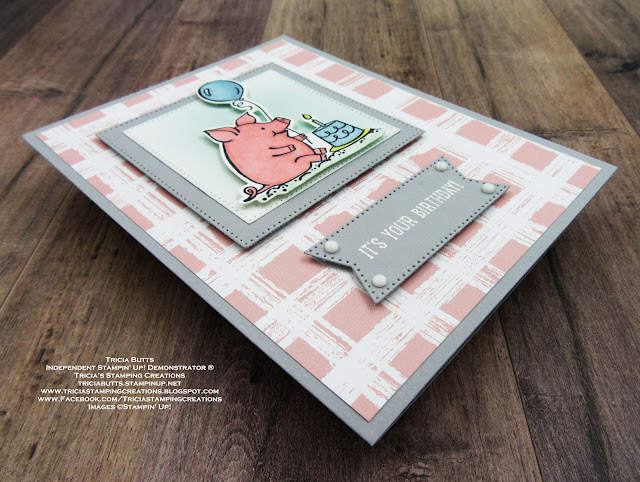 This sweet birthday card was so much fun to create and I love that the coordinating dies made cutting out the stamped pig image so much easier. There were so many other dies that I could have used to embellish this card, but I decided to keep the design clean and simple. I used Stampin' Blends Markers to color the pig, balloon and birthday cake images. For the background of the Basic White square, I gently added some Balmy Blue Classic ink with a Blending Brush to create a soft background. I added the die cut pig image to the square with Stampin' Dimensionals and then attached the square to the large Smoky Slate square. For the sentiment, I heat embossed the image with White embossing powder. To assemble the card, I attached the designer series paper to the card base and then added both the focal square and sentiment with Stampin' Dimensionals. To embellish the design, I added several small white Classic Matte Dots to the sentiment label and colored the balloon and birthday cake with Clear Wink of Stella Glitter Brush. I love the subtle sparkle it adds to the design without being overwhelming. This cheerful birthday card is simple to create and is sure to brighten someone's special day. I can't wait to create more fun projects with this wonderful bundle.


Thank you for taking the time to visit my blog. I hope that my card design will help inspire you to explore creating your own wonderful projects with the Perfect Partners exclusive dies and bundles, available during the month of September.

Now it's time to visit with my fellow Design Team Members and see what they have created to inspire you. Please use the Roll Call List below to visit their blogs. We would appreciate it if you would leave us a comment and let us know what you enjoyed about our projects.

If you live in
the U.S. and do not have a Stampin' Up! Demonstrator, please contact me and I
would be happy to help you with your creative projects. You may also visit my
Online Store to place your order and have it shipped to you.

Until Next
Time
Happy
Stamping,
Tricia Butts
Independent Stampin' Up!
Demonstrator
Like What You
See? Visit My Online Store Here
Visit My Facebook Business Page for Updates & Ideas
Click here to Contact Me
Perfect Partners Exclusive Dies
Available Only While Supplies Last
Click Below To Visit My Online Store
Weekly Deals Are Here
For The Month Of September
Click Below To View This Week's Deals

Create Beautiful Christmas Cards
With The Exclusive Ho Ho Ho Paper Pumpkin Kit
Click Below To Subscribe By October 10th