Showing posts with label Framed Florets Dies. Show all posts

Saturday, February 18, 2023

Stamping With Friends February Blog Hop Favorite January-April 2023 Mini Catalog Products

Welcome to the Stamping With Friends February Blog Hop, as we showcase our favorite products from the January-April 2023 Mini Catalog. There are so many amazing new products to choose from that it's hard to pick a favorite. Our wonderful Design Team members will be sharing their projects and ideas to help inspire you to explore the products in this new Mini Catalog to help spark your creativity. 
One of my favorite bundles in the January-April 2023 Mini Catalog is the Fragrant Flowers Bundle and I love that it coordinates with the Favored Flowers Designer Series Paper, which is a Level 1 Sale-a-bration Reward you can earn free with a qualifying order. For this card design, I used the Fragrant Flowers Dies to die cut out the flowers from one of the sheets of Favored Flowers Designer Series Paper to create the focal image. I love the bold, vibrant florals in this pretty paper and it is perfect for creating beautiful card designs. I also chose to use the Framed Florets Dies, another one of my favorites from the new mini catalog. The detailed oval frame die cut worked perfectly for this design and helped the focal design stand out against the Design A Day Dream Designer Series Paper background. This card requires minimal stamping and is simple to create with these amazing dies.
Products Used:
Go To Greetings stamp set (item #158763)
Fragrant Flowers Dies (item #160459)
Framed Florets Dies (item #160623)
Stylish Shapes Dies (item #159183)
Favored Flowers Designer Series Paper (item #160833) Level 1 Sale-a-bration Reward
Design A Daydream Designer Series Paper (item #159161) 
Host Reward
Petal Pink Cardstock (item #146985)
Basic Black Cardstock (item #121045)
Versamark Pad (item #102283)
Metallics Embossing Powders (item #155555)
Classic Matte Dots (item #158146)
Mini Stampin' Dimensionals (item #144108)
Measurements:
Petal Pink Cardstock
Card Base - 8 1/2" x 5 1/2" (Scored at 4 1/4")
Basic Black Cardstock
Layer 1 - 5 3/8" x 4 1/8"
Detailed Oval Frame die cut with the Framed Florets Dies
Sentiment Label die cut with the Stylish Shapes Dies
Design A Daydream Designer Series Paper 
Card Front - 5 1/4" x 4"
Tip: Die cut the Detailed Oval Frame from the middle of the Layer 1 Basic Black Cardstock to save cardstock. 
To create this beautiful card, I die cut all the pieces I would need first, so that I could arrange them into the finished design. I die cut the detailed oval frame using the Framed Florets Dies from Basic Black cardstock (the Layer 1 that frames the designer series paper card front) and then adhered the Design A Daydream Designer Series Paper to the Black Cardstock layer. I attached the detailed oval die cut to the center of the card front to create the focal area for my design. Using Mini Stampin' Dimensionals, I popped up the larger floral die cut. I attached the smaller floral elements first to the card front, to create the background and then attached the larger popped up image so that it slightly overlapped these flowers. For the sentiment, I heat embossed the image from the Go To Greetings stamp set onto a Basic Black sentiment label die cut with the Stylish Shapes Dies. I added it to the card front with Mini Stampin' Dimensionals. To complete the card design, I added several Matte Black Dots to coordinate with the Black accents in the card design. I love how this card design turned out and how dramatic the floral image looks against the subtle stripes in the background. 
Thank you for taking the time to visit my blog. I hope that my card design will help inspire you to explore the wonderful products in the January-April Mini Catalog. There are so many great options available to help you get creative. 
Please take the time to visit with my fellow Design Team members by clicking on the links in the Roll Call List below. We would appreciate it if you would leave us a comment and let us know what you enjoyed about our projects. 

If you live in the U.S. and do not have a Stampin' Up! Demonstrator, please contact me and I would be happy to help you with your creative projects. You may also visit my Online Store to place your order and have it shipped to you. 

Until Next Time

Happy Stamping,

Tricia Butts
Independent Stampin' Up! Demonstrator

Like What You See? Visit My Online Store Here

Visit My Facebook Business Page for Updates & Ideas

Click here to Contact Me


Time Is Running Out
To Take Advantage Of Sale-a-bration
Click Below For More Details

Explore The Amazing New Products
In The January-April 2023 Mini Catalog
Click Below To Visit My Online Store


Friday, February 3, 2023

Global Stamping Friends February Blog Hop Stamp Free

Welcome to the Global Stamping Friends February Blog Hop as we explore the theme "Stamp Free". This theme can be taken in several different ways, including creating a project with "Free stamps" like the free stamp sets available during Sale-a-bration or perhaps a project which does not use any stamps. Our wonderful Design Team members will be sharing their take on this month's theme to share their projects and ideas to help inspire you to get creative. 
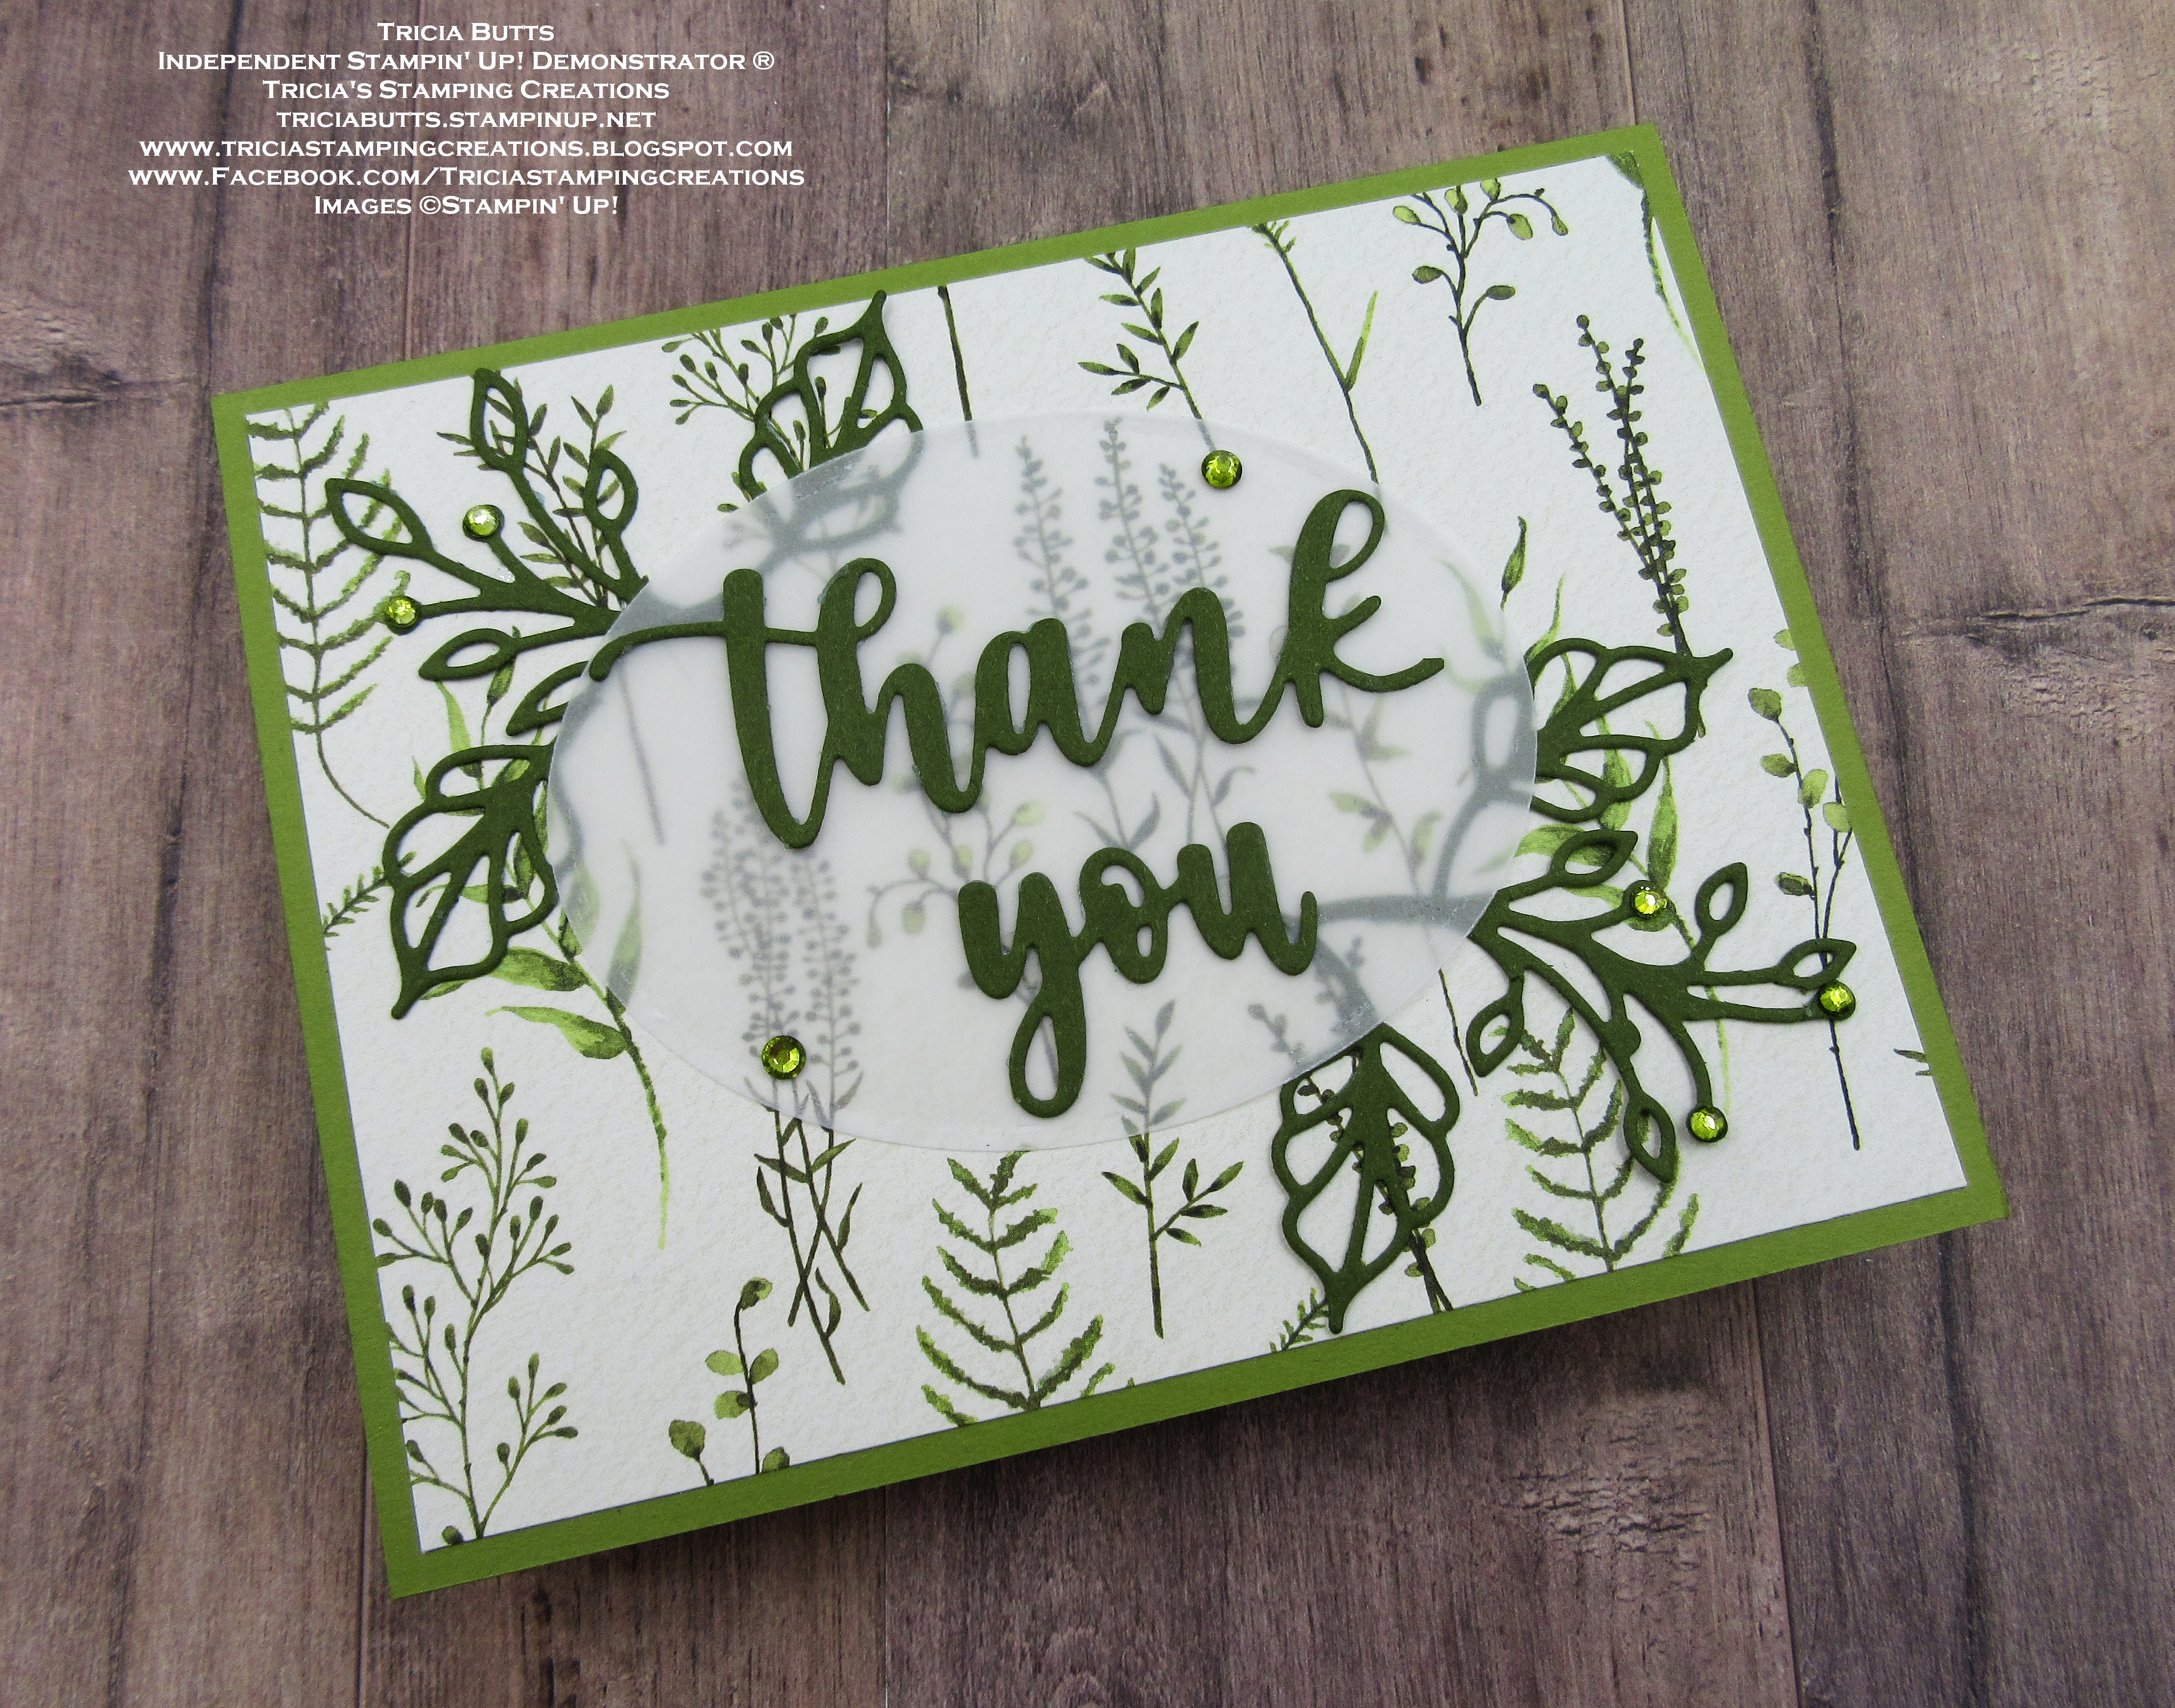
For my card today, I decided to go with a no stamping design using the Amazing Thanks Dies, an old favorite from the 2022-2023 Annual Catalog. I love the flowing script of the words in this die set and I thought they would work well with the pretty designs in the Dainty Flowers Designer Series Paper, a Level 1 Sale-a-bration Reward you can earn free with a qualifying order ($50 in the U.S.) I added a vellum oval to create a soft layer behind the sentiment and some die cut leaves to step up the design. I love the organic feel of this layout and how simple it was to create. 
Products Used:
Amazing Thanks Dies (item #157816)
Framed Florets Dies (item #160523)
Dainty Flowers Designer Series Paper (item #160834) Sale-a-bration Level 1 Reward
Old Olive Cardstock (item #100702)
Mossy Meadow Cardstock (item #133676)
Lovely Layers Vellum 3 3/4" x 5" (item #158919)
Old Olive Stampin' Blends Combo Pack (item #154892)
Basic Rhinestone Jewels (item #144220)
Mini Glue Dots (item #103683)
Measurements:
Old Olive Cardstock
Card Base - 8 1/2" x 5 1/2" (Score at 4 1/4")
Mossy Meadow Cardstock
Sentiment Words die cut with the Amazing Thanks Dies
Assorted Leaves die cut with the Framed Florets Dies
Lovely Layers Vellum - Plain
Large Oval die cut with the Framed Florets Dies
Dainty Flowers Designer Series Paper 
Card Front - 5 1/4" x 4"
This pretty monochromatic card design focuses on the beautiful designer series paper background and the assortment of die cuts that help create the focal design. I chose Mossy Meadow and Old Olive from the colors used in the designer series paper to create this card. I chose to use the Lovely Layers Vellum for the oval because I love the size of the pieces of vellum in this pack. It's a wonderful way to have a supply of vellum on hand ready to use. For the sentiment, I trimmed the Thanks die cut to remove the "s" and then adhered it and the You die cut to the vellum oval. Using Mini Glue Dots, I attached the vellum oval to the designer series paper card front, hiding the Glue Dots behind the letters so that they don't show through the vellum. I added the die cut leaves to the top left and bottom right corners of the vellum oval, hiding the ends of the stems behind the sentiment letters. To complete the design, I colored several Basic Rhinestones with the Dark Old Olive Stampin' Blends Marker and added them to the vellum oval and several of the leaves. This clean and simple Thank You card has an elegant feel to it that would also work for other occasions. 
Thank you for taking the time to visit my blog. I hope that my card design will help inspire you to explore creating projects "stamp free". There are so many wonderful options to choose from. 
Now it's time to visit Jan's blog and see what she has to share with us. Just click on the Next button below to visit her blog. We would love it if you would leave us a comment and let us know what you liked about our projects. I hope you enjoy the rest of our blog hop. 

If you live in the U.S. and do not have a Stampin' Up! Demonstrator, please contact me and I would be happy to help you with your creative projects. You may also visit my Online Store to place your order and have it shipped to you. 

Until Next Time

Happy Stamping,

Tricia Butts
Independent Stampin' Up! Demonstrator

Like What You See? Visit My Online Store Here

Visit My Facebook Business Page for Updates & Ideas

Click here to Contact Me


Take Advantage Of New Sale-a-bration Products
You Can Earn Free With A Qualifying Order
Click Below For More Details


Monday, January 9, 2023

Kylie Bertucci's Monthly International Blog Highlights January 2023

 
I am so excited to be participating in Kylie Bertucci's Monthly International Blog Highlights to start off 2023. Our theme is Thank You cards and at this time of the year and you will have the opportunity to visit with talented Stampin' Up! Demonstrators from around the world as they share their projects and ideas to help inspire you. I hope that we can help spark your creativity to help you create your own beautiful projects to start off the New Year. 
One of my favorite stamp sets in the new January-April 2023 Mini Catalog, is the whimsical Silly Goose stamp set. I just love the adorable images and fun sentiments that work for so many occasions. I wanted my card design to be fun and lighthearted, so I chose to create the background using one of the beautiful floral designs from the Dandy Designs Designer Series Paper, which is a Level 2 Sale-a-bration Reward you can earn free with a qualifying order. This wonderful pack of paper has 48 sheets filled with beautiful designs and pretty color combinations, perfect for Spring and beyond. I thought the color combination for this particular design fit perfectly with the colors I chose to color the goose and the floral pattern doesn't feel to heavy for the design, if that makes sense. I chose to use my favorite Framed Florets Dies to create the frame for my goose and I created the flowers to embellish the frame using the Two Tone Flora Bundle to tie in with the background design. 
Products Used:
Silly Goose stamp set (item #160866)
Framed Florets Dies (item #160623)
Two Tone Flora Bundle (item #160414)
Dandy Designs Designer Series Paper (item #160836) Sale-a-bration Level 2 Reward
Calypso Coral Cardstock (item #122925)
Basic White Cardstock (item #159276)
Pale Papaya Classic Ink Pad (item #155670)
Calypso Coral Classic Ink Pad (item #147101)
Pear Pizzazz Classic Ink Pad (item #147104)
Memento Tuxedo Black Pad (item #132708)
Pale Papaya Stampin' Blends Combo Pack (item #155519)
Gray Granite Stampin' Blends Combo Pack (item #154886)
Color Lifter (item #144608)
Clear Wink of Stella Glitter Brush (item #141897)
Basic Pearl Jewels (item #144219)
Mini Stampin' Dimensionals (item #144108)
Measurements:
Calypso Coral Cardstock
Card Base - 5 1/2" x 8 1/2" (Scored at 4 1/4")
Oval Frame die cut with the Framed Florets Dies
Basic White Cardstock
Oval die cut with Framed Florets Dies
Flowers & Leaves die cut with the Two Tone Flora Dies
Dandy Designs Designer Series Paper
Card Front - 5 1/4" x 4"
There is so much to love about this cute card design that I don't know where to start. The designer series paper gives this card such a cheerful feeling to it and I think it fits with the cute goose and his banner of thanks. I stamped the goose with Memento Tuxedo Black ink onto the Basic White oval and colored it in with the Dark Pale Papaya Stampin' Blends Marker. To give the goose a bit of dimension, I used the Light Gray Granite to add some color and then used the Color Lifter to lighten it so that there is the slightest hint of gray to its feathers. For the banner, I used the Pale Papaya Stampin' Blends Combo Pack to tie it in with the designer series paper. To help step up the card design, I decided to add some small flowers that I created using the Two Tone Flora Bundle. I stamped the flowers using Pale Papaya and Calypso Coral Classic inks and for the leaves I used Pear Pizzazz Classic ink. I die cut the images using the coordinating dies and added them to the bottom of the oval on either side of the goose image. For a touch of bling, I added small Basic Pearls to the centers of the flowers to complete the design. 
Thank you for taking the time to visit my blog. I hope that my Thank You card will inspire you to explore the wonderful new products in the January-April 2023 Mini Catalog and 2023 Sale-a-bration Catalog. There are so many wonderful ways to mix and match these products to help you get creative. 
I would love it if you would take the time to vote for my card design as part of January's International Blog Highlights. Simply click the Vote for me button below and click on the heart for my card design (#23). Please take the time to click on the other amazing cards in this month's highlights and share the love with my fellow Stampin' Up! Demonstrators. You can vote for up to 5 cards a day for the next week, so I encourage you to visit each day and vote for your favorites. 


If you live in the U.S. and do not have a Stampin' Up! Demonstrator, please contact me and I would be happy to help you with your creative projects. You may also visit my Online Store to place your order and have it shipped to you. 

Until Next Time

Happy Stamping,

Tricia Butts
Independent Stampin' Up! Demonstrator

Like What You See? Visit My Online Store Here

Visit My Facebook Business Page for Updates & Ideas

Click here to Contact Me


Celebrate The New Year
With The January-April 2023 Mini Catalog
Click Below To Visit My Online Store
Earn Free Exclusive Products
During Sale-a-bration
Click Below For More Details

Join The Stampin' Up! Family
Choose From 3 Amazing Options
Click Below For More Details


Wednesday, December 14, 2022

Around The World On Wednesday December Blog Hop Something New Something Used

Welcome to the Around the World On Wednesday December Blog Hop as we share projects with the theme, "Something New, Something Used". It's hard to believe this is our last hop for 2022 but I think you will love the wonderful projects and ideas that our Design Team members will be sharing to help inspire you to get creative. 
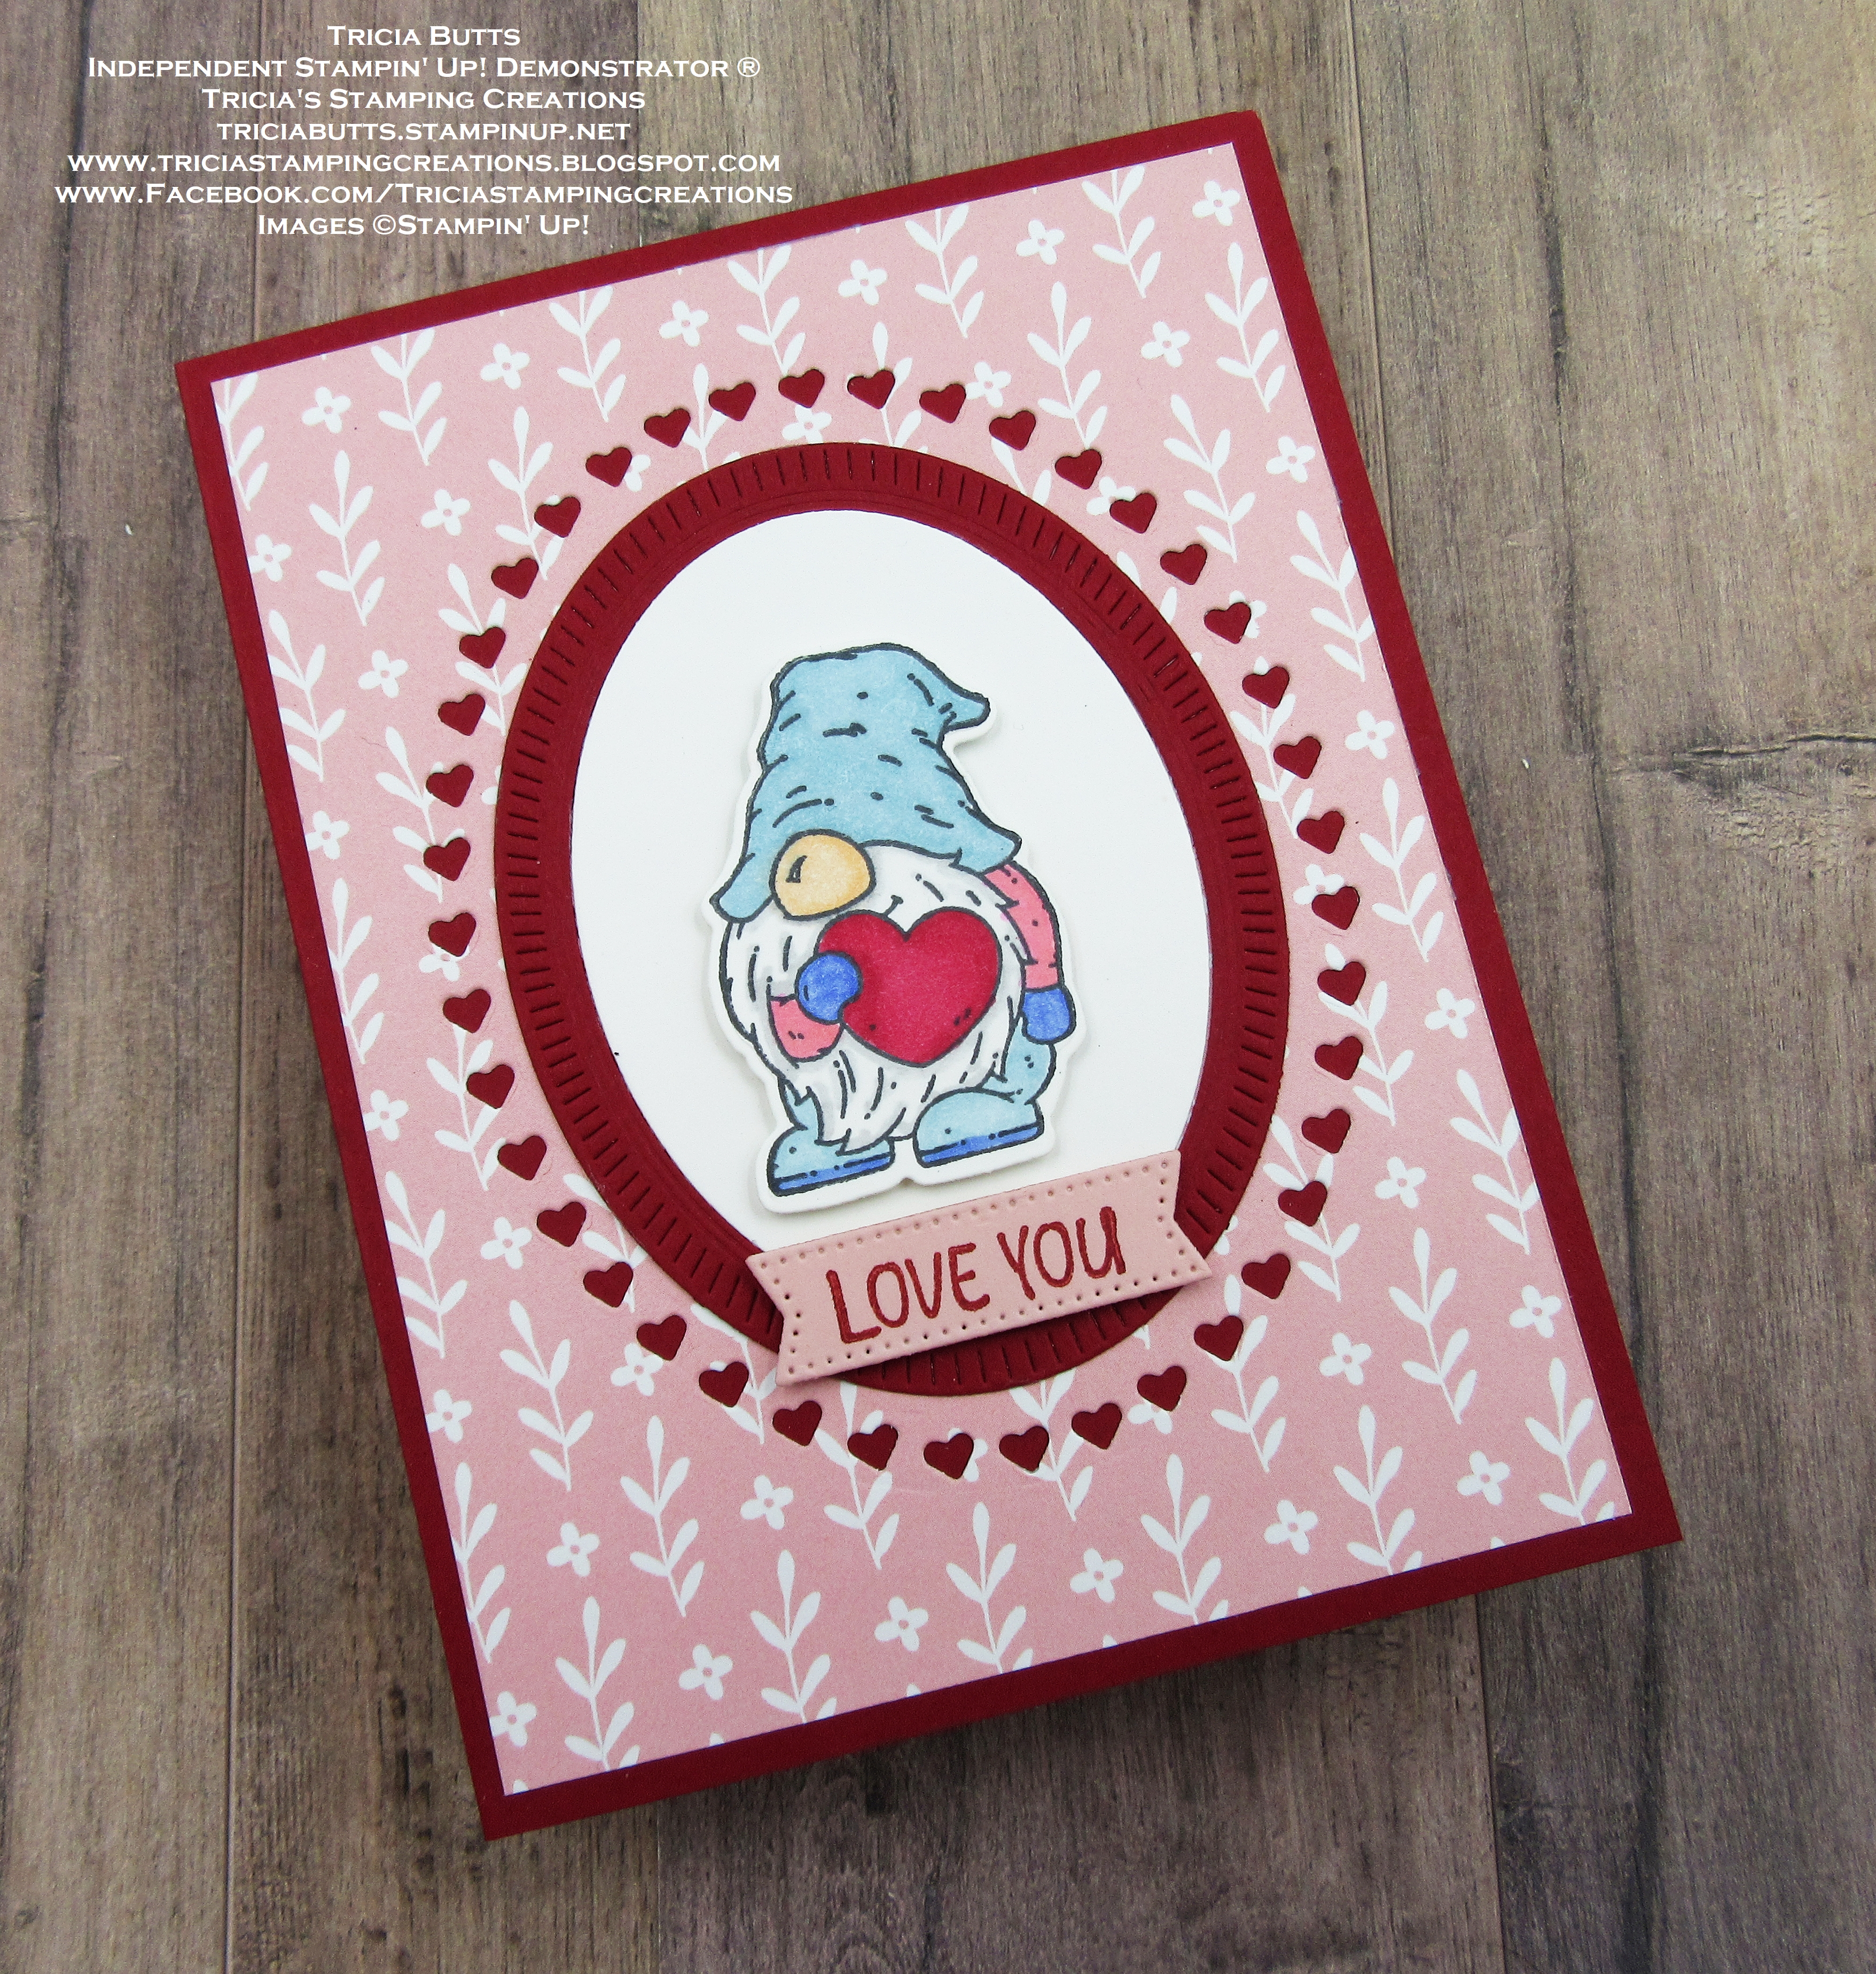
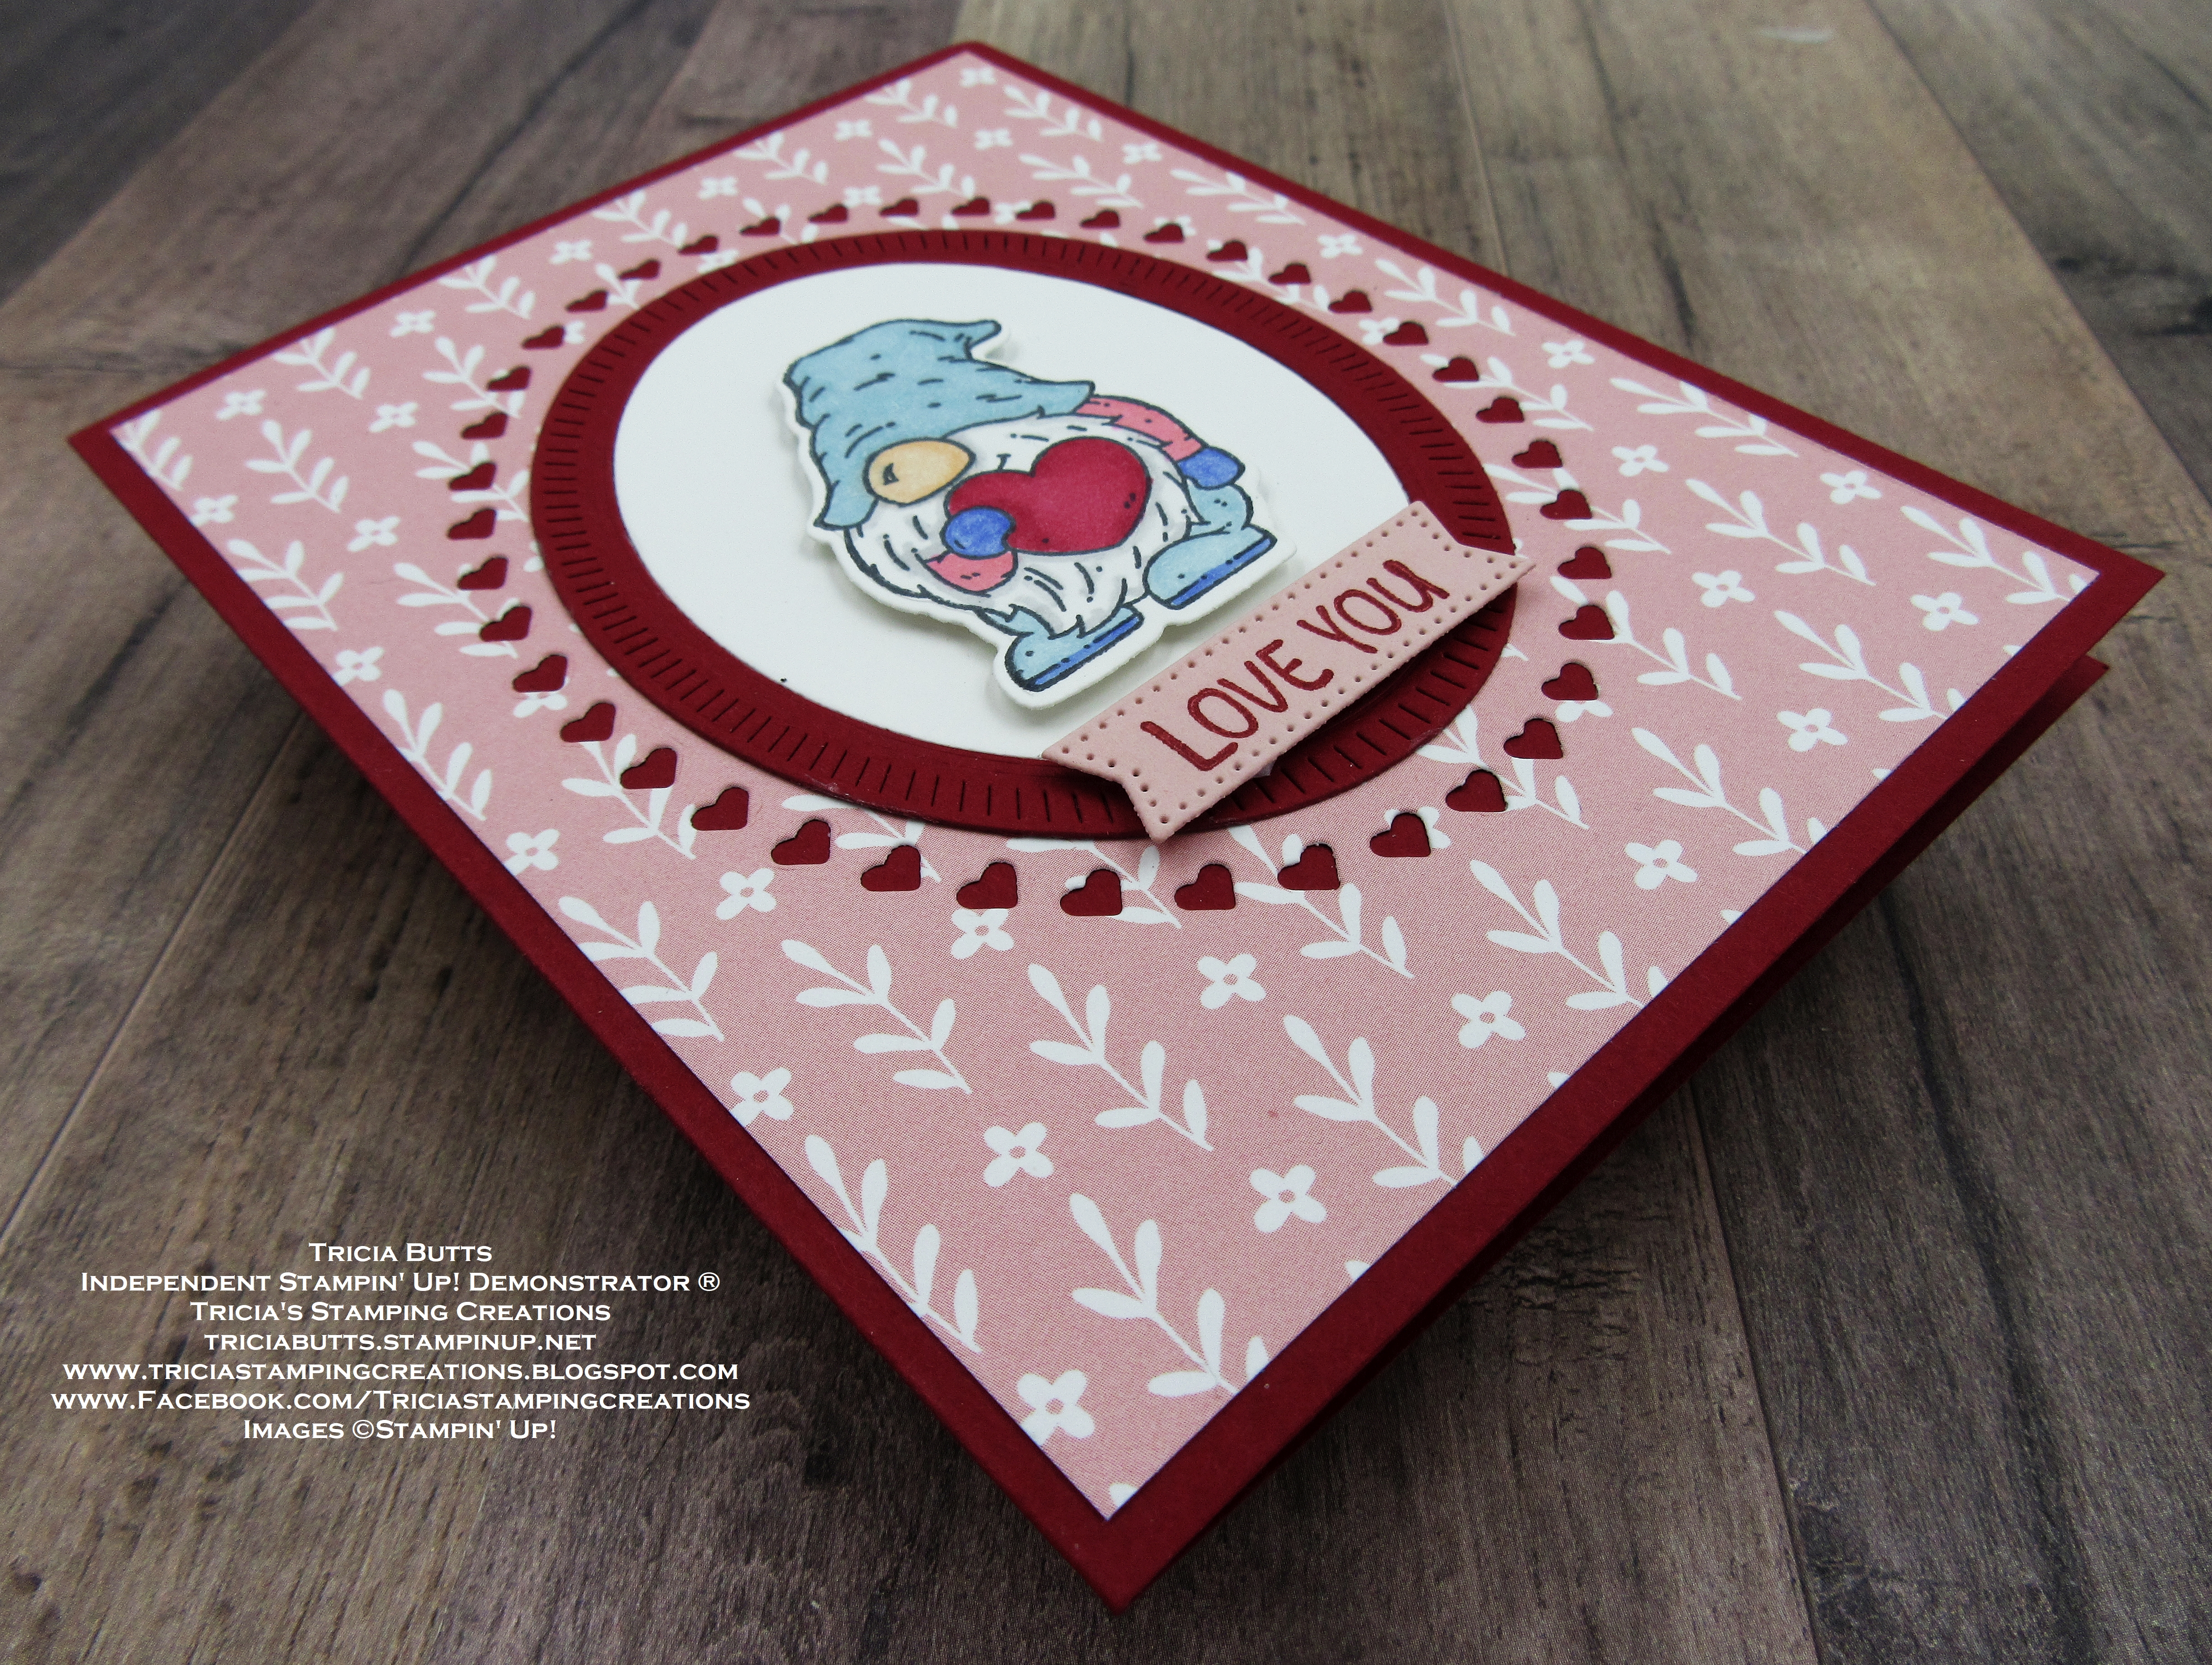
For my card design, I decided to pair the new Friendly Gnomes stamp set from the January-April 2023 Mini Catalog, with the Gnomes Dies which are carrying over from the July-December 2022 Mini Catalog. I love that the several of the dies fit the cute gnomes in the new Friendly Gnomes stamp set. For my design, I wanted to create a cute Valentine's Day card using one of the cute gnome images and the Love You sentiment. To create the layout, I used the Framed Florets Dies with one of the designs from the Fitting Florets Designer Series Paper. These products are very definitely something I have "used" a lot to create projects over the past two months and I love how they fit with my card theme. This card design is a wonderful example of how you can combine something new, with products that you already own to create new projects. 
Products Used:
Friendly Gnomes stamp set (item #160714) Sneak Peek 
Gnomes Dies (item #159625)
Framed Florets Dies (item #160623)
Stylish Shapes Dies (item #159183)
Fitting Florets Designer Series Paper (item #161814)
Cherry Cobbler Cardstock (item #119685)
Blushing Bride Cardstock (item #131198)
Basic White Cardstock (item #159276)
Cherry Cobbler Classic Ink Pad (item #147083)
Memento Tuxedo Black Pad (item #132708)
Balmy Blue Stampin' Blends Combo Pack (item #154830)
Cherry Cobbler Stampin' Blends Combo Pack (item #154880)
Petal Pink Stampin' Blends Combo Pack (item #154893)
Flirty Flamingo Stampin' Blends Combo Pack (item #154884)
Orchid Oasis Stampin' Blends Combo Pack (item #159223)
Smoky Slate Stampin' Blends Combo Pack (item #154904)
Color Lifter (item #144608)
Stampin' Dimensionals (item #104430)
Measurements:
Cherry Cobbler Cardstock
Card Base - 8 1/2" x 5 1/2" (Scored at 4 1/4")
Oval Detailed Frame die cut with the Framed Florets Dies 
Basic White Cardstock
Oval die cut with the Framed Florets Dies 
Stamped Gnome die cut with the Gnomes Dies
Fitting Florets Designer Series Paper
Card Front - 5 1/4" x 4"
Blushing Bride Cardstock
Sentiment Label die cut with the Stylish Shapes Dies
This cute Valentine's Day card was so much fun to create and I love that one of the designs in the Fitting Florets Designer Series Paper, worked perfectly for this card design. I used the detailed hearts die to create the frame in the designer series paper with the cute little hearts and added the Cherry Cobbler Oval frame to the center to frame the focal oval. For the gnome, I stamped the image with Memento Tuxedo Black ink onto Basic White cardstock and colored it with Stampin' Blends Markers. I die cut the image out with the coordinating die from the Gnomes Dies and attached it to the Basic White focal oval with Stampin' Dimensionals. to create the sentiment, I stamped the image with Cherry Cobbler Classic ink onto the Blushing Bride sentiment label and attached it to the bottom of the oval with Stampin' Dimensionals, just below the gnome's feet. I decided not to add any embellishments to my card design, preferring to let the hearts frame stand out. 
Thank you for taking the time to visit my blog. I hope that my card design will help inspire you to combine some of your old favorites with new products coming soon in the January-April 2023 Mini Catalog. It's a great way to show some love to some of the products you already have and give them new life when combined with new options. 
Now it's time to visit Teri's blog and see what she has to share with us this month. Just click on the Next button below to visit her blog or use the Roll Call List to find your way. We would appreciate it if you would leave us a comment and let us know what you liked about our projects. I hope you enjoy the rest of our blog hop. 

Roll Call List
If you live in the U.S. and do not have a Stampin' Up! Demonstrator, please contact me and I would be happy to help you with your creative projects. You may also visit my Online Store to place your order and have it shipped to you. 

Until Next Time

Happy Stamping,

Tricia Butts
Independent Stampin' Up! Demonstrator

Like What You See? Visit My Online Store Here

Visit My Facebook Business Page for Updates & Ideas

Click here to Contact Me 


Free Shipping Coming Soon
One Day Only - December 15th
Visit My Online Store To Place Your Order 

Save Up To 60% On Retiring Products
From The July-December 2022 Mini Catalog
While Supplies Last
Click Below To Shop From My Online Store 

Save Up To 60% On Discontinued Products
From the Clearance Rack Refresh
Click Below To Visit My Online Store


Tuesday, December 13, 2022

ICS December Blog Hop Thank You

Welcome to the last ICS Blog Hop for 2022 as we showcase Thank You cards to help inspire you. It's hard to believe it is December already and Christmas is less than 2 weeks away. It's the perfect time to create Thank You cards to have on hand to send to the people you appreciate and let them know you care. Our wonderful Design Team will be sharing their projects and ideas to help spark your creativity and help you to create your own beautiful cards to share with others.
This time of year can get very hectic and stressful and one of my favorite ways to relax and unwind is to enjoy some Creative Therapy. Creating clean and simple cards is not only a rewarding experience but a great way to replenish your card stash. For today's Thank You card, I have chosen to use the beautiful Fitting Florets Designer Series Paper with the coordinating Framed Florets Bundle. You may recognize this layout as one I have used quite a few times over the past couple of months and I must admit, it has become a favorite of mine. This time, I decided to create a landscape orientated design to show another variation with these products. I heat embossed the sentiment and floral details with Silver embossing powder and colored the flowers and leaves with Stampin' Blends Markers to step up the design. This design would work well for a variety of occasions, for people of all ages. 
Products Used:
Framed Florets Bundle (item #162407)
Fitting Florets Designer Series Paper (item #161814)
Balmy Blue Cardstock (item #146982)
Basic White Cardstock (item #159276)
Versamark Pad (item #102283)
Metallics Embossing Powders (item #155555)
Polished Pink Stampin' Blends Combo Pack (item #155520)
Soft Succulent Stampin' Blends Combo Pack (item #155521)
Basic Rhinestone Jewels (item #144220)
Measurements:
Balmy Blue Cardstock
Card Base - 8 1/2" x 5 1/2" (Scored at 4 1/4")
Detailed Oval Frame die cut with the Framed Florets Dies
Basic White Cardstock
Sentiment Oval die cut with the Framed Florets Dies
Fitting Florets Designer Series Paper
Card Front - 5 1/4" x 4"
This card is so simple to assemble and doesn't need a lot of supplies. The hardest part just might be choosing which design from the Fitting Florets Designer Series Paper to use for your background. There are so many great ones to choose from. To create the sentiment and frame, I die cut one of the medium detailed frames from Balmy Blue cardstock and one from Basic White cardstock. This way I have the outer frame in Balmy Blue and the matching center oval in Basic White for my sentiment. I heat embossed my sentiment and floral details with Silver embossing to add an elegant touch to the design. For a pop of color, I colored in the flower with the Light Polished Pink Stampin' Blends Marker and the leaves with the Light Soft Succulent Stampin' Blends Marker. The next step is to assemble the card by attaching the card front to the card base and then centering the frame and sentiment oval on the card front. The finishing touch is adding some Basic Rhinestone Jewels to the sentiment oval for a touch of bling. And there you have it! A simply beautiful card that is easy and stress-free to create. The Fitting Florets Designer Series Paper is only available while supplies last, so I would recommend ordering it soon to add to our collection. There are so many beautiful designs suitable for all seasons and both masculine and feminine designs. 
Thank you for taking the time to visit my blog. I hope that my card design will help inspire you to create your own beautiful Thank You cards to share with the people you love. The Fitting Florets Designer Series Paper and coordinating Framed Florets Bundle, help take the stress out of creating a variety of wonderful card designs. 
Now it's time to visit Joni's blog and see what she has to share with us. Just click on the Next button below to visit her blog and continue along our blog hop. We would love it if you would leave us a comment and let us know what you liked about our projects. I hope you enjoy the rest of this month's blog hop. 

If you live in the U.S. and do not have a Stampin' Up! Demonstrator, please contact me and I would be happy to help you with your creative projects. You may also visit my Online Store to place your order and have it shipped to you. 

Until Next Time

Happy Stamping,

Tricia Butts
Independent Stampin' Up! Demonstrator

Like What You See? Visit My Online Store Here

Visit My Facebook Business Page for Updates & Ideas

Click here to Contact Me


Tis The Season For Shopping
With Free Shipping December 15th Only
Place Your Order Via My Online Store 

Time Is Running Out
To Save Up To 60% On Retiring Products
From The July-December 2022 Mini Catalog
Visit My Online Store To Place Your Order 

Save Up To 60% On Discontinued Products
From the Clearance Rack Refresh
Available Only While Supplies Last
Click Below To Shop & Save