Wednesday, June 28, 2023

Paper Pumpkin Possibilities June Blog Hop Welcome Inn

Welcome to the Paper Pumpkin Possibilities June Blog Hop as we showcase alternative project ideas with the Welcome Inn Kit. Our talented Design Team members are excited to share their wonderful ideas and projects to help inspire you to think outside the box. 
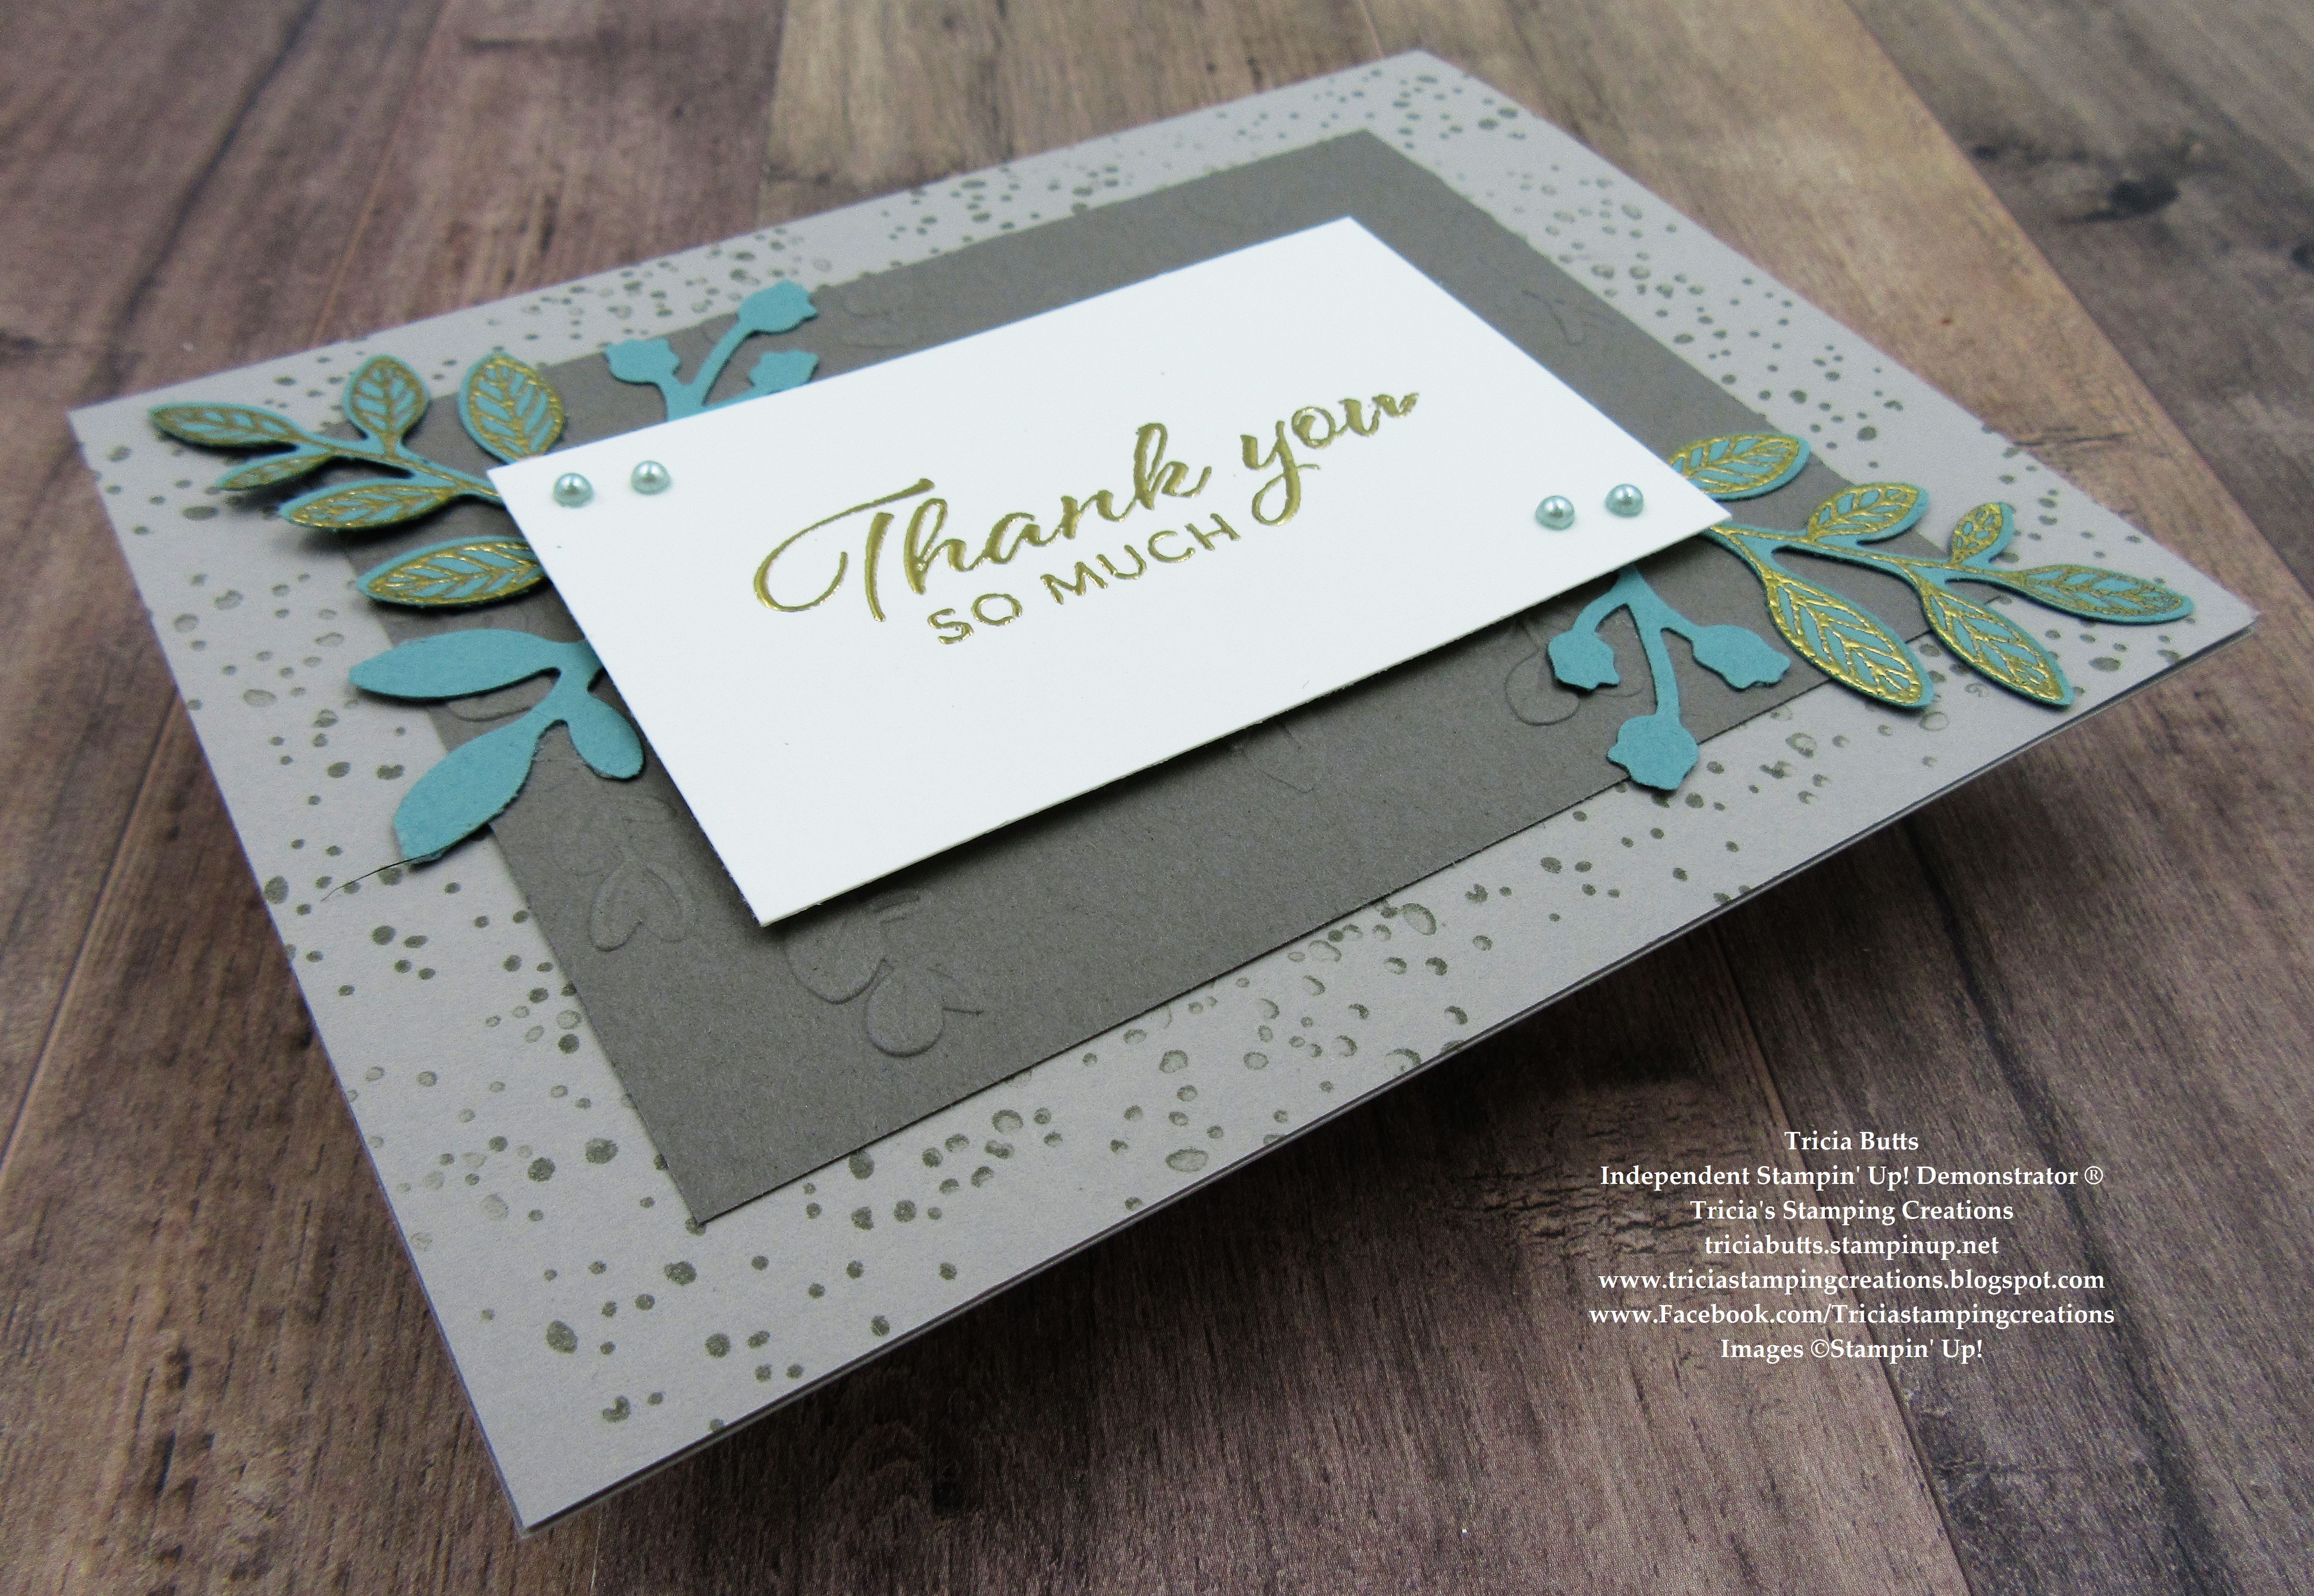
Sadly, my Paper Pumpkin kit did not arrive in time for this blog hop, so I had to get a little creative with my alternative card design. I recently ordered the Welcome Inn Dies, which are a special Add-On for the June Welcome Inn Paper Pumpkin Kit, and I decided to pair them with the Countryside Inn Designer Series Paper, which just happens to coordinate perfectly with this month's kit. I hope that my card design will show you that there are even more possibilities available to you, after you have used up all the supplies in this month's kit. The Countryside Inn Suite Collection in the 2023-2024 Annual Catalog offers coordinating products to help you stretch your kit even further. Also, don't forget, as a Paper Pumpkin subscriber, you can order the Welcome Inn Dies as an Add-On from my Online store while supplies last. 
Products Used:
Welcome Inn Dies (item #163192) Add-On
Welcome Inn Designer Series Paper (item #161467)
Countryside Corners Dies (item #161471)
Timeless Arrangements Bundle (item #161526)
Exposed Brick 3D Embossing Folder (item #161600)
Bough Punch (item #157711)
Boho Blue Cardstock (item #161724)
Lost Lagoon Cardstock (item #133679)
Pecan Pie Cardstock (item #161717)
Basic White Cardstock (item #159276)
Pecan Pie Classic Ink Pad (item #161665)
Versamark Pad (item #102283)
Basics Embossing Powders (item #155554)
Linen Thread (item #104199)
Rustic Metallic Adhesive Backed Dots (item #159082)
Stampin' Dimensionals (item #104430)
Sponge Daubers (item #133773)
Measurements:
Boho Blue Cardstock
Card Base - 8 1/2" x 5 1/2" (Scored at 4 1/4")
Large Matte Layer die cut with the Countryside Corners Dies
Basic White Cardstock
Focal Layer die cut with the Countryside Corners Dies
Pecan Pie Cardstock
Sentiment Label die cut with the Timeless Arrangements Dies
Lost Lagoon Cardstock
2 Leaves die cut with the Welcome Inn Dies
1 Bud Sprig punched out with the Bough Punch
Countryside Inn Designer Series Paper
Card Front - 4" x 5 1/4"
3 Vases die cut with the Welcome Inn Dies 
Normally when I create my alternative cards, I focus on using the exclusive stamp set included in the kit, to create my design. Because I don't have the kit, I had to come up with a new plan for my design and focus on how I could use the Welcome Inn Dies to show their versatility. I also decided to show how you can create a masculine card design using the dies with the Countryside Inn Designer Series Paper, to provide even more options for you to try. For the vases, I used the basic patterns on the reverse sides of the floral designs to create a masculine feel to my design. I chose to use Boho Blue cardstock for the card base and the matte layer to help provide contrast for the Night of Navy designer series paper card front layer. The background of the focal layer has been embossed with the new Exposed Brick 3D Embossing Folder to add texture and I gently added Pecan Pie Classic ink over the raised embossed areas to bring out the detail and give it a distressed, aged look. I layered the embossed layer on onto the Boho Blue matte layer and adhered the two outside vases to the embossed layer. To add some additional texture, I wrapped a piece of Linen Thread around the focal layer twice, tying a knot towards the right side. Using Stampin' Dimensionals, I added the center vase to the focal layer and added the die cut leaves and bud sprig so that the stems are hidden underneath the vase. 
For the sentiment, I heat embossed the image from the Timeless Arrangements stamp set onto Pecan Pie cardstock with White embossing powder and then die cut the label using the coordinating Timeless Arrangements Dies. I adhered the label to the center vase and added two small Rustic Metallic Dots to embellish. To assemble the finished card, I adhered the designer series paper card front to the Boho Blue card base and then added the focal layer with Stampin' Dimensionals, making sure to center it on the card front. I love the detail that the patterns on the vases adds to the card design and the wonderful texture that gives this design a rustic feel to it that is perfect for a masculine design.
Thank you for taking the time to visit my blog. I hope that my card will help inspire you to create your own wonderful designs with the elements in this wonderful kit as well as the Add-on Dies and coordinating products from the Countryside Inn Suite in the 2023-2024 Annual Catalog. The Welcome Inn Dies coordinate with the stamp set in the Welcome Inn Paper Pumpkin Kit and are available to order here while supplies last (must be an Paper Pumpkin subscriber).
Now it's time to visit Melva's blog and see what alternative ideas she has to share with us this month. Just click on the Next button to visit her blog. We would love it if you would leave us a comment and let us know how our projects inspired you. I hope you enjoy the rest of our blog hop. 

If you live in the U.S. and do not have a Stampin' Up! Demonstrator, please contact me and I would be happy to help you with your creative projects. You may also visit my Online Store to place your order and have it shipped to you. 

Until Next Time

Happy Stamping,

Tricia Butts
Independent Stampin' Up! Demonstrator

Like What You See? Visit My Online Store Here

Visit My Facebook Business Page for Updates & Ideas

Click here to Contact Me


Enjoy Some Creative Summer Fun
With The July Paper Pumpkin Kit
Click Below To Subscribe By July 10th

Final Days!
Don't Miss Out On The Designer Series Paper Sale
Ends June 30th
Click Below To Visit My Online Store

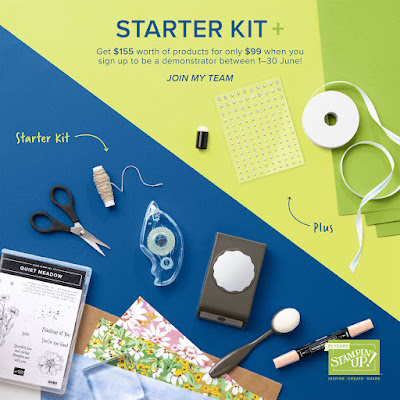
Last Days To Take Advantage Of The Starter Kit+
Choose $155 In Product For Just $99
Promotion Ends June 30th
Click Below For More Details 


Monday, June 26, 2023

Kylie Bertucci's International Highlights June Winners Blog Hop

 
I am so excited to be a part of this month's International Highlights Winners Blog Hop and want to thank all of you who voted for my card design this month (click here to view) to help me finish in the Top 10. I can't wait to share with you the card I created for today's hop.
For my card design today, I wanted to create a design that would work well as a masculine Thank You card. It can be challenging to design cards for the men in our life and when I looked at the images and sentiments in the new Layering Leaves stamp set, I felt like it would be a great fit for this style of card. I paired this stamp set with the Elegant Eucalyptus 3D Embossing Folders to add some subtle texture to the design and embossed the sentiment with Gold embossing powder to step up the card.  The colors I chose to use include Gray Granite, Pebbled Path, Lost Lagoon and Basic White. I feel that this card has a simple elegance to it that helps make it a wonderful masculine card.
Products Used:
Layering Leaves stamp set (item #161277)
Bough Punch (item #157711)
Elegant Eucalyptus 3D Embossing Folders (item #159170)
Gray Granite Cardstock (item #146983)
Pebbled Path Cardstock (item #161722)
Lost Lagoon Cardstock (item #133679)
Basic White Cardstock (item #159276)
Gray Granite Classic Ink Pad (item #147118)
Versamark Pad (item #102283)
Metallics Embossing Powders (item #155555)
Festive Pearls (item #159963)
Stampin' Dimensionals (item #104430)
Measurements:
Gray Granite Cardstock
Card Base - 8 1/2" x 5 1/2" (Scored at 4 1/4")
Pebbled Path Cardstock
Front Panel - 3 1/4" x 4 1/4" Embossed with the Elegant Eucaplytus 3D Embossing Folders
Basic White Cardstock 
Sentiment Panel - 2" x 3 1/4"
Lost Lagoon Cardstock
2 Large Leaf Sprigs heat embossed with Gold embossing powder and punched out with the Bough Punch
2 Small Buds punched out with the Bough Punch
1 Leaf Sprig with the Bough Punch
For my card design, I chose to use neutral colors for my card base and background layer and added touches of Lost Lagoon and Gold embossing to help make the design pop. For the card base, I stamped the front with the dots background image using Gray Granite Classic ink to create a tone-on-tone design that adds some texture to the background. I embossed the Pebbled Path cardstock panel with the embossing folder so that the leaves trailed down vertically on the panel and added another layer of subtle texture. I heat embossed the sentiment with Gold embossing powder onto the center of the Basic White panel and also heat embossed one of the leaf images twice onto Lost Lagoon cardstock before punching them out with the Bough Punch. I also punched out 2 of the small buds and one of the leaves using the Bough Punch to use to embellish the card design. I arranged the different leaves and buds onto the Pebbled Path cardstock layer and attached them with adhesive. I added the sentiment panel with Stampin' Dimensionals to add some dimension and then finished off the design with several of the pale green Festive Pearls to embellish the sentiment label. 
Thank you for taking the time to visit my blog. I hope that my Thank You card will inspire you to create your own beautiful cards to share with family and friends to let them know how much you appreciate them. Creating cards for the men in our lives doesn't have to be complicated and there are so many options in the 2023-2024 Annual Catalog to help you get creative.
Please take the time to visit with Kylie Bertucci and the other Top 10 Winners participating this month, by clicking on the links in the Roll Call List below. We would appreciate it if you would leave us a comment and let us know what you liked about our projects. 

If you live in the U.S. and do not have a Stampin' Up! Demonstrator, please contact me and I would be happy to help you with your creative projects. You may also visit my Online Store to place your order and have it shipped to you. 

Until Next Time

Happy Stamping,

Tricia Butts
Independent Stampin' Up! Demonstrator

Like What You See? Visit My Online Store Here

Visit My Facebook Business Page for Updates & Ideas

Click here to Contact Me


Final Week To Save 15%
On Select Designer Series Paper
Click Below To Visit My Online Store

Take Advantage Of The Starter Kit#
Choose $155 For Just $99
During The Month of June
Click Below For More Details


Wednesday, June 21, 2023

New At SU June Blog Hop Kid's Cards Zany Zoo

Today we are hopping with the New At SU June Blog Hop as we showcase Kids Cards. Our talented Design Team members will be sharing their fun and creative projects and ideas to help inspire you to create your own beautiful projects using products from the 2023-2024 Annual Catalog. 
Creating cards for kids can be challenging but also so much fun. For today's card design, I decided to create an Accordion Fun Fold that was inspired by fellow Stampin' Up! Demonstrator, Jacque Williams (you can watch her You Tube video here) using products from the Zoo Crew Suite in the 2023-2024 Annual Catalog. I love the fun animals in this suite and I thought they would be perfect for a kid's birthday card. The colors I chose are from the Zany Crew Designer Series Paper (which is on sale during the month of June) and include Granny Apple Green, Lemon Lime Twist and Basic White and I use a variety of Stampin' Blends Markers to add a pop of color to the focal images. The cute flute playing frogs have been die cut directly from one of the sheets of the designer series paper with one of the small circle dies from the Stylish Shapes Dies. I love how interactive this fun fold design is and I am sure that any child would love to receive it to celebrate their special day.
Products Used:
Zany Zoo Bundle (item #161315)
Stylish Shapes Dies (item #159183)
Scalloped Contours Dies (item #155560)
Zoo Crew Designer Series Paper (item #161304)
Granny Apple Green Cardstock (item #146990)
Lemon Lime Twist Cardstock (item #144245)
Basic White Cardstock (item #159276)
Memento Tuxedo Black Pad (item #132708)
Lemon Lime Twist Stampin' Blends Combo Pack (item #161682)
Lemon Lolly Stampin' Blends Combo Pack (item #161673)
Pool Party Stampin' Blends Combo Pack (item #154894)
Petal Pink Stampin' Blends Combo Pack (item #154893)
Smoky Slate Stampin' Blends Combo Pack (item #154904)
Pebbled Path Stampin' Blends Combo Pack (item #161658)
Boho Blue Stampin' Blends Combo Pack (item #161659)
2022-2024 In Color Baker's Twine (item #159195)
Pastel Adhesive Backed Sequins (item #160387)
Mini Stampin' Dimensionals (item #144108)
Mini Glue Dots (item #103683)
Measurements:
Granny Apple Green Cardstock
Card Base - 8 1/2" x 5 1/2" (Scored at 4 1/4")
3 Medium Circles die cut with the Stylish Shapes Dies
Lemond Lime Twist Cardstock
Card Front - 5 1/4" x 4"
Inside Layers (2) - 5 1/4" x 4"
Basic White Cardstock
Scalloped Rectangle die cut with the Stylish Shapes Dies 
Inside Accordion - 5 1/8" x 10" (Scored at 2",3",4",5",6",7" & 8" along the 10" side)
Small Circle die cut with the Stylish Shapes Dies
Stamped & die cut images with the Zany Zoo Bundle
Zoo Crew Designer Series Paper
Strip - 1" x 5 1/4"
2 Frog images die cut using the Small Circle Die from the Stylish Shapes Dies
This Accordion Fun Fold has that Simply Wow factor that kids are sure to love. I chose to use bright cheerful colors to bring it to life. The accordion mechanism on the inside of the card is simple to create and I got the idea from fellow Stampin' Up! Demonstrator, Jacque Williams here. Simply score the Basic White cardstock using the measurements above. I layered Lemon Lime Twist on the front and inside panels of the card to help make the card pop and I colored the alligator, balloon and raccoon images using Stampin' Blends Markers. For the inside accents, I die cut out two of the flute playing frogs from the designer series paper using one of the small circles dies from the Stylish Shapes Dies. I stamped the sentiment with Memento Tuxedo Black ink onto a Basic White small circle and then layered each of the circles onto Granny Apple Green cardstock circles to create a frame for each one. I attached the circles to the inside folds so that they were staggered from left to right, with the sentiment in the center and the frogs facing it from each side. The cute little raccoon was left over from when I stamped and die cut the balloons image and I colored it and attached it to the bottom left corner of the inside of the card to give the impression he is peeking in. For a touch of bling, I added some Gold Pastel Adhesive Backed Gems and to finish off the front design, I added a small bow tied with Parakeet Party Baker's Twine. I hope that my card design will help inspire you to give this Accordion Fun Fold a try.
Thank you for taking the time to visit my blog. I hope that my fun fold card design will help inspire you to create your own beautiful kids cards to help brighten their day. There are so many wonderful possibilities in the 2023-2024 Annual Catalog to choose from, including the Zoo Crew Suite. Remember, the Zoo Crew Designer Series Paper is just one of the select designer series papers on sale during the month of June. Save 15% on this cute designer series paper and so many others by visiting my Online Store.
Please take the time to visit with my fellow Design Team members to see their wonderful projects. Just use the Roll Call List below to find your way along our blog hop for inspiration. We would love it if you would leave us a comment and let us know what you liked about our projects.

If you live in the U.S. and do not have a Stampin' Up! Demonstrator, please contact me and I would be happy to help you with your creative projects. You may also visit my Online Store to place your order and have it shipped to you. 

Until Next Time

Happy Stamping,

Tricia Butts
Independent Stampin' Up! Demonstrator

Like What You See? Visit My Online Store Here

Visit My Facebook Business Page for Updates & Ideas

Click here to Contact Me


Take Advantage Of Free Shipping 
On Orders of $75 Or More
Today Only - June 21st
Click Below To Start Shopping


Save 15% On Select Designer Series Paper
During The Month Of June
Click Below To Shop From My Online Store

Take Advantage Of The Starter Kit+
Choose $155 in Product For Just $99
During The Month Of June
Click Below For More Details


Sunday, June 18, 2023

Stamptastic Friends June Blog Hop Nautical

Happy Sunday everyone and welcome to the Stamptastic Friends June Blog Hop as we explore this month's nautical theme. Our wonderful Design Team will be sharing their projects and ideas to inspire you. When I think of nautical, I think of the ocean, sailing, boats and my favorite color - blue. 
For my card today, I focused on the ocean, boats and the color blue to help me create my design. The Countryside Inn Designer Series Paper has some wonderful striped designs and I chose one of these to create the background for my card. The blue and white stripes has a wonderful nautical feel to it and when I paired it with the anchor image from the Beauty Of The Deep Bundle, I had the beginnings of my card design.
Products Used:
Beauty Of The Deep Bundle (item #161237)
He's All That stamp set (item #159071)
All That Dies (item #159078)
Stylish Shapes Dies (item #159183)
Countryside Inn Designer Series Paper (item #161467)
Night of Navy Cardstock (item #100867)
Misty Moonlight Cardstock (item #153081)
Versamark Pad (item #102283)
Metallics Embossing Powders (item #155555)
Linen Thread (item #104199)
Festive Pearls (item #159963)
Mini Stampin' Dimensionals (item #144108)
Measurements:
Night of Navy Cardstock
Card Base - 8 1/2" x 5 1/2" (Scored at 4 1/4")
Medium Circle Frame die cut with the Stylish Shapes Dies 
Sentiment Label die cut with the All That Dies
Misty Moonlight Cardstock
Medium Circle die cut with the Stylish Shapes Dies 
Countryside Inn Designer Series Paper
Card Front - 5 1/4" x 4"
For my card design, I chose to use Night of Navy, Misty Moonlight and White with a touch of Silver to step up the design. l wanted the anchor image to pop against the Misty Moonlight background so I heat embossed it with Silver embossing powder onto a piece of Misty Moonlight cardstock and then die cut it with the coordinating dies. I added it to the center of the Misty Moonlight circle with Mini Stampin' Dimensionals to pop it up. For the frame, I used the Stylish Shapes Dies to create a Night of Navy frame that would fit the Misty Moonlight circle and I attached it with Mini Stampin' Dimensionals that I cut in half so that they wouldn't show. The sentiment has been heat embossed with Silver embossing powder to coordinate with the anchor image and I added Silver Pearls to embellish the label. To add some texture to the design, I wrapped a piece of Linen Thread around the bottom of the designer series paper card front twice and tied a knot on the right hand side before attaching it to the card base. I added the sentiment label with Mini Stampin' Dimensionals over the Linen Thread, centering it on the card front. I also added a piece of Linen Thread through the hole at the top of the anchor and tied a knot before attaching the image to the card front, centering it above the sentiment. This design is perfect for masculine cards and instead of making a Father's Day card like I did, you could change the sentiment to make it a birthday, graduation or even retirement card. 
Thank you for taking the time to visit my blog. I hope that my nautical themed card design will help inspire you to explore mixing and matching products in the 2023-2024 Annual Catalog to create your own beautiful card designs. There are so many wonderful possibilities to choose from. A reminder that the Countryside Inn Designer Series Paper is on sale this month as part of the Designer Series Paper Sale and you can save 15% during the month of June. 
Please take the time to visit with my fellow Design Team members to see their wonderful projects this month. Just click on the links in the Roll Call List below to find your way. We would appreciate it if you would leave us a comment and let us know what you enjoyed about our projects.

If you live in the U.S. and do not have a Stampin' Up! Demonstrator, please contact me and I would be happy to help you with your creative projects. You may also visit my Online Store to place your order and have it shipped to you. 

Until Next Time

Happy Stamping,

Tricia Butts
Independent Stampin' Up! Demonstrator

Like What You See? Visit My Online Store Here

Visit My Facebook Business Page for Updates & Ideas

Click here to Contact Me


Save 15% On Select Designer Series Paper
During The Month of June
Click Below To Shop From My Online Store


Take Advantage of the Starter Kit+
Choose $155 in Product for Just $99
During The Month of June
Click Below For More Details


Wednesday, June 14, 2023

ICS June Blog Hop Punch A Bunch

It's time to hop along with the ICS June Blog Hop as we showcase the wonderful punches in the 2023-2024 Annual Catalog and Online Exclusives products. There are so many wonderful options to choose from to help you get creative. Our talented Design Team will be sharing their projects and ideas to help spark your creativity to help you create your own beautiful projects.
For my card design, I decided to use the Inked & Tiled Bundle which has two geometric shaped punches. I must admit, when I first saw this bundle in the catalog, I wasn't sure what to make of it. Then I started seeing other Demonstrators show how the two punch shapes interlocked and my brain went into overdrive. I had so much fun creating this pretty floral card design and working on the "puzzle pieces" to create the design. The floral images and sentiments in the coordinating stamp set are wonderful and I am officially a fan of the Inked & Tiled Bundle. I hope you will be too. 
Products Used:
Inked & Tiled Bundle (item #161168)
Stylish Shapes Dies (item #159183)
Lost Lagoon Cardstock (item #133679)
Pretty Peacock Cardstock (item #150880)
Basic White Cardstock (item #159276)
Lost Lagoon Classic Ink Pad (item #161678)
Petal Pink Classic Ink Pad (item #147108)
Calypso Coral Classic Ink Pad (item #147101)
Versamark Pad (item #102283)
Metallics Embossing Powders (item #155555)
Festive Pearls (item #159963)
Stampin' Dimensionals (item #104430)
Measurements:
Lost Lagoon Cardstock
Card Base - 8 1/2" x 5 1/2" (Scored at 4 1/4")
Card Front - 5 1/4" x 4" stamped with the leaves image using Lost Lagoon Classic ink and punched out 6 with the X Punch
Pretty Peacock Cardstock
Card Front - 5 1/4" x 4"
Sentiment Label die cut with the Stylish Shapes Dies
Basic White Cardstock
Card Front - 5 1/4" x 4" stamped with the floral images and punched out 6 with the Star Punch
The focus of the card design is the interlocking pieces that create an almost quilted look for the background. I stamped the leaves onto a Lost Lagoon card front with Lost Lagoon Classic ink and then punched out 6 of the X style punch. For the alternate pieces, I stamped a Basic White card front with the different floral images using Petal Pink, Calypso Coral and Lost Lagoon and then punched out 6 of the star style punch. I arranged the pieces onto the Pretty Peacock cardstock piece and adhered them so that there was a gap between each of the pieces. For the sentiment, I heat embossed the image with Gold embossing powder onto the Pretty Peacock label and attached it to the card front with Stampin' Dimensionals towards the bottom right corner. I attached the card front to the Lost Lagoon card base with Stampin' Dimensionals to pop it up. To finish off the card design, I added two small Gold pearls from the Festive Pearls, on either side of the sentiment. I love the watercolor look that the stamped images creates on the cardstock to create a soft and pretty design. This was a fun design to create and I can't wait to experiment more with these punches. 
Thank you for taking the time to visit my blog. I hope that my card design has inspired you to explore the wonderful world of punches and all the options they have to offer. 
Now it's time to visit Joni's blog and see what she has to share with us. Just click on the Next button to visit her blog to see her wonderful projects. We would love it if you would leave us a comment and let us know what you think about our projects. I hope you enjoy the rest of our blog hop. 


If you live in the U.S. and do not have a Stampin' Up! Demonstrator, please contact me and I would be happy to help you with your creative projects. You may also visit my Online Store to place your order and have it shipped to you. 

Until Next Time

Happy Stamping,

Tricia Butts
Independent Stampin' Up! Demonstrator

Like What You See? Visit My Online Store Here

Visit My Facebook Business Page for Updates & Ideas

Click here to Contact Me


Save 15% On Select Designer Series Paper
During The Month Of June
Click Below To Shop From My Online Store

Take Advantage Of The Starter Kit+
Choose $155 In Product For Just $99
During The Month Of June
Click Below For More Details