Showing posts with label Celebrate Everything Designer Series Paper. Show all posts

Saturday, December 3, 2022

Stamping With Friends December Blog Hop July-December 2022 Catalog Retirement

Welcome to the Stamping With Friends December Blog Hop as we showcase retiring products from the July-December 2022 Mini Catalog. Our wonderful Design Team members will be sharing their projects and ideas to help inspire you to explore the amazing products in this catalog before they disappear. 
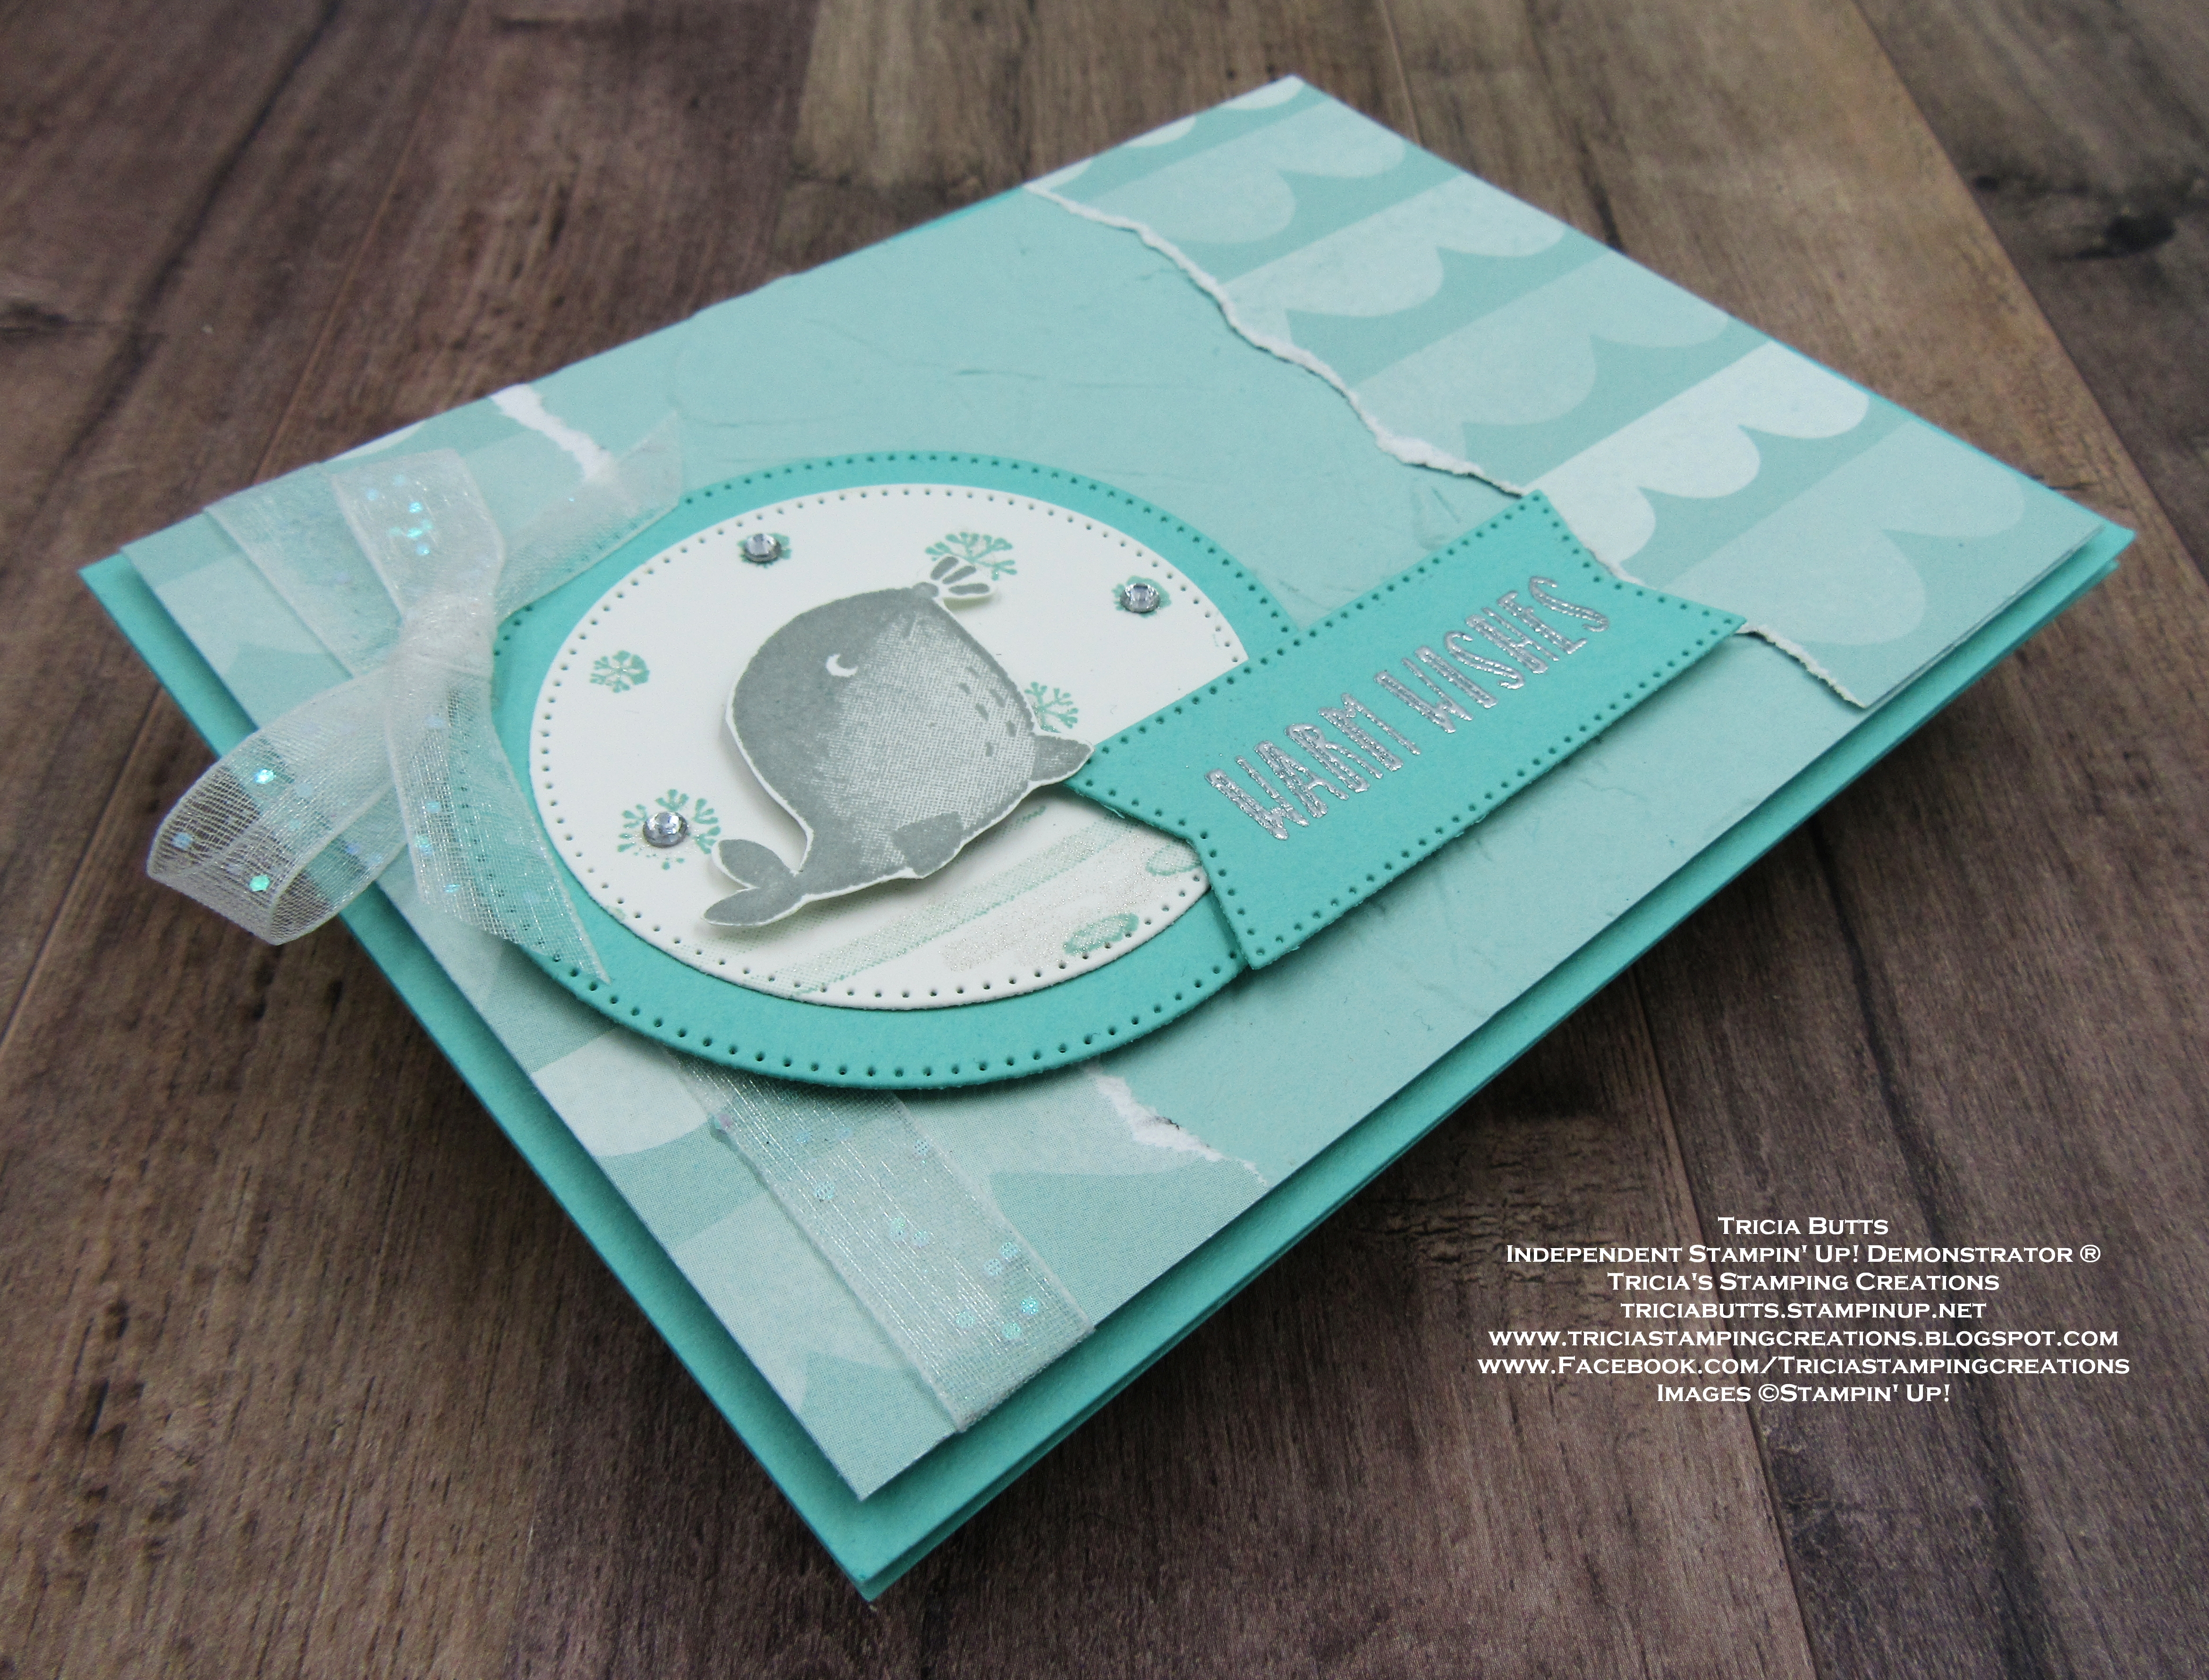
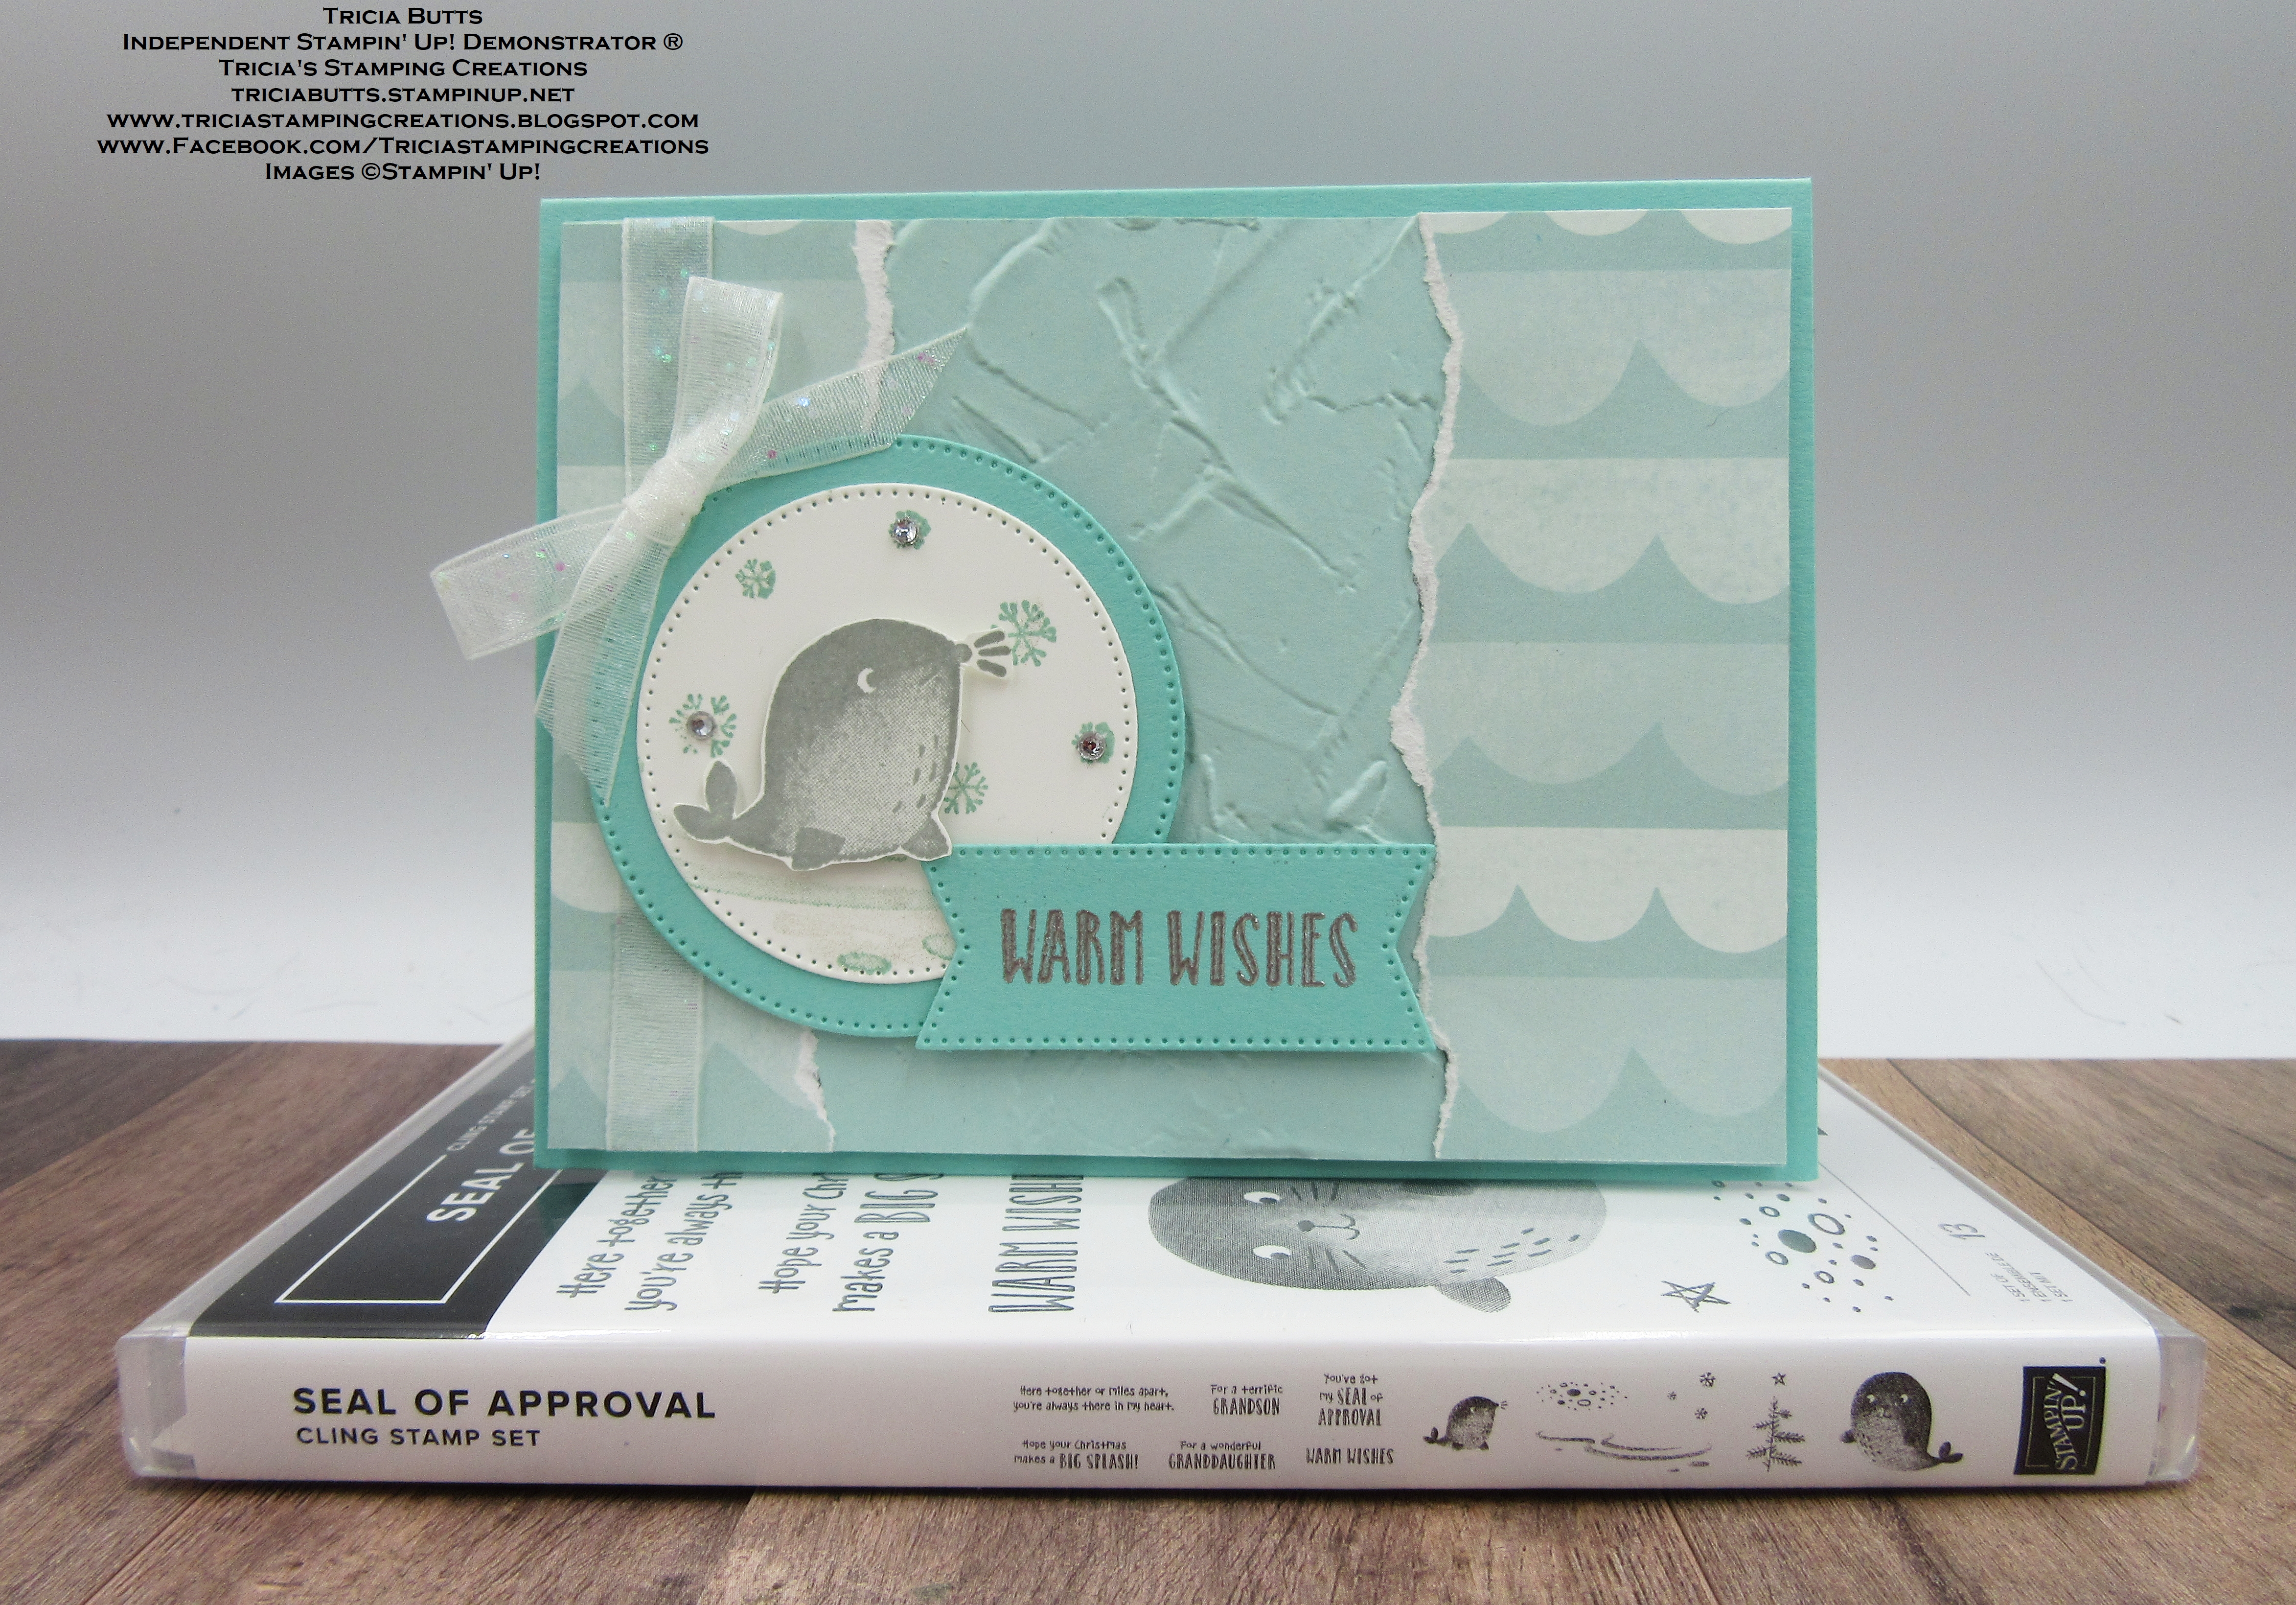
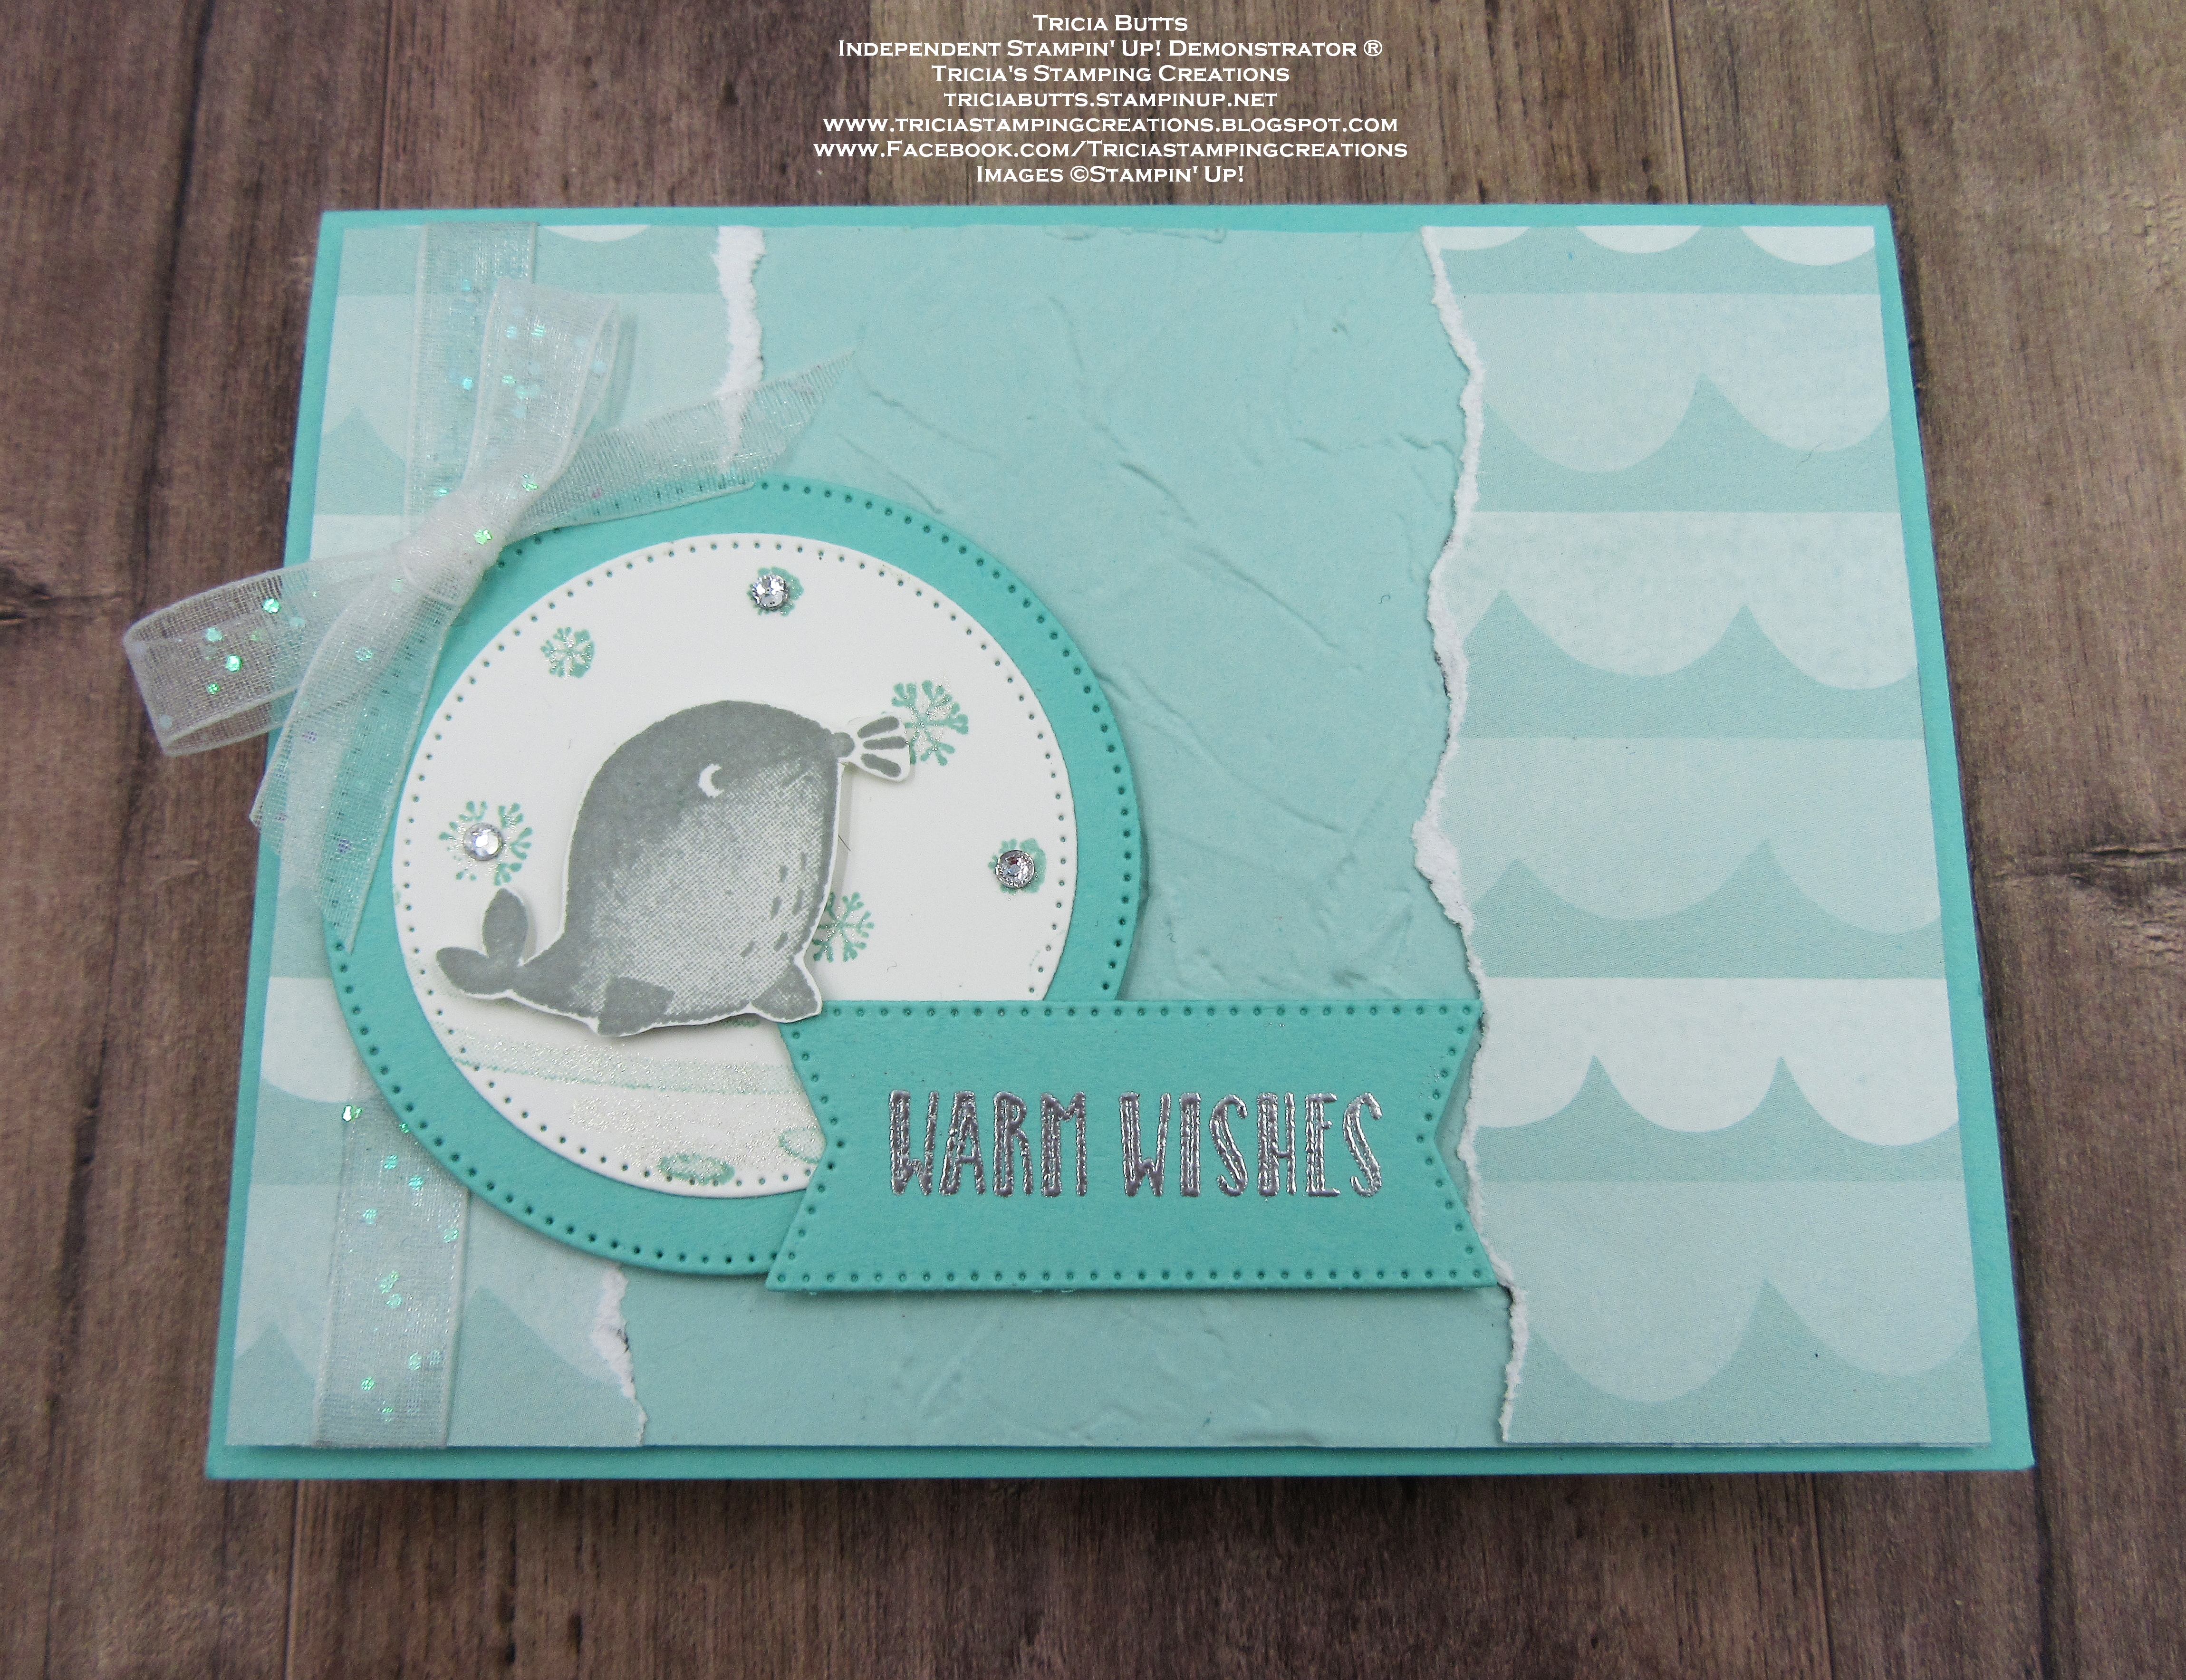
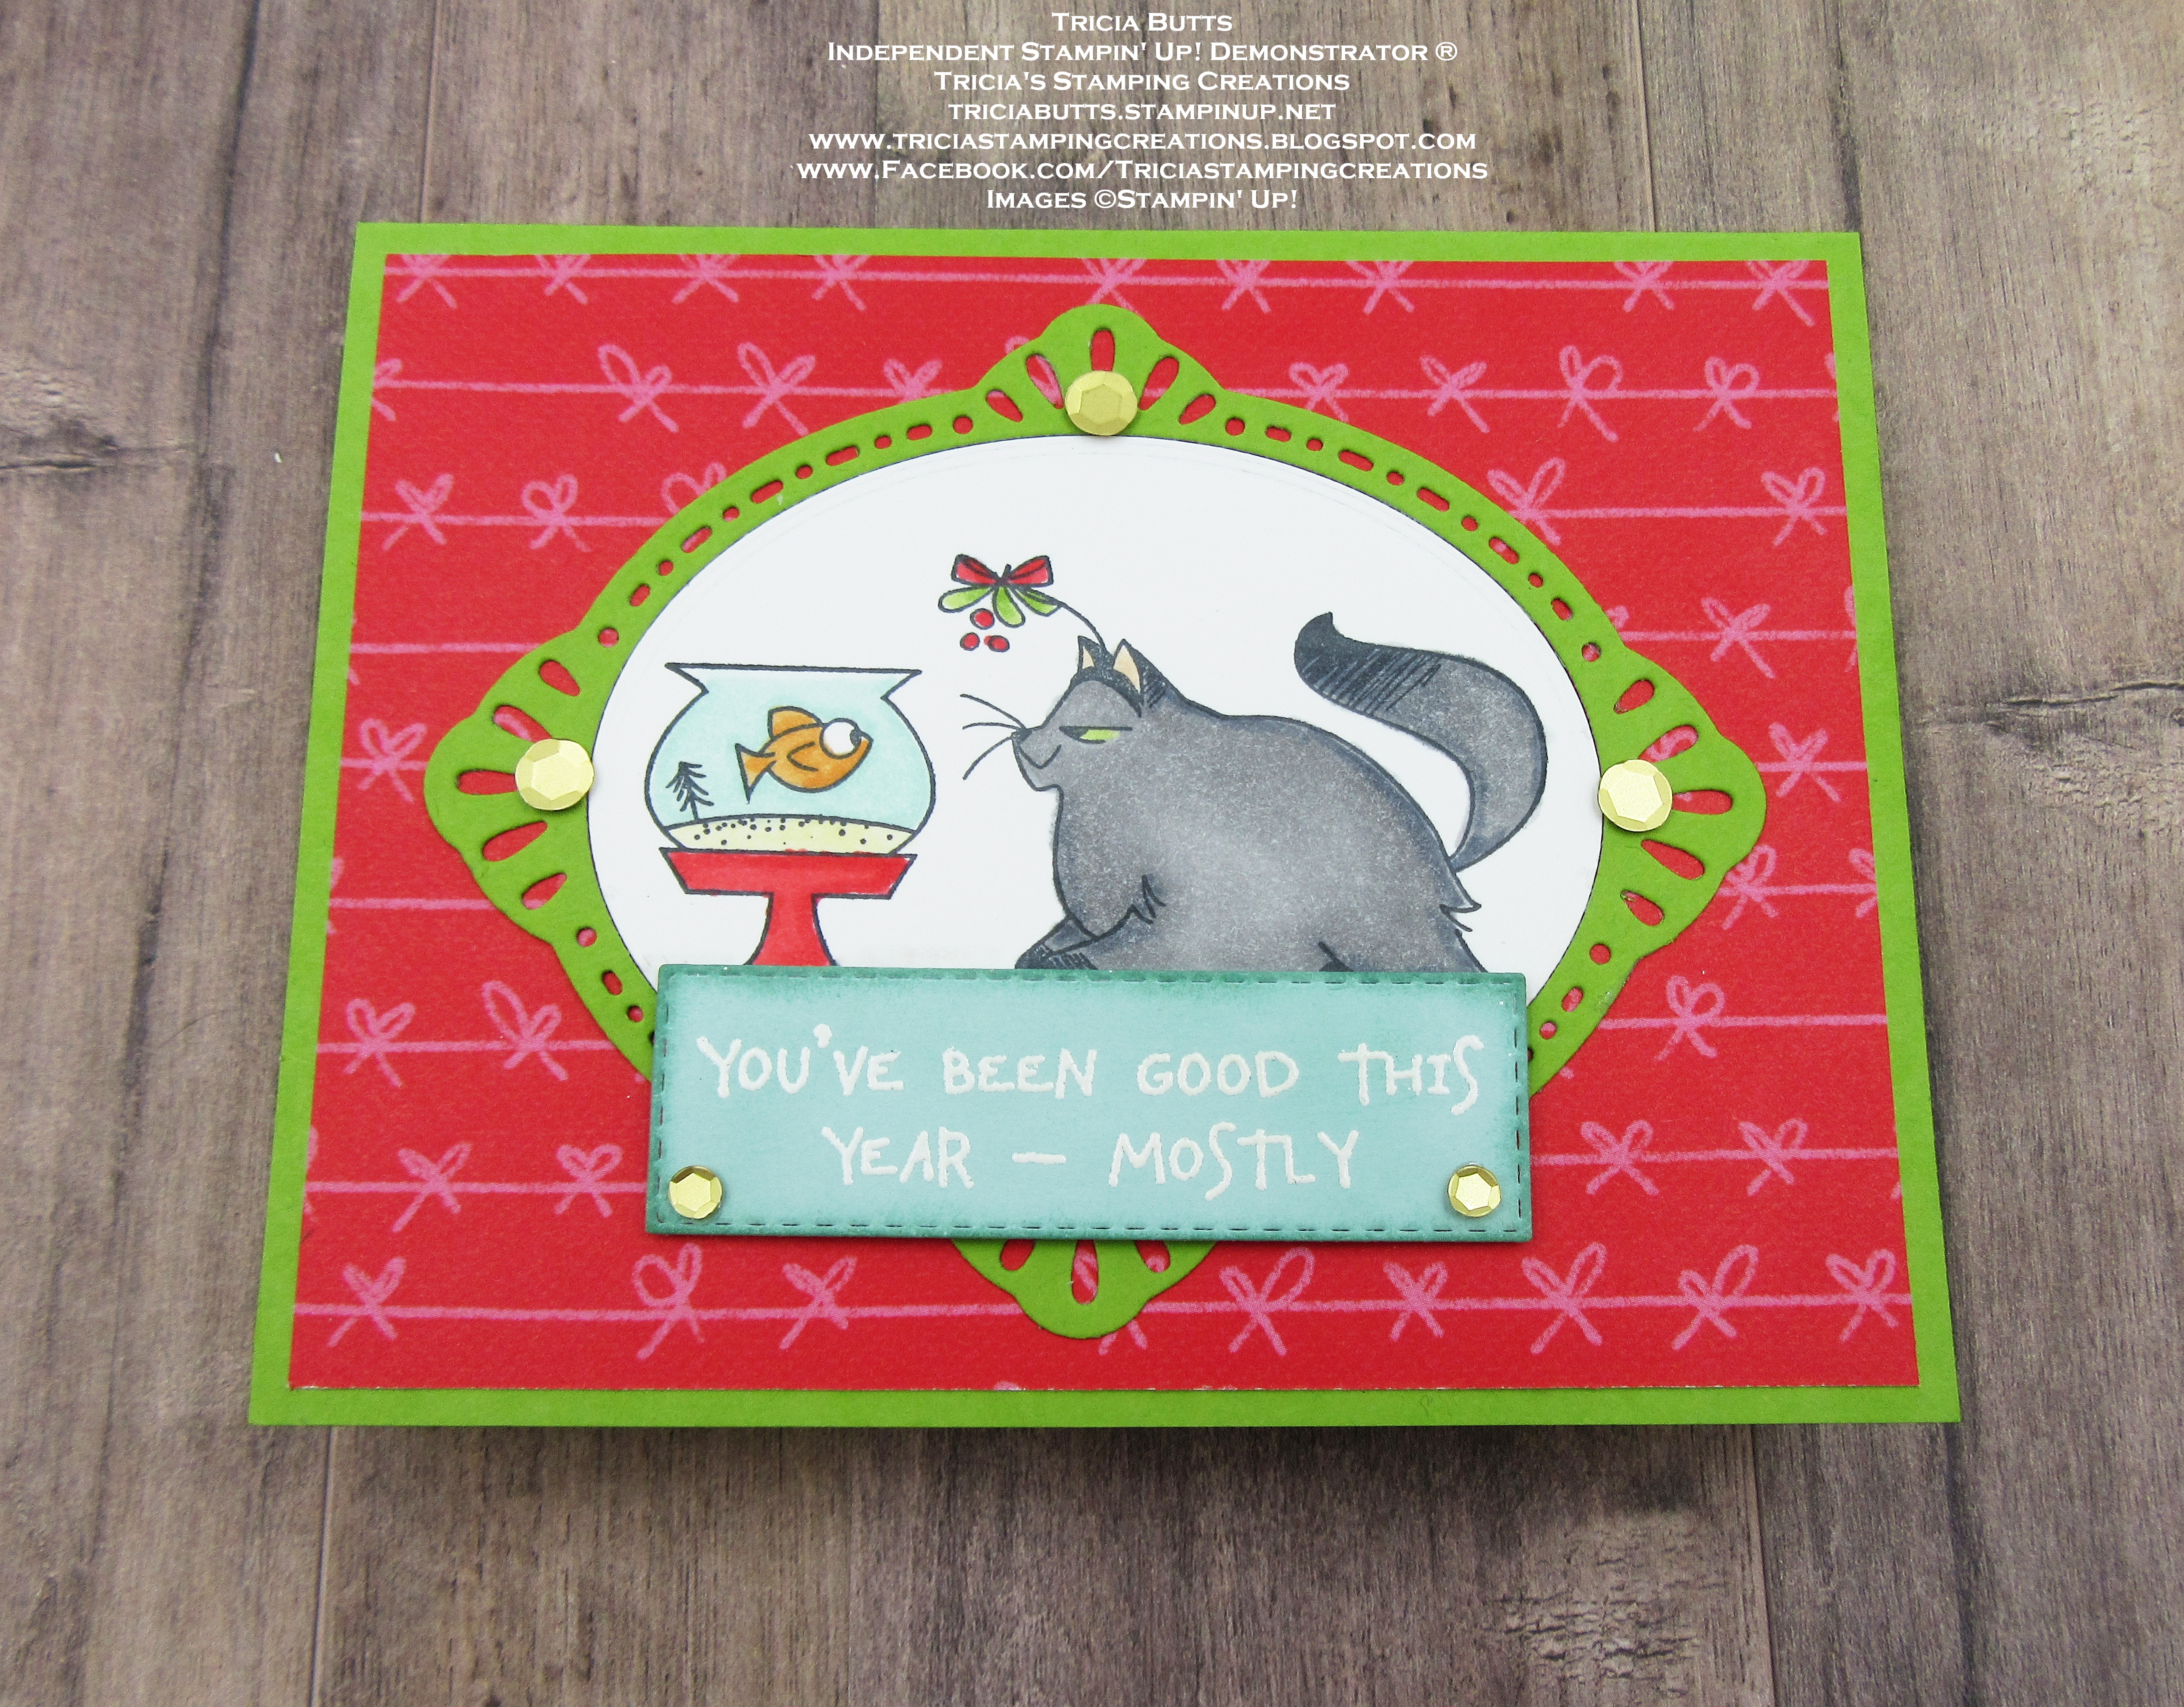
For today's card design, I chose to use one of my favorite retiring Christmas stamp sets, North Pole Mischief, to create a fun and whimsical Christmas card. I paired it with the retiring Celebrate Everything Designer Series Paper which is a Host Reward you can earn free with a qualifying order or party. For this card design, I wanted a twist on the traditional Christmas colors and paired the Poppy Parade in the designer series paper with Granny Apple Green cardstock for the card base and frame for the focal image. I love to color with Stampin' Blends Markers and this image was so much fun to color and bring to life. I think this Christmas card design is perfect for the cat lover who may have a mischievous feline in their lives.
Products Used:
North Pole Mischief stamp set (item #159770) Retiring
Framed Florets Dies (item #160623)
Stitched Rectangles Dies (item #151820)
Celebrate Everything Designer Series Paper (item #159913) Host Reward - Retiring
Granny Apple Green Cardstock (item #146990)
Pool Party Cardstock (item #122924)
Basic White Cardstock (item #159276)
Pool Party Classic Ink Pad (item #147107)
Memento Tuxedo Black Pad (item #132708)
Versamark Pad (item #102283)
Basics Embossing Powders (item #155554)
Granny Apple Green Stampin' Blends Combo Pack (item #154885)
Poppy Parade Stampin' Blends Combo Pack (item #154958)
Pumpkin Pie Stampin' Blends Combo Pack (item #154897)
Petal Pink Stampin' Blends Combo Pack (item #154893)
So Saffron Stampin' Blends Combo Pack (item #154905)
Pool Party Stampin' Blends Combo Pack (item #154894)
Smoky Slate Stampin' Blends Combo Pack (item #154904)
Basic Black Stampin' Blends Combo Pack (item #154843)
Adhesive Backed Seasonal Sequins (item #159964) Retiring
Measurements:
Granny Apple Green Cardstock
Card Base - 8 1/2" x 5 1/2" (Scored at 4 1/4")
Large Detailed Frame die cut with the Framed Florets Dies
Pool Party Cardstock
Sentiment Label die cut with the Stitched Rectangles Dies
Basic White Cardstock 
Large Oval die cut with the Framed Florets Dies
Celebrate Everything Designer Series Paper
Card Front - 5 1/4" x 4"
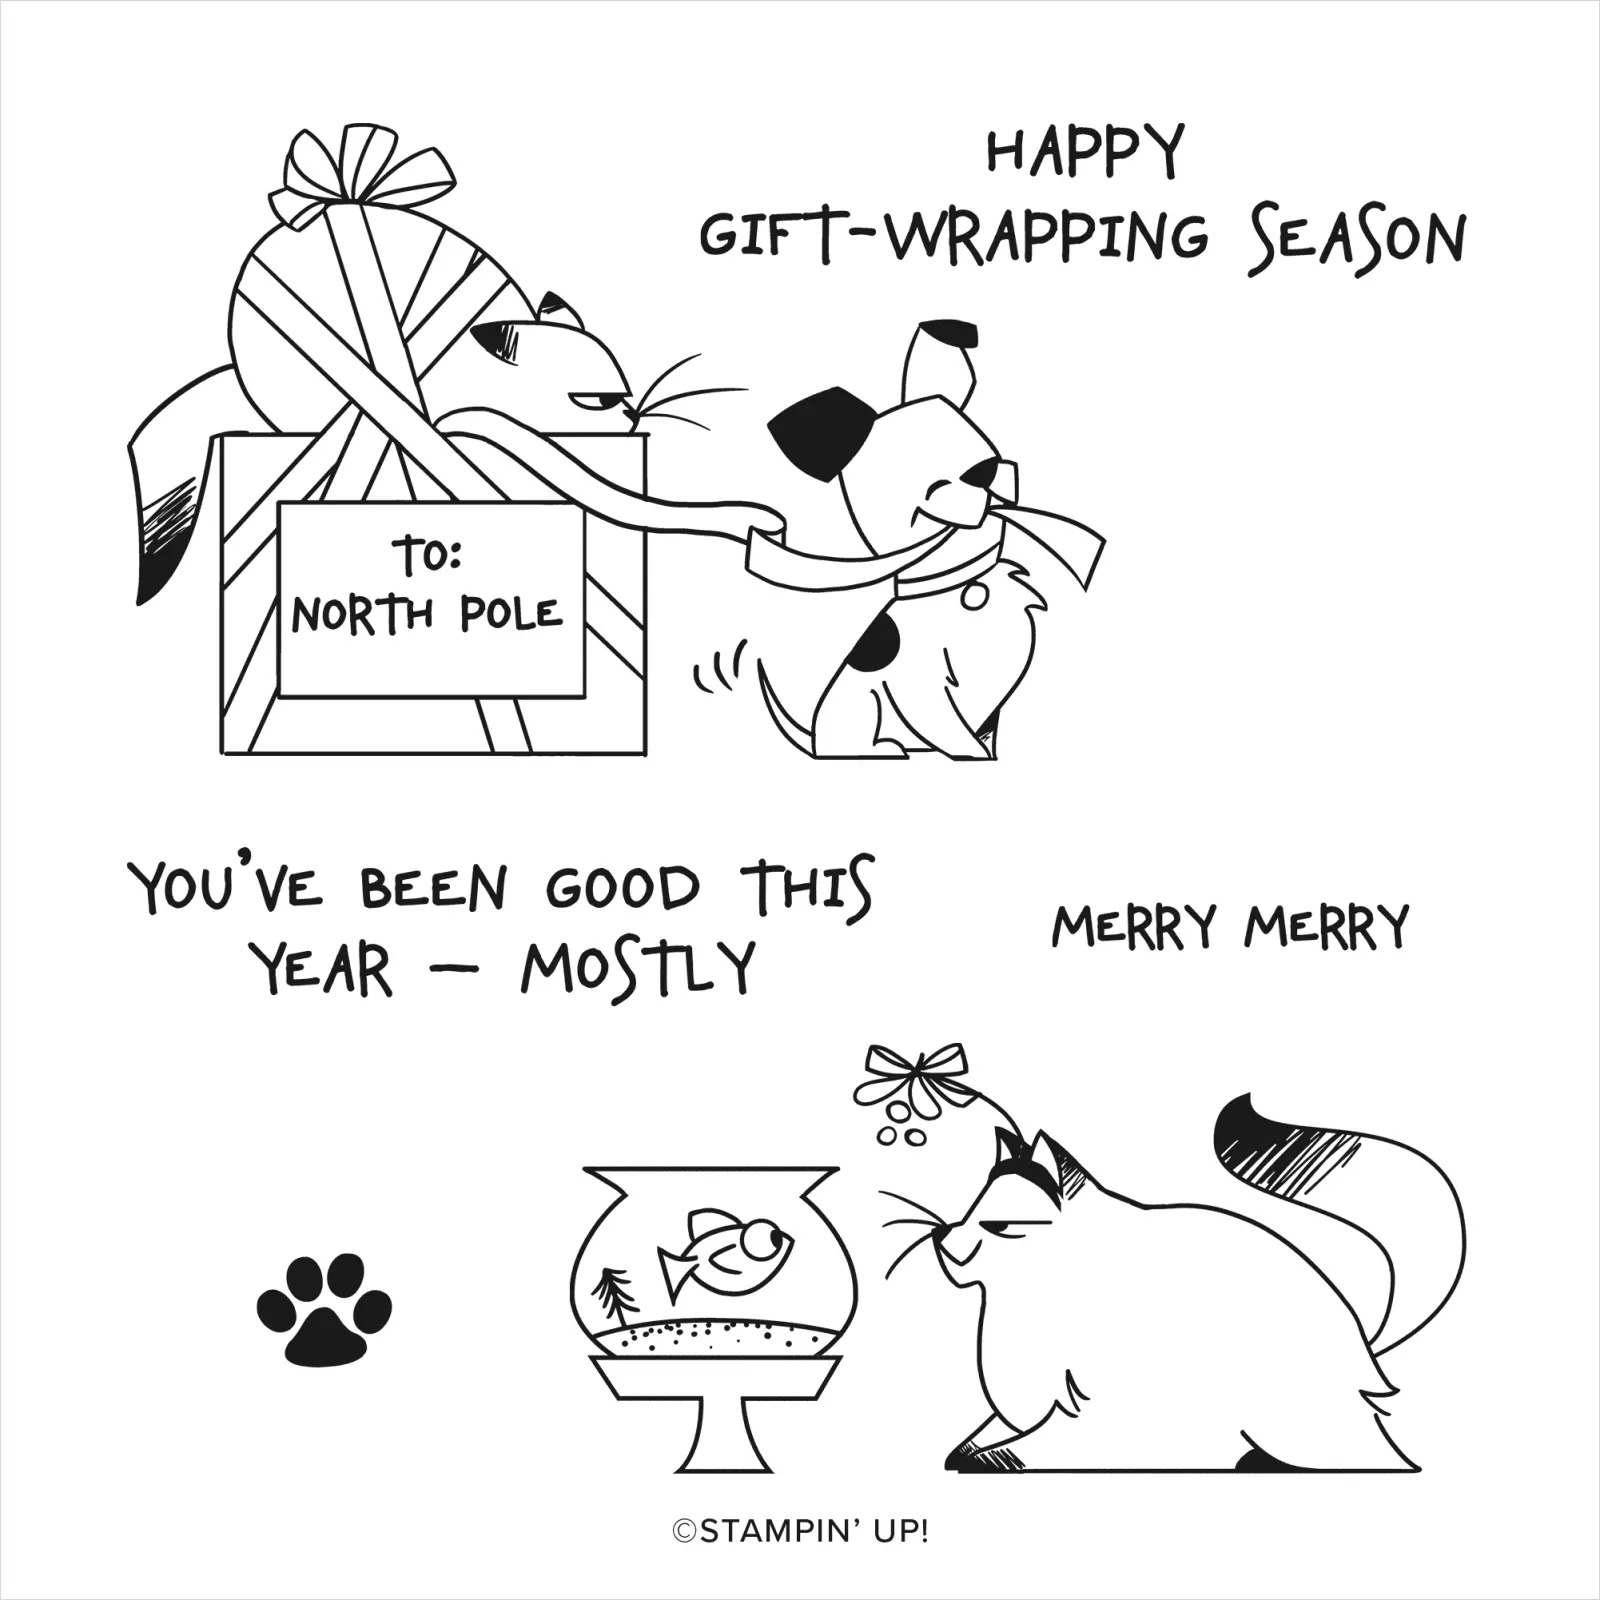
This clean and simple card design is simple to create and so much fun. I love the bright, cheerful color combination for this card that is sure to brighten someone's day when they receive it. I stamped the focal image with Memento Tuxedo Black ink onto the Basic White oval and colored it with Stampin' Blends. For the sentiment, I chose to cut the sentiment label with one of the Stitched Rectangles Dies using Pool Party cardstock to tie in with the color of the water in the fishbowl. I heat embossed the sentiment with White embossing powder and gently sponged some Pool Party ink around the outside edge to help make the sentiment pop. To assemble the card, I attached the designer series paper to the card base and then added the Granny Apple Green oval frame to the center of the card front. Next, I attached the Basic White oval to the center of the frame and added the Pool Party sentiment label with Stampin' Dimensionals, lining it up with the bottom of the cat and the fishbowl stand. To embellish the card, I added Gold self adhesive sequins for a touch of bling. This cute card is so much fun and I am so happy with how it turned out. 
Thank you for taking the time to visit my blog. I hope that my card design will help inspire you to explore the wonderful products in the July-December 2022 Mini Catalog. Remember, the retiring products in this catalog are available while supplies last, so don't delay in placing your order.  
Please take the time to visit with my fellow Design Team members to see their amazing projects. Just click on the links in the Roll Call List below to visit their blogs. We would appreciate it if you would leave us a comment and let us know what you liked about our projects. I hope you enjoy the rest of our blog hop.

If you live in the U.S. and do not have a Stampin' Up! Demonstrator, please contact me and I would be happy to help you with your creative projects. You may also visit my Online Store to place your order and have it shipped to you. 

Until Next Time

Happy Stamping,

Tricia Butts
Independent Stampin' Up! Demonstrator

Like What You See? Visit My Online Store Here

Visit My Facebook Business Page for Updates & Ideas

Click here to Contact Me


Save Up To 60% Off Select Retiring Products
From The July-December 2022 Mini Catalog Last Chance List
Click Below To Visit My Online Store


Monday, October 24, 2022

Kylie Bertucci's International Blog Highlights Winners Blog Hop October 2022

I am so excited to be a part of Kylie's International Highlight Top 10 Winners Blog Hop for October. You will have the opportunity to visit with incredibly talented Stampin' Up! Demonstrators as they share their beautiful projects and ideas to inspire you to get creative. I want to say a big thank you to all of you who voted for my card this month and giving me the opportunity to take part in this blog hop. I appreciate the support so much and hope you will enjoy our Thank You project ideas this month. 
Here in Colorado, we are enjoying the beautiful colors of Fall, so I thought I would use this as my inspiration for today's Thank You card design. I love creating clean and simple card designs using designer series paper. For today's card, I chose to use one of the designs from the Celebrate Everything Designer Series Paper, which is a Host Reward you can earn for free with a qualifying order/party. I paired it with the Framed Florets Bundle, which will be available for customers to order beginning November 1st. 
Products Used:
Framed Florets Bundle (item #162407) Available November 1st
Celebrate Everything Designer Series Paper (item #159913) Host Reward
Brushed Metallic Cardstock (item #153524)
Granny Apple Green Cardstock (item #146990)
Basic White Cardstock (item #159276)
Versamark Pad (item #102283)
Metallics Embossing Powders (item #155555)
Linen Thread (item #104199)
Brushed Metallic Adhesive Backed Dots (item #156506)
Mini Glue Dots (item #103683)
Measurements:
Granny Apple Green Cardstock
Card Base - 8 1/2" x 5 1/2" (Scored at 4 1/4")
Oval Frame die cut with the Framed Florets Dies
Celebrate Everything Designer Series Paper
Card Front - 5 1/4" x 4"
Basic White Cardstock
Sentiment Oval die cut with the Framed Florets Dies
Brushed Copper Cardstock
2 Detailed Leaves die cut with the Framed Florets Dies
The design I chose for the background for this card design has wonderful bright colors that work beautifully for a Thank You card. I like that this design works well for a masculine card and I kept the embellishments simple to reflect that. The Copper embossing for the sentiment and Copper die cut leaves coordinate to help step up the design without being over the top. This simple layout is easy to duplicate with other supplies to create a variety of card designs to suit all occasions. 
Thank you for taking the time to visit my blog today. I hope that my Thank You card will help inspire you to create your own beautiful projects to share with family and friends. Sending a handmade card to someone is a wonderful way to show how much you care and can really brighten someone's day.
Please take the time to hop through and visit with our talented Winners by using the Roll Call List below. We would love it if you would leave us a comment and let us know how much you enjoyed our projects. I hope you enjoy the rest of our blog hop.

If you live in the U.S. and do not have a Stampin' Up! Demonstrator, please contact me and I would be happy to help you with your creative projects. You may also visit my Online Store to place your order and have it shipped to you. 

Until Next Time

Happy Stamping,

Tricia Butts
Independent Stampin' Up! Demonstrator

Like What You See? Visit My Online Store Here

Visit My Facebook Business Page for Updates & Ideas

Click here to Contact Me


Join The Stampin' Up! Family
Get $155 in Stampin' Up! Products For Just $99
In Your Starter Kit During The Month of October
Click Below For More Details

Get Creative For The Holidays
With The July-December 2022 Mini Catalog
Click Below To Visit My Online Store


Saturday, October 8, 2022

Stamping Inkspiration October Blog Hop Sketch Challenge

Welcome to the Stamping Inkspiration October Blog Hop as we have fun with a Sketch Challenge this month. We have been challenged to create a card or 3D project using the sketch below to share with you all. Our wonderful Design Team members will be sharing their projects and ideas to help spark your creativity. 
Today's card design is a fun design featuring the Seal of Approval stamp set from the July-December 2022 Mini Catalog. I paired it with one of the designs from the Celebrate Everything Designer Series Paper Host Reward, which you can earn Free with a qualifying order or party. The scalloped design made me think of waves, which works well with the cute seals in the stamp set. My card is more of an all occasion design, but you could easily change the sentiment to create a non-traditional holiday card. 
Products Used:
Seal of Approval stamp set (item #159762)
Celebrate Everything Designer Series Paper Host Reward 
(item #159913)
Stylish Shapes Dies (item #159183)
Painted Texture 3D Embossing Folder (item #154317)
Pool Party Cardstock (item #122924)
Coastal Cabana Cardstock (item #131297)
Basic White Cardstock (item #159276)
Pool Party Classic Ink Pad (item #147107)
Smoky Slate Classic Ink Pad (item #147113)
Versamark Pad (item #102283)
Metallics Embossing Powders (item #155555)
Clear Wink of Stella Glitter Brush (item #141897)
White 3/8" Glittered Organdy Ribbon (item #156408)
Basic Rhinestone Jewels (item #144220)
Stampin' Dimensionals (item #104430)
Measurements:
Coastal Cabana Cardstock
Card Base - 8 1/2" x 5 1/2" (Scored at 4 1/4")
Large Circle die cut with the Stylish Shapes Dies
Sentiment Label die cut with the Stylish Shapes Dies
Basic White Cardstock
Medium Circle die cut with the Stylish Shapes Dies
Pool Party Cardstock
Card Front - 5 1/4" x 4" Embossed with the Painted Texture Embossing Folder
Celebrate Everything Designer Series Paper
1 piece - 3" x 4" (tear vertically down approx half way on the 3" side to create two pieces approx. 1 1/2" x 4")
This card was so much fun to design and I love the non-traditional theme of this Christmas stamp set. I wanted to create the look and feel of the ocean for my background, so I used the Painted Texture 3D Embossing Folder to add texture to the Pool Party cardstock layer. I attached the torn pieces of the designer series paper to either side of the embossed Pool Party layer, to create the look of waves to coordinate with my focal image. For the cute seal image, I stamped it with Smoky Slate Classic ink onto a piece of Basic White cardstock and fussy cut it out with Paper Snips. I stamped the snowflakes and water image onto the Basic White circle using Pool Party Classic ink, stamping off once on a scrap piece of paper. I attached the seal onto the circle with Stampin' Dimensionals and added several Basic Rhinestones to the centers of three of the snowflakes. For the sentiment, I heat embossed the image with Silver embossing powder. I added a piece of the White Glittered Organdy Ribbon on the left side of the card front, over the designer series paper. 
To assemble the card design, I attached the Basic White circle to the Coastal Cabana circle and added it to the card front on the left side with Stampin' Dimensionals, slightly overlapping the ribbon. I then added the sentiment to the right side of the circle, so that it slightly overlaps the focal circle. To complete the design, I tied a bow with the Glittered Organdy Ribbon and attached it to the top left side of the circle. For a touch of sparkle, I added some Clear Wink of Stella to the stamped snowflakes and water on the focal circle. I love how this card design turned out. This design is so versatile and can be used for so many occasions. 
Thank you for taking the time to visit my blog. I hope that my card design will help inspire you to create your own wonderful projects using this fun sketch challenge. There are so many wonderful possibilities to explore to create your own beautiful projects. 
Now it's time to visit Jan's blog and see what wonderful projects she has to share with us. Just click on the Next button below to visit her blog or use the Roll Call List below to find your way. We would love it if you would leave us a comment and let us know what you liked about our projects. I hope you enjoy the rest of our blog hop. 

Roll Call List

If you live in the U.S. and do not have a Stampin' Up! Demonstrator, please contact me and I would be happy to help you with your creative projects. You may also visit my Online Store to place your order and have it shipped to you. 

Until Next Time

Happy Stamping,

Tricia Butts
Independent Stampin' Up! Demonstrator

Like What You See? Visit My Online Store Here

Visit My Facebook Business Page for Updates & Ideas

Click here to Contact Me


Last Days To Sign Up
For The Ho Ho Ho Paper Pumpkin Card Kit
Click Below To Subscribe By October 10th

Get Creative For The Holidays
With The July-December 2022 Mini Catalog
Click Below To Visit My Online Store


Ink. Stamp. Share. October Showcase Blog Hop

Welcome to the Ink. Stamp. Share. October Showcase Blog Hop as we share new ideas and projects featuring current Stampin' Up! It's a great time for our Design Team Members to share what they are currently working on and putting a spotlight on products that you might not be familiar with. With the holidays getting closer, you may even see ideas that will help you create your own wonderful creations for family and friends. 
Today I decided to shift my focus from Fall themed projects to create a fun and festive Christmas card. I recently got the North Pole Mischief stamp set and I have been dying to ink it up and try it out. I decided to pair it with one of the designs from the Celebrate Everything Designer Series Paper Host Reward, which you can earn Free with a qualifying order or party. The bright, colorful ornaments in this design worked perfectly with the mischievous stamp image I chose for my design. The colors for my card design have been chosen from this paper, which makes it so much easier to have them all coordinate. 
Products Used:
North Pole Mischief stamp set (item #159770)
Stitched Rectangles Dies (item #151820)
Celebrate Everything Designer Series Paper Host Reward (item #159913)
Granny Apple Green Cardstock (item #146990)
Poppy Parade Cardstock (item #119793)
Basic White Cardstock (item #159276)
Memento Tuxedo Black Pad (item #132708)
Granny Apple Green Classic Ink Pad (item #147095)
Granny Apple Green Stampin' Blends Combo Pack (item #154885)
Poppy Parade Stampin' Blends Combo Pack (item #154958)
Shaded Spruce Stampin' Blends Combo Pack (item #154903)
Daffodil Delight Stampin' Blends Combo Pack (item #154883)
Crumb Cake Stampin' Blends Combo Pack (item #154882)
Soft Suede Stampin' Blends Combo Pack (item #154906)
Parakeet Party 1/8" Metallic Woven Ribbon (item #159196)
Iridescent Pearls Basic Jewels (item #158987)
Stampin' Dimensionals (item #104430)
Measurements:
Granny Apple Green Cardstock
Card Base - 8 1/2" x 5 1/2" (Scored at 4 1/4")
Frame die cut with the Stitched Rectangles Dies
Poppy Parade Cardstock
Rectangle - 1 1/8" x 3 1/8"
Basic White Cardstock
Large Stitched Rectangle die cut with the Stitched Rectangles Dies
Sentiment Label die cut with Stitched Rectangles Dies
Celebrate Everything Designer Series Paper
Card Front - 5 1/4" x 4" (Center opening die cut with Stitched Rectangles Dies
This adorable Christmas card is so bright and cheerful and is sure to make someone smile when they receive it. I chose to use Granny Apple Green as my main color for this card and I colored the image with Stampin' Blends Markers using colors from the designer series paper. I die cut the center of the card front layer to create a frame added a Granny Apple Green cardstock skinny frame around the edge to give it definition. I added the focal layer underneath so that the image was centered inside the frame. For the sentiment, I stamped the image with Granny Apple Green Classic ink and I colored several of the Iridescent Pearls with the Dark Granny Apple Green Stampin' Blends Marker to coordinate with the card design. Using a piece of Poppy Parade cardstock, I layered it with the sentiment to help make it pop. I love that the Parakeet Party Metallic Woven Ribbon is a close match for the Granny Apple Green cardstock and I tied a simple bow and attached it to the sentiment label with a Mini Glue Dot. I added the sentiment to the card front with Dimensionals to finish off the card design. This card design would be perfect for the animal lover in your family, especially if they have both dogs and cats. 
Thank you for taking the time to visit my blog. I hope that my card design will help inspire you to get creative and explore new products and ideas to create your own wonderful projects.
Please take the time to visit with my fellow Design Team Members by using the Roll Call List below. We would appreciate it if you would leave us a comment and let us know what you liked about our projects. I hope you enjoy the rest of our blog hop. 

If you live in the U.S. and do not have a Stampin' Up! Demonstrator, please contact me and I would be happy to help you with your creative projects. You may also visit my Online Store to place your order and have it shipped to you. 

Until Next Time

Happy Stamping,

Tricia Butts
Independent Stampin' Up! Demonstrator

Like What You See? Visit My Online Store Here

Visit My Facebook Business Page for Updates & Ideas

Click here to Contact Me


Time Is Running Out
To Get The Ho Ho Ho Paper Pumpkin Kit
Click Below To Subscribe By October 10th

Get Creative For The Holidays
With The July-December 2022 Mini Catalog
Click Below To Visit My Online Store