Showing posts with label 2018-2019 Annual Catalog. Show all posts

Sunday, September 15, 2019

The Joy Of Sets September Blog Hop Tri-Fold Card

 Welcome to the Joy of Sets September Blog Hop as we explore different ways to create tri-fold cards. This is my first time hopping with this wonderful group of stampers and I am excited to share my card design with you this month.

 This simple tri-fold card design features the Free as a Bird stamp set (item #149468) from the 2019-2020 Annual Catalog along with the coordinating Bird Ballad Designer Series Paper (item #149592). I love the soft, organic feel of this pretty paper and I chose my color combination from the colors used in this designer series paper.
 I chose to use Crumb Cake card stock for the card base, cut at 5 1/2" x 11" and scored at 3" and 7 1/4". The front flap is decorated with a piece of the designer series paper that is 5 1/4" x 3 1/2". The bird image from the stamp set was stamped with Memento Tuxedo Black ink onto Whisper White cardstock and I colored the image with Stampin' Blends Markers. To add a touch of shimmer, I colored over the bird with Clear Wink of Stella. I fussy cut the bird and attached it to a circle die cut from Pool Party cardstock using the Layering Circles Dies and layered onto an Old Olive scalloped circle cut using the same die set. I attached it to the card front with Stampin' Dimensionals. 
 For the inside side panel, I added a piece of Whisper White cardstock cut at 2 3/4" x 5 1/4" and I stamped the sentiment and flower with Memento Tuxedo Black ink and colored the flower with Stampin' Blends Markers. I attached a strip of the designer series paper cut at 1/2" x 5 1/4" and attached it to the panel so that the reverse side was showing, to provide a contrast against the front panel.
 The inside panel is a piece of 4" x 5 1/4" Whisper White cardstock that I stamped with the Memento Tuxedo Black ink and colored with the Stampin' Blends Markers. I was able to use the sentiments and images from the Free as a Bird stamp set to decorate the panels to coordinate with the designer series paper. For the sentiment on the front panel, I used the Itty Bitty Greetings stamp set (item #151331) and stamped the sentiment onto a scrap of Whisper White cardstock with Memento Tuxedo Black ink and punched it out using the Classic Label Punch (item #141491) and attached the label to the circle element with Snail adhesive. To add a touch of bling, I added Basic Rhinestones to the sentiment label. 

Thank you for taking the time to visit my blog today. I hope that my card design will help inspire you to try creating your own tri-fold card design and explore how you can use designer series paper to create your own projects. 

Now it's time to visit Angie's blog and see what she has to share with us this month. Just click the Next button to visit her blog or use the Previous button to visit Jane's blog. I hope that you enjoy our blog hop this month. 


Until Next Time
Happy Stamping,


Tricia Butts
Independent Stampin' Up! Demonstrator
Like What You See? Visit My Online Store Here
Visit My Facebook Business Page for Updates & Ideas


Click here to Contact Me

If you live in the U.S. and do not already have a demonstrator, please contact me and I would be happy to help you. 

September is the month to take advantage of the Buy 3, Get 1 Free Designer Series Paper Promotion.
Choose from the select paper packs in the 2019-2020 Annual Catalog

Friday, June 14, 2019

SBTD Something Old & Something New Blog Hop

Welcome to the SBTD Something Old & Something New Blog Hop. This month we are sharing ideas and projects to help you pair up new products from the new 2019-2020 Annual Catalog with old favorites that have carried over from past catalogs. 
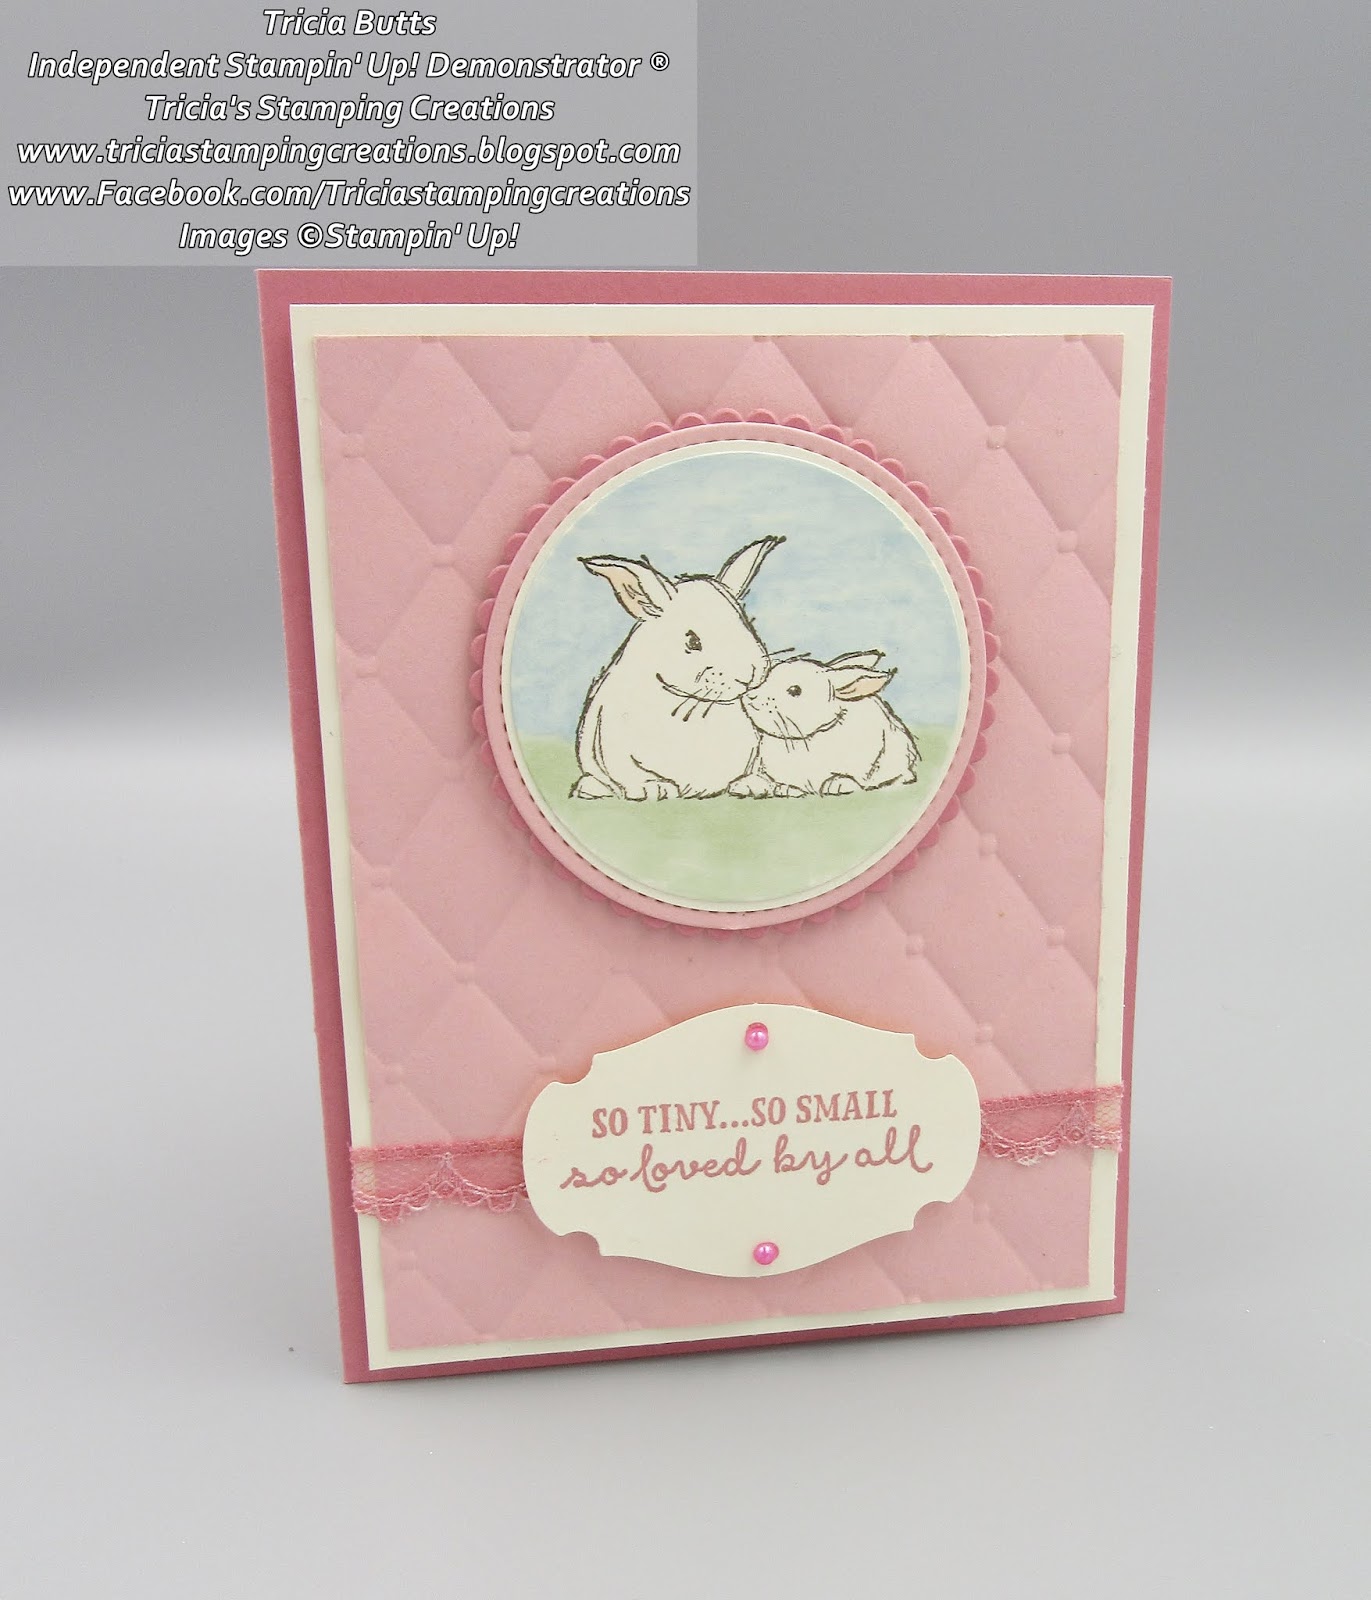
 My card design today features the new Wildly Happy Cling stamp set (item #149408) paired with the Layering Circles Dies (item #141705) and Stitched Shapes Dies (item #152323) from the 2019-2020 Annual Catalog. I thought it would be fun to pair a new stamp set with some old favorite die sets.
 My card base was created from Rococo Rose cardstock, one of the new 2019-2021 In Colors. It works beautifully with Very Vanilla and Blushing Bride cardstock. I embossed the layer of Blushing Bride cardstock using the Tufted 3D Embossing Folder to create a quilted look to the background. 
The bunnies image has been stamped onto a Very Vanilla cardstock circle die cut using the dies from the Layering Circles Dies. I stamped the image with Early Espresso Classic ink and colored the background and inside of the ears using the Stampin' Blends Markers. I layered the colored image onto a circle of Very Vanilla cardstock that I punched out using the 2 1/4" Circle Punch and then layered it onto a circle die cut from Blushing Bride cardstock using the Stitched Shapes Dies. The last layer was created from Rococo Rose cardstock using one of the Scalloped Circle dies from the Layering Circles Dies. I attached the image to the card front with Stampin' Dimensionals. 
The sentiment was stamped with Rococo Rose Classic ink onto a scrap of Very Vanilla cardstock and punched out using the Story Label Punch. Using the Rococo Rose Light Stampin' Blend Marker,  I colored a piece of the Very Vanilla Lace Trim and attached it to the card front. I attached the sentiment label on top of the lace using Stampin' Dimensionals. To embellish the sentiment, I colored two of the smallest Basic Pearls with the Rococo Rose Light Stampin' Blends Marker and attached them to the label. 

I love the soft and pretty look to this card design and I think it makes a wonderful baby card for a little girl. By changing the colors for this card, you could create a card design suitable for a baby boy or keep it neutral so that it isn't gender specific. 
Thank you for taking the time to visit my blog today and I hope that my card design helps inspire you to mix and match your old favorites with some new products from the 2019-2020 Annual Catalog. If you live in the U.S. and do not already have a demonstrator, please contact me and I would be happy to help you.

Now it's time to visit Courtenay's blog and see what she has to share with us this month. Just click the Next button below to visit her blog. I hope that you will take the time to hop along our blog hop this month and we would appreciate you leaving us a comment. 

Until Next Time
Happy Stamping,


Tricia Butts
Independent Stampin' Up! Demonstrator
Like What You See? Visit My Online Store Here
Visit My Facebook Business Page for Updates & Ideas


Sunday, May 12, 2019

2019 Kre8tors Techniques Blog Hop

Welcome to the 2018 Kre8tors Blog Hop and this month we are focusing on techniques. As you travel along our blog hop, you will be visiting with Stampin' Up! demonstrators from all over the world, as we share our creative ideas with you. I hope you enjoy the projects we have created.
 For my technique, I chose to watercolor the dry embossed image from the Lovely Floral Dynamic Embossing Folder (item #148048) using Watercolor Pencils. I love the soft look created by these beautiful pencils and the large floral image from the embossing folder is perfect for a card front design. 
 To create this card, I chose Blueberry Bushel cardstock for the card base and I added a layer of Very Vanilla cardstock that I embossed with the Lovely Floral Dynamic Embossing Folder. This beautiful embossing folder is retiring and is only available while supplies last, so make sure you order it before it disappears. I colored the embossed image with a variety of colors from the Stampin' Up! Watercolor Pencils and used a Blender Pen to soften and blend the color for a smooth watercolor look. I added small Basic Pearls that I colored using the Dark Pineapple Punch Stampin' Blends Marker (item #147030) added them to the centers of the small blue flowers. 
To create the sentiment, I chose one from the Itty Bitty Greetings stamp set (item #146667) in the 2018-2019 Annual Catalog. I love the variety of sentiments in this stamp set and the fonts are wonderful. I stamped it onto a scrap of Very Vanilla cardstock with Blueberry Bushel Classic ink and I created a banner look on both ends with my Paper Snips. 
To finish off the card design, I added a piece of Blueberry Bushel 1/8" Grosgrain Ribbon (item #146950) across the bottom of the card front and attached the sentiment with Stampin' Dimensionals. To embellish the sentiment, I added two small Basic Pearls that I colored with the Dark Pineapple Punch Stampin' Blends Marker. 
Thank you for taking the time to visit my blog today and view my card design. I hope that you have enjoyed my technique and that it inspires you to give it a try with your own projects. If you live in the U.S. and do not already have a demonstrator, please contact me and I would be happy to help you. 

Now it's time to visit Sandra's blog and see what she has to share with us this month. Just click on the Next button below to visit her blog or use the Blog Hop Roll Call List below to find your way if you get lost. Enjoy the rest of your blog hop journey. 

Roll Call List

Until Next Time
Happy Stamping,

Tricia Butts
Independent Stampin' Up! Demonstrator

Like What You See? Visit My Online Store Here
Visit My Facebook Business Page for Updates & Ideas
Contact me for more information