Showing posts with label baby card. Show all posts

Saturday, June 8, 2024

Stamping Inkspirations June Blog Hop Tic-Tac-Toe Challenge

It's time to hop along with the Stamping Inkspirations June Blog Hop and this month we have a Tic-Tac-Toe Challenge to help spark our creativity. Our Design Team will be sharing their wonderful projects and ideas to help inspire you. How does the challenge work? Well, just like in the game, you pick three boxes in a row either horizontally, vertically or diagonally, to use to create your project. There are so many different options, which means you will see a wonderful variety of projects. 
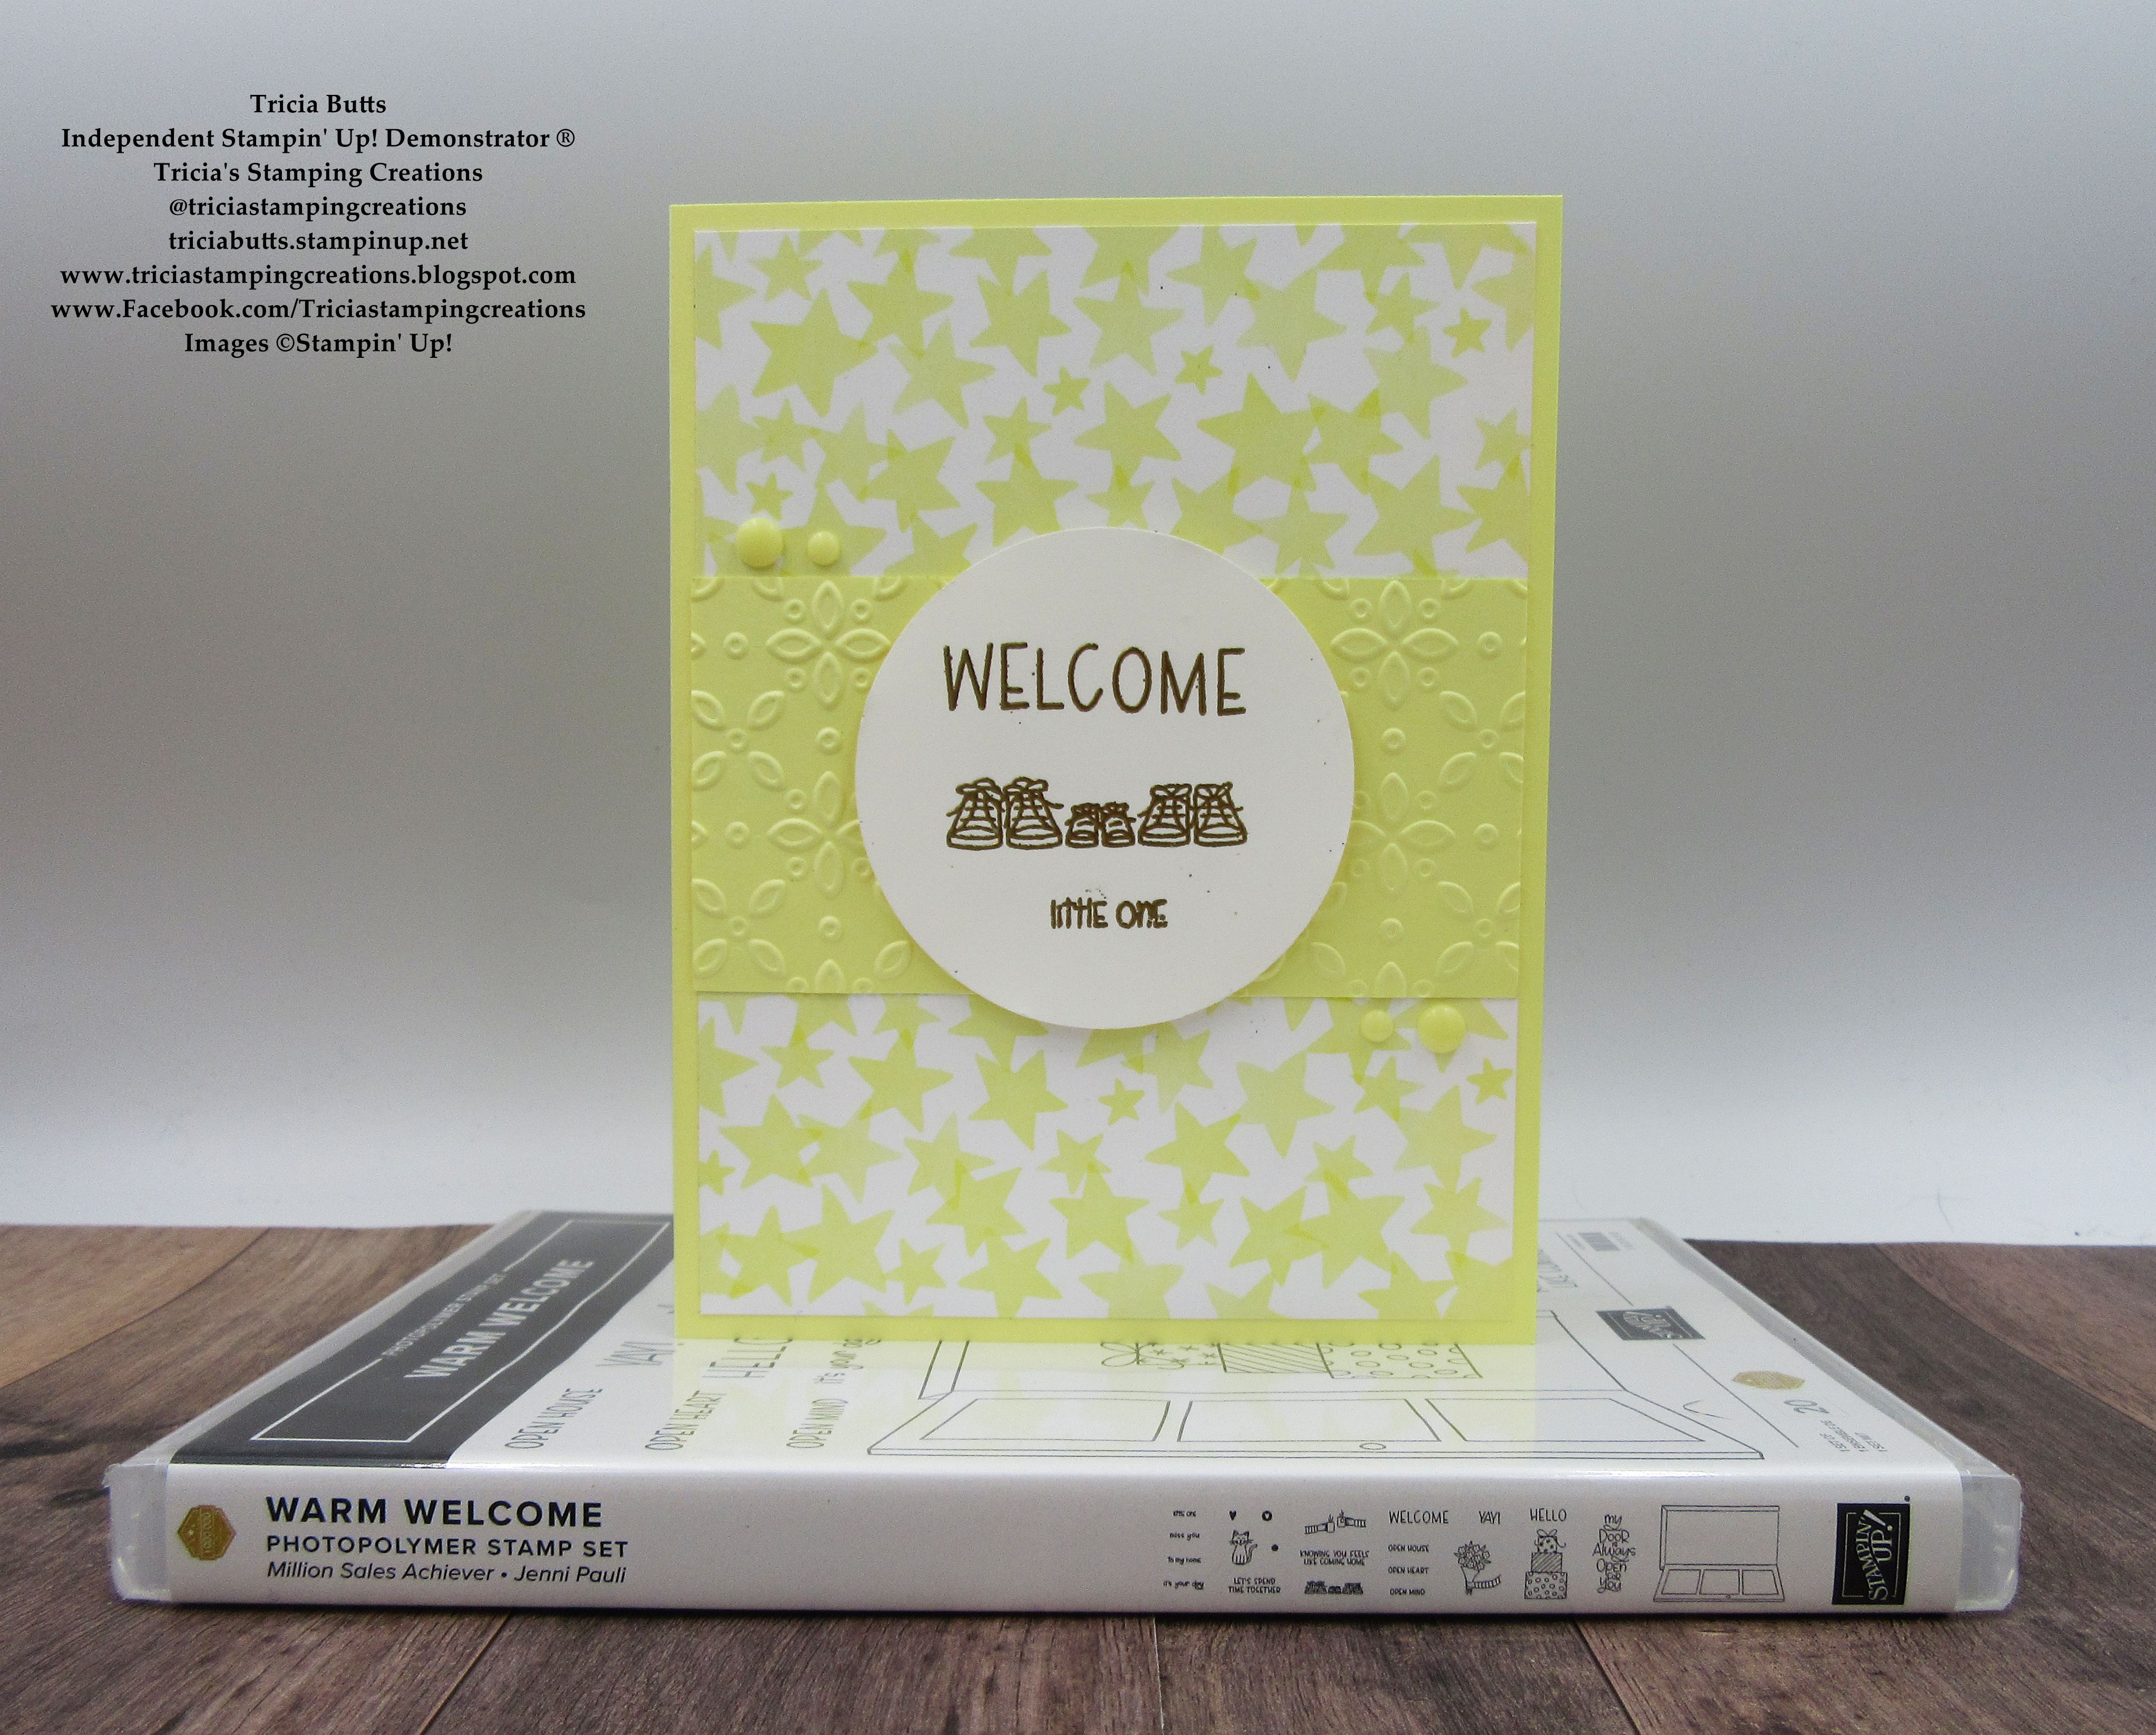
For my card, I chose to use the bottom horizontal row with stars, emboss and yellow as the elements for my design. I don't use Lemon Lolly very often, so I chose to use that as my yellow because it coordinates with one of the stars patterns in the Bright & Beautiful 6"x6" Designer Series Paper. This pretty yellow is perfect for a baby card design and I chose the Warm Welcome stamp set to create the sentiment, which I heat embossed with Gold embossing powder. I also added a little texture with the new Eyelet 3D Embossing Folder to help step up the design. I thought this design would be perfect as a non-gender specific baby card while still keeping it clean and simple. 
Products Used:
Warm Welcome stamp set (item #160698)
Eyelet 3D Embossing Folder (item #163414)
2 3/8" Circle Punch (item #161354)
Bright & Beautiful 6"x6" Designer Series Paper (item #161449)
Versamark Pad (item #102283)
Metallics Wow Embossing Powders (item #165678)
Rainbow Adhesive Backed Dots (item #162758)
Measurements:
Lemon Lolly Cardstock
Card Base - 5 1/2" x 8 1/2" (Scored at 4 1/4")
Center Strip - 2" x 4" Embossed with the Eyelet 3D Embossing Folder
Basic White Cardstock
Medium Circle punched out with the 2 3/8" Circle Punch
Bright & Beautiful Designer Series Paper
Card Front - 5 1/4" x 4"
For this card design, I chose a monochromatic color palette using just Lemon Lolly and Basic White with a little Gold embossing for a touch of elegance. I didn't want a design that was too frilly or fancy in keeping with the neutral color palette. The stars in the designer series paper were perfect for the background and I added a middle strip that I embossed with the new Eyelet 3D Embossing Folder that gives the card texture and an almost quilted look to the design. For the focal circle, I punched out a circle using the 2 3/8" Circle Punch and heat embossed the sentiments and shoes image with Gold embossing powder to help step up the design. I love that the cute little shoes signify the new addition to the family without being specific to a baby boy or baby girl. I added the focal circle to the center of the embossed strip with Stampin' Dimensionals to help pop it up. To complete the design, I added several of the Lemon Lolly Dots from the Rainbow Adhesive Backed Dots for a tone on tone look. Do you think I met the Tic-Tac-Toe Challenge requirements? Let me know what you like best about this card design. I would love to hear your thoughts.
Thank you for taking the time to visit my blog. I hope that my card design will help spark your creativity and encourage you to create your own beautiful projects using this fun challenge. There are so many great options to explore. 
Now it's time to visit Judith's blog and see what she has created with this Tic-Tac-Toe Challenge. Just click the Next button below to visit her blog or use the Roll Call List below. We would love it if you would leave us a comment and let us know what you liked about our projects. 

Roll Call List

If you live in the U.S. and do not have a Stampin' Up! Demonstrator, please contact me and I would be happy to help you with your creative projects. You may also visit my Online Store to place your order and have it shipped to you. 

Until Next Time

Happy Stamping,

Tricia Butts
Independent Stampin' Up! Demonstrator

Like What You See? Visit My Online Store Here

Visit My Facebook Business Page for Updates & Ideas

Click here to Contact Me


Save An Extra 10% On Select Bundles
Plus 10% Off Stampin' Cut & Emboss Machines
Click Below To Shop Now

Explore Your Creativity
With The New 2024-2025 Annual Catalog
Click Below To Visit My Online Store


Friday, April 19, 2024

Crafty Collaborations Monochromatic Color Challenge Week 16 - Daffodil Delight

Are you ready for this week's Crafty Collaborations Monochromatic Color Challenge? It's Week 16 and we are showcasing Daffodil Delight from the Brights Collection. This pretty yellow reminds me of sunshine and happy days so I wanted to create a fun, happy card design for this week's challenge. 
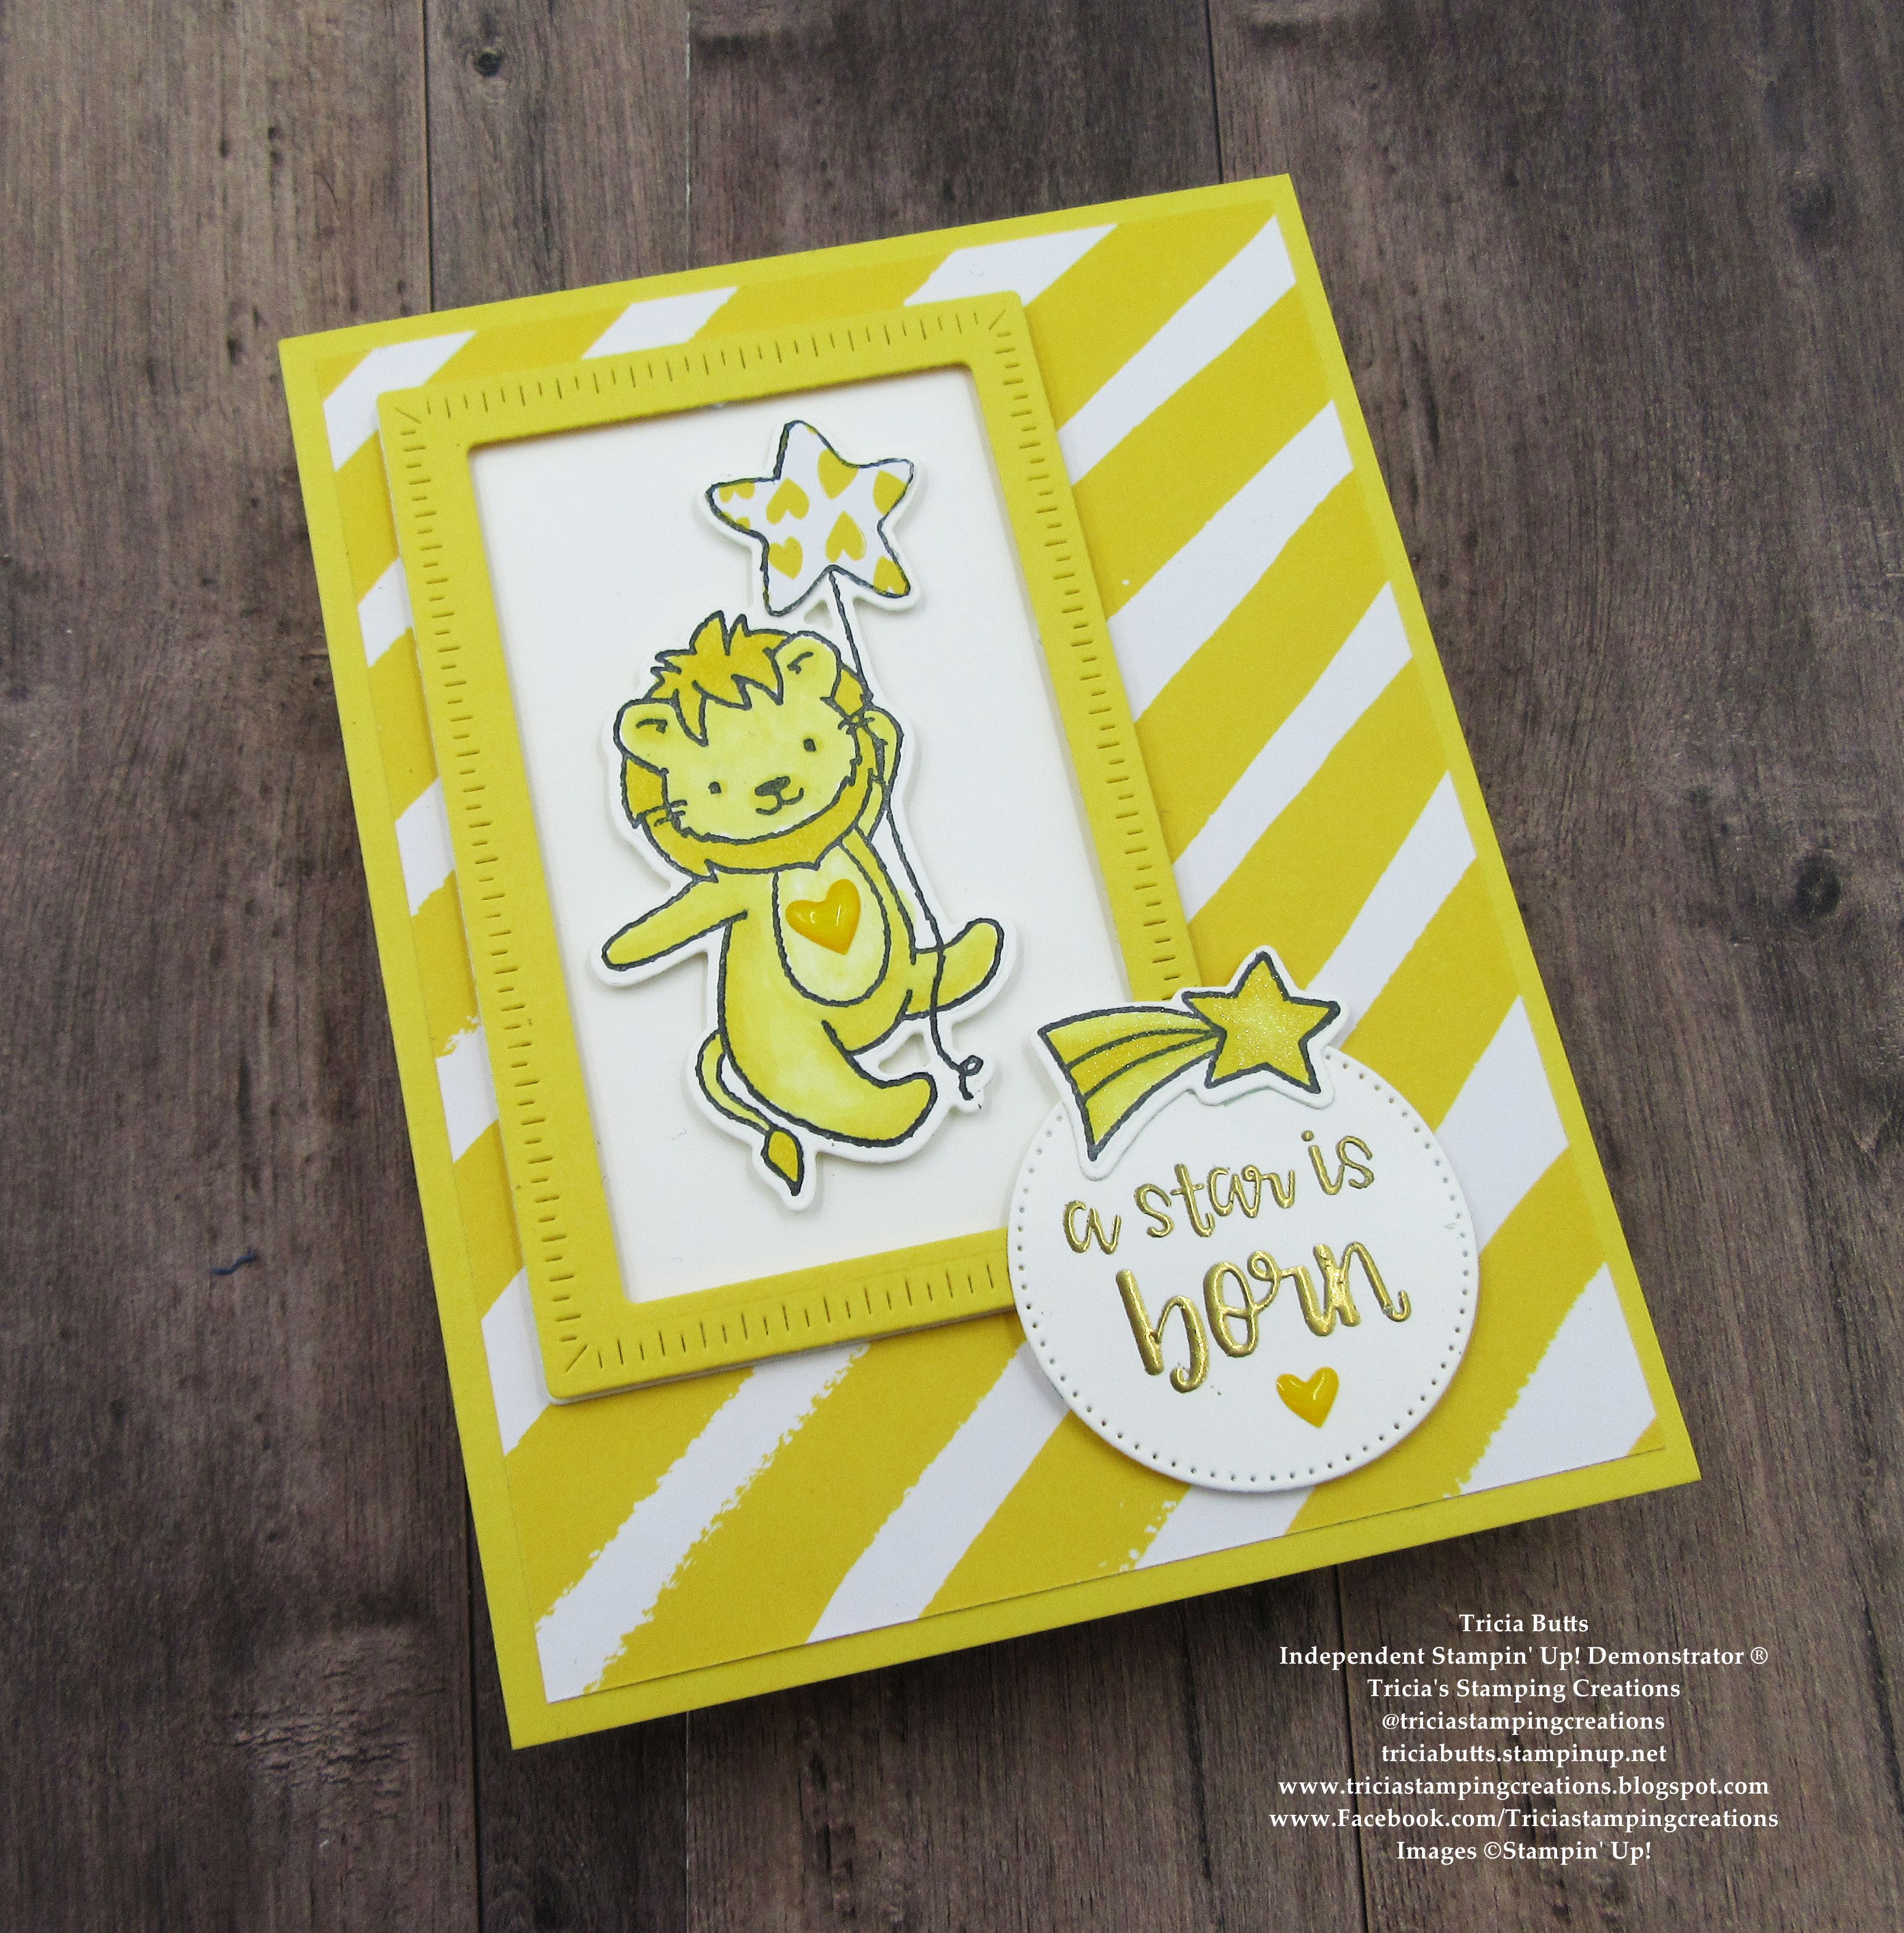
When I saw this bright, cheery color I immediately thought baby card. It may not be what everyone thinks of when they see this color but when you pair it with the Little Dreamers Bundle, it just seems like the perfect match. I chose to use the adorable lion image paired with cute stars to help celebrate a very special occasion. A little coloring with Stampin' Blends Markers, some paper piecing for the star and a designer series paper background help bring this sweet baby card to life. What's not to love?
Products Used:
Little Dreamers Bundle (item #161579) - Retiring
Radiating Stitches Dies (item #161595)
Stylish Shapes Dies (item #159183)
Brights 6"x6" Designer Series Paper (item #161643) - Retiring
Daffodil Delight Cardstock (item #119683)
Basic White Cardstock (item #159276)
Daffodil Delight Stampin' Blends Combo Pack (item #154883)
Memento Tuxedo Black Pad (item #132708)
Versamark Pad (item #102283)
Metallics Embossing Powders (item #155555) - Retiring
Clear Wink of Stella Glitter Brush (item #141897) 
Adhesive Backed Hearts & Flowers (item #162557) - Retiring
Stampin' Dimensionals (item #104430)
Measurements:
Daffodil Delight Cardstock
Card Base - 5 1/2" x 8 1/2" (Scored at 4 1/4")
Rectangle Frame die cut with the Radiating Stitches Dies
Daffodil Delight Designer Series Paper 
Card Front - 5 1/4" x 4"
Fussy cut Star image stamped with the Little Dreamers stamp set
Basic White Cardstock
Lion image stamped and die cut with the Little Dreamers Bundle 
Shooting Star image stamped and die cut with the Little Dreamers Bundle
Rectangle die cut with the Radiating Stitches Die
Sentiment Circle die cut with the Stylish Shapes Dies
For this card design, I wanted to find a balance between Basic White and Daffodil Delight to create this pretty card design. I love the striped designer series paper background that I added to the Daffodil Delight card base and I chose to create a Daffodil Delight rectangle frame using the Radiating Stitches Dies as well as the Basic White background. For the cute lion image, I stamped it with Memento Tuxedo Black ink and colored it in using both Dark and Light Daffodil Delight Stampin' Blends Markers to achieve the different shades of color. I repeated the process for the shooting star image and then die cut both the lion and shooting star images out with the coordinating Little Dreamers Dies. For the star balloon, I stamped the image onto a piece of the designer series paper with Memento Black ink and fussy cut the star out with Paper Snips and attached it on top of the star on the lion image. For the sentiment, I heat embossed the image with Gold embossing powder onto a Basic White Circle I die cut with the Stylish Shapes Dies. I attached the framed rectangle to the top left side of the card front and then added the lion image using Stampin' Dimensionals. I attached the circle sentiment label to the bottom right corner, slightly overlapping the frame, also using Stampin'  Dimensionals. To decorate the sentiment, I added the shooting star across the top and added a small Daffodil heart below the sentiment and also a larger heart on the belly of the lion. To complete the design, I colored the shooting star image with Clear Wink of Stella to give it a pretty shimmer. I just love how cute this card design turned out, Doesn't it showcase Daffodil Delight perfectly? Let me know what you think in the comments. 
Thank you for taking the time to visit my blog. I hope that my sweet baby card design will help inspire you to give Daffodil Delight a try when creating your next project. It's a perfect color for Spring and Summer projects and there are so many wonderful possibilities to explore. 
Don't forget to check out all the wonderful projects showcasing Daffodil  Delight in this week's Monochromatic Insta Hop. Just click here to get started. We would appreciate it if you would leave us a comment and let us know what you liked about our projects. I hope to see you next week for Week 17's Monochromatic Color Challenge.

If you live in the U.S. and do not have a Stampin' Up! Demonstrator, please contact me and I would be happy to help you with your creative projects. You may also visit my Online Store to place your order and have it shipped to you. 

Until Next Time

Happy Stamping,

Tricia Butts
Independent Stampin' Up! Demonstrator

Like What You See? Visit My Online Store Here

Visit My Facebook Business Page for Updates & Ideas

Click here to Contact Me


Save Up To 60% Off Select Retiring Products
During The Last Chance Product Sale
Click Below To Shop Now

Explore Your Creativity
With The Online Exclusives Products
Click Below To Visit My Online Store


Saturday, February 12, 2022

Ink. Stamp. Share. February Showcase Blog Hop

Welcome to the Ink. Stamp. Share. February Showcase Blog Hop as our Design Team Members share projects they are currently working on with Stampin' Up! products. We hope that our projects and ideas will help inspire you to get creative and create your own wonderful creations. 
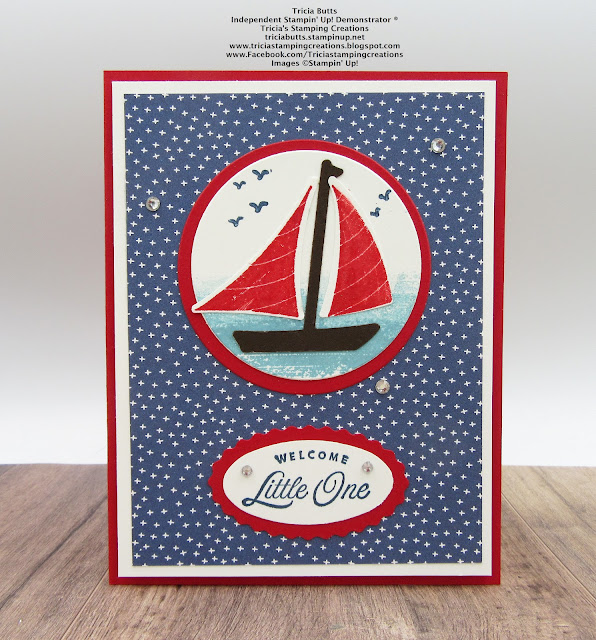
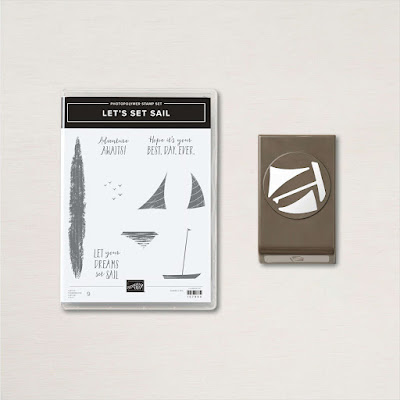
Today I am sharing a sweet Welcome Baby card that I created with the new Let's Set Sail Bundle from the January-June 2022 Mini Catalog. Often when we think of baby cards, we think of pastel colors but I wanted to create a card that was bright and bold for a baby boy. The background design was created with the Sunshine & Rainbows 6"x6" Designer Series Paper, one of the Level 1 Sale-a-Bration Rewards you can earn free with a qualifying order. I love the contrast between the Misty Moonlight background and the Real Red and Basic White. This fun card design would also work well as a Birthday or Thank You card.
Products Used:
Let's Set Sail Bundle (item #157906)
Celebrating You stamp set (item #158028)
Layering Circles Dies (item #151770)
Double Oval Punch (item #154242)
Sunshine & Rainbows 6"x6" Designer Series Paper (item #158126)
Level 1 Sale-a-Bration Reward
Real Red Cardstock (item #102482)
Basic White Cardstock (item #159276)
Early Espresso Cardstock (item #119686)
Real Red Classic Ink Pad (item #147084)
Misty Moonlight Classic Ink Pad (item #153118)
Balmy Blue Classic Ink Pad (item #147105)
Clear Wink of Stella Glitter Brush (item #141897)
Basic Rhinestone Jewels (item #144220)
Stampin' Dimensionals (item #104430)
Measurements:
Real Red Cardstock 
Card Base - 8 1/2" x 5 1/2" (Scored at 4 1/4")
Large Circle die cut with the Layering Circles Dies 
Scalloped Oval punched with the Double Oval Punch
Basic White Cardstock
Layer 1 - 5 1/4" x 4"
Focal Circle die cut with the Layering Circles Dies
Sentiment Label punched out with the Double Oval Punch
Sunshine & Rainbows Designer Series Paper
Card Front - 5" x 3 3/4"
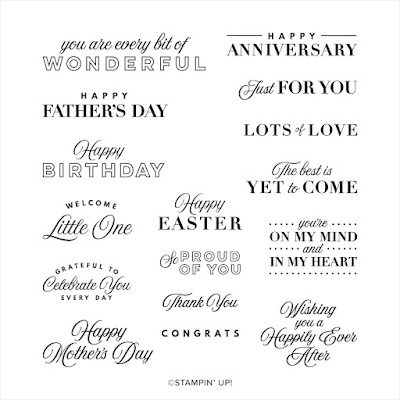
This wonderful clean and simple card was fun to create and I loved using the new Sailboat Builder Punch to create the focal image. I stamped the sails using Real Red Classic ink onto Basic White cardstock and punched it out with the punch. I punched out the boat from Early Espresso cardstock also using the punch. For the focal image, I stamped the water with the long image using Balmy Blue Classic ink, stamping several times without reinking to create layers like waves. I also stamped the birds in the sky using Misty Moonlight Classic ink. I attached the boat to the focal circle towards the center and then attached the sails on either side of the mast. I layered the focal image onto the large Real Red circle and then attached it to the center of the card front. I stamped the sentiment from the Celebrating You stamp set with Misty Moonlight Classic ink onto Basic White cardstock and punched it out with the Double Oval Punch. I layered it onto the scalloped Real Red oval that was punched out using the same punch and attached it below the focal circle. To embellish the card design, I used Clear Wink of Stella to color the sails and the waves to add some shimmer and I added some Basic Rhinestones for a touch of bling. 
Thank you for taking the time to visit my blog. I hope that my card design will help spark your creativity and encourage you to explore creating your own beautiful projects. 
Please take the time to visit with my fellow team members to see what they have been working on recently. Just click the Next or Previous links to hop along with us or use the Roll Call List below to find your way. We would love it if you would leave us a comment and let us know what you liked about our projects. I hope you enjoy our blog hop.


If you live in the U.S. and do not have a Stampin' Up! Demonstrator, please contact me and I would be happy to help you with your creative projects. You may also visit my Online Store to place your order and have it shipped to you. Remember that Sale-a-bration ends February 28th, so don't forget to take advantage of the exclusive free products you can earn with a qualifying order. 

Until Next Time

Happy Stamping,

Tricia Butts
Independent Stampin' Up! Demonstrator

Like What You See? Visit My Online Store Here

Visit My Facebook Business Page for Updates & Ideas

Click here to Contact Me

 
Time Is Running Out
To Earn Exclusive Free Sale-a-Bration Products
Click Below For More Details


Explore Your Creativity
With The January-June 2022 Mini Catalog
Click Below To Visit My Online Store

Get Creative
With The New All Together Collection
Click Below To View These Amazing New Products


Thursday, April 1, 2021

We Create April Blog Hop The Animal Kingdom


Welcome to the We Create April Blog Hop as we showcase projects with the theme "Animal Kingdom". I love animals and love creating projects featuring animals, so I am so excited about this month's theme. You will love the amazing projects that our fabulous Stampin' Up! Demonstrators have to share with you.
One of my favorite animal stamp sets from the 2020-2021 Annual Catalog is the Wildly Happy stamp set (item #149408). I just love the beautiful images and the fonts for the sentiments that help you to create wonderful baby cards. Today I paired the foxes image with one of the designs from the Forever Greenery Designer Series Paper (item #152492) to create this organic card design. This card would work well for either a boy or girl or as a way to congratulate a couple who have just announced they are pregnant and don't know the gender of the baby. 
Products Used:
Wildly Happy stamp set (item #149408) Retiring
Layering Ovals Dies (item #151771) Retiring
Classic Label Punch (item #141491) Retiring
Subtles 3 D Embossing Folder (item #151775) Retiring
Forever Greenery Designer Series Paper (item #152492) Retiring
Shaded Spruce Cardstock (item #146981)
Soft Sea Foam Cardstock (item #146988))
Basic White Cardstock (item #159276)
Shaded Spruce Classic Ink Pad (item #147088)
Memento Tuxedo Black Pad (item #132708)
Versamark Pad (item #102283)
White Embossing Powder (item #109132)
Cajun Craze Stampin' Blends Combo Pack (item #154879)
Petal Pink Stampin' Blends Combo Pack (item #154893)
Soft Sea Foam Stampin' Blends Combo Pack (item #154902)
Basic Rhinestone Jewels (item #144220)
Stampin' Dimensionals (item #104430)
Measurements:
Shaded Spruce Cardstock
Card Base 8 1/2" x 5 1/2" (Scored at 4 1/4")
Matte Layer - 3 1/4" x 5 1/4"
Scalloped Ovals die cut with Layering Ovals Dies
Sentiment Label punched with the Classic Label Punch
Soft Sea Foam Cardstock
Background Layer - 5 1/4" x 4" Embossed with the Subtle 3D Embossing Folder
Basic White Cardstock
Ovals die cut with Layering Ovals Dies
This card is simple to create and is really all about layers. The different layers of paper and color help to add texture and dimension to the design without adding a lot of bulk. I combined the Cajun Craze and Petal Pink Stampin' Blends Markers to create areas of light and shade when coloring the stamped image. I used the Light Soft Sea Foam Stampin' Blends Marker to add a shadow around the foxes. For the sentiment, I heat embossed the For You image onto a scrap of Shaded Spruce cardstock and used the Classic Label Punch to punch it out. I layered it onto the oval sentiment and I love the contrast between the Basic White and Shaded Spruce labels. As you may have noticed, I used a lot of products that are retiring from the 2020-2021 Annual Catalog to create this card design. So many of these products are favorites of mine and I love using them to create my card designs and I will be sorry to see them go. 
Thank you for taking the time to visit my blog. I hop that my card design will help inspire you to explore this wonderful theme and all the amazing animals products that Stampin' Up! has to offer. I love the way that Stampin' Up!'s products coordinate to help create beautiful cards without the stress. 
Now it's time to visit Jeanna's wonderful blog to see what she has to share with us this month. Just click the Next button below to visit her blog. I hope you enjoy the rest of our blog hop. Please leave us a comment and let us know what you liked about our projects. 

If you live in the U.S. and do not have a Stampin' Up! Demonstrator, please contact me and I would be happy to help you with your creative projects. You may also visit my Online Store to place your order and have it shipped to you. Remember to take advantage of the Last Chance Product Sale and stock up on your favorite retiring products before they disappear. 

Until Next Time

Happy Stamping,

Tricia Butts
Independent Stampin' Up! Demonstrator

Like What You See? Visit My Online Store Here

Visit My Facebook Business Page for Updates & Ideas

Click here to Contact Me


Available While Supplies Last!
The Last Chance Product Sale Is Happening Now
Click Below To Shop For Retiring Products Before They Disappear


Enjoy Some Creative Family Fun
With The April So Cool Paper Pumpkin Kit
Click Below To Subscribe By April 10th
\
Celebrate Spring
With The January-June 2021 Mini Catalog
Click Below To Shop For Your Favorite Products


Friday, June 14, 2019

SBTD Something Old & Something New Blog Hop

Welcome to the SBTD Something Old & Something New Blog Hop. This month we are sharing ideas and projects to help you pair up new products from the new 2019-2020 Annual Catalog with old favorites that have carried over from past catalogs. 
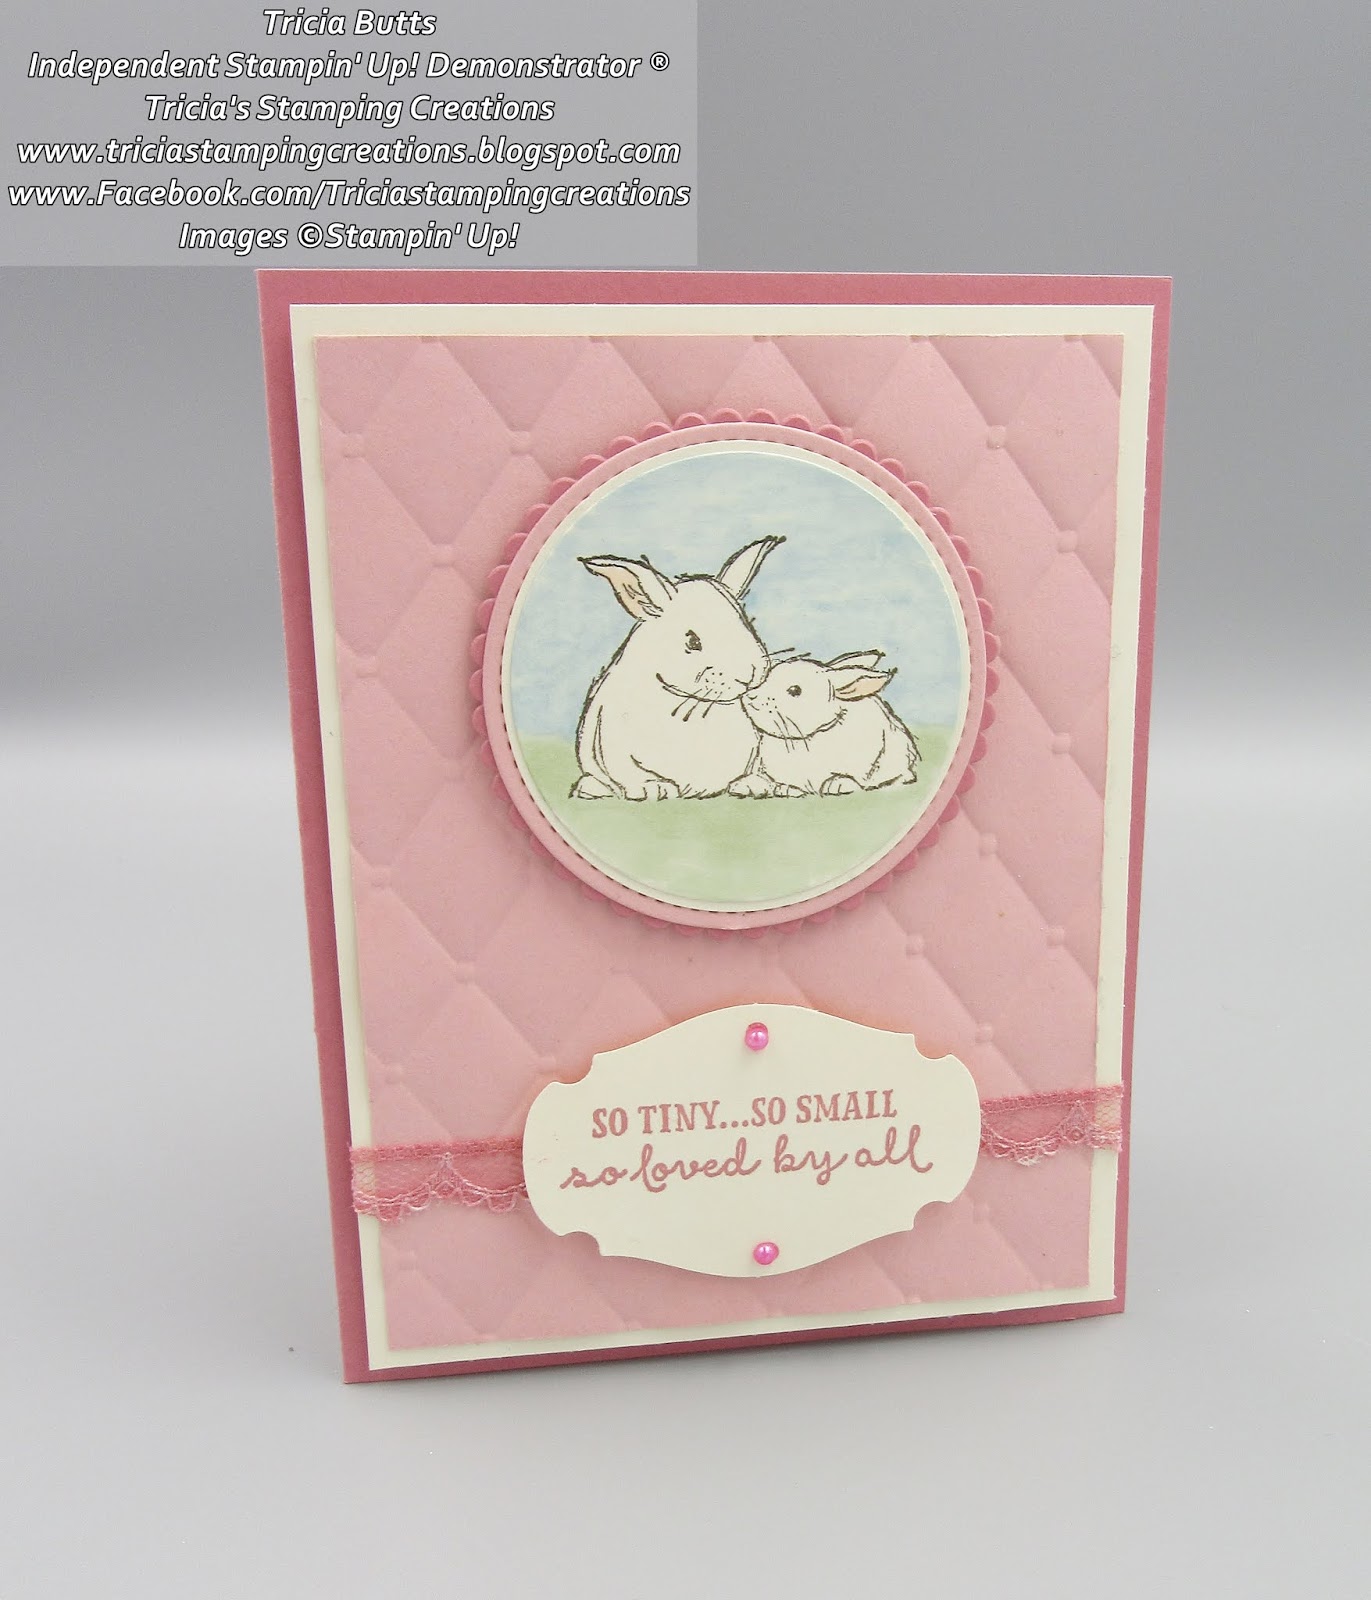
 My card design today features the new Wildly Happy Cling stamp set (item #149408) paired with the Layering Circles Dies (item #141705) and Stitched Shapes Dies (item #152323) from the 2019-2020 Annual Catalog. I thought it would be fun to pair a new stamp set with some old favorite die sets.
 My card base was created from Rococo Rose cardstock, one of the new 2019-2021 In Colors. It works beautifully with Very Vanilla and Blushing Bride cardstock. I embossed the layer of Blushing Bride cardstock using the Tufted 3D Embossing Folder to create a quilted look to the background. 
The bunnies image has been stamped onto a Very Vanilla cardstock circle die cut using the dies from the Layering Circles Dies. I stamped the image with Early Espresso Classic ink and colored the background and inside of the ears using the Stampin' Blends Markers. I layered the colored image onto a circle of Very Vanilla cardstock that I punched out using the 2 1/4" Circle Punch and then layered it onto a circle die cut from Blushing Bride cardstock using the Stitched Shapes Dies. The last layer was created from Rococo Rose cardstock using one of the Scalloped Circle dies from the Layering Circles Dies. I attached the image to the card front with Stampin' Dimensionals. 
The sentiment was stamped with Rococo Rose Classic ink onto a scrap of Very Vanilla cardstock and punched out using the Story Label Punch. Using the Rococo Rose Light Stampin' Blend Marker,  I colored a piece of the Very Vanilla Lace Trim and attached it to the card front. I attached the sentiment label on top of the lace using Stampin' Dimensionals. To embellish the sentiment, I colored two of the smallest Basic Pearls with the Rococo Rose Light Stampin' Blends Marker and attached them to the label. 

I love the soft and pretty look to this card design and I think it makes a wonderful baby card for a little girl. By changing the colors for this card, you could create a card design suitable for a baby boy or keep it neutral so that it isn't gender specific. 
Thank you for taking the time to visit my blog today and I hope that my card design helps inspire you to mix and match your old favorites with some new products from the 2019-2020 Annual Catalog. If you live in the U.S. and do not already have a demonstrator, please contact me and I would be happy to help you.

Now it's time to visit Courtenay's blog and see what she has to share with us this month. Just click the Next button below to visit her blog. I hope that you will take the time to hop along our blog hop this month and we would appreciate you leaving us a comment. 

Until Next Time
Happy Stamping,


Tricia Butts
Independent Stampin' Up! Demonstrator
Like What You See? Visit My Online Store Here
Visit My Facebook Business Page for Updates & Ideas