
Welcome to the New At SU November Blog Hop as we showcase Gift Card Holder ideas to help inspire you. Our Design Team members will be sharing their ideas and projects to help spark your creativity and help you create your own beautiful gift card holders to give to family and friends.

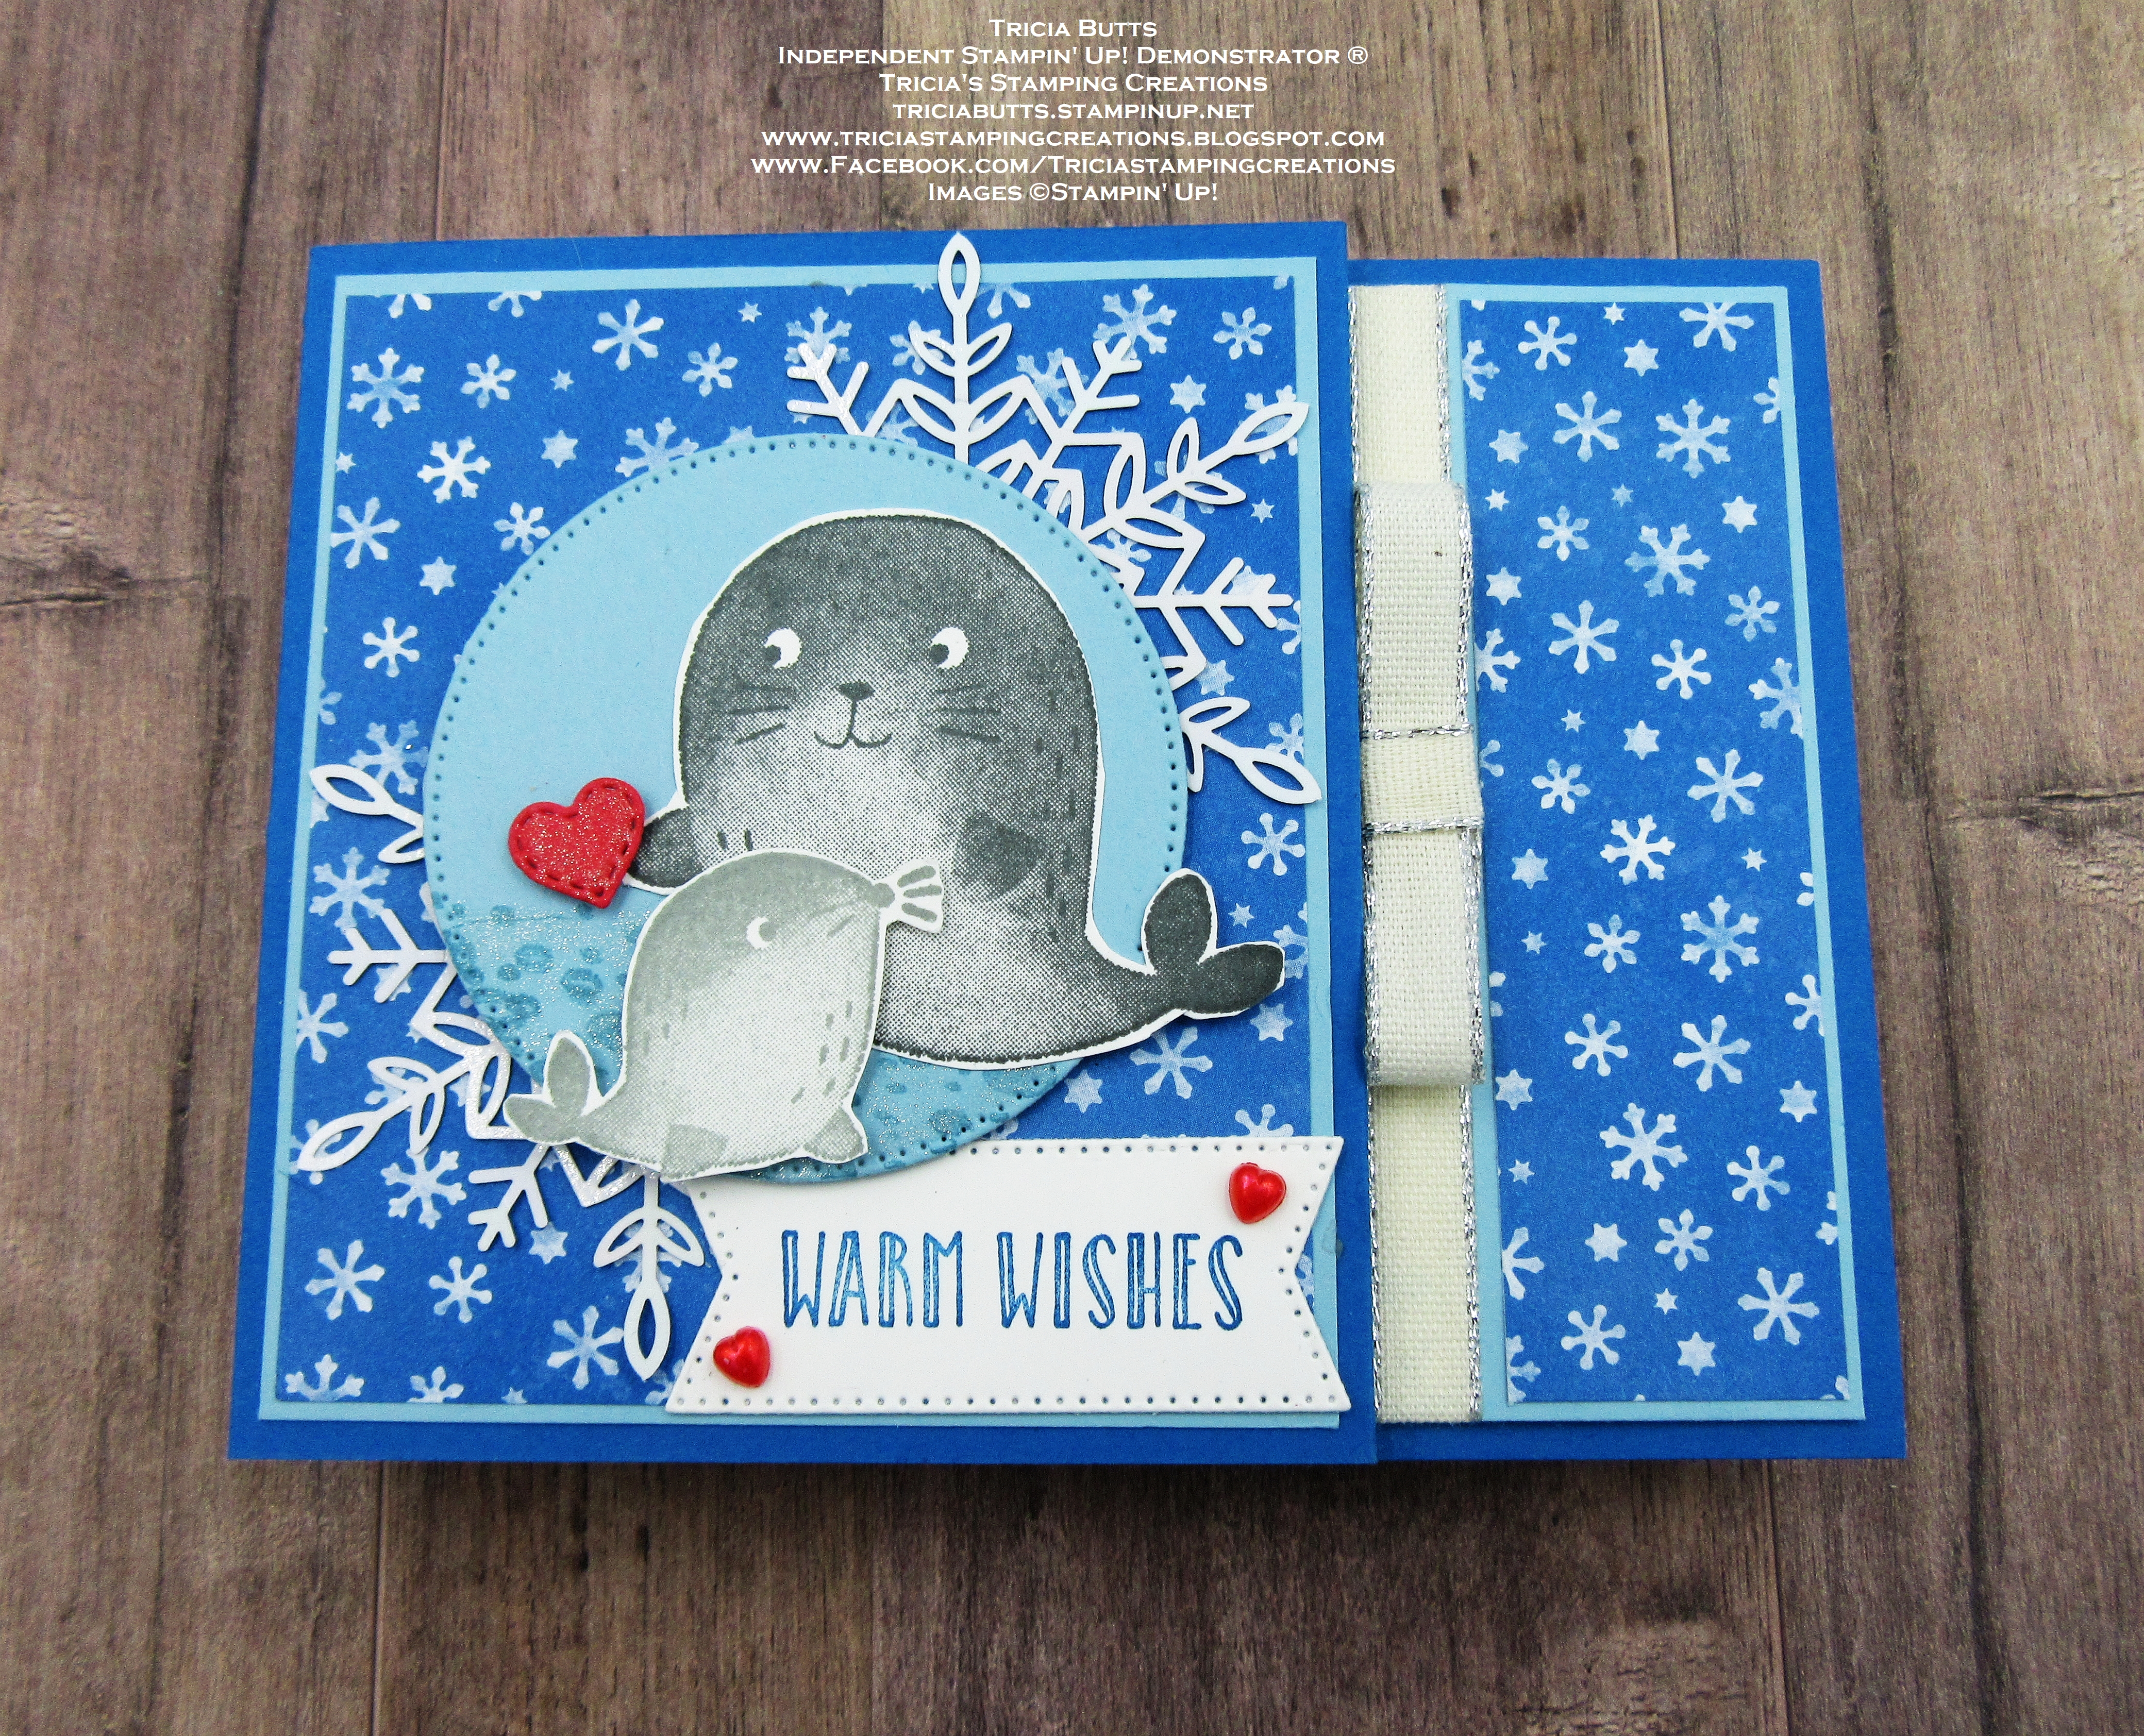
For my Gift Card Holder, I chose to create a simple design that is easy to duplicate. With the holidays approaching quickly, it helps to have a supply on hand in case you need a last minute gift for someone special. For my card design, I chose to use the cute Seal of Approval stamp set and paired it with one of the designs from the Storybook Gnomes Designer Series Paper. This Wintery themed card design would work well as a birthday card as well as for Christmas.

Products Used:
Seal of Approval stamp set (item #159762)
Stylish Shapes Dies (item #159183)
Give It A Whirl Dies (item #154336)
Essential Tag Punch (item #153607)
Storybook Gnomes Designer Series Paper (item #159615)
Pacific Point Cardstock (item #111350)
Balmy Blue Cardstock (item #146982)
Sweet Sorbet Cardstock (item #159268)
Basic White Cardstock (item #159276)
Balmy Blue Classic Ink Pad (item #147105)
Pacific Point Classic Ink Pad (item #147098)
Smoky Slate Classic Ink Pad (item #147113)
Basic Gray Classic Ink Pad (item #149165)
Sweet Sorbet Stampin' Blends Combo Pack (item #159224)
Clear Wink of Stella Glitter Brush (item #141897)
Wonderful Snowflakes (item #156340)
Silver 3/8" Metallic Edge Cotton Ribbon (item #159193)
Heart Pearls (item #159190)
Mini Stampin' Dimensionals (item #144108)
Mini Glue Dots (item #103683)
Tear & Tape Adhesive (item #154031)

Measurements:
Pacific Point Cardstock
Card Base - 4 1/4" x 11" (Scored at 5 1/2" & 9 1/4")
Balmy Blue Cardstock
Front Layer - 3 1/2" x 4"
Side Layer - 1 1/4" x 4"
Medium Circle die cut with the Stylish Shapes Dies
Storybook Gnomes Designer Series Paper
Front Layer - 3 3/8" x 3 7/8"
Side Layer - 1 1/8" x 4"
Front Inside Flap Layer - 1 1/2" x 4"
Basic White Cardstock
Back Inside Layer - 5 1/4" x 4"
Front Inside Layer - 3 1/2" x 4"
Sentiment Layer die cut with the Stylish Shapes Dies
Small seal & large seal, fussy cut with Paper Snips
Sweet Sorbet Cardstock
Small Heart die cut with the Give It A Whirl Dies


Thank you for taking the time to visit my blog. I hope that my gift card holder will inspire you to create your own wonderful projects, whether it's for the upcoming holidays or another special occasion.

Please take the time to visit with my fellow Design Team members and see the wonderful projects they have to share on their blogs. Click on the links in the Roll Call List below to find your way and we would appreciate it if you would leave us a comment and let us know what you liked about our projects.

If you live in
the U.S. and do not have a Stampin' Up! Demonstrator, please contact me and I
would be happy to help you with your creative projects. You may also visit my
Online Store to place your order and have it shipped to you.
Until Next
Time
Happy
Stamping,
Tricia Butts
Independent Stampin' Up! Demonstrator
Like What You
See? Visit My Online Store Here
Visit My Facebook Business Page for Updates & Ideas
Click here to Contact Me
Save Up to 20% On Select Products
In The 2022-2023 Annual Catalog
Click Below To Visit My Online Store

Get Creative For The Holidays
With The July-December 2022 Mini Catalog
Click Below To Visit My Online Store

I like the way this is a card and has a secret panel
ReplyDeleteThis is adorable, Tricia! Thanks for sharing this!💕
ReplyDelete