
It's time to hop along with the Stamping Inkspirations April Blog Hop as we showcase beautiful fun fold card designs to help inspire you. Our wonderful Design Team Members will be sharing their amazing projects and ideas to help you step outside your comfort zone and take your cards to the next level.

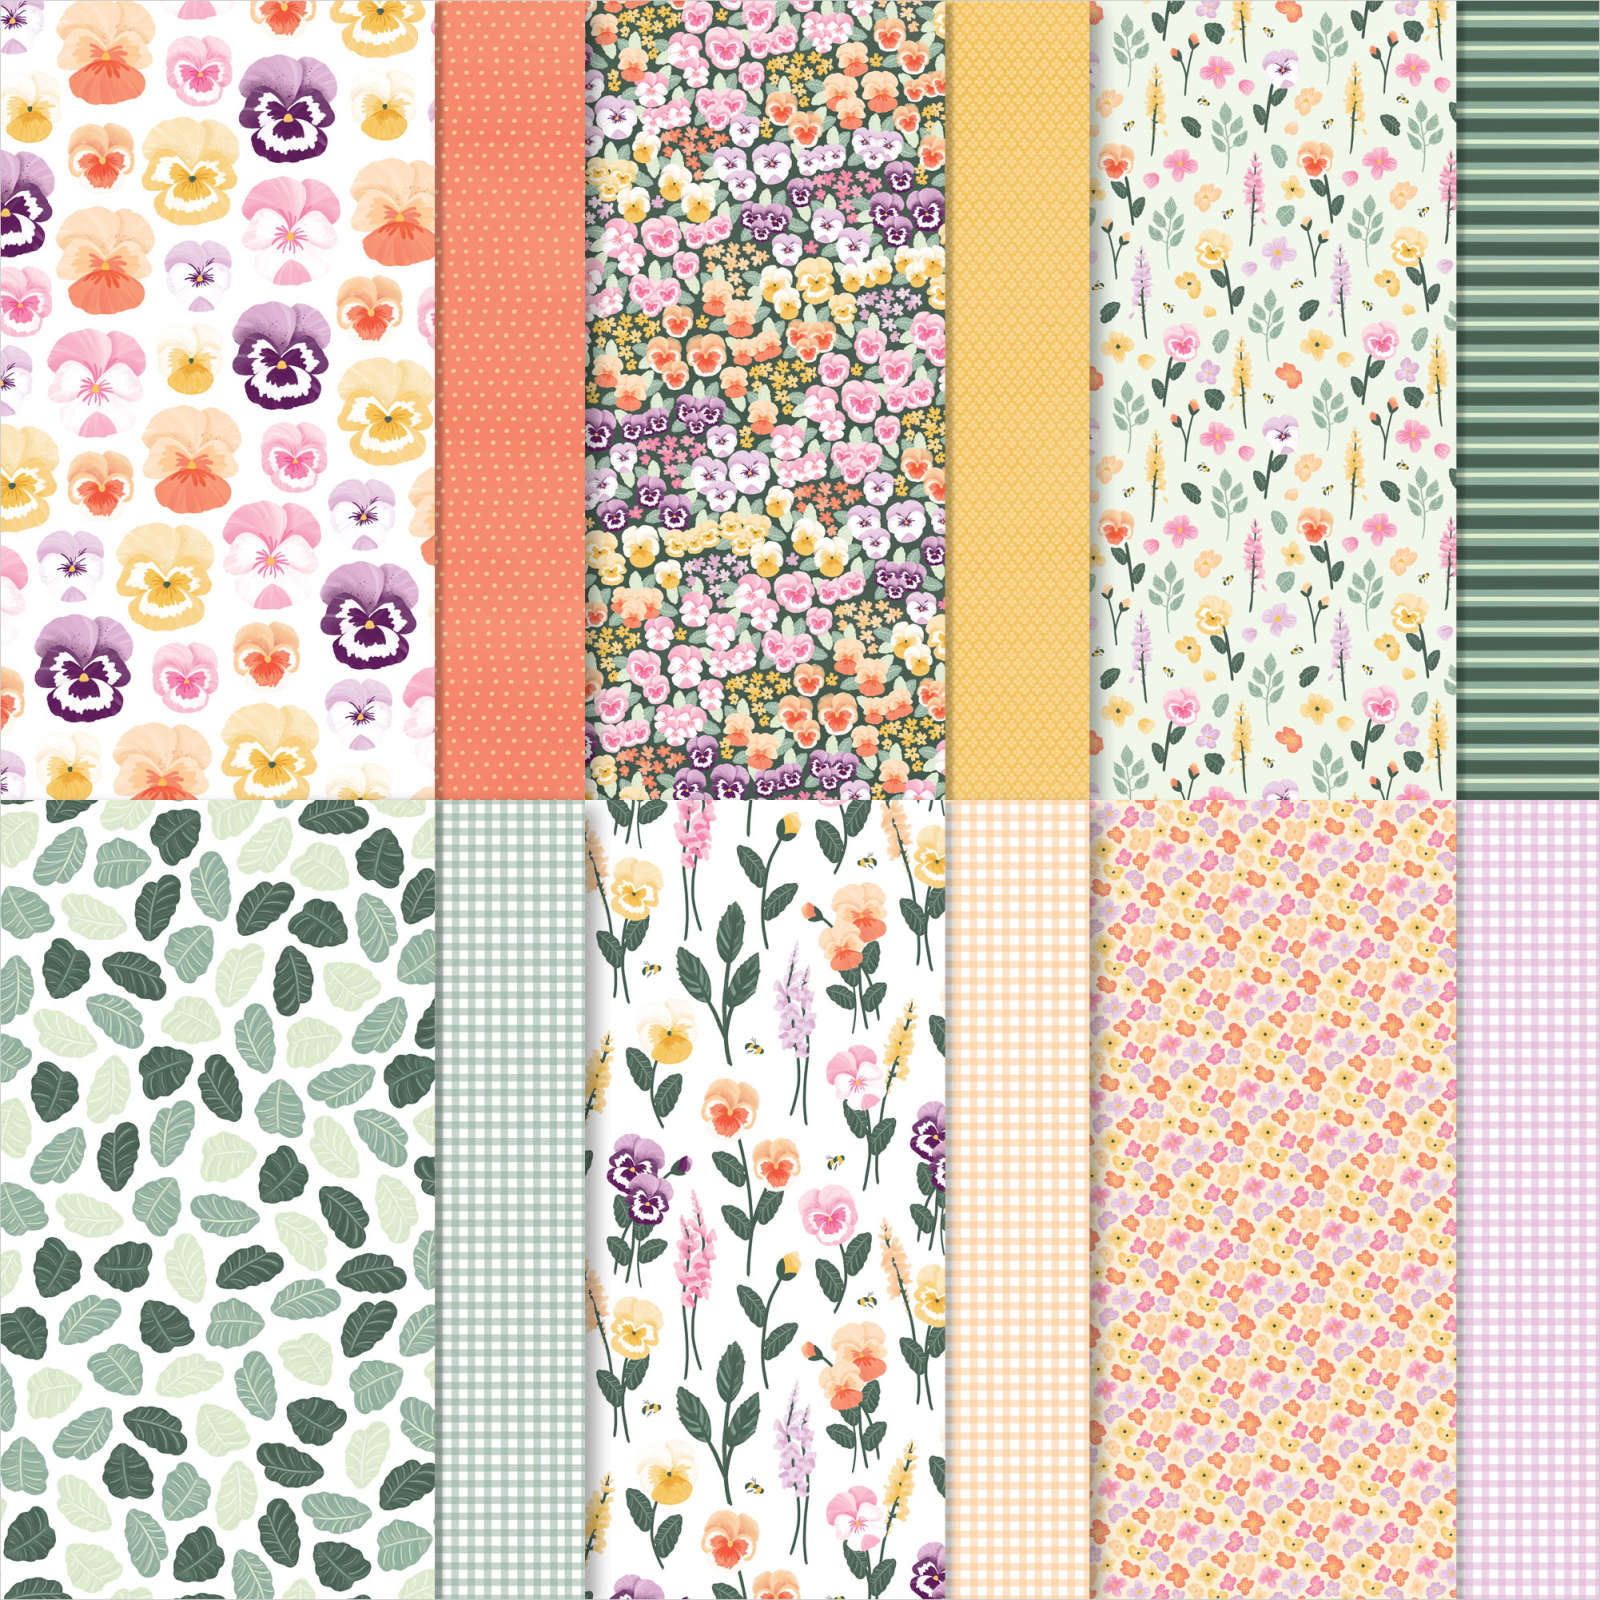
With Easter coming up soon, I thought I would create a simple fun fold to celebrate the occasion. For this card design I chose the Easter Friends stamp set with its wonderful images and sentiments and paired it with the pretty Pansy Petals Designer Series Paper. Isn't the bunny in this stamp set simply adorable? This simple fun fold is easy to create and is a wonderful way to step up a standard card base.

Products Used:
Easter Friends stamp set (item #157737)
Pansy Dies 155680)
Tasteful Labels Dies (item #152886) Retiring
Stitched So Sweetly Dies (item #151690) Retiring
Pansy Petals Designer Series Paper (item #155807) Retiring
Fresh Freesia Cardstock (item #155613)
Basic White Cardstock (item #159276)
Cinnamon Cider Classic Ink Pad (item #153114) Retiring
Soft Sea Foam Classic Ink Pad (item #147102)
Versamark Pad (item #102283)
Metallics Embossing Powders (item #155555)
Brushed Brass Butterflies (item #158136)
Stampin' Dimensionals (item #104430)
Blender Pens (item #102845)

Measurements:
Fresh Freesia Cardstock
Card Base - 5 1/2" x 7 1/2" (Scored at 4 1/4")
Pansy Petals Designer Series Paper
Card Front - 3" x 5 1/4" Side Strip - 1" x 5 1/4"
Two pansies die cut with the Pansy Dies
Basic White Cardstock
Focal Label die cut with the Stitched So Sweetly Dies
Sentiment Label die cut with the Tasteful Labels Dies

This cute fun fold is simple to create using a standard size card base (5 1/2" x 8 1/2") by simply cutting off 1" from the card front so that the base measures 7 1/2" x 5 1/2". You will still score the card base at 4 1/4" to create your fun fold. For the card front, I cut a 5 1/4" x 4" piece of the Pansy Petal Designer Series Paper and then cut a 1" strip off of one side to create two pieces measuring 3" x 5 1/4" and 1" x 51/4". I attached the larger piece to the card front and flipped the strip over so that the reverse side faces up. I attached the strip to the inside Basic White layer along the right side and then attached this layer to the inside of the card base. This way when the card is closed, you have that wonderful contrast between the two designs. For the bunny, I stamped it with Cinnamon Cider Classic ink onto the scalloped rectangle layer and used a Blender Pen to soften and lightly color the image. The Blender Pen helps to reactivate the ink to add that soft color to the image. For the grass, I used Soft Sea Foam Classic ink along the bottom to help ground the image and once again softened it with the Blender Pen. For the sentiment, I heat embossed the image with Gold embossing powder onto the sentiment label. To assemble the card front, I attached both the focal image and the sentiment label with Stampin' Dimensionals. I attached the two die cut pansies (from the designer series paper) to decorate the panels. To finish off the card design, I added several Brushed Brass Butterflies for a touch of bling.
Thank you for taking the time to visit my blog. I hope that my fun fold card design will help inspire you to create your own beautiful cards and explore the variety of fun fold designs available. There are so many wonderful options to try.

Now it's time to visit Aurélie's wonderful blog to see what she has created for us. Just click the Next button below to visit her blog or use the Roll Call List to find your way. We would appreciate it if you would leave us a comment and let us know what you liked about our projects. I hope you enjoy the rest of our blog hop.
Roll Call List
Angie McKenzie ● Tricia Butts ● Aurélie Fabre
Karen Egan ● Teri West ● Gez Carpenter
Susan Webster ● Rochelle Laird-Smith ● Sue Allen
Jill Chapman ● Leonie Stuart ● Karen Henderson
Mo Rootes ● Rebecca-Jo Unwin ● Danielle Kassing

If you live in
the U.S. and do not have a Stampin' Up! Demonstrator, please contact me and I
would be happy to help you with your creative projects. You may also visit my
Online Store to place your order and have it shipped to you.

Until Next
Time
Happy
Stamping,
Tricia Butts
Independent Stampin' Up!
Demonstrator
Like What You
See? Visit My Online Store Here
Visit My Facebook Business Page for Updates & Ideas
Click here to Contact Me
Stock Up On Your Favorite Retiring Products
Before They Disappear
Click Below To Visit My Online Store
Before They Disappear
Click Below To Visit My Online Store

Final Days To Sign Up
For The April Paper Pumpkin Kit
Click Here To Subscribe By April 10th

Love how this fold allows for coordinating papers to be showcased.
ReplyDeleteCute card! Love the bunny!
ReplyDeleteThis fun fold is perfect for this adorable bunny image, Tricia. So so cute. Thanks for sharing!💕
ReplyDeleteSuper cute Tricia, love this set
ReplyDeleteVery cute Tricia x
ReplyDeleteThat bunny is adorable. The papers really shine as part of this fun fold card!
ReplyDeletepretty card ! xx
ReplyDeleteCute card Tricia, Thanks for sharing.
ReplyDelete