
Welcome to the 3D Paper Trimmer June Blog Hop with our theme "Box It Up". You will be visiting with talented Stampin' Up! Demonstrators from around the world as they share their projects and ideas to help inspire you to create your own fun 3D projects.


Christmas Trimmings Dies (item #155561) New
Nothing's Better Than stamp set (item #152507)
Tailor Made Tags Dies (item #155563) New
Regals 6"x6" Designer Series Paper (item #155227) New
Misty Moonlight Cardstock (item #153081)
Real Red Cardstock (item #102482)
Basic White Cardstock (item #159276)
Versamark Pad (item #102283)
Metallics Embossing Powders (item #155555) New
Basic Rhinestone Jewels (item #144220)
Stampin' Dimensionals (item #104430)
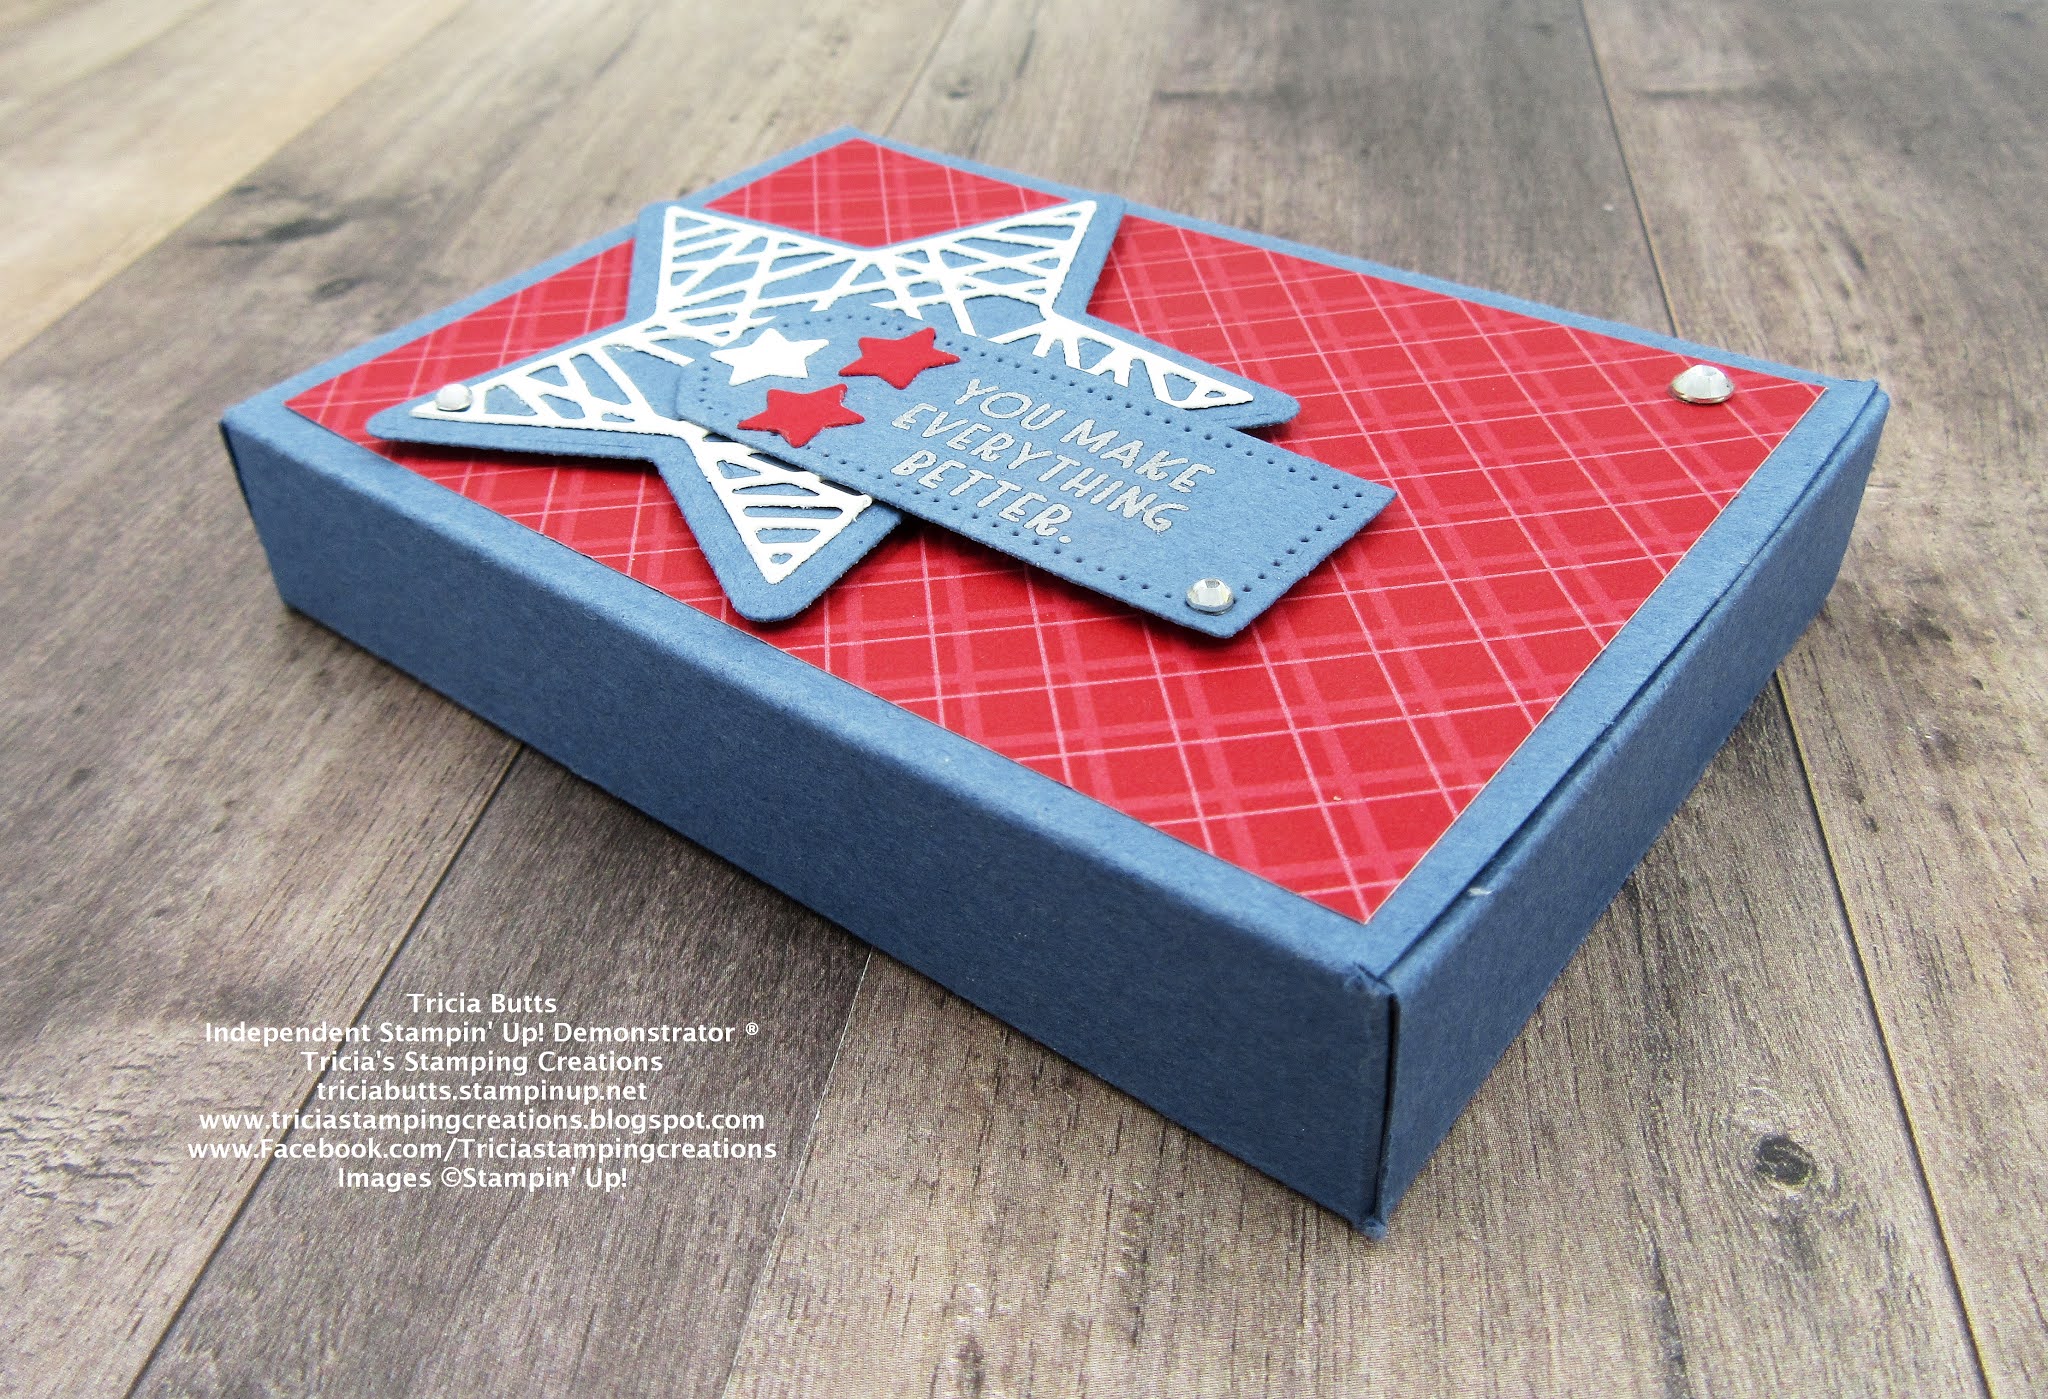
Misty Moonlight
Treat Box - 6 1/4" x 8" (Box size 4 1/4" x 3" x 3/4")
Large Star Die cut with Christmas Trimmings Dies
Sentiment Tag die cut with Tailor Made Tags Dies
Real Red Designer Series Paper
Background Layer - 4" x 2 3/4"
Basic White Cardstock
Detailed Star die cut with Christmas Trimmings Dies
One small star die cut with Christmas Trimmings Dies
Real Red Cardstock
Two small stars die cut with Christmas Trimmings Dies


Thank you for taking the time to visit my blog. I hope that my treat box will help inspire you to create your own fun 3D projects to share with family and friends. They are a great way to brighten someone's day.


If you live in the U.S. and do not have a Stampin' Up! Demonstrator, please contact me and I would be happy to help you with your creative projects. You may also visit my Online store to place your order.

Until Next
Time
Happy
Stamping,
Tricia Butts
Independent Stampin' Up!
Demonstrator
Like What You
See? Visit My Online Store Here
Visit My Facebook Business Page for Updates & Ideas
Click here to Contact Me
Final Days To Stock Up On Your Favorite
Retiring Products From The January-June 2021 Mini Catalog
Click Below To Visit My Online Store

Enjoy A Creative Adventure
With The July Paper Pumpkin Kit
Click Below To Subscribe By July 10th

Explore Your Creativity
With The Kits Collection
Click Below To Visit My Online Store

Love this box Tricia, I have my eye on that Christmas set, great to see it being used for more than just Christmas :-)
ReplyDelete