Showing posts with label anniversary card. Show all posts

Wednesday, August 14, 2024

ICS August Blog Hop Happy Anniversary


Welcome to our very special ICS August Blog Hop as we celebrate our 10 year anniversary. I was honored to be invited to join this amazing Design Team over 5 years ago and I have loved every minute of this creative journey with such talented Stampin' Up! Demonstrators. To help celebrate this occasion, we will be sharing our projects and ideas with the theme of anniversary to help inspire you. 
Anniversary cards celebrate a special event, so I thought I would create an elegant clean and simple card design using the new Changing Leaves Hybrid Embossing Folder from the Online Exclusives. I love how the embossing folder and coordinating dies work together to add wonderful detail. For my color palette, I chose to use the new 2024-2026 In Color, Summer Splash, paired with Pool Party and Gold accents. For the sentiment, I heat embossed the image from the Sweetly Scripted stamp set, also from the Online Exclusives, to finish off this beautiful card design. 
Products Used:
Sweetly Scripted stamp set (item #163600)
Changing Leaves Hybrid Embossing Folder (item #164138)
Summer Splash Cardstock (item #163797)
Pool Party Cardstock (item #122924)
Gold Foil Sheets (item #132622)
Versamark Pad (item #102283)
Metallics Wow Embossing Powders (item #165678)
Blooming Pearls (item #162238)
Mini Stampin' Dimensionals (item #144108)
Measurements:
Summer Splash Cardstock
Card Base - 5 1/2" x 8 1/2" (Scored at 4 1/4")
Sentiment Strip - 3/4" x 5 1/4"
Pool Party Cardstock
Card Front - 5 3/8" x 4 1/8" Embossed with the Changing Leaves Hybrid Embossing Folder
Gold Foil Sheets
Detailed Gold Leaves die cut with the Changing Leaves Hybrid Embossing Folder Dies
This simply beautiful card focuses on the wonderful texture created by the Changing Leaves Hybrid Embossing Folder combined with the exquisitely detailed Gold foil leaves created with the coordinating dies. I love the way the Pool Party card front pops against the Summer Splash card base. I chose Gold embossing for the sentiment on the Summer Splash sentiment strip to coordinate with the Gold leaves and added several Gold pearls to complete the design.
Thank you for taking the time to visit my blog. I hope that my card design will help inspire you to create your own beautiful projects to celebrate the special milestone events in your life. 
Now it's time to visit Charmane's blog and see what she has created to celebrate our 10 year anniversary. Just click on the Next button to visit her blog. We would love it if you would leave us a comment and let us know what you like about our projects. I hope you enjoy the rest of our blog hop.


If you live in the U.S. and do not have a Stampin' Up! Demonstrator, please contact me and I would be happy to help you with your creative projects. You may also visit my Online Store to place your order and have it shipped to you. 

Until Next Time

Happy Stamping,

Tricia Butts
Independent Stampin' Up! Demonstrator

Like What You See? Visit My Online Store Here

Visit My Facebook Business Page for Updates & Ideas

Click here to Contact Me


Saturday, August 6, 2022

Stamping With Friends Masking Technique Blog Hop

Welcome to the Stamping With Friends Masking Technique Blog Hop as our Design Team members showcase projects using a variety of masking techniques. Masking is a wonderful way to help take your projects to the next level. 
For my card design today, I chose to create a vintage style Anniversary card using the Wonderful World stamp set from the Wonderful World Bundle, which is an exclusive Sale-a-bration product you can earn free with a qualifying order. I love the images in this stamp set and I thought they would be perfect for the design for my masking technique. I also chose to use the new Masking Paper that Stampin' Up! released in the 2022-2023 Annual Catalog and I love how the repositionable adhesive on the back of the paper, makes it simple to place the mask in place and not have to worry about it moving while applying ink with the blending brushes or when stamping the images. This soft and pretty card design would also work well as a special birthday card or even a sympathy card. 
Products Used:
Wonderful World Bundle (item #159918) Sale-a-bration Reward
Celebrating You stamp set (item #158028)
Stitched Rectangles Dies (item #151820)
Crumb Cake Cardstock (item #120953)
Very Vanilla Cardstock (item #101650)
Gold & Rose Gold 6"x6" Metallic Specialty Paper
Stampin' Up! Masking Paper 5" x7" (item #155480)
Crumb Cake Classic Ink Pad (item #147116)
Blushing Bride Classic Ink Pad (item #147100)
Polished Pink Classic Ink Pad (item #155712)
Versamark Pad (item #102283)
Metallics Embossing Powders (item #155555)
Blending Brushes (item #153611)
Brushed Brass Butterflies (item #158136)
Stampin' Dimensionals (item #10443
Measurements:
Crumb Cake Cardstock
Card Base - 8 1/2" x 5 1/2" (Scored at 4 1/4")
Sentiment Label die cut with the Stitched Rectangles Dies
Very Vanilla Cardstock 
Card Front - 5 1/4" x 4"
Inside Layer - 5 1/4" x 4"
Masking Paper
5 1/4" x 4" - Torn into 2 long narrow pieces
Gold Metallic Specialty Paper
2 Strips - 1/4" x 4"
2 Strips - 3/8" x 4"
This vintage card design has a wonderful old world feel to it and I love that the masked area looks like aged vintage wallpaper. To create the look, I torn the piece of Masking Paper into two pieces (down the middle of the 4" side) and placed the torn edges towards the center of the Very Vanilla cardstock, leaving a large panel in the center. I then added color to the exposed panel with Blending Brushes, starting with Blushing Bride, then adding a small amount of Polished Pink around the edges and finally using Crumb Cake ink to tone down the brightness of the pinks and add an antique feel to the design. I then stamped the rose image from the Wonderful World stamp set randomly over the panel using Crumb Cake ink, making sure to overlap the torn edge of the Masking Paper. I then added the small leaves in some of the spaces around the edge to finish off the design. Next, I gently peeled the Masking Paper off of the Very Vanilla cardstock to create the finished design. To embellish the card front, I added two 3/8" x 4" strips of Gold Metallic Specialty Paper to the top and bottom edge of the card front and then added the two strips of 1/4" x 4" Gold Metallic Specialty Paper, approx. 1/4" from the 3/8" strips. I love how these strips frame the focal design and add to the vintage feel of the card design. 
For the inside of the card, I repeated the process on the Very Vanilla cardstock layer, but this time I placed the Masking Paper diagonally across from the corners so that the straight edges overlapped in the center. I repeated the same color combination for the blending and stamped the same images with Crumb Cake Classic ink to recreate the same look as the card front. I decided not to add a sentiment to the inside of the card and adhered it to the inside of the card base. For the sentiment label, I die cut a stitched rectangle with the Stitched Rectangles Dies from Crumb Cake cardstock and heat embossed the sentiment from the Celebrating You stamp with Gold embossing powder. I aged the label by blending Crumb Cake ink around the stitched edges with a Blending Brush before adhering it to the card front using Stampin' Dimensionals. To finish off the design, I added several small and large Brass Brushed Butterflies to the card front for a touch of bling. 
Thank you for taking the time to visit my blog. I hope that my card design will help inspire you to try using masking in your own creative projects. There are so many wonderful possibilities to explore to create your own beautiful projects. 
Please take the time to visit with my fellow Design Team members by using the Roll Call List below. We would love it if you would visit our blogs and leave us a comment letting us know what you enjoyed about our projects.

If you live in the U.S. and do not have a Stampin' Up! Demonstrator, please contact me and I would be happy to help you with your creative projects. You may also visit my Online Store to place your order and have it shipped to you. 

Until Next Time

Happy Stamping,

Tricia Butts
Independent Stampin' Up! Demonstrator

Like What You See? Visit My Online Store Here

Visit My Facebook Business Page for Updates & Ideas

Click here to Contact Me


There's Still Time To Earn Exclusive Free Products
During Sale-a-bration
Click Below For More Details

Get Creative For The Holidays
With The July-December 2022 Mini Catalog
Click Below To Visit My Online Store


Saturday, March 12, 2022

Ink. Stamp. Share. March Showcase Blog Hop

Welcome to the Ink. Stamp. Share. March Showcase Blog Hop as our team members share the projects they are working on using current Stampin' Up! projects. You will have the chance to visit with Stampin' Up! Demonstrators from around the world as they share their projects and ideas to help inspire you and spark your creativity.
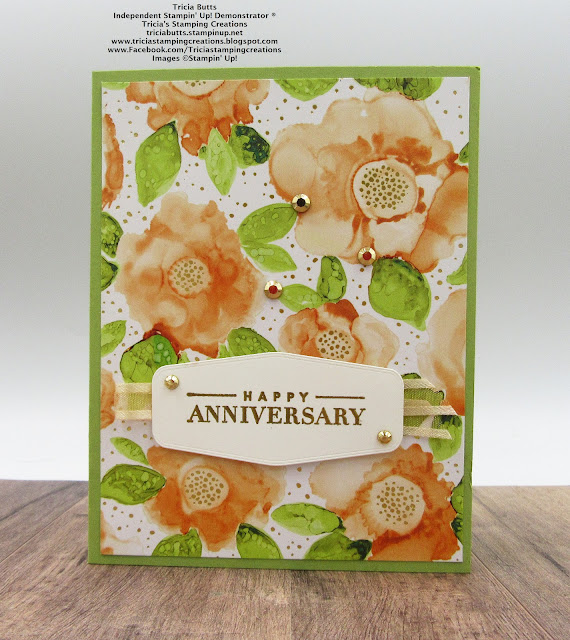
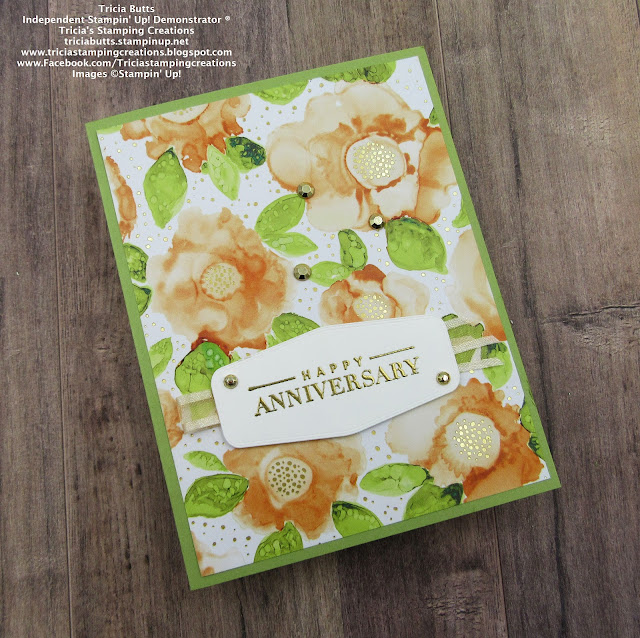
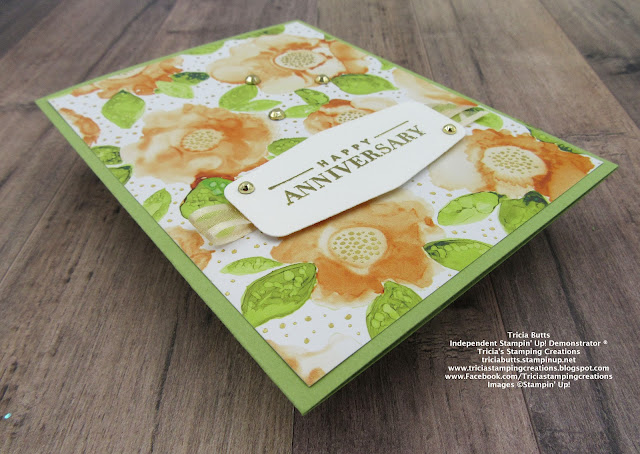
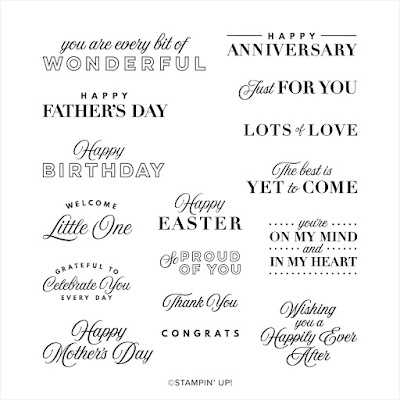
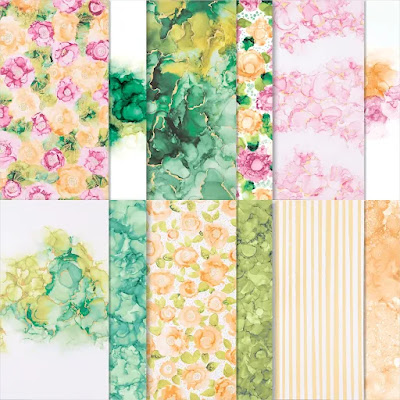
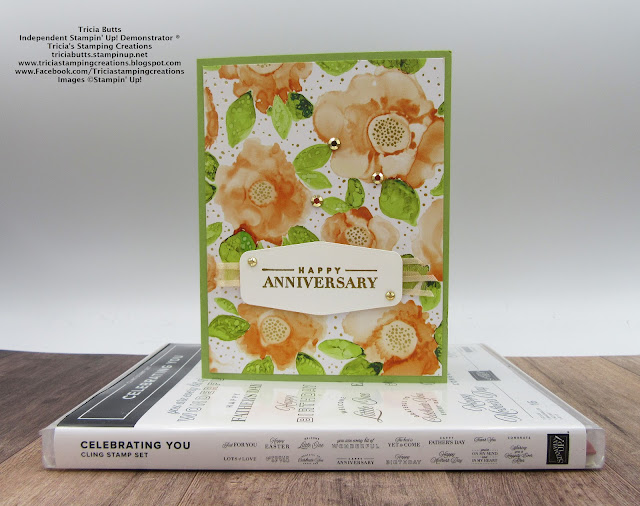
As we get closer to the end of the 2021-2022 Annual Catalog, I find myself revisiting old favorites from this catalog and combining them with new products in the January-June 2022 Mini Catalog. Today I decided to create a beautiful Anniversary card using the stunning Expressions In Ink Specialty Designer Series Paper and combined it with the wonderful sentiment stamp set, Celebrating You. The gold foil detail in the designer series paper is so elegant and I heat embossed the sentiment with gold embossing powder to coordinate to complete the design. This beautiful paper is too pretty to cover up, so I didn't add anything other than the sentiment and some simple embellishments to create this elegant clean and simple card design.
Products Used:
Celebrating You stamp set (item #158028)
Expressions In Ink Specialty Designer Series Paper (item #155464)
Tasteful Labels Dies (item #152886)
Pear Pizzazz Cardstock (item #131201)
Basic White Cardstock (item #159276)
Versamark Pad (item #102283)
Metallics Embossing Powders (item #155555)
Pale Papaya 3/8" Open Weave Ribbon (item #155672)
Gilded Gems (item #152478)
Measurements:
Pear Pizzazz Cardstock
Card Base - 8 1/2" x 5 1/2" (Scored at 4 1/4")
Expressions In Ink Designer Series Paper
Card Front - 5 1/4" 4"
Basic White Cardstock
Sentiment Label die cut with the Tasteful Labels Dies
This beautiful card design is simple to create and would work well for a variety of occasions. One of the great things about the Celebrating You stamp set is that it is full of sentiments for all occasions which makes it a great addition to your stamp stash. To embellish the sentiment, I used a piece of Pale Papaya Open Weave Ribbon that I folded in half and attached to the card front and then attached the sentiment label on top with Stampin' Dimensionals. I added two of the small Gilded Gems to the sentiment label and several of the larger size to the card front for a touch of bling. This card layout is perfect if you need to make a card in a hurry for a special occasion.
Thank you for visiting my blog. I hope that my card design will help inspire you to create your own beautiful projects using the amazing products that Stampin' Up! has to offer. 
Now it's time to visit with my fellow Stampin' Up! Demonstrators from around the world and see what they have to share with us. Just click on the Next or Previous to travel along our blog hop or use the Roll Call List to find your way. We would appreciate it if you would leave us a comment and let us know what you enjoyed about our projects. 

If you live in the U.S. and do not have a Stampin' Up! Demonstrator, please contact me and I would be happy to help you with your creative projects. You may also visit my Online Store to place your order and have it shipped to you. 

Until Next Time

Happy Stamping,

Tricia Butts
Independent Stampin' Up! Demonstrator

Like What You See? Visit My Online Store Here

Visit My Facebook Business Page for Updates & Ideas

Click here to Contact Me


Available For A Limited Time
The Amazing Waves Of The Ocean Collection
Click Below For More Details

Save 20% With The Savings Are In Bloom Promotion
During The Month Of March
Click Below To Visit My Online Store


Sunday, August 9, 2020

2020 Kre8tors August Blog Hop Anniversary

I am so happy you could join us today for the 2020 Kre8tors August Blog Hop as we showcase Anniversary projects to help inspire you. You will be visiting with amazing Stampin' Up! Demonstrators from around the world as they share their ideas and projects. 
 For my Anniversary card, I decided to create a masculine design. I combined the Embrace Each Moment stamp set (item #152594) with the Stitched Be Mine Dies (item #151814) in the 2020-2021 Annual Catalog. For the background, I wanted a rustic feel so I chose one of the designs from the In Good Taste Designer Series Paper (item #152494) with a weathered wood grain look. 
 To create this card design, I started with Real Red cardstock for the card base and I added a layer of the In Good Taste Designer Series Paper for the background. Using a piece of Linen Thread (item #104199), I wrapped it around the designer series paper layer twice and tied a bow on the left side of the card front. I attached the designer series paper layer to the card base with adhesive. 
The hearts were created using the Stitched Be Mine Dies and I die cut one each of Whisper White, Real Red and Silver Foil to create the two focal images. On the White cardstock heart, I stamped the hands image from the Embrace Each Moment stamp set with Early Espresso Classic ink, stamped off once on scrap paper, to lighten the outline. I colored the hands using Dark and Light Petal Pink and Ivory Stampin' Blends Markers and blended the images with the Color Lifter. For the sentiment, I heat embossed the image onto the Real Red cardstock heart with Silver Embossing Powder, 
 To assemble the hearts, I adhered the Whisper White heart on the right side of the card front, over the top of the Linen Thread. I then added the Real Red scalloped heart frame around the outside of the heart. Next, I adhered the Real Red sentiment heart to the left side of the card front so that it slightly overlaps the Whisper White heart. I then added the Silver Foil scalloped heart frame around this heart. To complete the card design, I colored several Basic Rhinestones with the Dark Real Red Stampin' Blends Marker and added them to the card front for a touch of bling. I love how this card turned out and I think it works well as a masculine Anniversary card. 
Thank you for taking the time to visit my blog today. I hope that my card design helps inspire you to explore creating your own beautiful projects for the special people in your life. There are so many amazing products in the 2020-2021 Annual Catalog to help you with your creative projects. 

Now it's time to visit Lisa's blog and see what she has to share with us this month. Just click the Next button below to visit her blog or use the Roll Call List below to find your way. We would love it if you would leave us a comment and let us know what you enjoyed about our projects. I hope you enjoy the rest of our blog hop. 
 Lisa


Roll Call List

If you live in the U.S. and do not already have a Stampin' Up! Demonstrator, please contact me and I would be happy to help you with your creative projects. You may also visit my Online Store to place your orders and have them shipped directly to you. 
Until Next Time
Happy Stamping,
Tricia Butts
Independent Stampin' Up! Demonstrator
Like What You See? Visit My Online Store Here
Visit My Facebook Business Page for Updates & Ideas
Click here to Contact Me

The New August-December 2020 Mini Catalog Is Here!
Click Below To Shop From My Online Store
 Click Here To Visit My Online Store


Time Is Running Out!
Celebrate The Everyday Heroes In Your Life
With The August Paper Pumpkin Kit
Click Below To Subscribe by August 10th
 Click Here To Subscribe


Saturday, June 27, 2020

Ink. Stamp. Share June Blog Hop New Products

Welcome to the Ink. Stamp. Share. June Blog Hop as we showcase new products from the new 2020-2021 Annual Catalog. You will be visiting with talented Stampin' Up! Demonstrators from around the world as they share their wonderful projects and ideas to help inspire you. 
 Today my husband and I are celebrating our 28th Wedding Anniversary and I knew when I saw the new Embrace Each Moment stamp set (item #152594) in the new 2020-2021 Annual Catalog, that it was the stamp set I needed to create the Anniversary card I wanted to give to my husband. I love the sketch image designs and the sentiments are beautiful and the one I chose has special meaning for us. 
My love for the new 2020-2022 In Colors continues and I decided to use Just Jade cardstock for my card base and I added a layer of the Misty Moonlight Designer Series Paper from the 2020-2022 In Color 6"x6" Designer Series pack (item #153070) to create the background. I love that this designer series paper gives the look of distressed denim that is perfect for a masculine card design. 
To create my focal design, I stamped the image onto Whisper White cardstock with Soft Suede Classic ink and colored the image using a variety of Stampin' Blends Markers including Petal Pink, So Saffron, Balmy Blue, Misty Moonlight, Just Jade and Soft Suede colors. I die cut the image using one of the Stitched Rectangles Dies (item #151820) and layered it onto a Silver Foil rectangle die cut using a slightly larger die from the same set. 
For the sentiment, I heat embossed the image with Silver Embossing Powder onto a scrap of Whisper White cardstock and die cut it using a circle die from the Layering Circles Dies (item #151770). I also die cut a slightly larger circle from Just Jade cardstock using the same die set and attached the sentiment circle to it with adhesive. Using the Dog Builder Punch (item #148543), I punched out a small heart from Real Red cardstock and added it to the sentiment circle with adhesive.

To assemble the card, I used Stampin' Dimensionals to attach the focal image and circle sentiment to the card front. I love this clean and simple layout for this card design and think it is perfect for my husband as we celebrate our anniversary. 
Thank you for taking the time to visit my blog today. I hope that my card design will help inspire you to explore the wonderful new products in the new Annual Catalog and create your own beautiful projects. For me, creating unique cards for special occasions brings me so much joy and I love seeing the expression on people's faces when they receive a card made especially for them. 

Now it's time to visit Sue's wonderful blog and see what she has to share with us this month. Just click the Next button below to visit her blog or use the Roll Call List to find your way. I hope you enjoy the rest of our blog hop. 
 Sue


Roll Call

If you live in the U.S. and do not already have a Stampin' Up! Demonstrator, please contact me and I would be happy to help you with your creative projects. You can also visit my Online Store to place an order 24/7 and have it shipped directly to you. 


Until Next Time
Happy Stamping,
Tricia Butts
Independent Stampin' Up! Demonstrator
Like What You See? Visit My Online Store Here
Visit My Facebook Business Page for Updates & Ideas
Click here to Contact Me

Celebrate The Summer With The July Summer Nights 
Paper Pumpkin Kit
Click Below To Subscribe by July 10th 
 Click Here To Subscribe