Showing posts with label Softly Sophisticated Bundle. Show all posts

Monday, February 12, 2024

Demonstrator Training February Blog Hop Thank You

Welcome to the Demonstrator Training February Blog Hop as we showcase Thank You and Congratulations cards to help inspire you. Our wonderful Design Team will be sharing their projects and ideas using current Stampin' Up! products to help spark your creativity.
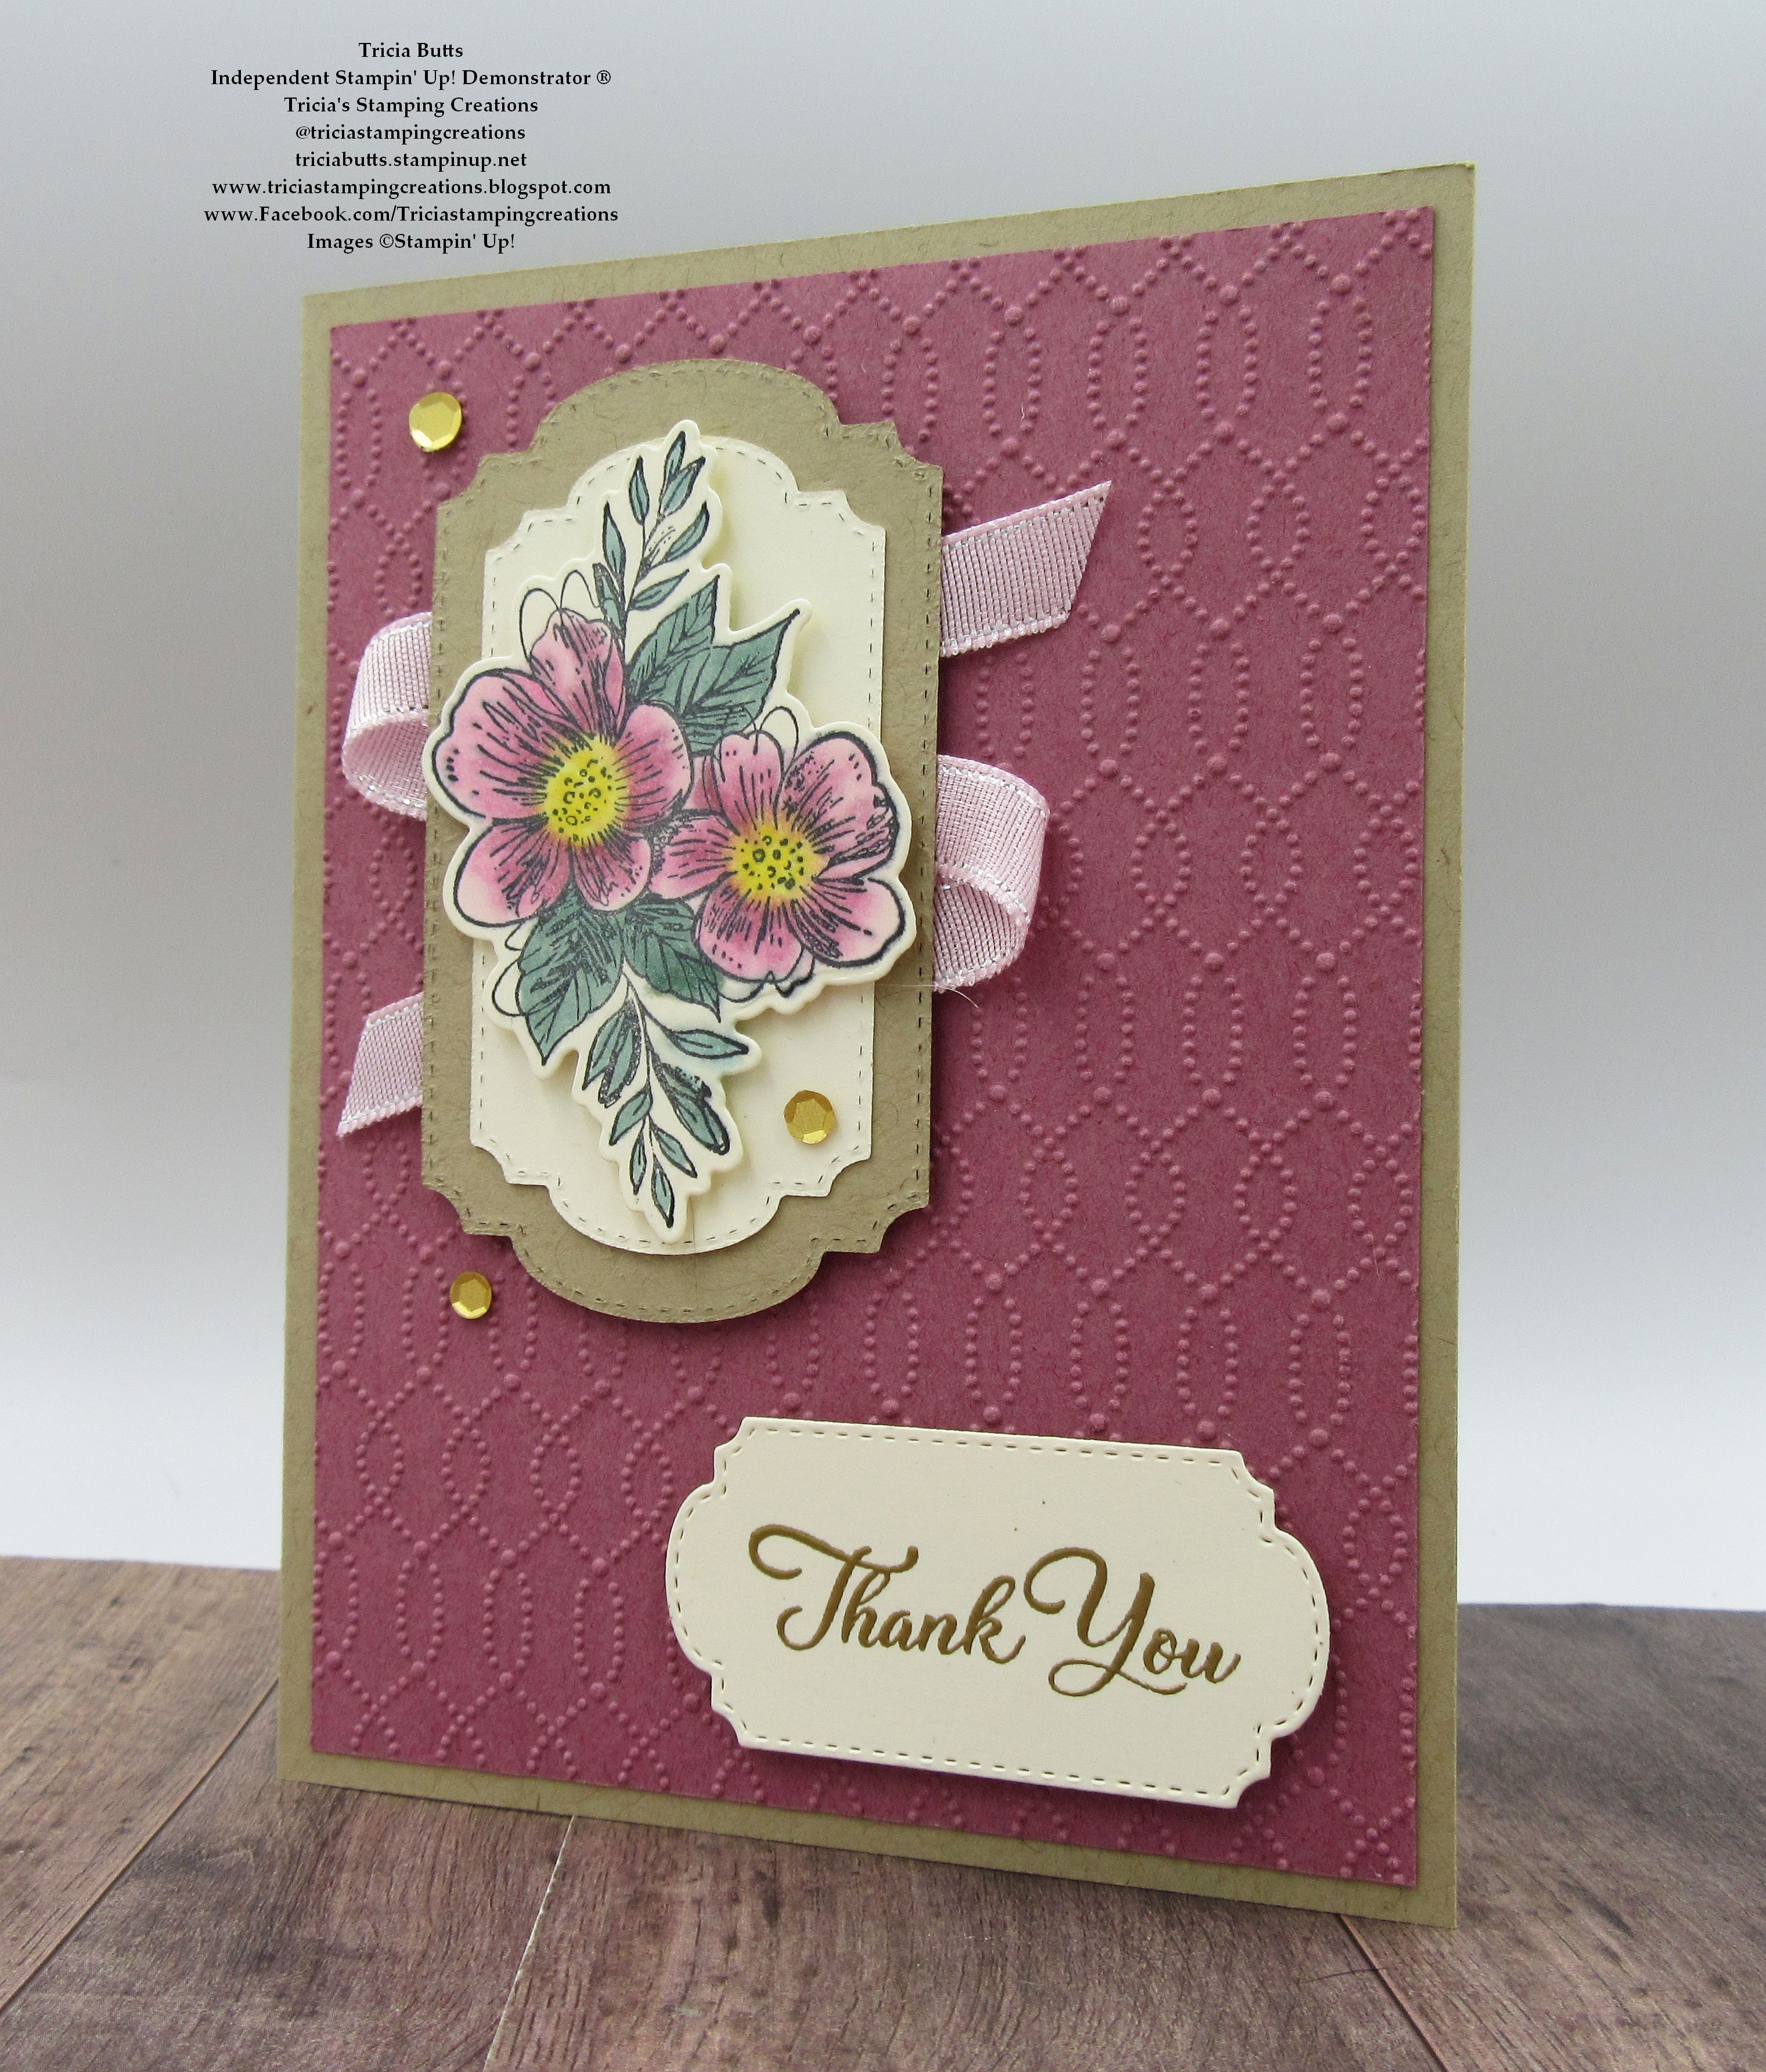
For my card design today, I thought I would use the new Thoughtful Expressions Bundle to create a pretty Thank You card. I chose to use the embossing folder from the Softly Sophisticated Bundle, which is a Level 2 Sale-a-bration Reward you can earn free with a qualifying $100 order. I love the delicate detail and texture this embossing folder adds to the background. The beautiful floral image is just one of the wonderful designs in the Thoughtful Expressions stamp set and I love the variety of layering shapes in the Thoughtful Expressions Dies. The sentiment is from the Go To Greetings stamp set, one of my favorite sentiment stamp sets because it has a wonderful range of sentiments in different sizes and fonts that works well for a variety of occasions.
Products Used:
Thoughtful Expressions Bundle (item #162822)
Softly Sophisticated Bundle (item #162947) Sale-a-bration Level 2 Reward
Go To Greetings stamp set (item #158763)
Crumb Cake Cardstock (item #120953)
Moody Mauve Cardstock (item #161723)
Very Vanilla Cardstock (item #101650)
Memento Tuxedo Black Pad (item #132708)
Versamark Pad (item #102283)
Metallics Embossing Powders (item #155555)
Moody Mauve Stampin' Blends Combo Pack (item #161660)
Bubble Bath Stampin' Blends Combo Pack (item #161675)
Lost Lagoon Stampin' Blends Combo Pack (item #161680)
Daffodil Delight Stampin' Blends Combo Pack (item #154883)
Sheer Ribbon Combo Pack (item #161635)
Pastel Adhesive Backed Sequins (item #160387)
Stampin' Dimensionals (item #104430)
Measurements:
Crumb Cake Cardstock
Card Base - 5 1/2" x 8 1/2" (Scored at 4 1/4")
Label die cut with the Thoughtful Expressions Dies
Very Vanilla Cardstock 
Floral image stamped and die cut with the Thoughtful Expressions Dies
Focal Layer die cut with the Thoughtful Expressions Dies
Sentiment Label die cut with the Thoughtful Expressions Dies
Moody Mauve Cardstock
Card Front - 5 1/4" x 4"
This pretty card design is all about the layers to add depth and dimension to the design. I stamped the floral design onto a piece of Very Vanilla cardstock with Memento Tuxedo Black ink and colored in the image using Stampin' Blends Markers before die cutting it out with the coordinating die. I layered it onto a Very Vanilla cardstock label die cut with the Thoughtful Expressions Dies, using Stampin' Dimensionals to pop it up. I then added it to the slightly larger Crumb Cake label die cut with same dies. The card front has been embossed with the Softly Sophisticated Embossing Folder and attached to the Crumb Cake card base. I added a piece of the Bubble Bath Sheer Ribbon behind the Crumb Cake label in a zig zag and then attached the label to the card front with Stampin' Dimensionals, towards the left side. For the sentiment, I heat embossed the image from the Go To Greetings stamp set with Gold embossing powder onto a Very Vanilla cardstock label and attached it to the card front with Stampin' Dimensionals. To finish off the design, I added several Gold Sequins for a touch of bling. I love the soft and pretty look of this card design and how well these colors work together.
Thank you for taking the time to visit my blog. I hope that my card design will help inspire you to create your own beautiful Thank You cards to send to family and friends. There are so many wonderful options to explore. The Softly Sophisticated Bundle is just one of the amazing Sale-a-bration products you can earn free with a qualifying order. Remember that Sale-a-bration ends February 29th, so make to place your order soon to avoid missing out. 
Please take a moment to visit with my fellow Stampin' Up! Demonstrators from around the world as they share their projects to help inspire you. Just click on the links in the Roll Call List to visit their blogs. We would appreciate it if you would leave us a comment and let us know what you liked about our projects.
If you live in the U.S. and do not have a Stampin' Up! Demonstrator, please contact me and I would be happy to help you with your creative projects. You may also visit my Online Store to place your order and have it shipped to you. 

Until Next Time

Happy Stamping,

Tricia Butts
Independent Stampin' Up! Demonstrator

Like What You See? Visit My Online Store Here

Visit My Facebook Business Page for Updates & Ideas

Click here to Contact Me


More Sale-a-bration Products Are Now Available
To Earn Free With A Qualifying Order
Click Below For More Details 

Explore Your Creativity In 2024
With The January-April 2024 Mini Catalog
Click Below To Shop Now


Friday, January 5, 2024

Crafty Collaborations Monochromatic Color Challenge - Copper Clay

The New Year is a great time to try new things and step outside your comfort zone. So for 2024, I will be participating in the Crafty Collaborations weekly Monochromatic Insta Hop, to help get creative using Stampin' Up!'s amazing color coordinated products. Our first color is Copper Clay, one of the 2023-2025 In Colors, and we have been challenged to create a card design using products featuring this color. I hope that my new journey on this color challenge will help inspire you to join and explore Stampin' Up!'s beautiful colors.
Copper Clay is not a color that I use very often so it I was trying to come up with a card design, I looked through the stamp sets that I had on hand to see what would work well with this color. With the launch of the new January-April 2024 Mini Catalog, I had just recently received an order of new products and one of them was the Cutest Cows Bundle. The images in this stamp set are so adorable and I just new that it would be perfect for this color challenge. As you can see from my finished card, I had fun combining quite a few products to create my design. These products include cardstock, designer series paper, textured ribbon, dots, Classic ink and Stampin' Blends Markers. 
Products Used:
Cutest Cows Bundle (item #162897)
Bee Builder Punch (item #162553)
2 3/8" Circle Punch (item #161354)
Softly Sophisticated Bundle (item #162947) Sale-a-bration 
2023-2025 In Color 6"x6" Designer Series Paper (item #161646)
Copper Clay Cardstock (item #161721)
Basic White Cardstock (item #159276)
Copper Clay Classic Ink Pad (item #161647)
Memento Tuxedo Black Pad (item #132708)
Copper Clay Stampin' Blends Combo Pack (item #161662)
Basic Black Classic Blends Combo Pack (item #154843)
Petal Pink Classic Blends Combo Pack (item #154893)
Copper Clay 3/8" Textured Ribbon (item #161629)
2023-2025 In Color Dots (item #161620)
Blender Pens (item #102845)
Stampin' Dimensionals (item #104430)
Measurements:
Copper Clay Cardstock
Card Base - 5 1/2" x 8 1/2" (Scored at 4 1/4")
Strip - 1 1/4" x 4" Embossed with the Softly Sophisticated 3D Embossing Folder
Copper Clay Polka Dot Designer Series Paper
Card Front - 5 1/4" x 4"
Basic White Cardstock
Inside Layer - 5 1/4" x 4"
Circle punched out with the 2 3/8" Circle Punch
Cow stamped and punched out with the Cutest Cows Bundle 
Sentiment Bubble punched out with the Bee Builder Punch
I love when this time of year when not only do we have a new mini catalog full of new products to play with, but we also have the opportunity to earn Free products with qualifying orders for Sale-a-bration. For my card design, I wanted to show how you can take existing products from the 2023-2024 Annual Catalog, which you may have in your crafting supplies, and combine them with new products from the new mini catalog. To me, Copper Clay is this wonderful, rich reddish brown color and I thought it would be a perfect color for a cow. I used the Light Copper Clay Stampin' Blends Marker to color the spots and the muzzle of the cow and Light Basic Black Stampin' Blends Marker for the hooves. I added a touch of Light Petal Pink Stampin' Blends to the inside of the ears. I punched out the body and the head of the cow and added them to the Basic White cardstock circle, using a Stampin' Dimensional to pop up the head. To add some texture, I used the Softly Sophisticated 3D embossing folder (part of the Softly Sophisticated Bundle Level 2 Sale-a-bration Reward) to emboss the strip of cardstock and then added a piece of textured ribbon around the center of the strip before adding it to the polka dot designer series paper background. I attached the focal image with Stampin' Dimensionals, towards the left side of the strip. For the sentiment label, I used the Bee Builder Punch to create a word bubble (the body of the bee is perfect for this) and stamped the sentiment with Tuxedo Black ink. I attached the sentiment to the card front with Stampin' Dimensionals so that it appears as though the cow is speaking. To complete the card design, I added several of the Copper Clay Dots for a little sparkle. 
For the inside layer of the card, I stamped the milk cans along the bottom of the Basic White cardstock layer, using Copper Clay Classic ink and lightly blended the lines to add soft color to the images using a Blend Pen. I stamped the sentiments in the center of the panel with Tuxedo Black ink. So there you have it. My cute card design featuring Copper Clay. What do you think? Did I do a good job showcasing this color? Let me know in the comments. 
Thank you for taking the time to visit my blog. I hope that my card design will help inspire you to step outside your comfort zone and explore using Stampin' Up! colors that you might not normally use. Don't forget to check out the new January-April 2024 Mini Catalog to see all the amazing new products and take advantage of Sale-a-bration to earn Free products with your qualifying orders. The Softly Sophisticated Bundle is a Level 2 Sale-a-bration Reward you can earn Free with a qualifying $100 order. 
I would love it if you would take the time to hop along with our Monochromatic Insta Hop here and see what my fellow demonstrators created with this week's challenge color, Copper Clay. We would love it if you would leave us a comment and let us know what you liked about our projects. I hope you will join me next Friday to see what I create with Week 2's color challenge. 

If you live in the U.S. and do not have a Stampin' Up! Demonstrator, please contact me and I would be happy to help you with your creative projects. You may also visit my Online Store to place your order and have it shipped to you. 

Until Next Time

Happy Stamping,

Tricia Butts
Independent Stampin' Up! Demonstrator

Like What You See? Visit My Online Store Here

Visit My Facebook Business Page for Updates & Ideas

Click here to Contact Me


Get Creative For The New Year
With The January-April 2024 Mini Catalog
Click Below To Shop Now