Showing posts with label Merriest Frames Hybrid Embossing Folder. Show all posts

Saturday, July 9, 2022

Stamping Inkspiration July Blog Hop Color Challenge

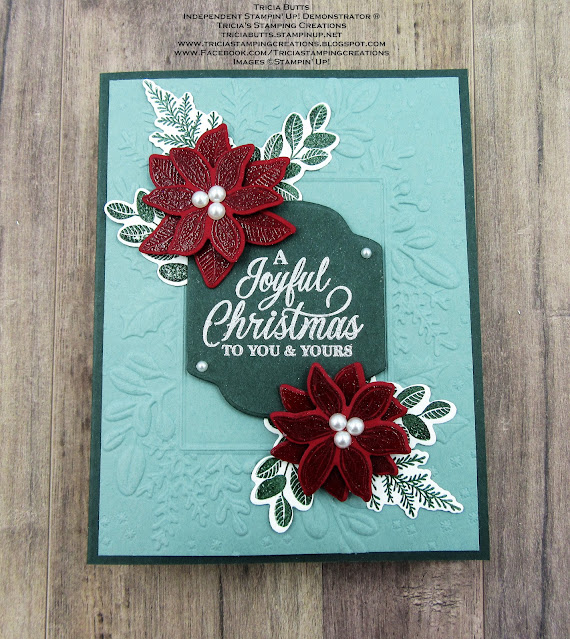
Welcome to the Stamping Inkspiration July Blog Hop and this month we are celebrating Christmas In July with a Color Challenge. We were given the choice of two different color palettes, one for warm wather and one for cold weather, and I decided to choose the cold weather color combination as shown below. It includes Cherry Cobbler, Evening Evergreen, Soft Succulent, Sahara Sand and Early Espresso and we have been challenged to use at least three colors.
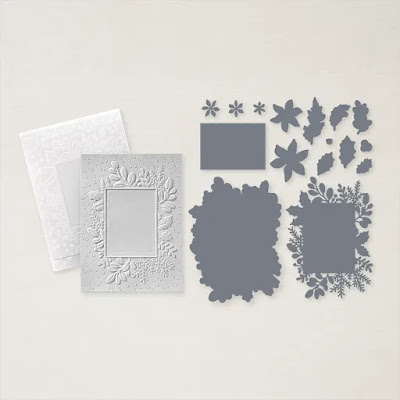
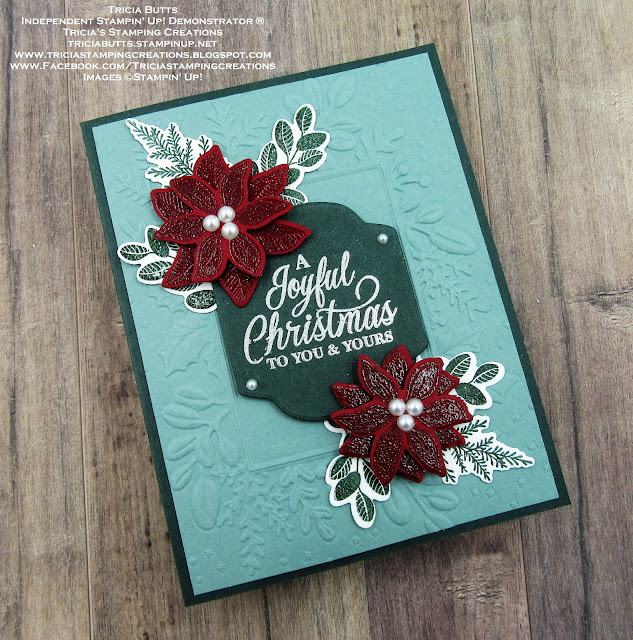
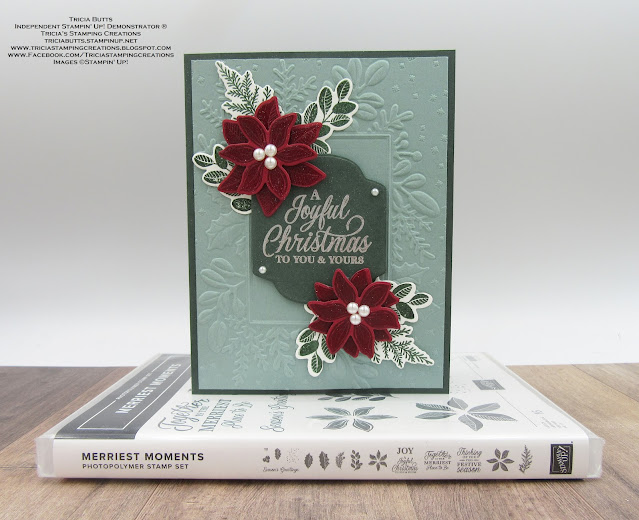
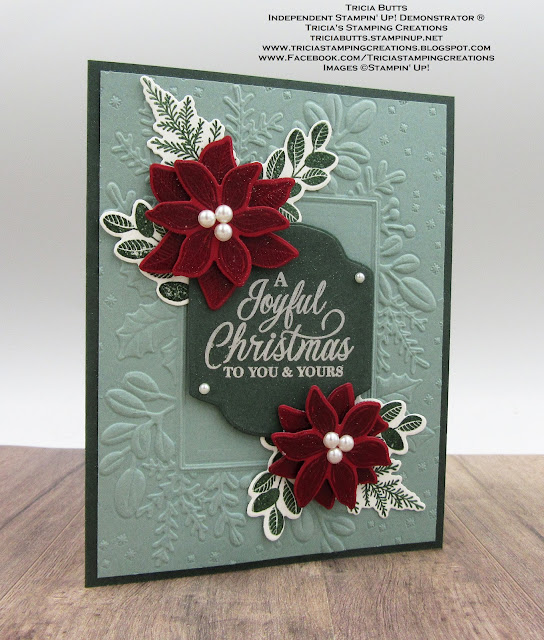
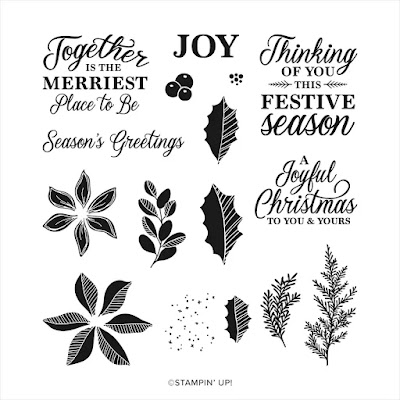
For my card design, I decided to focus on a more traditional color combination, so I chose to use Soft Succulent, Evening Evergreen and Cherry Cobbler. I used the Merriest Moments stamp set and coordinating Merriest Frames Hybrid Embossing Folder from the new July-December 2022 Mini Catalog and I just love the detail in these stamp images and coordinating dies. The embossing folder creates such a beautiful background and adds wonderful texture to the design. 
Products Used:
Merriest Moments stamp set (item #156353)
Merriest Frames Hybrid Embossing Folder (item #156385)
Seasonal Labels Dies (item #156299)
Evening Evergreen Cardstock (item #155574)
Soft Succulent Cardstock (item #155776)
Cherry Cobbler Cardstock (item #119685)
Basic White Cardstock (item #159276)
Evening Evergreen Classic Ink Pad (item #155576)
Versamark Pad (item #102283)
Basics Embossing Powders (item #155554)
Metallics Embossing Powders (item #155555)
Basic Pearl Jewels (item #144219)
Stampin' Dimensionals (item #104430)
Measurements:
Evening Evergreen Cardstock
Card Base - 8 1/2" x 5 1/2" (Scored at 4 1/4")
Sentiment Label die cut with the Seasonal Labels Dies
Soft Succulent Cardstock
Card Front - 5 1/4" x 4" embossed with the Merriest Frames Hybrid Embossing Folder
Cherry Cobbler Cardstock
Poinsettia flowers heat embossed and die cut
Basic White Cardstock
Stamped and die cut leaves
This traditional Christmas card design was so much fun to create and really helped me get into the spirit of Christmas in July. The combination of Soft Succulent, Evening Evergreen and Cherry Cobbler are perfect for creating traditional Christmas designs and the Silver embossing and pearls help step it up to the next level. For the poinsettias, I heat embossed the stamped images with Clear embossing powder and layered them using a Stampin' Dimensional to add dimension to the flowers. The leaves have been stamped with Evening Evergreen Classic ink to create the foliage in the background. 
Thank you for taking the time to visit my blog. I hope that my card design will help inspire you to create your own beautiful projects with this color challenge. There are so many wonderful options to explore, whether you choose traditional like I did or something more modern and fun. 
Now it's time to visit Sharon's blog and see what she has created with this month's color challenge. Just click the Next button to visit her blog or use the Roll Call List below to find you way. We would appreciate it if you would leave us a comment and let us know what you liked about our projects. I hope you enjoy the rest of our blog hop. 


Roll Call List

If you live in the U.S. and do not have a Stampin' Up! Demonstrator, please contact me and I would be happy to help you with your creative projects. You may also visit my Online Store to place your order and have it shipped to you.

Until Next Time

Happy Stamping,

Tricia Butts
Independent Stampin' Up! Demonstrator

Like What You See? Visit My Online Store Here

Visit My Facebook Business Page for Updates & Ideas

Click here to Contact Me


Get Creative For The Holidays
With The July-December 2022 Mini Catalog
Click Below To Visit My Online Store

Earn Exclusive Free Products
During Sale-A-Bration
Click Below For Details


Monday, November 8, 2021

Kylie Bertucci's Monthly International Blog Highlights November 2021


Welcome to Kylie's Monthly International Blog Highlights as we showcase projects with the theme "Thank You". November is thought of as the month of gratitude and being thankful for blessings in our lives. What better way to show that than to create beautiful Thank You cards to send to the people in our lives to let them know we appreciate them. 
I love finding new ways to use my stamp sets and dies to create beautiful cards. The Pretty Pumpkins stamp set is traditionally a Fall/Thanksgiving themed set and I really love the fonts for the sentiments in this stamp set. I decided to pair one of the sentiments from this set with the Merriest Frames Hybrid Embossing Folder, which includes dies that coordinate with the embossing folder and the coordinating Merriest Moments stamp set. I love the detail in the embossed die cut and thought it would look pretty as a frame for a thank you card. For my color combination, I chose Fresh Freesia and Basic White with a touch of Silver for a soft and pretty design. 
Products:
Pretty Pumpkins stamp set (item #156472)
Merriest Moments Bundle (item #156783)
Wonderful Snowflakes (item #156340)
Fresh Freesia Cardstock (item #155613)
Basic White Cardstock (item #159276)
Versamark Pad (item #102283)
Metallics Embossing Powders (item #155555)
White 3/8" Glittered Organdy Ribbon (item #156408)
Basic Rhinestone Jewels (item #144220)
Mini Stampin' Dimensionals (item #144108)
Mini Glue Dots (item #103683)
Measurements:
Fresh Freesia Cardstock
Card Base - 8 1/2" x 5 1/2" (Scored at 4 1/4")
Sentiment Label die cut with the Merriest Frames Hybrid Embossing Folder (Dies)
Three small flowers die cut with the Merriest Frames Hybrid Embossing Folder (Dies)
Basic White Cardstock
Detailed embossed frame die cut with the Merriest Frames Hybrid Embossing Folder
This card design showcases the detail and versatility of the Merriest Frames Hybrid Embossing Folder. The combination of the embossing folder and the coordinating detailed frame die creates a beautiful frame for the sentiment label. I heat embossed the sentiment with Silver embossing powder to add an elegant touch. To create the flowers, I die cut three of the medium sized detailed flower die cuts from one of the Snowflake Wonder sheets in the spaces in between the snowflakes. This gives the white flowers a pretty shimmer to them. I then cut three of the small die cut flowers from the Fresh Freesia cardstock and attached them to the center of white flowers with Mini Glue Dots. For a touch of bling, I added a large Basic Rhinestone Jewel to the center of each flower and added them to embossed frame with Mini Stampin' Dimensionals. I attached the frame to the card base with Mini Stampin' Dimensionals to pop it up. To finish off the card design, I added a piece of the White Glittered Organdy Ribbon under the top right corner and a pretty bow to the bottom of the frame.  
Thank you for taking the time to visit my blog. I hope that my card design will help inspire you to create your own beautiful Thank You cards to send out to the people in your life. There are so many wonderful possibilities to explore.
I would love it if you would take the time to vote for my card this month as part of Kylie's Blog Highlights. Just click the button below and click on the heart for my card (#38) to vote for it. You can vote for 5 different projects each day, so please take the time to visit my fellow Stampin' Up! Demonstrators and see their wonderful projects. We appreciate your support. 

If you live in the U.S. and do not have a Stampin' Up!, please contact me and I will be happy to help you with your creative projects. You may also visit my Online Store to place your order and have it shipped to you. 

Until Next Time

Happy Stamping,

Tricia Butts
Independent Stampin' Up! Demonstrator

Like What You See? Visit My Online Store Here

Visit My Facebook Business Page for Updates & Ideas

Click here to Contact Me


Time Is Running Out
To Get Your November Gifts Galore Paper Pumpkin Kit
Click Below To Subscribe by November 10th

Explore The Beautiful Eden's Garden Collection
Click Below For More Details