Showing posts with label Meadow Moments Embossing Folders. Show all posts

Tuesday, March 1, 2022

We Create March Blog Hop Sporting Green


Welcome to the We Create March Blog Hop and this month our theme is "Sporting Green". When you think of March, you think of Spring and St Patrick's Day, not to mention March Madness if you are a college basketball fan. This month our Design Team Members will be sharing their projects and ideas to help inspire you to create your own wonderful projects.
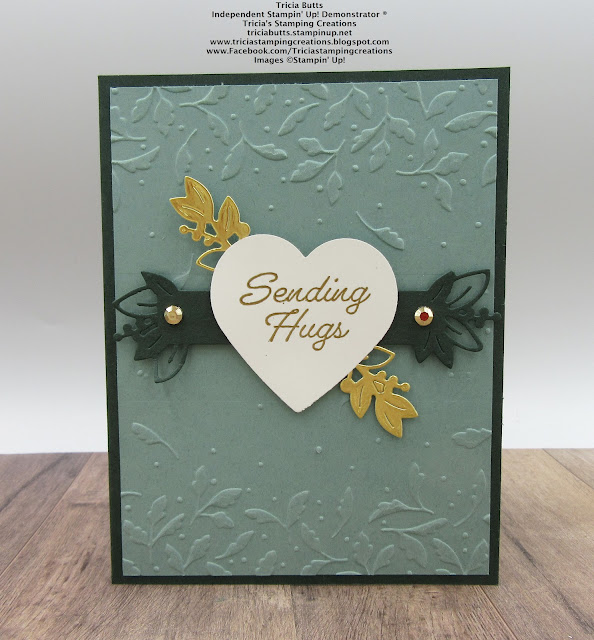
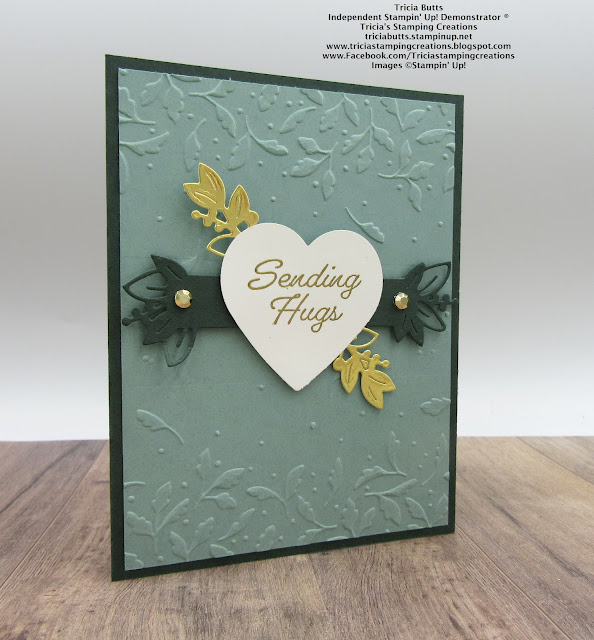
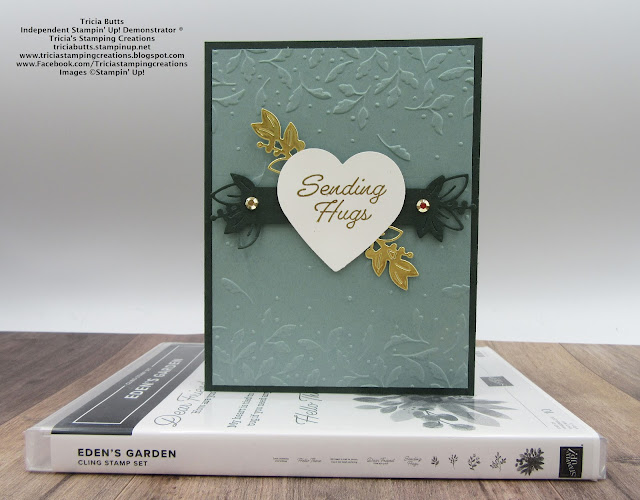
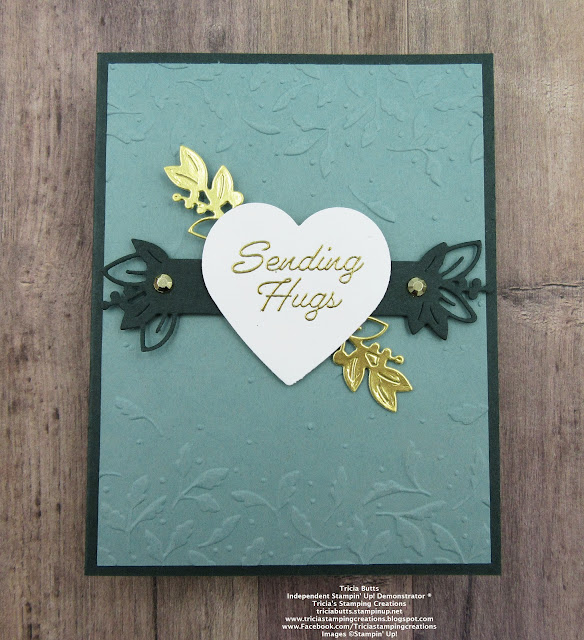
For my card, I decided to focus on using Greens to create my design. I wanted to create a clean and simple Spring themed design, adding texture to the background with one of the Meadow Moments Embossing Folders and detail with the Eden Dies. 
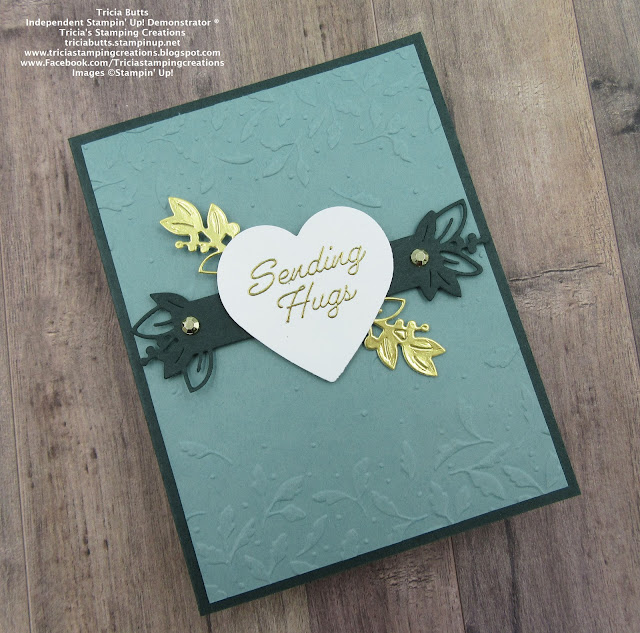
Products Used:
Eden's Garden Bundle (item #157832)
Heart Punch Pack (item #151292)
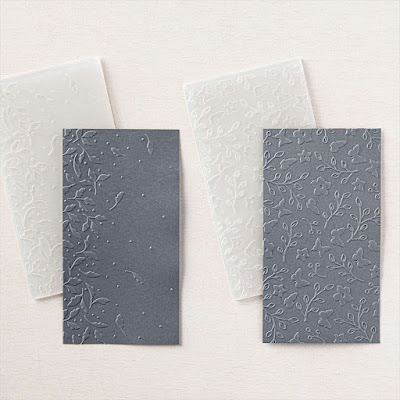
Meadow Moments Embossing Folders (item #153126)
Gold Foil Sheets (item #132622)
Evening Evergreen Cardstock (item #155574)
Soft Succulent Cardstock (item #155776)
Basic White Cardstock (item #159276)
Versamark Pad (item #102283)
Metallics Embossing Powders (item #155555)
Gilded Gems (item #152478)
Stampin' Dimensionals (item #104430)
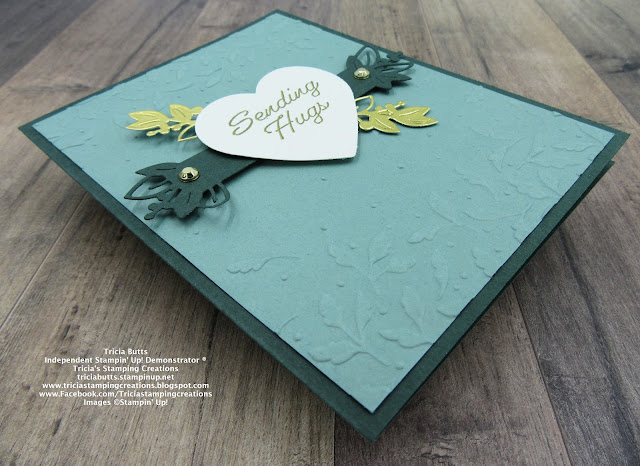
Measurements:
Evening Evergreen Cardstock
Card Base - 8 1/2" x 5 1/2" (Scored at 4 1/4")
Sentiment Label die cut with the Eden Dies
Soft Succulent Cardstock
Card Front - 5 1/4" x 4"
Basic White Cardstock
Heart punched out with the Heart Punch Pack
Gold Foil Sheet
2 leaves die cut with the Eden Dies 
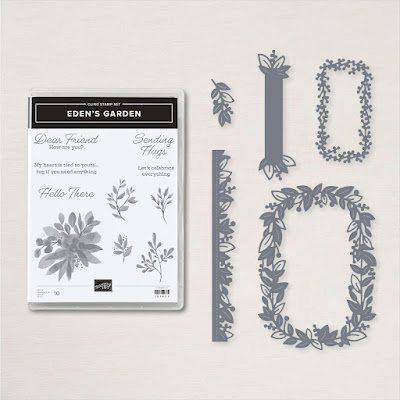
This clean and simple card design is simple to create and I love how the heart sentiment label pops against the Soft Succulent card front. The touches of Gold Foil and the Gold embossing for the sentiment help step up the design for an elegant look. Evening Evergreen and Soft Succulent make a wonderful combination and this card could even work as a masculine card design. 
Thank you for taking the time to visit my blog. I hope that my card design will help inspire you to explore the wonderful colors and products that Stampin' Up! has to offer, to create your own beautiful Spring projects. 
Now it's time to visit Tanya's blog and see what she has created this month. Just click the Next button below to visit her blog. We would love it if you would leave us a comment and let us know what you liked about our projects. I hope you enjoy the rest of our blog hop. 
If you live in the U.S. and do not have a Stampin' Up! Demonstrator, please contact me and I would be happy to help you with your creative projects. You may also visit my Online Store to place your order and have it shipped to you. 

Until Next Time

Happy Stamping,

Tricia Butts
Independent Stampin' Up! Demonstrator

Like What You See? Visit My Online Store Here

Visit My Facebook Business Page for Updates & Ideas

Click here to Contact Me


Step Your Creativity To The Next Level
Save 20% With the Savings Are In Bloom Promotion
Click Below To Visit My Online Store

Discover Your Artistic Abilities
With The Waves Of The Ocean Collection
Click Below For More Details


Saturday, April 24, 2021

Ink. Stamp. Share. April Monthly Blog Hop Sketch Challenge

Welcome to the Ink. Stamp. Share. April Monthly Blog Hop and this month we have a sketch challenge to help spark our creativity. You will be visiting with wonderful Stampin' Up! Demonstrators from around the world as they share their tips and ideas to help inspire you. 
Sketches are a wonderful starting point when you need inspiration for a card design. It is like a road map that helps you to plan your layout and you choose what colors and images you want to use to create your own unique version. 
For my card design, I chose to use one of the pretty papers from the Flowers For Every Season 6"x6" Designer Series Paper (item #152486) for the lower half of the background and I chose colors from this paper to create my card design. For the decorative element, I chose to use one of the detailed butterflies from the Brilliant Wings Dies (item #155523) and the sentiment is from the Itty Bitty Birthdays stamp set, which is one of my go-to sentiment stamp sets for birthdays. 
Products Used:
Itty Bitty Birthdays stamp set (item #148618) - Retiring
Flowers For Every Season 6"x6" Designer Series Paper 
(item #152486) - Retiring 
Banner Triple Punch (item #138292) - Retiring
Brilliant Wings Dies (item #155523)
Meadow Moments Embossing Folders (item #153126)
Stitched Rectangles Dies (item #151820)
Misty Moonlight Cardstock (item #153081)
Just Jade Cardstock (item #153079)
Basic White Cardstock (item #159276)
Versamark Pad (item #102283)
White Embossing Powder (item #109132) - Retiring
Just Jade 1/4" Ribbon (item #153621) - Retiring
Basic Rhinestone Jewels (item #144220)
Measurements:
Misty Moonlight Cardstock
Card Base - 8 1/2" x 5 1/2" (Scored at 4 1/4")
Banner - 1 1/2" x 4" (One end punched with the Banner Triple Punch)
Sentiment Label die cut with one of the Stitched Rectangles Dies
Just Jade Cardstock
Banner - 1 /2" x 4" (One end punched with the Banner Triple Punch)
Basic White Cardstock
Background Layer - 5 1/4" x 4" Embossed with one of the Meadow Moments Embossing Folders
Detailed Butterfly die cut with the Brilliant Wings Dies
Flowers For Every Season Designer Series Paper
Layer - 2" x 5 1/4"
By following the layout of the sketch, it is easy to assemble this card to create a pretty clean and simple design. I embossed the Basic White cardstock layer to add texture and added the designer series paper layer to the bottom of this background layer. I added a piece of Just Jade 1/4" Ribbon to cover the seam of the designer series paper and provide the element in the sketch. For the banners, I used the Banner Triple Punch to create a banner on one end of the Misty Moonlight and Just Jade strips and then trimmed the length so that the Misty Moonlight piece was approx. 3 1/2" long and the Just Jade piece was approx. 3 3/4" long. I layered them and attached them to the left side of the card front, adding the detailed Basic White butterfly as the element in the sketch. For the sentiment, I heat embossed the image with White Embossing Powder onto a piece of Misty Moonlight cardstock and die cut it with one of the Stitched Rectangles Dies and added it to the card front with Stampin' Dimensionals. To finish off the design, I added three Basic Rhinestone Jewels for a touch of bling. This card design would work well for a variety of occasions and you could adapt it to work other designer series paper patterns to create a completely different look. There are so many wonderful possibilities to explore when using a sketch. 
Thank you for taking the time to visit my blog. I hope that my card design will help inspire you to try creating your own beautiful projects using this fun sketch challenge. A sketch layout can be a wonderful way to help get you started when you are experiencing a creative block and they help to provide a road map for your own beautiful creations.
Now it's time to visit Mo's wonderful blog and see what beautiful projects she has to share with us using this sketch. Just click the Next button below to visit her blog or use the Roll Call List below to find your way. We would love it if you would leave us a comment and let us know what you enjoyed about our projects. I hope you enjoy the rest of our blog hop. 
Roll Call
If you live in the U.S. and do not have a Stampin' Up! Demonstrator, please contact me and I would be happy to help you with your creative projects. You may also visit my Online Store to place your order and have it shipped to you.
Until Next Time

Happy Stamping,

Tricia Butts
Independent Stampin' Up! Demonstrator
Like What You See? Visit My Online Store Here

Visit My Facebook Business Page for Updates & Ideas

Click here to Contact Me


Available While Supplies Last!
Shop For Your Favorite Retiring Products
From The Last Chance Products Sale
Click Below To Visit My Online Store

Step Up To The Plate
With The May Paper Pumpkin Kit
Click Below To Subscribe By May 10th

Celebrate Spring 
With The January-June 2021 Mini Catalog
Click Below To Shop In My Online Store


Saturday, March 27, 2021

3D Paper Trimmer March Blog Hop Happy Easter

Welcome to the 3D Paper Trimmer March Blog Hop as we showcase projects for Easter. You will be visiting with wonderful Stampin' Up! Demonstrators from around the world as they share their ideas and projects to help inspire you.
Today I am sharing a pretty Easter Treat Box created using the Mini Pizza Boxes (item #144645) which I decorated with Purple Posy Designer Series Paper from the 2019-2021 In Color 6"x6" Designer Series Paper (item #153071). I used the Brilliant Wings Dies to create the beautiful layered butterfly on the top of the box and the Itty Bitty Greetings stamp set (item #151331). 
Products Used:
Brilliant Wings Dies (item #155523)
Meadow Moments Embossing Folders (item #153126)
2019-2021 In Colors 6"x6" Designer Series Paper (item #153071) Retiring
Classic Label Punch (item #141491) Retiring
Itty Bitty Greetings stamp set (item #151331) Retiring
Highland Heather Cardstock (item #146986)
Whisper White Mini Pizza Boxes (item #144645) Retiring
Versamark Pad (item #102283)
White Embossing Powder (item #109132)
Basic Rhinestone Jewels (item #144220)
Measurements:
Highland Heather Cardstock
3 1/4" x 3 1/4" Square
4 Strips - 3/4" x 3 1/4" Embossed with the Meadow Moments Embossing Folders
Butterfly die cut with Brilliant Wings Dies
Sentiment Label punched with the Classic Label Punch
Purple Posy Designer Series Paper
3" x 3" Square
Detailed butterfly die cut with Brilliant Wings Dies
The Mini Pizza Boxes are easy to decorate and work well for a variety of occasions. I love how the Purple Posy and Highland Heather work together to create a pretty Spring feel to this treat box and the butterfly die cuts make a beautiful focal point. I added Basic Rhinestones to the center of the butterfly and to the sentiment label to decorate and add a touch of bling. The side panels for the box have been embossed with one the Meadow Moments Embossing Folders to coordinate with the butterfly theme of the box. 
With the 2020-2021 Annual Catalog coming to an end, now is a great time to stock up on your favorite retiring products during the Last Chance Product Sale. These products are available while supplies last and select products have been discounted up to 60%. 
Thank you for taking the time to visit my blog. I hope that my treat box will help inspire you to create your own beautiful projects to celebrate Easter. The Mini Pizza Boxes are a wonderful way to create beautiful treats for the holiday to give to the special people in your life.
Now it's time to visit Gez's amazing blog and see what she has to share with us. Just click on the Next button below to visit her blog. We would love it if you would leave us a comment and let us know what you enjoyed about our projects. I hope you enjoy the rest of our blog hop.


If you live in the U.S. and do not have a Stampin' Up! Demonstrator, please contact me and I would be happy to help you with your creative projects. You may also visit my Online Store to place your order and have it shipped to you.

Until Next Time

Happy Stamping,

Tricia Butts
Independent Stampin' Up! Demonstrator

Like What You See? Visit My Online Store Here

Visit My Facebook Business Page for Updates & Ideas

Click here to Contact Me


Stock Up On Your Favorite Retiring Products
From The 2020-2021 Annual Catalog
During The Last Chance Products Sale
Click Below To Visit My Online Store

Celebrate Spring
With The January-June 2021 Mini Catalog 
Click Below To Visit My Online Store

Available For A Limited Time
The Hey Chick & Hey Birthday Chick Bundles
Click Below For More Details