Showing posts with label Count On Me stamp set. Show all posts

Friday, April 1, 2022

We Create April Blog Hop Bunnies & Bears

 
Welcome to the We Create April Blog Hop as we showcase our theme of Bunnies and Bears. Our Design Team Members will be sharing fun projects and ideas to help inspire you to create your own wonderful projects. 
For my card design, I chose to use the bear from the Count On Me stamp set. I wanted to create a card that would provide comfort and support and I really liked the sentiments in this stamp set. I paired it with the retiring You're A Peach Designer Series Paper with this pretty Balmy Blue polka dot pattern. I wanted to create a card that would help brighten someone's day and let them know they were loved. 
Products Used:
Count On Me stamp set (item #155647)
Sweet Hearts Dies (item #157523)
Hippo & Friends Deis (item #153585) Retiring
You're A Peach Designer Series Paper (item #155686) Retiring
Poppy Parade Cardstock (item #119793)
Thick Basic White Cardstock (item #159229)
Basic White Cardstock (item #159276)
Cinnamon Cider Stampin' Blends Combo Pack (item #153105) Retiring
Crumb Cake Stampin' Blends Combo Pack (item #154882)
Poppy Parade Stampin' Blends Combo Pack (item #154958)
Versamark Pad (item #102283)
Metallics Embossing Powders (item #155555)
Stampin' Dimensionals (item #104430)
Measurements:
Thick Basic White Cardstock
Card Base - 8 1/2" x 5 1/2" (Scored at 4 1/4")
You're A Peach Designer Series Paper
Card Front - 5 1/4" x 4"
Basic White Cardstock
Focal Layer die cut with Hippo & Friends Dies
Sentiment Label die cut with Hippo & Friends Dies
Poppy Parade Cardstock
5 small hearts die cut with Sweet Hearts Dies
I love using designer series paper to create clean and simple cards. This pretty polka dot paper creates the perfect background for my card and the Poppy Parade hearts add a wonderful pop of color. I heat embossed the sentiment with Silver embossing powder to step up the design and I colored the bear using Stampin' Blends Markers. This adorable bear is easy to color and works well for a variety of occasions. 
Thank you for taking the time to visit my blog. I hope that my card design will help inspire you to create your own beautiful projects with this wonderful stamp set. There are so many wonderful possibilities to explore. 
Now it's time to visit Libby's blog to see what wonderful projects she has to share with us. Just click the Next button to visit her blog. We hope you enjoy our blog hop and would love it if you would leave us a comment and let us know what you liked about our projects. 

We Create Blog Hop April 2022 Blog Roll
Kimberley Morris 
Tricia Butts You Are Here!
Libby Fens
Linda Moore

If you live in the U.S. and do not have a Stampin' Up! Demonstrator, please contact me and I would be happy to help you with your creative projects. You may also visit my Online Store to place your order and have it shipped to you. 

Until Next Time

Happy Stamping,

Tricia Butts
Independent Stampin' Up! Demonstrator

Like What You See? Visit My Online Store Here

Visit My Facebook Business Page for Updates & Ideas

Click here to Contact Me


Stock Up On Your Favorite Retiring Products
Available Only While Supplies Last
Click Below To Visit My Online Store

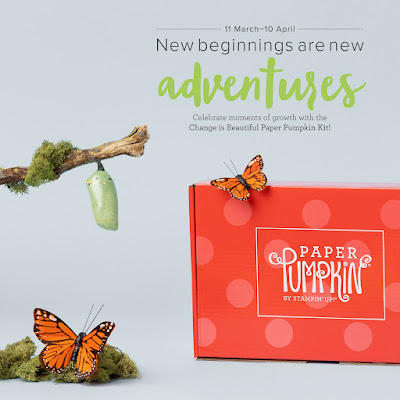
Celebrate New Beginnings
With The April Paper Pumpkin Kit
Click Below To Subscribe By April 10th


Saturday, November 13, 2021

Stamping Inkspirations November Blog Hop Thankful For You

Welcome to the Stamping Inkspirations November Blog Hop as we showcase projects with the theme "Thankful For You". Sending Thank You cards is a wonderful way to show the people in your life how much you appreciate them and all that they do. You will be visiting with our Design Team Members as they share their ideas and projects to help inspire you to create your own way to say Thank You to the people in your life.
My Thank You card is a clean and simple design featuring the 2020-2022 In Color 6"x6" Designer Series Paper. I used the Quadrangle One Sheet Wonder pattern that I used for this card and combined it with the Count On Me stamp set and Through It Together stamp set for a bright and cheerful card design. With this One Sheet Wonder, you can create four cards with the option to make them all the same or vary them to create different versions.
Products Used:
Count On Me stamp set (item #155647)
Through It Together stamp set (item #155796)
Stitched So Sweetly Dies (item #151690)
2020-2022 In Color 6"x6" Designer Series Paper (item #155230)
Magenta Madness Cardstock (item #153080)
Basic White Cardstock (item #159276)
Memento Tuxedo Black Pad (item $132708)
Versamark Pad (item #102283)
Basics Embossing Powders (item #155554)
Magenta Madness Stampin' Blends Combo Pack (item #153106)
Basic Black Stampin' Blends Combo Pack (item #154843)
2020-2022 In Color Square Gems (item #155572)
Stampin' Dimensionals
Measurements:
Magenta Madness Cardstock
Card Base - 8 1/2" x 5 1/2" (Scored at 4 1/4")
Sentiment Label die cut with Stitched So Sweetly Dies
Basic White Cardstock
Card Front - 5 1/4" x 4"
Focal Label die cut with Stitched So Sweetly Dies
Magenta Madness Designer Series Paper
This clean and simple card design is great for creating multiple cards to stock up your card stash. I love that you can create a variety of card designs with this template or you can choose to create them all the same. I love how the cute penguin from the Count On Me stamp set pops against the Magenta Madness and Basic White color combination. I popped up the scalloped rectangle with Stampin' Dimensionals to step up the design and used the Square Gems in Magenta Madness to add a touch of bling. 
Thank you for taking the time to visit my blog today. I hope that my card design will inspire you to explore creating your own beautiful cards to share with the people in your life. 
Now it's time to visit Teri's Blog and see what she has to share with us. Just click the Next button to visit her blog or use the Roll Call List below to find your way. We would love it if you would leave us a comment and let us know what you enjoyed about our projects. I hope enjoy the rest of our blog hop. 

Roll Call List

If you live in the U.S. and do not have a Stampin' Up! Demonstrator, please contact me and I would be happy to help you with your creative projects. You may also visit my Online Store to place your order and have it shipped to you. 

Until Next Time

Happy Stamping,

Tricia Butts
Independent Stampin' Up! Demonstrator

Like What You See? Visit My Online Store Here

Visit My Facebook Business Page for Updates & Ideas

Click here to Contact Me


Explore The Beautiful Eden's Garden Collection
Click Below For More Details

The Seasonal Sale Is Coming Soon!
Click Below For More Information


Tuesday, July 27, 2021

Paper Pumpkin Possibilities July Blog Hop The Adventure Begins


Welcome to the Paper Pumpkin Possibilities July Blog Hop as we showcase alternative project ideas using The Adventure Begins Kit. You will be visiting with talented Stampin' Up! Demonstrators as they share their ideas and projects to help inspire you to think outside the box.
The July Paper Pumpkin kit would have to be one of my all time favorites. I just love the designs and colors for these fun fold designs. This meant that it was very difficult for me to cut up any of the card bases for my alternate card design. So instead, I decided to cut up one of the beautiful coordinating envelopes to create the background of my card design. For my focal image, I chose the sweet bear from the Count On Me stamp set from the 2021-2022 Annual Catalog. It's one of my favorite stamp sets and I thought it was a perfect fit for this card.
Products Used:
Paper Pumpkin July Kit The Adventure Begins
Count On Me stamp set (item #155647)
Misty Moonlight Cardstock (item #153081)
Basic White Cardstock (item #159276(
Memento Tuxedo Black Pad (item #132708)
Versamark Pad (item #102283)
Metallics Embossing Powders (item #155555)
Crumb Cake Stampin' Blends Combo Pack (item #154882)
Poppy Parade Stampin' Blends Combo Pack (item #154958)
Measurements:
Misty Moonlight Cardstock
Card Base - 8 1/2" x 5 1/2" (Scored at 4 1/4")
Basic White Cardstock
Layer 1 - 5 1/4" x 4"
Stamped bear image from the Count On Me stamp set
Sentiment Strip - 1/2" x 4"
Envelope 
3 Strips - 1 1/4" x 5" cut from the front & top panel of the envelope
From the moment I saw the envelopes, I knew that I needed to find a way to create a background with the beautiful designs. I carefully pulled the envelope apart and then cut off the top of the envelope, a  strip above the white label area and a strip below the white label. I trimmed each piece to create 3 strips measuring 1 1/4" x 5". I attached each strip to the Basic White cardstock layer so that it created a flow from the ground up to the sky. 
For the focal image, I stamped the bear image onto a piece of Basic White cardstock with Memento Tuxedo Black ink and colored the bear with the Crumb Cake Stampin' Blends Markers and the heart with the Poppy Parade Stampin' Blends Markers. I fussy cut the image out ready to attach to the card front. For the sentiment, I heat embossed one of the sentiments from the exclusive stamp set from the kit with Gold embossing powder onto a Basic White 1/2" strip. I trimmed the right end at an angle and attached it to the card front. Using Stampin' Dimensionals from the kit, I attached the bear image to the card front over the left side of the sentiment strip. To complete the design, I added three of the yellow colored sequins to add a touch of bling. 
Thank you for taking the time to visit my blog. I hope that my alternative card design will help spark your creativity to create your own wonderful projects with this kit. I love being able to combine products from the 2021-2022 Annual Catalog with the kit supplies to create something fun and unique.
Now it's time to visit Elizabeth's blog and see what alternative ideas she has to share with us. Just click the Next button below to visit her blog. Please leave us a comment and let us know what you liked about our projects. I hope you enjoy the rest of our blog hop. 

If you live in the U.S. and do not have a Stampin' Up! Demonstrator, please contact me and I would be happy to help you with your creative projects. You may also visit my Online Store to place your order and have it shipped to you. 

Until Next Time

Happy Stamping,

Tricia Butts
Independent Stampin' Up! Demonstrator

Like What You See? Visit My Online Store Here

Visit My Facebook Business Page for Updates & Ideas

Click here to Contact Me


Stock Up & Save 15%
During the Designer Series Paper Sale
Click Below To Visit My Online Store

Share A Box Of Hope
With The August Paper Pumpkin Kit
Click Below To Subscribe By August 10th

Explore Your Creativity
With The Kits Collection
Click Below To Visit My Online Store


Saturday, July 3, 2021

Stamping With Friends Card Challenge July Blog Hop Slimline Card

 Welcome to the Stamping With Friends Card Challenge July Blog Hop and this month we have been challenged to create a Slimline card design. You will be visiting with talented Stampin' Up! Demonstrators as they share their ideas and projects to help inspire you.
For my Slimline card, I chose to create a fun birthday card with some of the new stamp sets from the 2021-2022 Annual Catalog. I wanted it to be a clean and simple stamping design with a bit of a twist and I love how it turned out. The colors I chose are Pale Papaya, Coastal Cabana and Misty Moonlight and I add Silver embossing for the sentiment to step it up. The stamp sets I chose to use are Watercolor Shapes for the background design, Biggest Wish for the sentiments and Count On Me for the cute little penguin. It is so much fun to play with different stamp sets and create fun new designs. The wonderful thing about a Slimline card is that you have a larger area to create your design without it feeling overcrowded. 
Products Used:
Biggest Wish stamp set (item #155052) New
Count On Me stamp set (item #155647) New 
Watercolor Shapes stamp set (item #156968) New
Basic White Thick Cardstock (item #159229)
Basic White Cardstock (item #159276)
Misty Moonlight Cardstock (item #153081)
Coastal Cabana Classic Ink Pad (item #147097)
Misty Moonlight Classic Ink Pad (item #153118)
Pale Papaya Classic Ink Pad (item #155670) New
Versamark Pad (item #102283)
Memento Tuxedo Black Pad (item #132708)
Metallics Embossing Powders (item #155555) New
Basic Black Stampin' Blends Combo Pack (item #154843)
Pale Papaya Stampin' Blends Combo Pack (item #155519) New
Pumpkin Pie Stampin' Blends Combo Pack (item #154897)
Mini Stampin' Dimensionals (item #144108)

Measurements:
Basic White Thick Cardstock
Card Base - 8 1/2" x 7" (Scored at 3 1/2" along the 7" side)
Basic White Cardstock
Focal Layer - 8" x 3"
Stamped and fussy cut penguins from the Count On Me stamp set
Misty Moonlight Cardstock
Layer 1 - 8 1/4" x 3 1/4"

This card design is a great SIP card - stamps, inks and paper. The layers of cardstock help create dimension with the Misty Moonlight adding a frame around the focal layer that helps the stamped images pop. For the background design, I stamped the large circles with Coastal Cabana and the small circles with Pale Papaya Classic inks using the Watercolor Shapes stamp set. I love the texture that these images create. The small crosses image is from the Biggest Wish stamp set and I stamped them randomly on the background with Misty Moonlight Classic ink to complete the background design. The sentiment has been heat embossed with Silver embossing powder using the cursive "happy" sentiment and the more bold block style "Birthday" towards the center of the card design. I love how the embossing steps up the design with a bit of shimmer that works well with this color combination. The cute little penguins from the Count On Me stamp set, were creating by stamping the image twice onto a scrap of Basic White cardstock using Memento Tuxedo Black ink and I colored them with the Stampin' Blends Markers. Using Paper Snips, I fussy cut out the penguins and balloons and added Mini Stampin' Dimensionals onto the back of each piece. For placement, I stamped the penguin image twice onto the card design with Memento Tuxedo Black ink and then lined up the fussy cut images and adhered them on top of each of the penguins and the balloons to add some dimension to the design. This card design works well for people of all ages and is a wonderful way to celebrate a special day. 

Thank you for taking the time to visit my blog. I hope that my card design will help inspire you to try creating your own Slimline cards. There are so many wonderful possibilities to explore using stamps, ink and paper to create your designs.Now it's time to visit Michelle's blog and see what wonderful projects she has to share with us. Just click on the Next button below to visit her blog or use the Roll Call List to find your way. We would love it if you would leave us a comment and let us know what you enjoyed about our projects. I hope you will enjoy the rest of our blog hop. 


If you live in the U.S. and do not have a Stampin' Up! Demonstrator, please contact me and I would be happy to help you with your creative projects. You may also visit my Online store to place your order and have it shipped to you. Remember to check out the Designer Series Paper Sale during July and save 15% on select designer series paper. 

Until Next Time

Happy Stamping,

Tricia Butts
Independent Stampin' Up! Demonstrator

Like What You See? Visit My Online Store Here

Visit My Facebook Business Page for Updates & Ideas

Click here to Contact Me


Stock Up & Save

During the Designer Series Paper Sale

Click Below To Visit My Online Store


Enjoy A Creative Adventure
With The July Paper Pumpkin Kit
Click Below To Subscribe By July 10th

Explore Your Creativity
With The Kits Collection
Click Below To Visit My Online Store