
Welcome to the We Create May Blog Hop as we celebrate this month's theme "Flower Frenzy". Stampin' Up! has so many wonderful products featuring flowers for us to share with you and help inspire you to get creative. I hope you will take the time to visit with our talented Design Team as they share their projects and ideas.

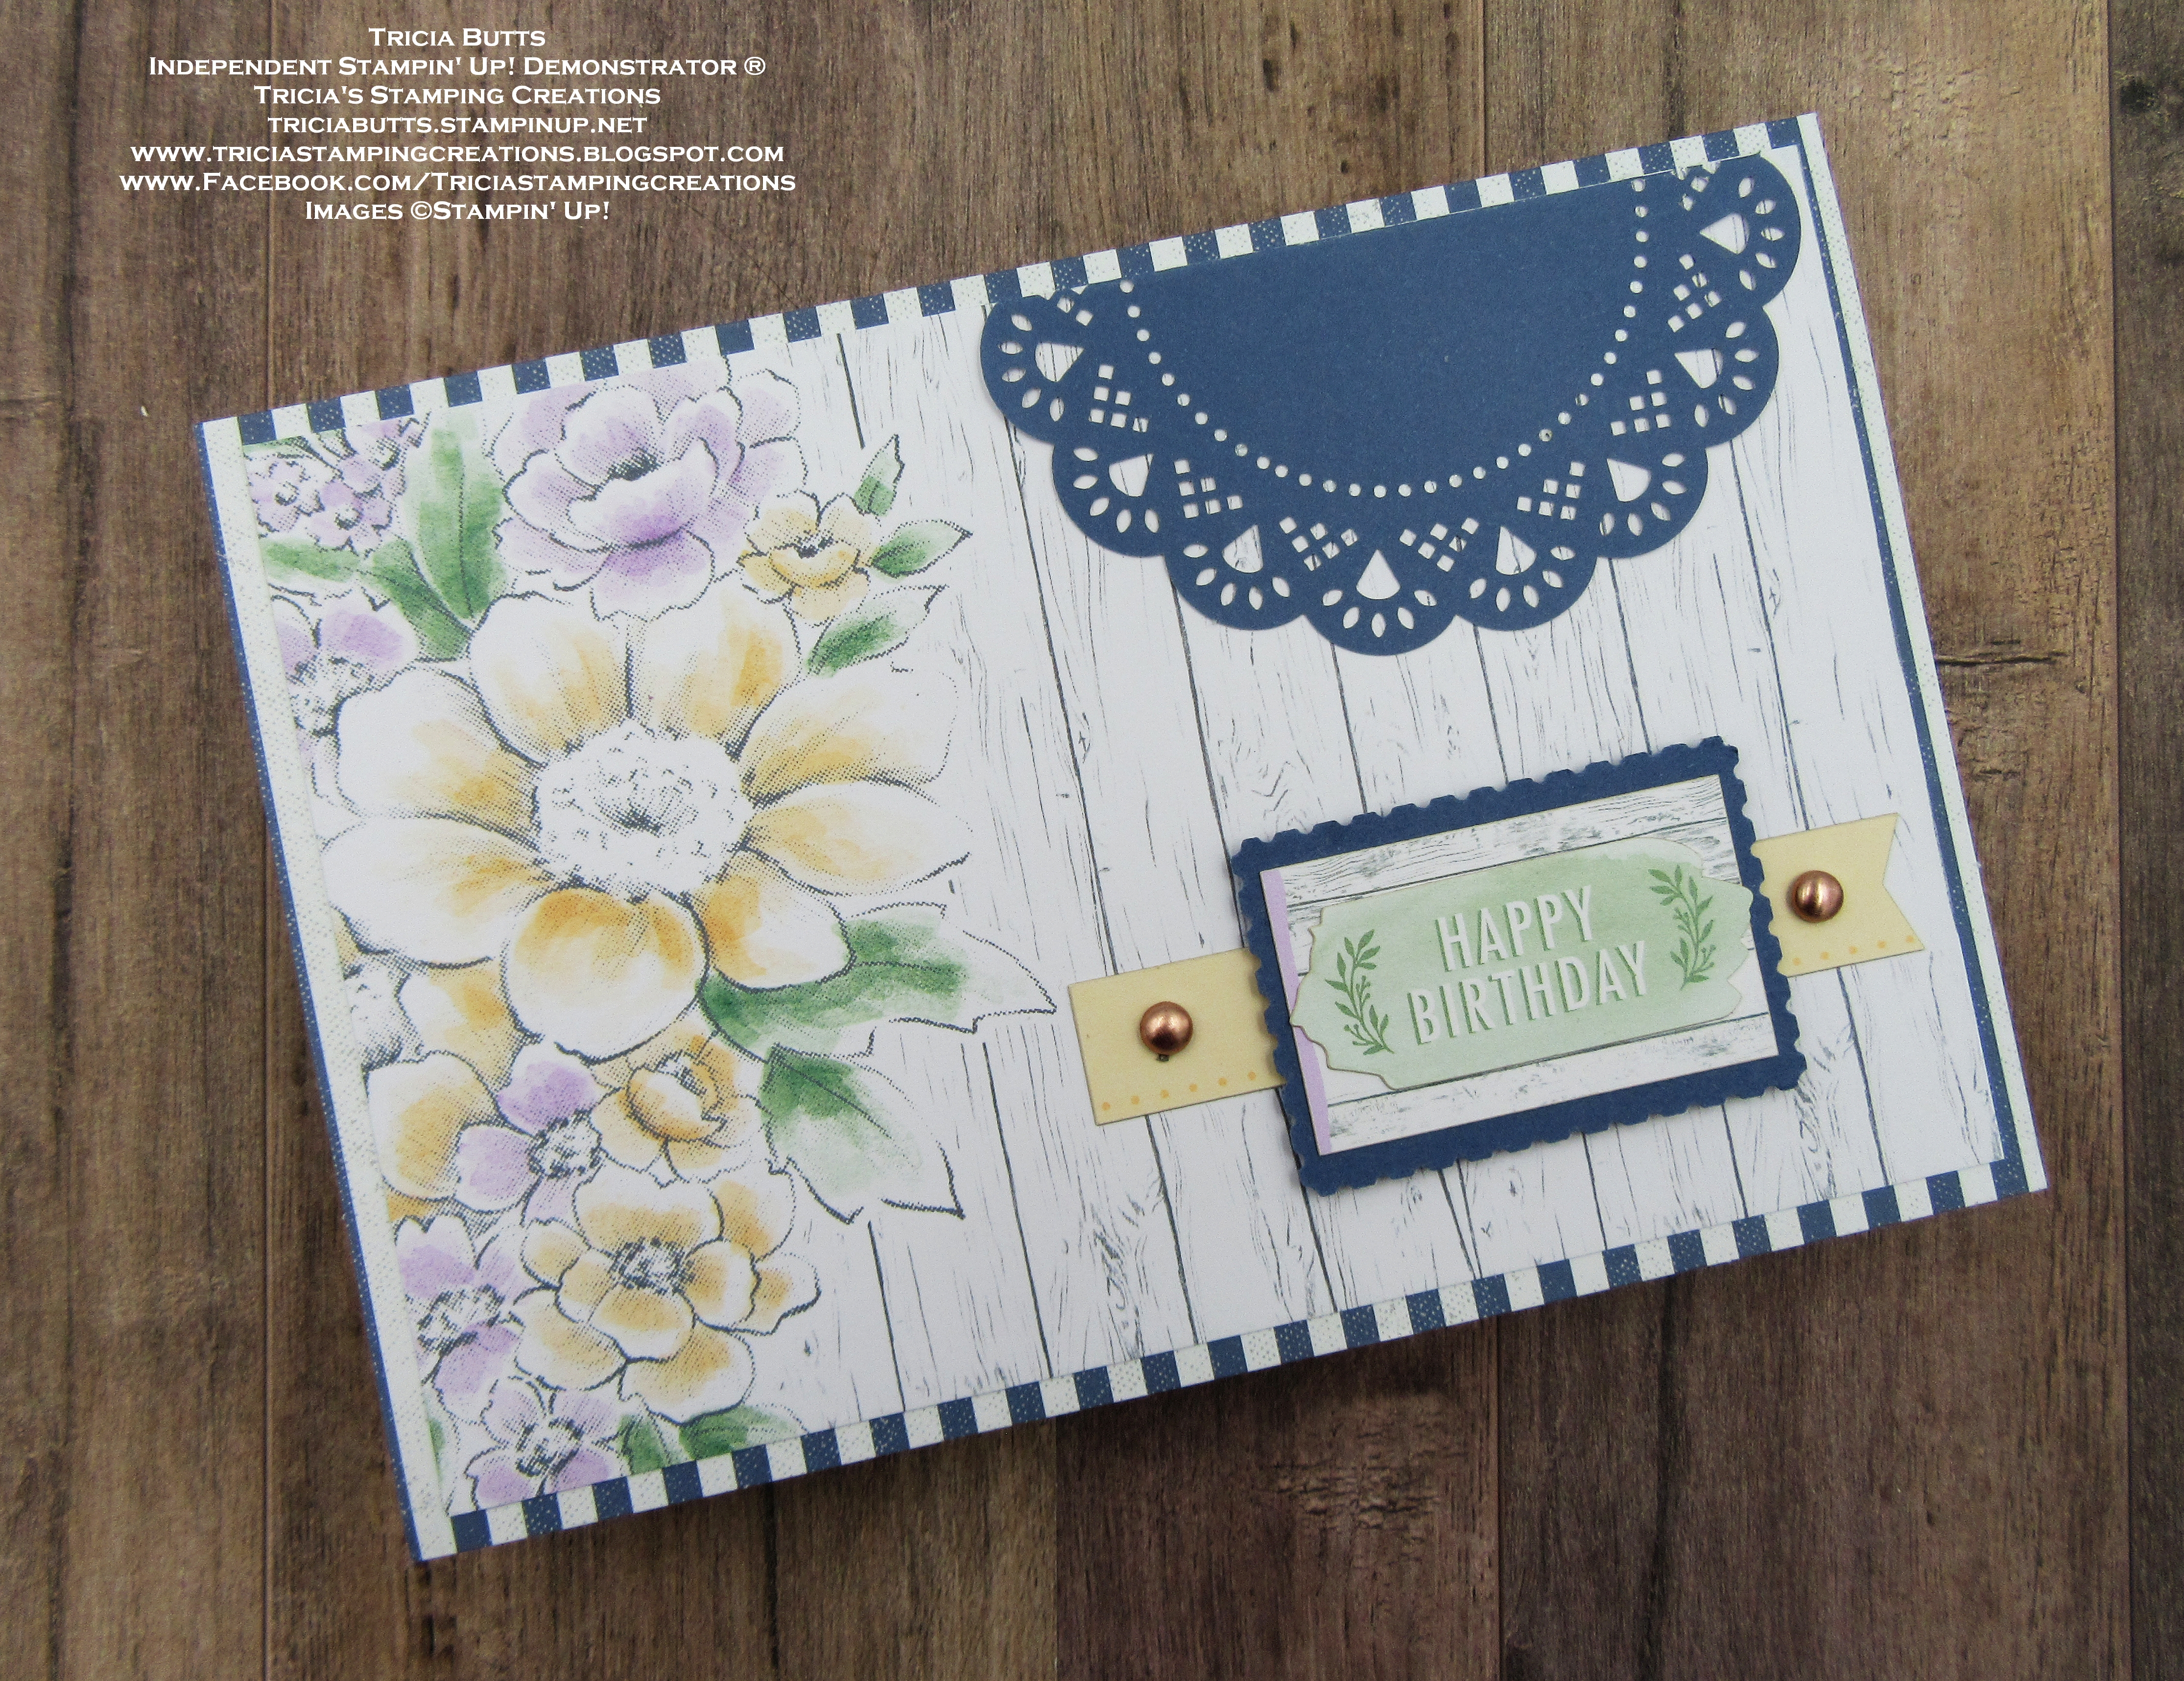
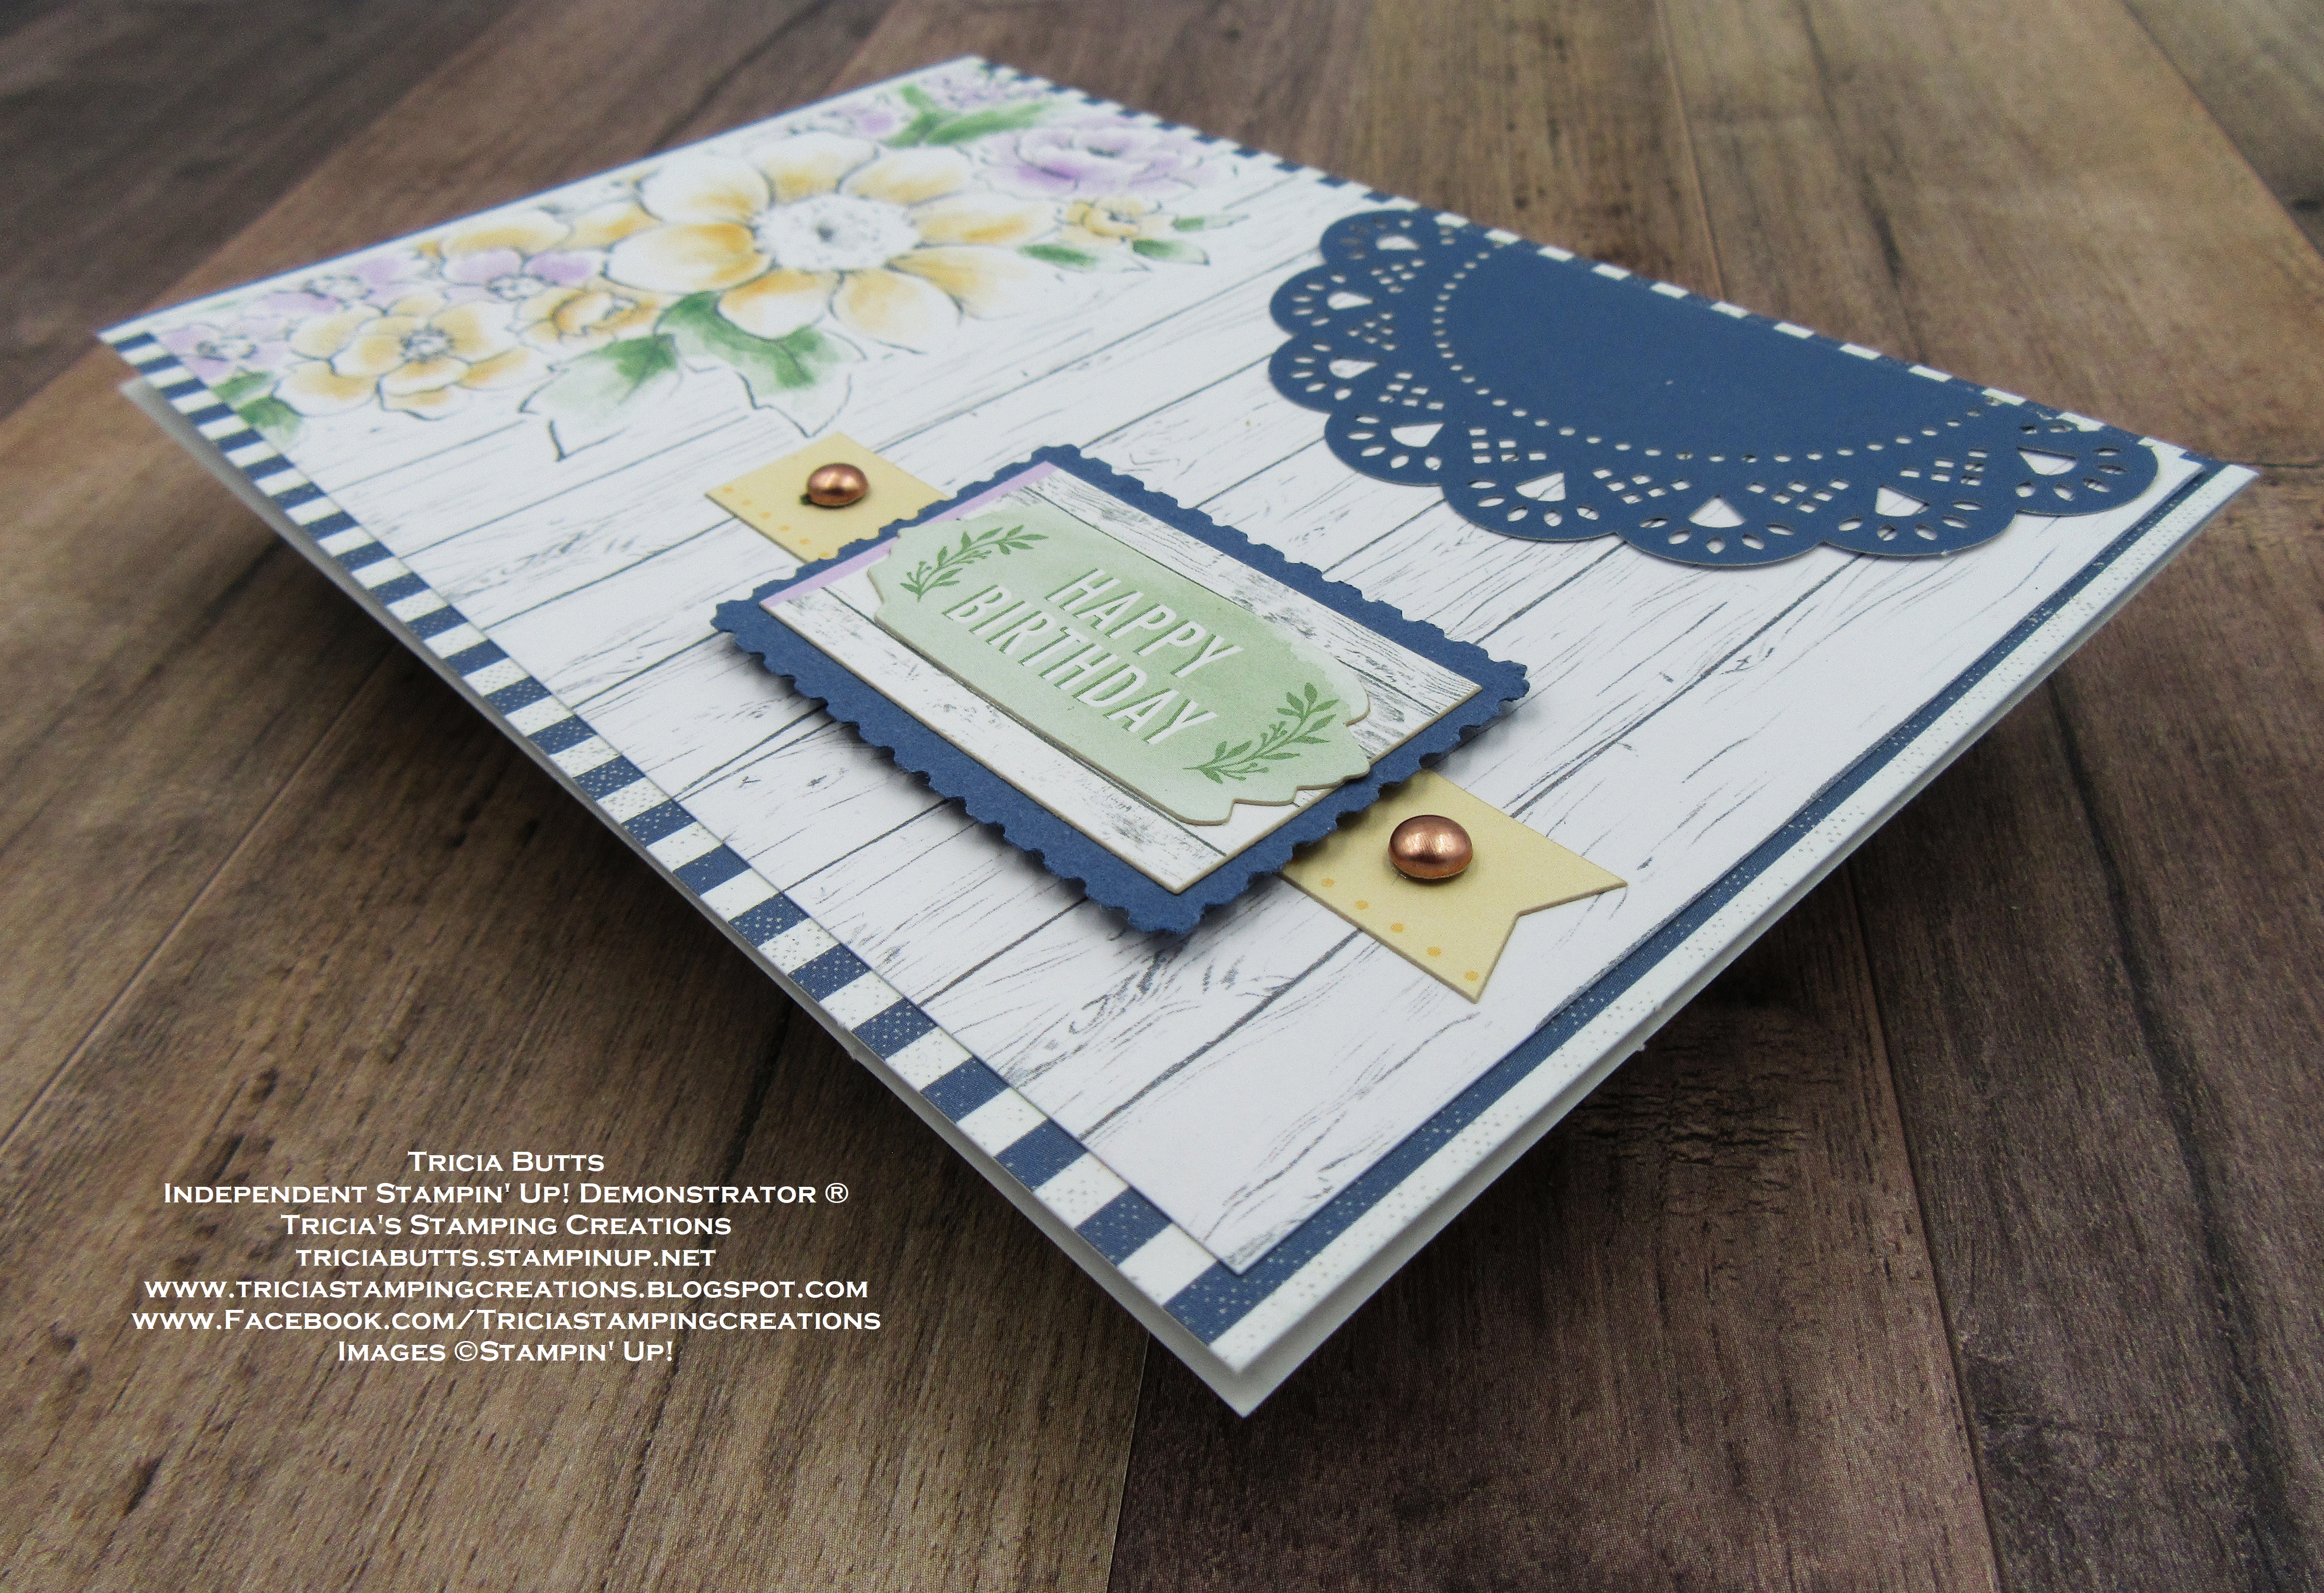
For my card design, I chose to use the Heart & Home Memories & More Card Pack with the coordinating Heart & Home Memories & More Cards & Envelopes, to create a beautiful birthday card. I love the striped background on the card base and how it frames the pretty floral Memories & More card that I used for the card front. The stickers in the card pack work well for creating the sentiment and accents for this card design. The Heart & Home Memories & More products are a great way to create beautiful card quickly and simply and you don't need to stamp.
Products Used:
Heart & Home Memories & More Card Pack (item #157957)
Heart & Home Memories & More Cards & Envelopes
(item #157958)
Heart & Home Doilies (item #157956)
Misty Moonlight Cardstock (item #153081)
Rectangular Postage Stamp Punch (item #152709)
Brushed Metallic Adhesive Backed Dots (item #156506)
Stampin' Dimensionals (item #104430)
Measurements:
Heart & Home Memories & More Striped Card Base- 41/4" x 6 1/4"
Large Memories & More Card - 4" x 6"
Misty Moonlight Rectangular Postage Label
1/2 Misty Moonlight Doily

To create this pretty card, it is simply a matter of layering the different elements to build the card. I used half of one of the Misty Moonlight doilies to embellish the top right edge of the card front. I love the way the lacy detail helps step up the card design. For the sentiment, I punched out a postage rectangle from Misty Moonlight cardstock with the Rectangular Postage Punch and added the woodgrain rectangle sticker to it to create the background for the sentiment, which is also a sticker from the card pack. I added the sentiment label to the card front with Stampin' Dimensionals and then added one of the Pale Papaya arrow stickers (cutting it in half) on either side of the sentiment label. To finish off the card design, I added two of the Copper Brushed Adhesive Backed Dots to the arrow.

Thank you for taking the time to visit my blog. I hope that my card design will help inspire you to explore the beautiful products that Stampin' Up! has to offer to help you create your own wonderful projects.

Now it's time to visit Tanya's blog and see what she has to share with us. Just click the Next button below to visit her blog. We would appreciate it if you would leave us a comment and let us know what you liked about our projects. I hope you enjoy the rest of our blog hop.

If you live in
the U.S. and do not have a Stampin' Up! Demonstrator, please contact me and I
would be happy to help you with your creative projects. You may also visit my
Online Store to place your order and have it shipped to you.

Until Next
Time
Happy
Stamping,
Tricia Butts
Independent Stampin' Up!
Demonstrator
Like What You
See? Visit My Online Store Here
Visit My Facebook Business Page for Updates & Ideas
Click here to Contact Me
Final Days!
Stock Up On Retiring Products Now
Click Below To Visit My Online Store
Stock Up On Retiring Products Now
Click Below To Visit My Online Store

Explore The Amazing New 2022-2024 In Colors
With The May Paper Pumpkin Kit
Click Below To Subscribe By May 10th

This is absolutely lovely! I love the design with the doily and the balance it brings!
ReplyDelete