It's time to hop along with the Global Stamping Friends (GSF) October Blog Hop as we share ideas for creating fun Treat Holders just in time for the holidays. You will be visiting with Stampin' Up! demonstrators from around the world as they share their projects to help inspire you. I hope you enjoy the treat ideas we are sharing this month.
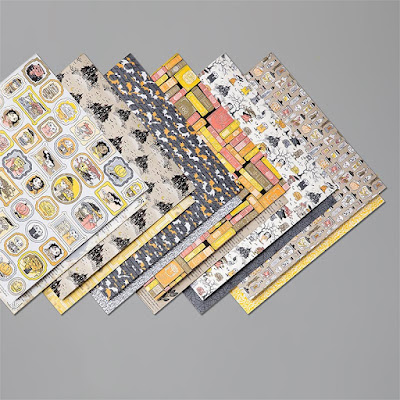
Today I am sharing a cute treat idea using the Mini Pizza Boxes (item #144645) from the 2019-2020 Annual Catalog. These boxes are so easy to decorate and are very versatile. I colored the outside of the box using a piece of sponge and Memento Tuxedo Black ink to transform the white pizza box to black. To decorate the box, I used a piece of the Monster Bash Designer Series Paper (item #150447) from the 2019 Holiday Catalog. I cut a 3 1/4" square piece for the top of the box and three 3 1/4" x 3/4" strips for the sides. I attached the designer series paper pieces with Snail adhesive to the box.
Using the Spooktacular Bash Bundle (item #153040), I stamped the mummy image onto a piece of Whisper White cardstock and colored the image using Stampin' Blends Markers. I die cut the image using the coordinating die from the Ornate Frames dies which is included in the bundle. I layered the die cut image onto the detailed frame die cut from Basic Black cardstock and attached it to the top of the box with Black Stampin' Dimensionals (item #150893). I added two googly eyes to the mummy image from the Assorted Googly Eyes pack (item #150453) with Mini Glue Dots. I added a bow tied with the Basic Black 3/8" Scalloped Edge Ribbon (item #150449) to the top of the detailed frame with a Mini Glue dot to finish it off.
To create the sentiment, I stamped the image from the Spooktacular Bash stamp set onto Pumpkin Pie cardstock with Versamark ink and heat embossed it with Shimmer Black Embossing Powder. I die cut the sentiment with the coordinating die and attached it to the top of the box with Black Stampin' Dimensionals, overlapping the mummy image slightly.
The last step to decorating this cute treat box was to add the Basic Black 3/8" Scalloped Edge ribbon around the top edge of the sides of the box, slightly overlapping the designer series paper strips. I just love the way this ribbon coordinates with the paper and adds the finishing touch to the treat box.
Thank you for taking the time to visit my blog today. I hope that my treat box idea will help to inspire you to create your own projects for the holidays to share with family and friends. If you live in the U.S. and do not already have a demonstrator, please contact me and I would be happy to help you.
4. June Olsen
5. Jan Musselman
6. Tricia Butts
7. Kimberley Anne Morris
8. Angélique Stempelkeuken
9. Marieke Bart
Until Next Time
Happy Stamping,
Happy Stamping,
Tricia Butts
Independent Stampin' Up! Demonstrator
Independent Stampin' Up! Demonstrator
Get an early start on your Christmas cards with this no stress, no fuss card kit


This looks great! You did a fantastic job coloring that box. They look so different colored. Thanks for sharing!
ReplyDeleteI would never have thought to colour the box but it looks fab and perfectly co-ordinated with the Monster Bash DSP. I'll have to get mine used up soon! Thanks for sharing x
ReplyDeleteWOW! I hadn't thought of changing the color of the white! You're brilliant! Thank you for the inspiration! That will make my Christmas ones much more colorful!
ReplyDeleteI love your pizza box and that you took the time to color it too! TFS
ReplyDelete