Wednesday, March 16, 2022

New At SU March Blog Hop CASE the 2021-2022 Annual Catalog

Welcome to the New at SU March Blog Hop as we CASE the 2021-2022 Annual Catalog using products from the January-June 2022 Mini Catalog. What is CASE? It stands for Copy And Share Everything and is simply a way to help spark your creativity by using a project to help provide you with a map to create your own beautiful creations. Whether you choose to copy the design exactly or use the layout, the colors, the stamp set or any combination, it is a great starting point to help you get creative.
For my card design, I chose to CASE the above card design from the 2021-2022 Annual Catalog, which can be found on page 51. This card design uses the Layering Diorama Dies with the Sailing Home stamp set and coordinating Smooth Sailing Dies. For my card, I have chosen to use products from the New Horizons Suite from the January-June 2022 Mini Catalog with the Layering Diorama Dies. 
For my card design, I decided to switch it from portrait to landscape and instead of an ocean theme, I chose to showcase the mountains. For the background, I used one of the woodgrain designs from the Heart & Home Designer Series Paper. The Layering Diorama Dies worked perfectly for the opening and I created two layers using the 3rd and 4th largest dies. I love the texture and layers of this design and I think it would work well for a variety of occasions.
Products Used:
On the Horizon Bundle (item #157779)
New Horizons 6"x6" Designer Series Paper (item #157768)
Pebbles Enamel Shapes (item #158141
Layering Diorama Dies (item #155565)
Tailored Tag Punch (item #145667)
Heart & Home Designer Series Paper (item #157928)
Basic Gray Cardstock (item #121044)
Misty Moonlight Cardstock (item #153081)
Rich Razzleberry Cardstock (item #115316)
Garden Green Cardstock (item #102584)
Pear Pizzazz Cardstock (item #131201)
Basic White Cardstock (item #159276)
Misty Moonlight Classic Ink Pad (item #153118)
Versamark Pad (item #102283)
Metallics Embossing Powders (item #155555)
Stampin' Dimensionals (item #104430)
Mini Stampin' Dimensionals (item #144108)
Measurements:
Basic Gray Cardstock 
Card Base - 8 1/2" x 5 1/2" (Scored at 4 1/4")
Rich Razzleberry Cardstock
Layer 1 - 5 1/4" x 4"
Heart & Home Designer Series Paper
Card Front - 5 1/8" x 3 7/8"
New Horizons Designer Series Paper
Background Layer - 3 3/4" x 4 3/4"
Misty Moonlight Cardstock
2 sets of mountains die cut with the Horizon Dies
Basic White Cardstock
1 set of mountain detail (Snow) die cut with the Horizon Dies
Sentiment Tag punched with the Tailored Tag Punch
Garden Green Cardstock
1 set of grass die cut with the Horizons Dies
Pear Pizzazz Cardstock
2 sets of grass die cut with the Horizons Dies
Just like the original card design from the Annual Catalog, I chose to use the Layering Diorama Dies to create the opening for my card design. I liked the way it looked like a window to a scene outside. For my design, I chose to use the Heart & Home Designer Series Paper for my main background design and I layered it with a piece of Rich Razzleberry cardstock. I chose to use two different sizes of the dies to create a framed look for scene inside. I used a piece of the New Horizons Designer Series Paper to create the background scene and attached it to the center of the Basic Gray card base. I added one of Misty Moonlight mountain die cuts to the designer series paper, lining it up along the center of the design. I attached the layered card front over the top of the background using Stampin' Dimensionals to pop it up and give it dimension. I layered the snow die cut layer over the second Misty Moonlight mountain die cut and added it to the card front with Mini Stampin' Dimensionals so that it goes across the opening and slightly offset from the background die cut. I attached the Garden Green grass and one of the Pear Pizzazz grass to the inside of the bottom of the frame to create the foreground of the scene. I punched out a tag using the Tailored Tag Punch from Basic White cardstock and stamped the woodgrain image with Misty Moonlight Classic ink(stamping off once) several times to create the background design on the tag. I heat embossed the sentiment with Silver Embossing Powder and sponged the edges with Misty Moonlight Classic ink using a Sponge Dauber. I attached the {ear Pizzazz grass to the left side of the card front, towards the bottom and then added the sentiment to the bottom of the card front so that it overlaps the opening, using Stampin' Dimensionals. To embellish the card, I added several of the Pebbles Enamel Shapes on either side of the sentiment tag to complete the design. This card design reminds me of the view of the Rocky Mountains that I see each day and I love the softness of the background created by the designer series paper. 
Thank you for taking the time to visit my blog. I hope that my card design will help inspire you to try CASEing to create your own beautiful card designs. Whether you decide to copy the design exactly or use it as a blue print for your own wonderful design, it is a great way to open new doors to your creativity. 
Now it's time to visit Rochelle's wonderful blog and see what she has chosen to CASE for this month's blog hop. Just click on the Next button to visit her blog or use the Roll Call List to find your way. We would appreciate it if you would leave us a comment and let us know what you liked about our projects. I hope you enjoy the rest of our blog hop.

Roll Call List 

If you live in the U.S. and do not have a Stampin' Up! Demonstrator, please contact me and I would be happy to help you with your creative projects. You may also visit my Online Store to place your order and have it shipped to you. 

Until Next Time

Happy Stamping,

Tricia Butts
Independent Stampin' Up! Demonstrator

Like What You See? Visit My Online Store Here

Visit My Facebook Business Page for Updates & Ideas

Click here to Contact Me


Save 20% With The Savings Are In Bloom Promotion
During The Month Of March
Click Below To Visit My Online Store

Available For A Limited Time
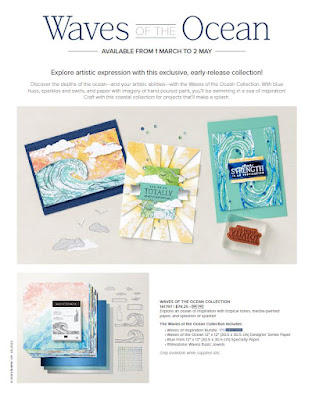
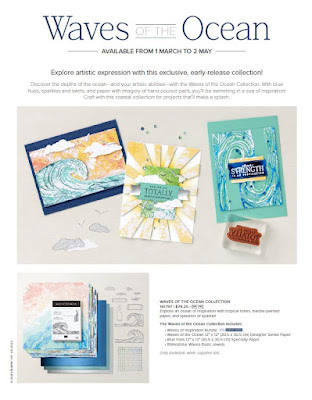
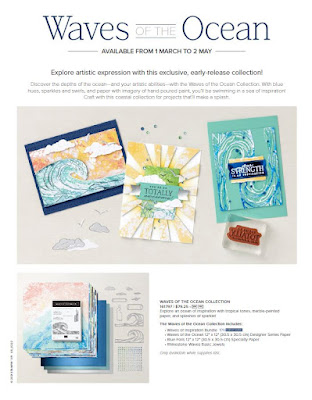
The Amazing Waves Of The Ocean Collection
Click Below For More Details


Saturday, March 12, 2022

Colour Combo March Blog Hop

Welcome to the Colour Combo March Blog Hop as we explore creating projects with Bermuda Bay, Balmy Blue and Soft Sea Foam. You will be visiting with talented Stampin' Up! Demonstrators as they share their projects and ideas to help inspire you and spark your creativity. 
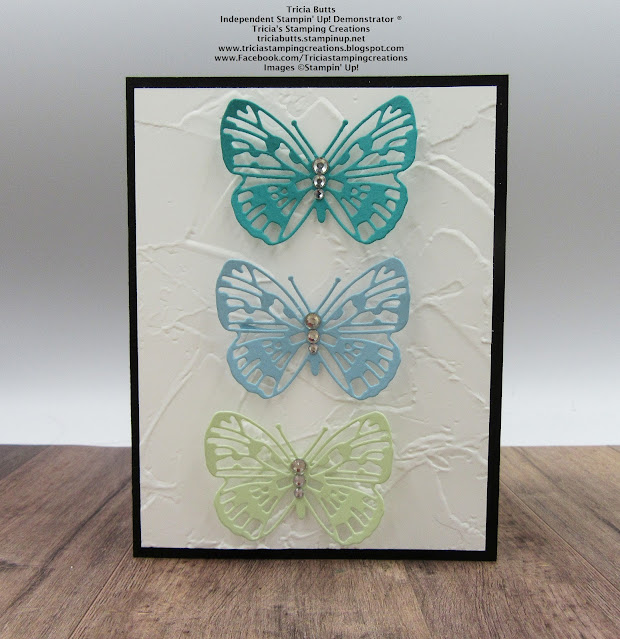
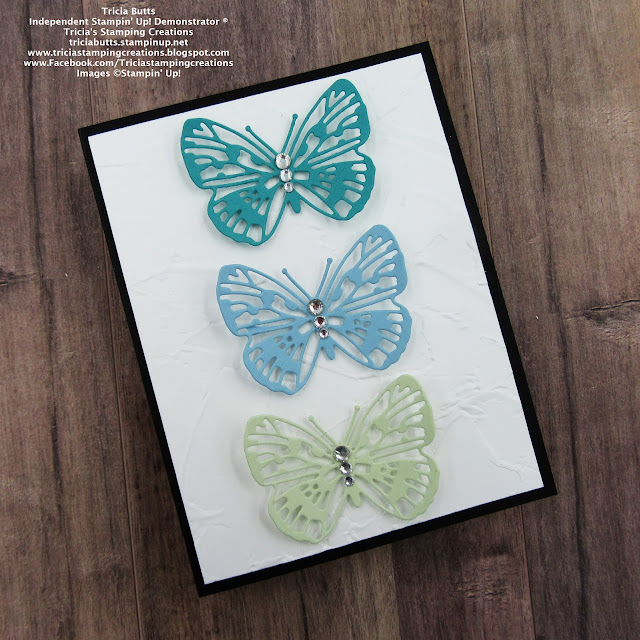
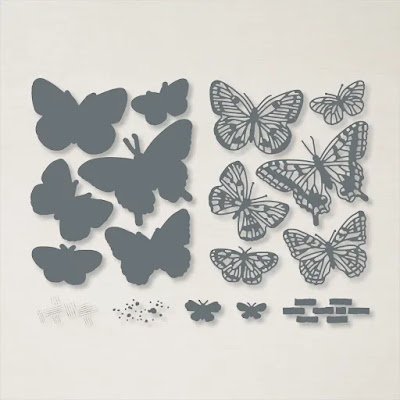
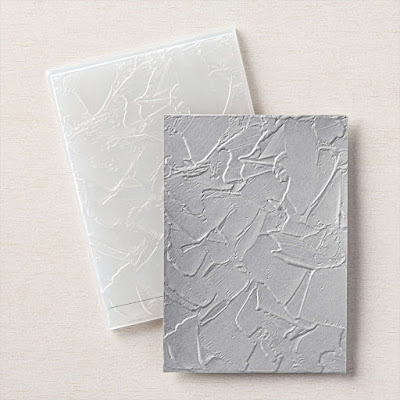
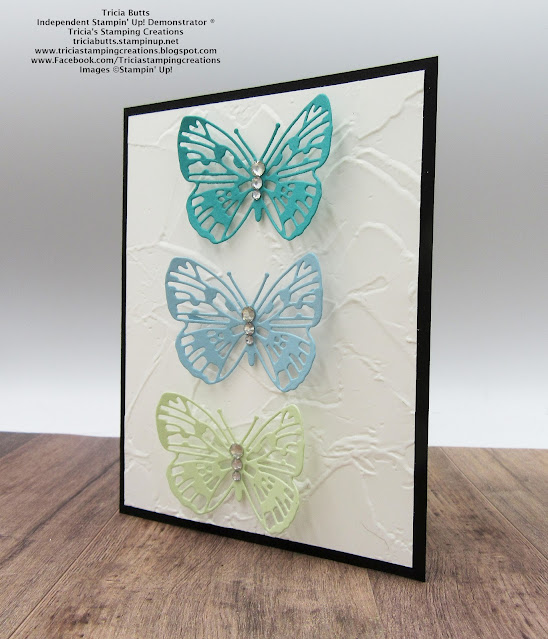
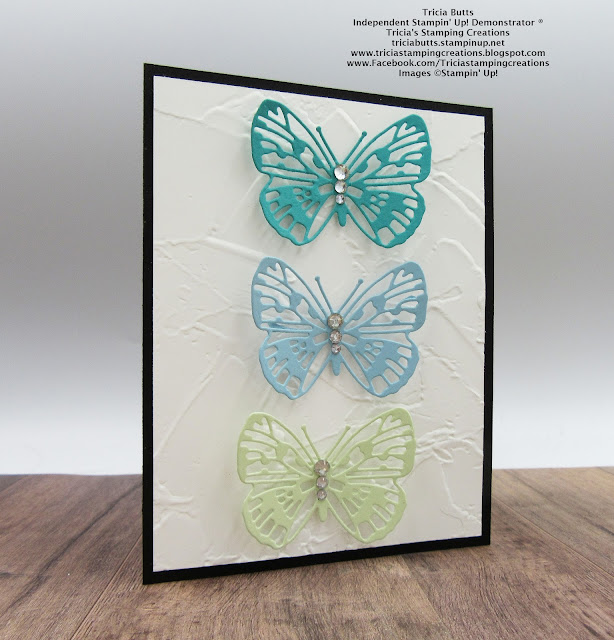
I love how these three colors work together and I wanted to showcase them in a bold yet simple design. For this card, I decided to use the Brilliant Wings Dies and I paired it with the Painted Texture 3D Embossing Folder to add texture to the background. The Black card base provides a bold frame for the Basic White background which helps make the butterflies pop. It's not often that I create a card that has no stamping, but I am really happy with how this no-stamping card design turned out.
Products Used:
Brilliant Wings Dies (item #155523)
Painted Texture 3D Embossing Folder (item #154317)
Basic Black Cardstock (item #121045)
Basic White Cardstock (item #159276)
Bermuda Bay Cardstock (item #131197)
Balmy Blue Cardstock (item #146982) 
Soft Sea Foam Cardstock (item #146988)
Basic Rhinestone Jewels (item #144220)
Mini Stampin' Dimensionals (item #144108)
Measurements:
Basic Black Cardstock
Card Base - 8 1/2" x 5 1/2" (Scored at 4 1/4")
Basic White Cardstock
Card Front - 5 1/4" x 4"
Bermuda Bay Cardstock
Detailed Butterfly die cut with Brilliant Wings Dies
Balmy Blue Cardstock
Detailed Butterfly die cut with Brilliant Wings Dies
Soft Sea Foam Cardstock
Detailed Butterfly die cut with Brilliant Wings Dies
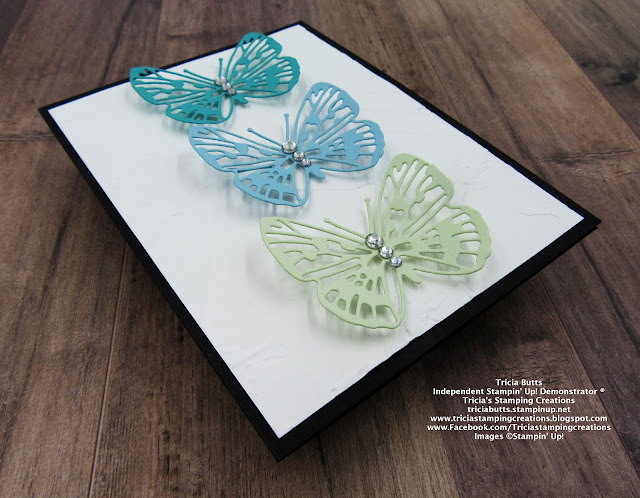
This clean and simple card design is a great way to showcase these beautiful colors using the detailed butterflies from the Brilliant Wings Dies. I cut one of each color using the same size die to create the focal design for my card. For the background, I embossed the Basic White cardstock layer with the Painted Texture 3D Embossing Folder. I love the texture that this adds to the card design. I adhered the Basic White cardstock layer to the Basic Black card base and then positioned the butterfly die cuts so that they are equally spaced down the center of the card front, starting with Bermuda Bay, then Balmy Blue and finally Soft Sea Foam. I attached them by cutting a Mini Stampin' Dimensional in half to attach to the back of the body of the butterfly and then attached them to the card front. To finish off the card design, I added Basic Rhinestone Jewels in three different sizes, going from largest to smallest from the head down towards the tail. I decided to not add a sentiment to my card design because I liked the symmetry of this design. This makes it a great all occasion card design that would work well for both men and women of all ages. 
Thank you for taking the time to visit my blog. I hope that my card design will help inspire you to create your own beautiful projects with this color combination. There are so many wonderful possibilities available using Stampin' Up!'s coordinating products.
Now it's time to visit Mo's wonderful blog to see what she has created with this month's color combination. Just click the Next button below to visit her blog. We would appreciate it if you would leave us a comment and let us know what you liked about our projects. I hope you enjoy the rest of our blog hop. 

If you live in the U.S. and do not have a Stampin' Up! Demonstrator, please contact me and I would be happy to help you with your creative projects. You may also visit my Online Store to place an order and have it shipped to you. 

Until Next Time

Happy Stamping,

Tricia Butts
Independent Stampin' Up! Demonstrator

Like What You See? Visit My Online Store Here

Visit My Facebook Business Page for Updates & Ideas

Click here to Contact Me


Save 20% With The Savings Are In Bloom Promotion
During The Month Of March
Click Below To Visit My Online Store

Available For A Limited Time
The Amazing Waves Of The Ocean Collection
Click Below For More Details


Stamping Inkspirations March Blog Hop Embossing Techniques

Welcome to the Stamping Inkspirations March Blog Hop as we showcase projects created using Embossing Techniques. Whether you love heat embossing or dry embossing, there are so many different ways to create with these wonderful techniques. You will be visiting with our wonderful Design Team Members as they share their projects and ideas to help inspire you to create your own wonderful creations.
I love embossing, so I decided to combine heat embossing with dry embossing to create my card design. For this card I chose the Love & Happiness Bundle which includes the beautifully detailed Bouquet of Love Hybrid Embossing Folder, which also includes coordinating dies. For the sentiment, I heat embossed the image from the Celebrating You stamp set with Gold embossing to add an elegant touch to the design. 
Products Used:
Celebrating You stamp set (item #158028)
Love & Happiness Bundle (item #157642)
Subtles 6"x6" Designer Series Paper (item #155229)
Blushing Bride Cardstock (item #131198)
Very Vanilla Cardstock (item #101650)
Soft Sea Foam Cardstock (item #146988)
Versamark Pad (item #102283)
Metallics Embossing Powders (item #155555)
Pearl Basic Jewels (item #144219)
Stampin' Dimensionals (item #104430)
Measurements:
Blushing Bride Cardstock
Card Base - 5 1/2" x 4 1/2" (Scored at 4 1/4")
Card Front - 5 1/4" x 4"
Very Vanilla Cardstock
Layer 1 - 5 3/8" x 4 1/8"
Embossed Heart die cut with the Bouquet of Love Hybrid Embossing Folder
Sentiment Label die cut with the Bouquet of Love Hybrid Embossing Folder (dies)
Blushing Bride Designer Series Paper
Two large flowers and two small flowers die cut with the Bouquet of Love Embossing Folder (dies)
Soft Sea Foam Cardstock
Four leaves die cut with the Bouquet of Love Embossing Folder (dies)
This pretty card design can be used for a variety of occasions. I had considered using one of the sentiments from the Love & Happiness stamp set from the bundle, but decided instead to use the Celebrating You stamp set. The card front was embossed and the heart die cut using the Bouquet of Love Hybrid Embossing Folder and I attached it to the Very Vanilla cardstock layer with Stampin' Dimensionals. For the Very Vanilla heart I die cut and embossed it and placed it inside the heart opening of the card front. After heat embossing the sentiment with Gold embossing powder onto the label, I attached it to card front across the Very Vanilla heart with Stampin' Dimensionals to pop it up. To embellish the card design, I added a flower to each end of the label using die cut flowers from the Blushing Bride Designer Series Paper and added leaves die cut from Soft Sea Foam cardstock. I used Basic Pearl Jewels to create the centers of the flowers and added three of the smallest pearls to embellish the Very Vanilla embossed heart. 
Thank you for taking the time to visit my blog. I hope that my card design will help inspire you to explore the wonderful world of embossing to help you create your own beautiful projects. There are so many amazing possibilities to explore. 
Now it's time to visit Karen's blog and see what she has to share with us. Just click on the Next button to visit her blog or use the Roll Call List below to find your way. We would love it if you would leave us a comment and let us know what you liked about our projects. I hope you enjoy the rest of our blog hop. 


If you live in the U.S. and do not have a Stampin' Up! Demonstrator, please contact me and I would be happy to help you with your creative projects. You may also visit my Online Store to place your order and have it shipped to you. 

Until Next Time

Happy Stamping,

Tricia Butts
Independent Stampin' Up! Demonstrator

Like What You See? Visit My Online Store Here

Visit My Facebook Business Page for Updates & Ideas

Click here to Contact Me 


Save 20% With The Savings Are In Bloom Promotion
During The Month Of March
Click Below To Visit My Online Store

Available For A Limited Time
The Amazing Waves Of The Ocean Collection
Click Below For More Details


Ink. Stamp. Share. March Showcase Blog Hop

Welcome to the Ink. Stamp. Share. March Showcase Blog Hop as our team members share the projects they are working on using current Stampin' Up! projects. You will have the chance to visit with Stampin' Up! Demonstrators from around the world as they share their projects and ideas to help inspire you and spark your creativity.
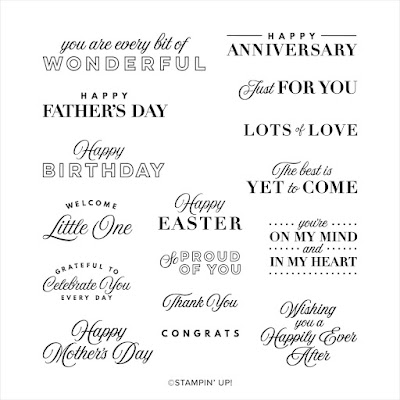
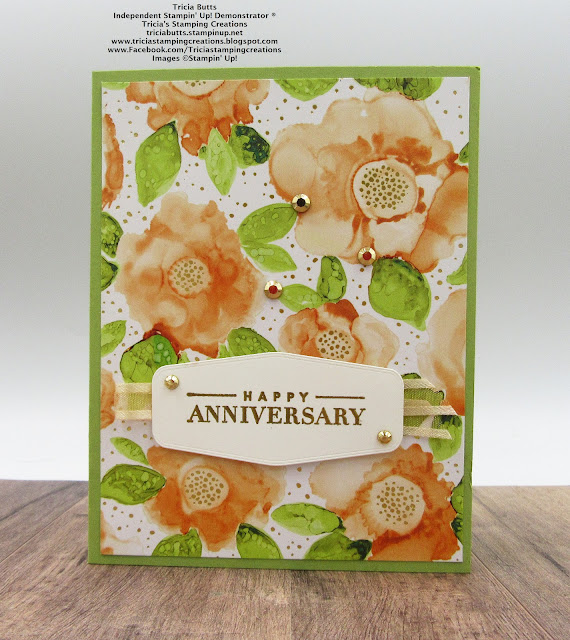
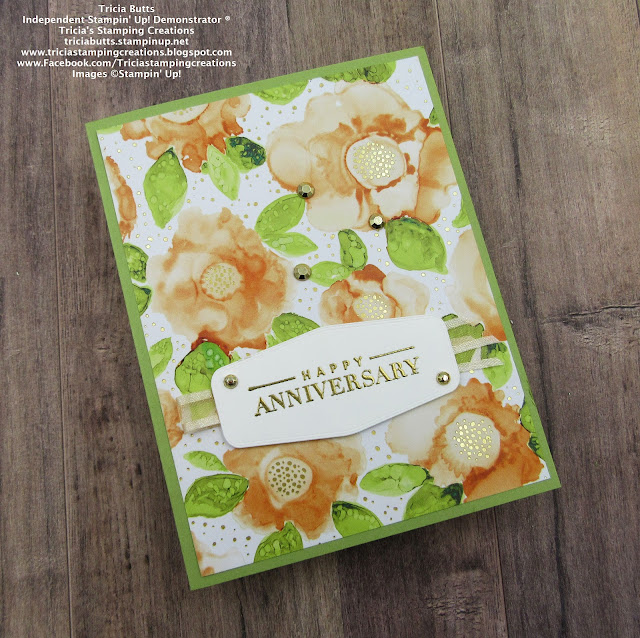
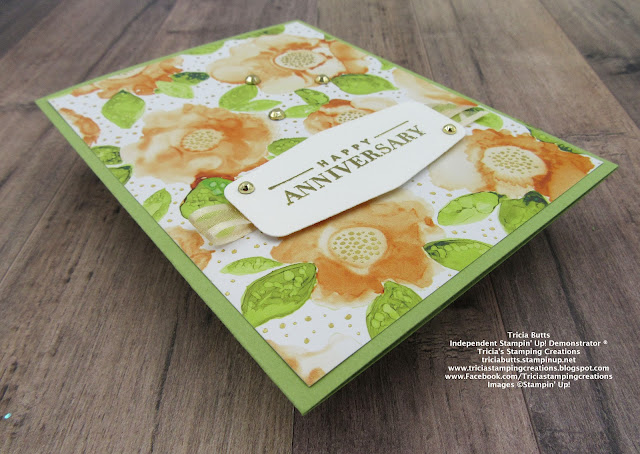
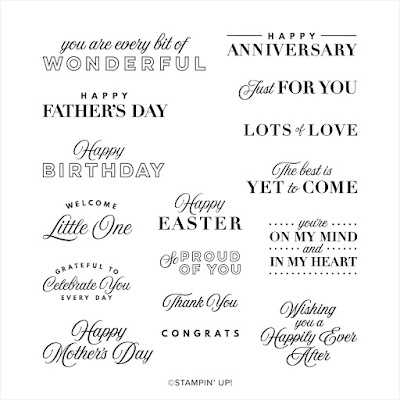
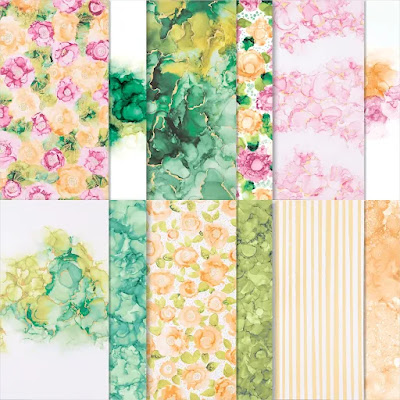
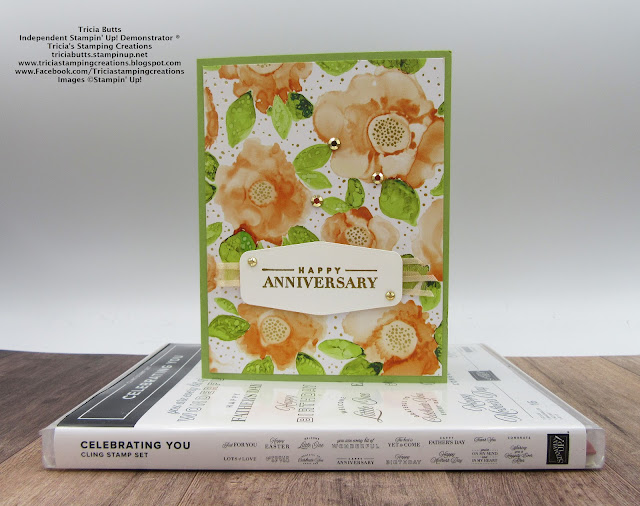
As we get closer to the end of the 2021-2022 Annual Catalog, I find myself revisiting old favorites from this catalog and combining them with new products in the January-June 2022 Mini Catalog. Today I decided to create a beautiful Anniversary card using the stunning Expressions In Ink Specialty Designer Series Paper and combined it with the wonderful sentiment stamp set, Celebrating You. The gold foil detail in the designer series paper is so elegant and I heat embossed the sentiment with gold embossing powder to coordinate to complete the design. This beautiful paper is too pretty to cover up, so I didn't add anything other than the sentiment and some simple embellishments to create this elegant clean and simple card design.
Products Used:
Celebrating You stamp set (item #158028)
Expressions In Ink Specialty Designer Series Paper (item #155464)
Tasteful Labels Dies (item #152886)
Pear Pizzazz Cardstock (item #131201)
Basic White Cardstock (item #159276)
Versamark Pad (item #102283)
Metallics Embossing Powders (item #155555)
Pale Papaya 3/8" Open Weave Ribbon (item #155672)
Gilded Gems (item #152478)
Measurements:
Pear Pizzazz Cardstock
Card Base - 8 1/2" x 5 1/2" (Scored at 4 1/4")
Expressions In Ink Designer Series Paper
Card Front - 5 1/4" 4"
Basic White Cardstock
Sentiment Label die cut with the Tasteful Labels Dies
This beautiful card design is simple to create and would work well for a variety of occasions. One of the great things about the Celebrating You stamp set is that it is full of sentiments for all occasions which makes it a great addition to your stamp stash. To embellish the sentiment, I used a piece of Pale Papaya Open Weave Ribbon that I folded in half and attached to the card front and then attached the sentiment label on top with Stampin' Dimensionals. I added two of the small Gilded Gems to the sentiment label and several of the larger size to the card front for a touch of bling. This card layout is perfect if you need to make a card in a hurry for a special occasion.
Thank you for visiting my blog. I hope that my card design will help inspire you to create your own beautiful projects using the amazing products that Stampin' Up! has to offer. 
Now it's time to visit with my fellow Stampin' Up! Demonstrators from around the world and see what they have to share with us. Just click on the Next or Previous to travel along our blog hop or use the Roll Call List to find your way. We would appreciate it if you would leave us a comment and let us know what you enjoyed about our projects. 

If you live in the U.S. and do not have a Stampin' Up! Demonstrator, please contact me and I would be happy to help you with your creative projects. You may also visit my Online Store to place your order and have it shipped to you. 

Until Next Time

Happy Stamping,

Tricia Butts
Independent Stampin' Up! Demonstrator

Like What You See? Visit My Online Store Here

Visit My Facebook Business Page for Updates & Ideas

Click here to Contact Me


Available For A Limited Time
The Amazing Waves Of The Ocean Collection
Click Below For More Details

Save 20% With The Savings Are In Bloom Promotion
During The Month Of March
Click Below To Visit My Online Store


Wednesday, March 9, 2022

Around The World On Wednesday March Blog Hop Layer Up

Welcome to the Around the World on Wednesday March Blog Hop and this month our theme is Layer Up. We have been challenged to layers to our projects to create beautiful designs. You will be visiting with our talented Design Team Members from around the world as they share their projects and ideas to help inspire you to get creative.
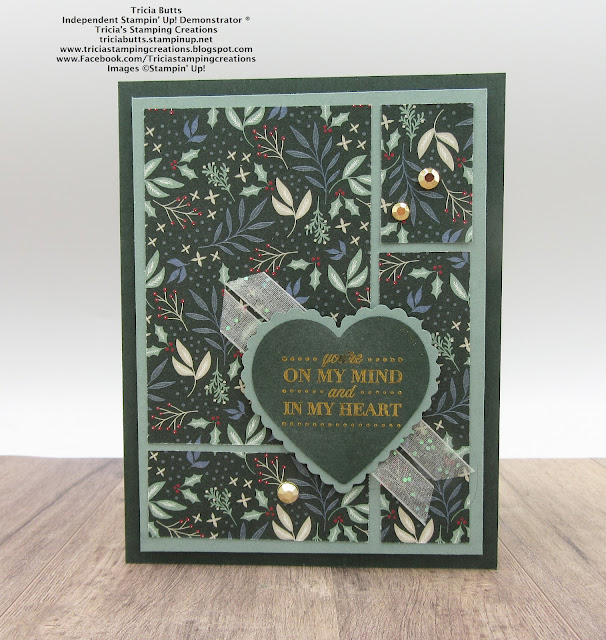
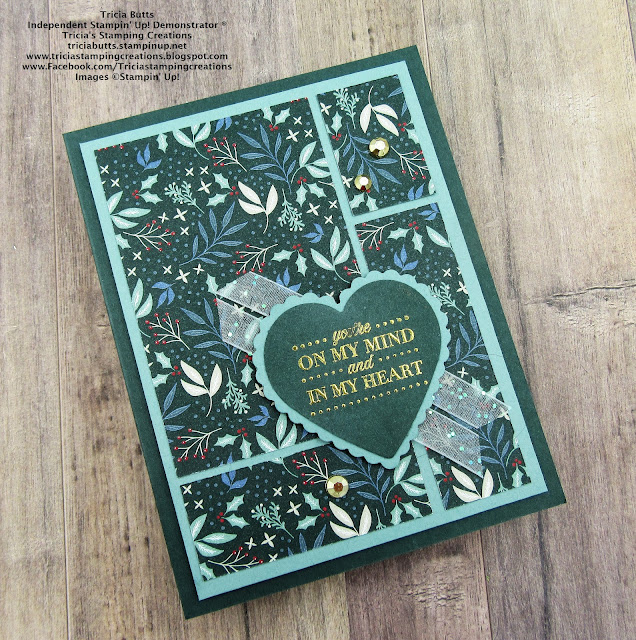
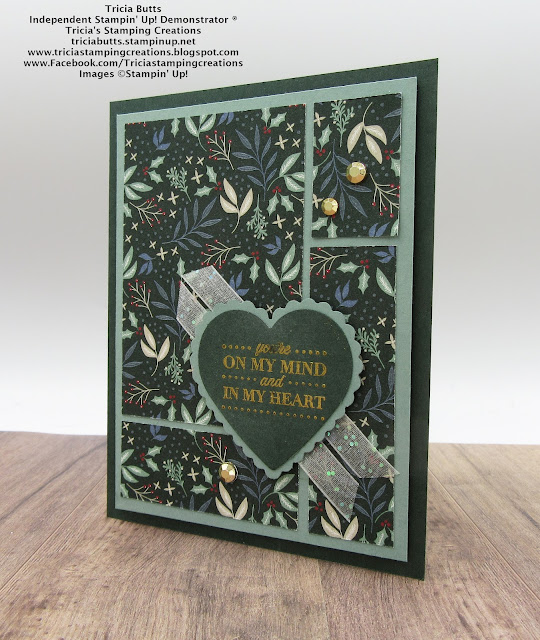
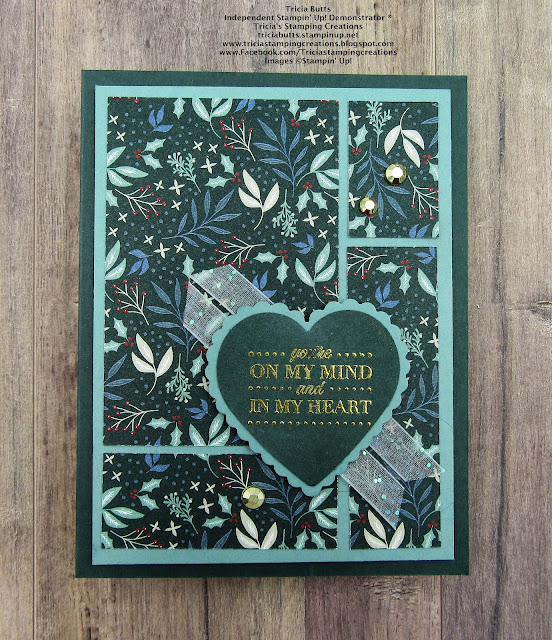
My style tends towards clean and simple, so adding a lot of layers is outside my comfort zone. With this in mind, I decided to try a fun layout that fellow Stampin' Up! Demonstrator, Karen Titus, shared recently on her blog, Stamping On The Back Porch. She created a fun layout by cutting up a piece of designer series paper and layering it onto another layer of cardstock before adding it to her card front. That gave me three layers. Then I added a sentiment using the Heart Punch Pack and that gave me two more layers. So in the end, I was able to create five layers for my card design while still being a clean and simple design. 
Products Used:
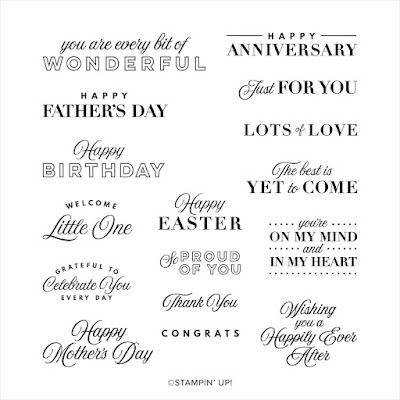
Celebrating You stamp set (item #158028)
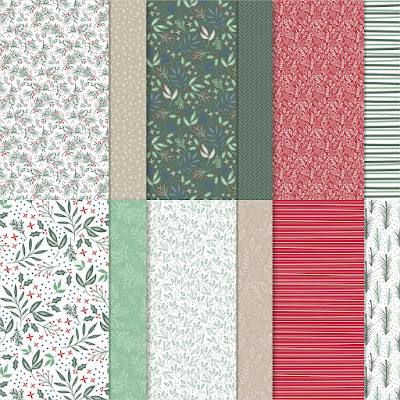
Tidings of Christmas 6"x6" Designer Series Paper (item #155718)
Heart Punch Pack (item #1512923)
Soft Succulent Cardstock (item #155776)
Evening Evergreen Cardstock (item #155574)
Versamark Pad (item $102283)
Metallics Embossing Powders (item #155555)
White 3/8" Glittered Organdy Ribbon (item #156408)
Gilded Gems (item #152478)
Stampin' Dimensionals (item #104430)
Measurements:
Evening Evergreen Cardstock
Card Base - 8 1/2" x 5 1/2" (Scored at 4 1/4")
Heart sentiment label punched with the Heart Punch Pack
Soft Succulent Cardstock
Card Front - 5 1/4" x 4"
Tidings of Christmas Designer Series Paper
3 1/2" x 4 3/4" 
Cut at 2 1/2" along the short side (3 1/2")
Cut at 3 3/4" along the short side of the large piece and 1 1/2" on the long narrow piece to create 4 pieces measuring:
2 1/2" x 3 3/4", 1" x 2 1/2", 1" x 1 1/2" & 1" x 3 1/4"
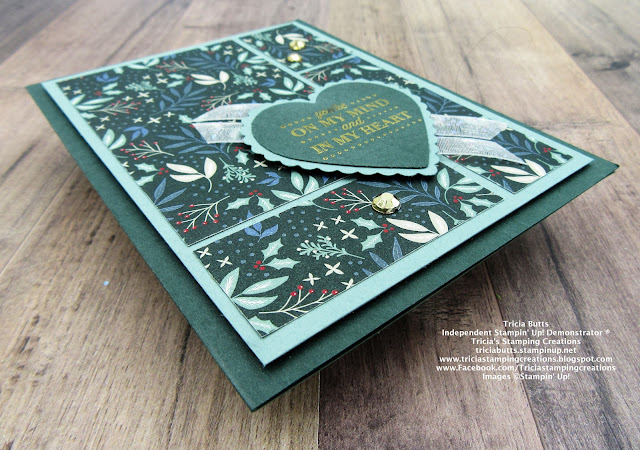
The key to this simple card design is the layout of the designer series paper pieces on the card front layer. I attached them in the order that I cut them out so that it creates a narrow border around each piece. I chose to use one of the Tidings of Christmas Designer Series Paper to show that this pretty paper can be used for so much more than Christmas cards. I chose Soft Succulent and Evening Evergreen for my cardstock colors from the colors in the designer series paper and I like the way this combination brings the design to life. I used Stampin' Dimensionals to pop up the Soft Succulent card front on the card base to give the card dimension. For the sentiment, I heat embossed the image from the Celebrating You stamp set with Gold embossing powder onto the Evening Evergreen heart and then layered it onto the Soft Succulent scalloped heart. To embellish the card, I cut two pieces of White Organdy Glittered Ribbon, both approx. 3 1/2" long, and attached them to the back of the heart sentiment label. I attached the sentiment label to the card front with Stampin' Dimensionals towards the bottom right side. To finish off the design, I added several Gilded Gems to the card front for a touch of bling to give the card an elegant touch. This card design provides a message of comfort and I think that these types of cards are very much needed right now. Cards are after all a paper hug that we can send to the people we love. 
Thank you for taking the time to visit my blog. I hope that my card design will help inspire you to explore adding layers to your cards to create beautiful designs. There are so many wonderful possibilities to explore. 
Now it's time to visit Elaine's blog and see what wonderful projects she has to share with us. Just click on the Next button to visit her blog or use the Roll Call List to find your way. We would love it if you would leave us a comment and let us know what you liked about our projects. I hope you enjoy the rest of our blog hop. 

Roll Call List
If you live in the U.S. and do not have a Stampin' Up! Demonstrator, please contact me and I would be happy to help you with your creative projects. You may also visit my Online Store to place your order and have it shipped to you. 

Until Next Time

Happy Stamping,

Tricia Butts
Independent Stampin' Up! Demonstrator

Like What You See? Visit My Online Store Here

Visit My Facebook Business Page for Updates & Ideas

Click here to Contact Me 


Celebrate Paper Pumpkin's 9th Birthday
With The Beyond The Horizon Kit
Including A Bonus Free Stamp Set
Click Below To Subscribe By March 10th


Save 20% With The Savings Are In Bloom Promotion
During The Month of March
Click Below To Visit My Online Store

Available For A Limited Time
The Waves Of The Ocean Collection
Click Below For More Details