Showing posts with label Vintage. Show all posts

Friday, January 26, 2024

Crafty Collaborations Monochromatic Color Challenge - Moody Mauve

It's week 4 of the Crafty Collaborations Monochromatic Insta Hop Color Challenge and this week we are creating with Moody Mauve. One of the 2023-2025 In Colors, this pretty color is a cross between pink and purple and I thought it would work well with my vintage card design. 
For today's card design, I wanted to use the beautiful Detailed Dogwood stamp set, which is a Level 2 Sale-a-bration Reward you can earn free with a qualifying design. I loved the beautiful images and thought they would work well to create collage style background. I paired it with the Notes of Nature stamp set and the Perennial Postage Bundle to add some detail and texture to the design. 
Products Used:
Detailed Dogwood stamp set (item #162953) Level 2 Sale-a-bration Reward
Notes of Nature stamp set (item #162630)
Perennial Postage Bundle (item #162608)
Moody Mauve Cardstock (item #161723)
Basic White Cardstock (item #159276)
Moody Mauve Classic Ink Pad (item #161649)
Versamark Pad (item #102283)
Basics Embossing Powders (item #155554)
2023-2025 In Color Jute Trim (item #161637)
Adhesive Backed Dragonflies & Birds (item #162743)
Stampin' Dimensionals (item #104430)
Mini Glue Dots (item #103683)
Measurements:
Moody Mauve Cardstock
Card Base - 8 1/2" x 5 1/2" (Scored at 4 1/4")
Focal Layer die cut with the Perennial Postage Dies
Basic White Cardstock
Card Front - approx. 4" x 5 1/4" die cut with the Perennial Postage Dies
Sentiment Layer stamped and die cut with the Perennial Postage Bundle
I love collage stamping using a variety of images and the Detailed Dogwood stamp set has a lovely variety of images to help create texture and detail into the design. For additional images, I used the Notes of Nature stamp set, which coordinates beautifully with this stamp set. To get the variety of shades from the one ink pad, I stamped the images full strength, second and even third generation to give the look of lighter and darker tones. I used the Perennial Postage Dies to add coordinating detail around the card front, focal layer and the sentiment and I gently blended Moody Mauve ink around the edges of each layer to add dimension. For the focal image, I heat embossed one of the floral images with White embossing powder onto the Moody Mauve cardstock layer. I stamped the sentiment with Moody Mauve Classic ink onto the Basic White sentiment label. To assemble the card, I attached the focal layer first with Stampin' Dimensionals to the card front and then added the sentiment layer, slightly overlapping the bottom right corner of the focal layer. To step up the design, I added some Moody Mauve Jute Trim, separating a couple of strands and tying it into a bow, before attaching it to the sentiment with a Mini Glue Dot. To finish off the design, I added several gold dragonflies to a touch of bling. I had so much fun creating this beautiful card design using Moody Mauve. I hope it inspires you to give this pretty color a try with your own projects.
Thank you for taking the time to visit my blog. I hope that my card design will inspire you to explore using Moody Mauve to create your own wonderful designs. There are so many wonderful options available to help you stretch your wings and try something new.
I hope you will take some time to enjoy the other wonderful projects being shared as part of this week's Monochromatic Insta Hop. Just click here to get started. We would love it if you would leave us a comment and let us know what you liked about our projects. I look forward to seeing you back next Friday for Week 5's Monochromatic Color Challenge. 

If you live in the U.S. and do not have a Stampin' Up! Demonstrator, please contact me and I would be happy to help you with your creative projects. You may also visit my Online Store to place your order and have it shipped to you. 

Until Next Time

Happy Stamping,

Tricia Butts
Independent Stampin' Up! Demonstrator

Like What You See? Visit My Online Store Here

Visit My Facebook Business Page for Updates & Ideas

Click here to Contact Me


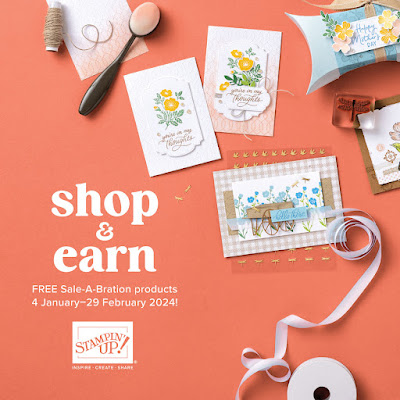
Sal-a-bration Is Here!
Earn Exclusive Free Products With A Qualifying Order
Click Below For Details

Explore Your Creativity In 2024
With The January-April 2024 Mini Catalog 
Click Below To Shop Now


Wednesday, January 10, 2024

Inspire. Create. Share January Blog Hop All About The Sale-A-Bration

It's time to visit with the Inspire. Create. Share. January Blog Hop and see the wonderful new Sale-a-bration products that are now available to order. Our wonderful Design Team will be sharing their projects and ideas to help spark your creativity for 2024. What is Sale-a-bration? It is a special time of the year when Stampin' Up! releases exclusive products that you can earn free with a qualifying order until February 29th. 
One of my favorite Sale-a-bration products would have to be the beautiful Softly Stippled Designer Series Paper, which you can earn free with a qualifying $50 order. The designs in this pack of paper are so pretty and they coordinate with the Stippled Roses Bundle that I chose to use to create my card design. I love the vintage feel of these products and that was the main influence for my card design. 
Products Used:
Stippled Roses Bundle (item #162667)
Deckled Circles Dies (item #162286)
Tailor Made Tags Dies (item #155563)
Softly Stippled Designer Series Paper (item #162975) Sale-a-bration Level 1 Reward
Pebbled Path Cardstock (item #161722)
Very Vanilla Cardstock (item #101650)
Pebbled Path Classic Ink Pad (item #161648)
Petal Pink Stampin' Blends Combo Pack (item #154893)
Calypso Coral Stampin' Blends Combo Pack (item #154881)
Soft Sea Foam Stampin' Blends Combo Pack (item #154902)
Pastel Adhesive Backed Sequins (item #160387)
Gold & Silver 1/8" Trim (item #161633)
Stampin' Dimensionals (item #104430)
Measurements:
Pebbled Path Cardstock 
Card Base - 5 1/2" x 8 1/2" (Scored at 4 1/4")
Deckled Circle die cut with the Deckled Circles Dies 
Very Vanilla Cardstock
Leaves and roses images stamped and die cut with the Stippled Roses Bundle 
Sentiment Tag die cut with the Tailor Made Tags Dies
Softly Stippled Designer Series Paper
Card Front - 5 1/4" x 4"
This pretty card design was so much fun to create and it gave me the opportunity to color with my favorite medium, Stampin' Blends Markers. I stamped the roses and leaves images with Pebbled Path Classic ink onto Very Vanilla cardstock and colored the roses using Petal Pink and Calypso Coral Stampin' Blends Markers and the leaves with the Soft Sea Foam Markers. I die cut them out with the coordinating Stippled Roses Dies and used the Light Petal Pink Stampin' Blends Marker to color around the edges of each of the images to soften the background. I attached the Pebbled Path Deckled Circle to the bottom left corner of the designer series paper card front and trimmed off the excess from the left and bottom sides. I attached the card front to the card base and then attached the leaves and roses to Deckled Circle area, popping up the top rose with Stampin' Dimensionals. For the sentiment label, I stamped the image with Pebbled Path Classic ink onto Very Vanilla cardstock and die cut it out with one of the Tailor Made Tags Dies. I attached it to the card front with Stampin' Dimensionals, slightly tucking it underneath the top rose. To embellish the card design, I added a small bow tied with Gold Trim and several of the Gold Pastel Adhesive Backed Sequins for a touch of sparkle. I love how this beautiful designer series paper brings this card design to life and how pretty the tone on tone floral design looks. It adds a wonderful elegance to a lovely Thank You card. 
Thank you for taking the time to visit my blog. I hope that my card design will help inspire you to create your own beautiful projects and take advantage of the wonderful Sale-a-bration rewards. There are so many options to explore.
Now it's time to visit Cheryl's blog and see what she has to share with us this month. Just click on the Next button below to visit her blog. We would love it if you would leave us a comment and let us know what you liked about our projects. I hope you enjoy the rest of our blog hop.


If you live in the U.S. and do not have a Stampin' Up! Demonstrator, please contact me and I would be happy to help you with your creative projects. You may also visit my Online Store to place your order and have it shipped to you. 

Until Next Time

Happy Stamping,

Tricia Butts
Independent Stampin' Up! Demonstrator

Like What You See? Visit My Online Store Here

Visit My Facebook Business Page for Updates & Ideas

Click here to Contact Me


Explore Your Creativity In 2024
With The January-April 2024 Mini Catalog
Click Below To Shop Now

Sale-a-bration Is Here!
Earn Exclusive Free Products With A Qualifying Order
Click Below For More Details


Around The World On Wednesday January Blog Hop Sketch Challenge

Welcome to the Around the World January Blog Hop as we start off the New Year with a Sketch Challenge. Our amazing Design Team will be sharing their projects and ideas to help spark your creativity for 2024. With the launch of the new January-April 2024 Mini Catalog and 2024 Sale-a-bration Catalog, there are so many possibilities to explore.
With today's sketch, I decided to create several different layers to create the look I wanted for my finished card design. I chose to use the beautiful Stippled Roses stamp set from the January-April 2024 Mini Catalog and paired it with the coordinating Softly Stippled Designer Series Paper that you can earn free during Sale-a-bration with a qualifying order. 
When I first saw the Stippled Roses stamp set, I thought it would be perfect for creating a vintage style card design. I chose to use Gold embossing powder for the focal image and the sentiment to give that worn, antique feeling. The beautiful designs in the Softly Stippled Designer Series Paper also fit with this theme, I cut two card fronts from the same sheet and then cut them both in half diagonally (in the same direction). I then flipped one of the pieces from one card front to match up with the opposite side of the other card front, to give the two design background. (This actually gives you enough to create two complete card fronts with this design.) I realized after I had cut the designer series paper that my diagonal was going in the opposite direction than the sketch, so I just flipped the sketch so that the banner and bow would be on the opposite side to the sketch. In the end, I think I like how it worked out better with the mistake. 
Products Used:
Stippled Roses stamp set (item #162657)
Nested Essentials Dies (item #161697)
Sending Dies (item #159271)
Softly Stippled Designer Series Paper (item #162975)
Pebbled Path Cardstock (item #161722)
Gray Granite Cardstock (item #146983)
Petal Pink Classic Ink Pad (item #147108)
Soft Sea Foam Classic Ink Pad (item #147102)
Gray Granite Classic Ink Pad (item #147118)
Versamark Pad (item #102283)
Metallics Embossing Powders (item #155555)
Gold & Silver 1/8" Trim(item #161633)
Small Blending Brushes (item #160518)
Stampin' Dimensionals (item #104430)
Mini Glue Dots (item #103683)
Measurements:
Pebbled Path Cardstock
Card Base - 5 1/2" x 8 1/2" (Scored at 4 1/4")
Banner die cut with the Nested Essentials Dies 
Sentiment Label die cut with the Sending Dies
Gray Granite Cardstock
Focal Layer - 4 1/2" x 3 1/4"
Softly Stippled Designer Series Paper 
2 pieces - 5 1/4" x 4" both cut diagonally (one half flipped over to line up with the other half)
It's difficult to photograph this card design because the Gold embossing catches the light and makes it hard to see all the detail. For the main focal panel, I heat embossed the large roses image onto the Granite Gray cardstock and then added soft color to the center of the roses with Petal Pink Classic ink and Soft Sea Foam Classic ink to the leaves, using the Small Blending Brushes. I wanted the edges of the panel to appear worn and aged, so I added Gray Granite Classic ink around the edges of the panel with a Small Blending Brush. For the background layer, I attached the pieces of designer series paper to the Pebbled Path card base, leaving a small gap between the diagonal seam to allow the Pebbled Path cardstock to show through. I attached the focal panel to the center of the card base with Stampin' Dimensionals to pop it up and add dimension to the design. I die cut a banner from Pebbled Path cardstock using the Nested Essentials Dies and added it to the right side of the focal panel, attaching it with Stampin' Dimensionals along the top edge to the card base. For the sentiment, I heat embossed the image with Gold embossing powder onto Pebbled Path cardstock and then die cut it with the long thin sentiment die from the Sending Dies set. I attached the sentiment to the card front with Stampin' Dimensionals along the bottom of the focal image towards the right side. To complete the card design, I tied a small bow with the Gold 1/8" Trim and attached it to the banner with Mini Glue Dots. I love how this card turned out and I think it is a good interpretation of this month's sketch.
Thank you for taking the time to visit my blog. I hope that my card design will help inspire you to give this Sketch Challenge a try and see what you can create. It's a wonderful way to help spark your creativity and step outside your comfort zone using products you already own. Just think of all the creative possibilities to explore. 
Now it's time to visit Theresa's blog to see what she has created with this month's Sketch Challenge. Just click on the Next button to visit her blog or use the Roll Call list to find your way along our blog hop. We would appreciate it if you would leave us a comment and let us know what you liked about our projects. I hope you enjoy the rest of our blog hop.


Roll Call List

If you live in the U.S. and do not have a Stampin' Up! Demonstrator, please contact me and I would be happy to help you with your creative projects. You may also visit my Online Store to place your order and have it shipped to you. 

Until Next Time

Happy Stamping,

Tricia Butts
Independent Stampin' Up! Demonstrator

Like What You See? Visit My Online Store Here

Visit My Facebook Business Page for Updates & Ideas

Click here to Contact Me


Explore Your Creativity In 2024
With The January-April 2024 Mini Catalog
Click Below To Shop Now

Sale-a-bration Is Here!
Earn Exclusive Free Products With A Qualifying Order
Click Below For More Details


Wednesday, December 20, 2023

New At SU December Blog Hop Crumb Cake & Vanilla Notes of Nature Bundle

 
Welcome to our last New At SU Blog Hop for 2023 as we showcase projects using a Crumb Cake and Very Vanilla Color Challenge. Our Design Team will be creating projects using these two colors with the option that we may add one more color. I am excited to see what everyone creates this month to help inspire you.
For my card design today, I thought I would give you a Sneak Peek of some new products from the upcoming January-April 2024 Mini Catalog, which will launch January 4th, 2024. When I think of Crumb Cake and Very Vanilla together, I think of vintage designs and so I chose to add some Gold embossing to add to this theme. I have paired the ne Notes of Nature Bundle, which is perfect for collage style stamping, with the new Perennial Postage Bundle, which is fast becoming a new favorite for sentiments. Creating this card was quite a challenge for me as I am not used to using just neutrals for my designs, but I love how this card turned out and I hope it brings joy to the person receiving it.
Products Used:
Notes of Nature Bundle (item #162640) Sneak Peek 
Perennial Postage Bundle (item #162608) Sneak Peek
Crumb Cake Cardstock (item #120953)
Very Vanilla Cardstock (item #101650)
Crumb Cake Classic Ink Pad (item #147116)
Versamark Pad (item #102283)
Metallics Embossing Powders (item #155555)
Pastel Adhesive Backed Sequins (item #160387)
Sponge Daubers (item #133773)
Stampin' Dimensionals (item #104430)
Measurements:
Crumb Cake Cardstock
Card Base - 5 1/2" x 8 1/2" (Scored at 4 1/4")
Detailed foliage die cut with the Notes of Nature Dies
Very Vanilla Cardstock
Card Front - 5 1/4" x 4" Left side edge die cut with the Notes of Nature Dies
Sentiment Label die cut with the Perennial Postage Dies 
This was such a fun card to create and I loved using the new Notes of Nature stamp set to create the background design for my card front. Before stamping, I used the decorative edge die from the Notes of Nature Dies to create the look of a notebook page. To give the design depth and dimension, I used 1st and 2nd generation stamping (full strength and stamping off once), using Crumb Cake Classic ink with a variety of the images from the Notes of Nature stamp set to create the different layers of color. The collage style background is perfect for a vintage themed design. I heat embossed two of the more delicate images using Gold embossing powder to add an elegant look to the design. I gently sponged the edges with Crumb Cake Classic ink using a Sponge Dauber to add a distressed feel to the card front. For the sentiment, I heat embossed the image from the Perennial Postage stamp set onto Very Vanilla cardstock and die cut it out with the coordinating Perennial Postage Dies. I dipped the edges of the sentiment label into my Versamark Pad and heat embossed them with Gold embossing powder to create a vintage look. Using several of the detailed dies from the Notes of Nature Dies, I die cut a variety of foliage from Crumb Cake cardstock to add behind the sentiment label. For the finishing touch, I added several Gold Pastel Adhesive Backed Sequins to the card front to coordinate with the Gold embossing. 
Thank you for taking the time to visit my blog. I hope that my card design will help get you excited about the new products coming in the January-April 2024 Mini Catalog. There are so many wonderful products to choose from to help spark your creativity.
Please visit my fellow Design Team members by clicking on the links in the Roll Call List below. We would appreciate it if you would leave us a comment and let us know what you enjoyed about our projects. 

If you live in the U.S. and do not have a Stampin' Up! Demonstrator, please contact me and I would be happy to help you with your creative projects. You may also visit my Online Store to place your order and have it shipped to you. 

Until Next Time

Happy Stamping,

Tricia Butts
Independent Stampin' Up! Demonstrator

Like What You See? Visit My Online Store Here

Visit My Facebook Business Page for Updates & Ideas

Click here to Contact Me


Stock Up On Your Favorite Retiring Products
From The September-December 2023 Mini Catalog
Click Below To Begin Shopping

Explore The Latest Additions
To The Online Exclusives
Click Below To Visit My Online Store


Wednesday, June 14, 2023

Around The World On Wednesday June Blog Hop Let's Go On An Adventure

Welcome to the Around The World On Wednesday June Blog Hop as we go on an adventure to create fun and inspiring projects. Our wonderful Design Team will be sharing their projects and ideas to help spark your creativity and hopefully inspire you to go on your own creative adventure. 
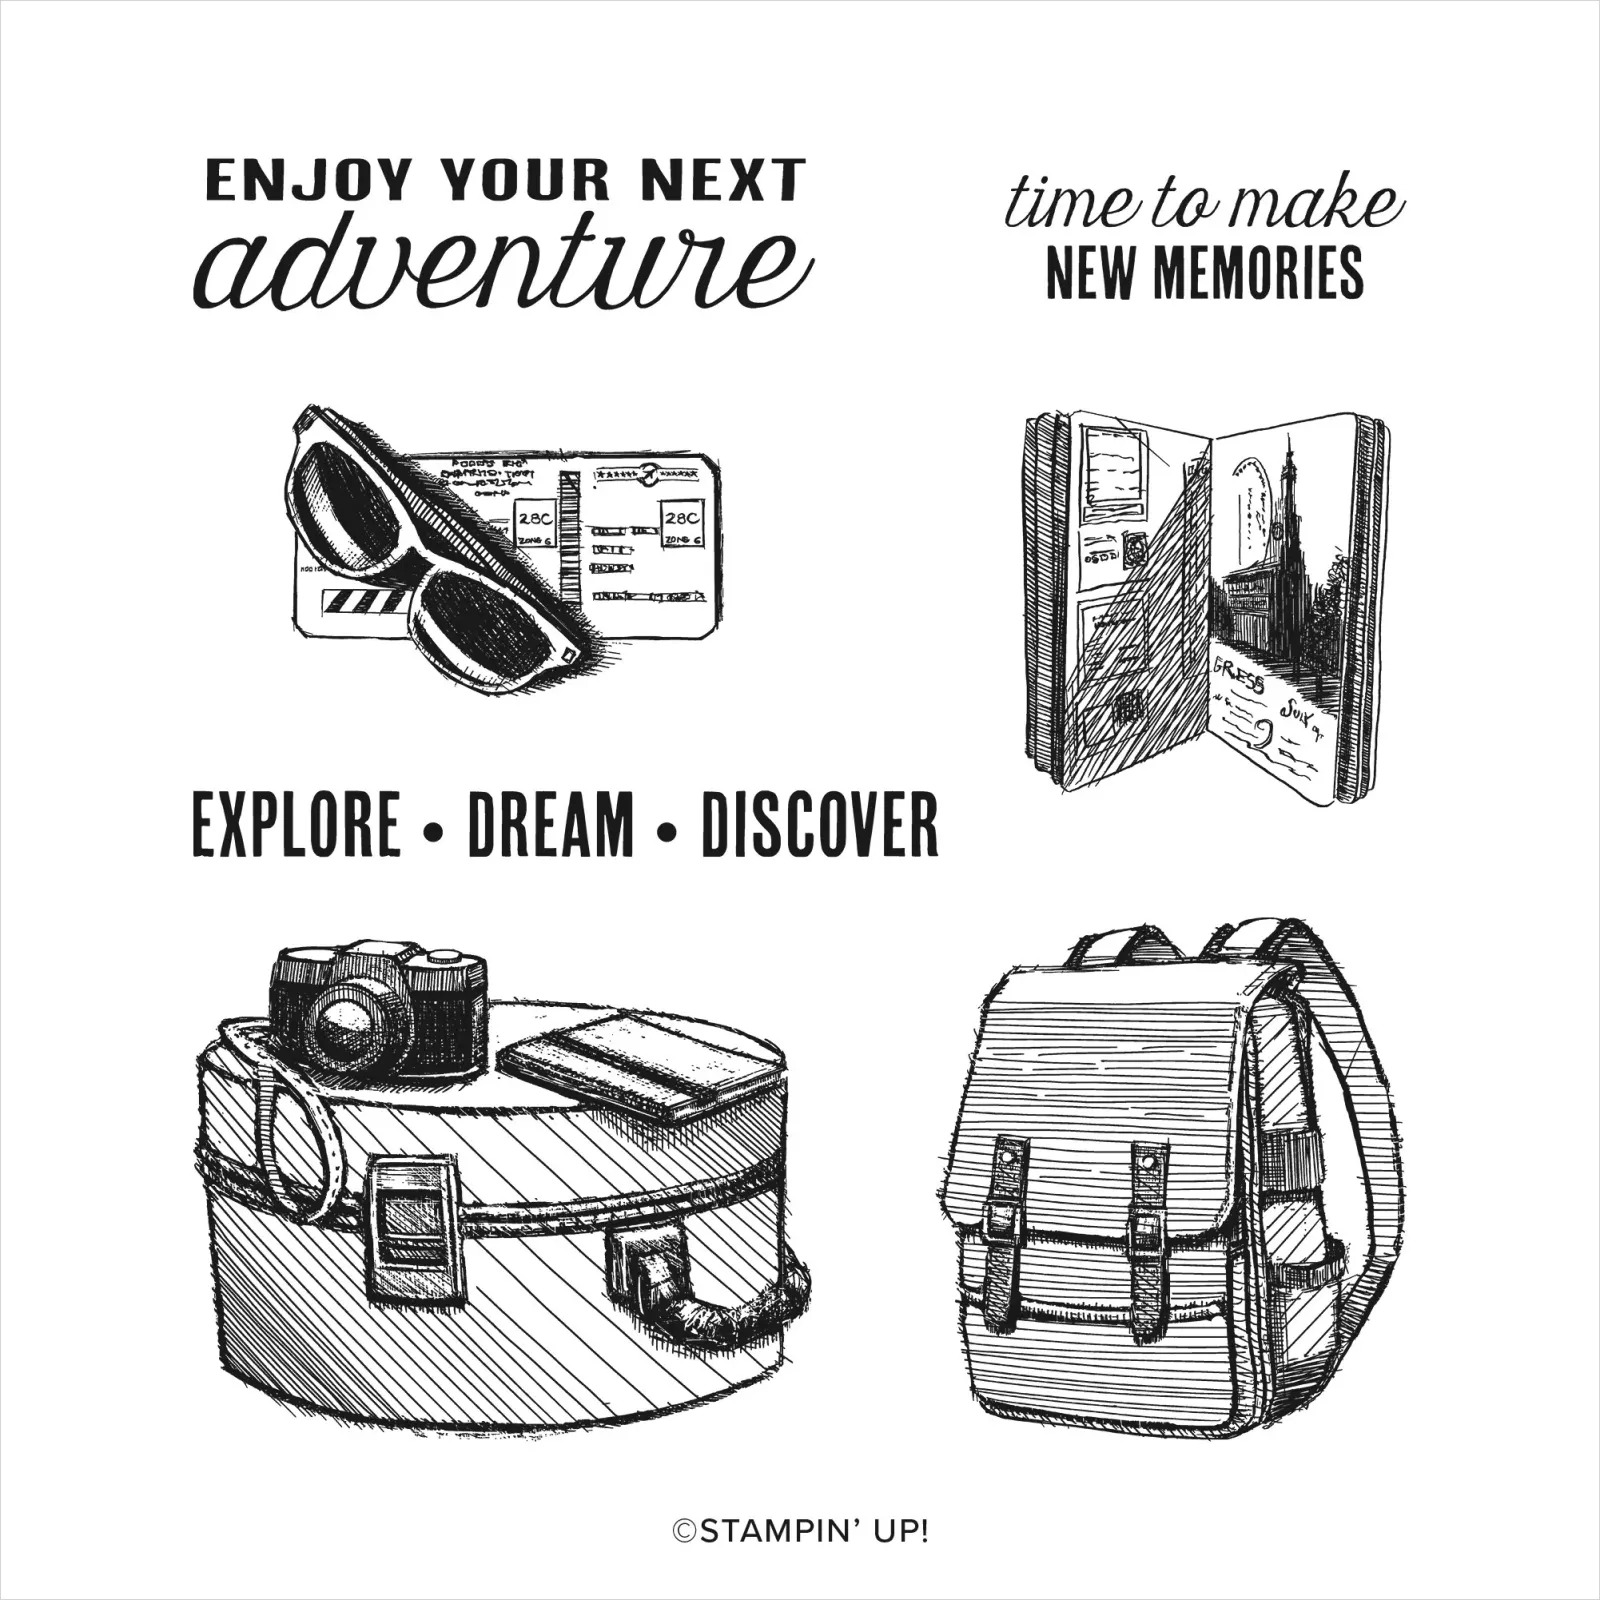
When I think about adventure, my mind goes to traveling and exploring new places. I have been fortunate to have traveled and lived in various places around the world, so this is what influenced my card design. For my card design today, I wanted to use the new Next Destination stamp set in the 2023-2024 Annual Catalog. I love the images and sentiments in this stamp set and I thought it would be perfect for creating cards for Graduations and Retirements. The card design I created has a vintage feel to it and would be a perfect masculine card. I paired it with the Watercolor World stamp to create the background for the card design and used Pecan Pie, Wild Wheat, Early Espresso and Very Vanilla with a touch of Gold to step up the design. 
Products Used:
Next Destination stamp set (item #161427)
Watercolor World stamp set (item #160708)
Stylish Shapes Dies (item #159183)
Early Espresso Cardstock (item #119686)
Pecan Pie Cardstock (item #161717)
Very Vanilla Cardstock (item #101650)
Early Espresso Classic Ink Pad (item #147114)
Pecan Pie Classic Ink Pad (item #161665)
Versamark Pad (item #102283)
Metallics Embossing Powders (item #155555)
Pecan Pie Stampin' Blends Combo Pack (item #161674)
Crumb Cake Stampin' Blends Combo Pack (item #154882)
Smoky Slate Stampin' Blends Combo Pack (item #154904)
Wild Wheat Stampin' Blends Combo Pack (item #161661)
Gray Granite Stampin' Blends Combo Pack (item #154886_
Color Lifter (item #144608)
Brushed Metallic Adhesive Backed Dots (item #156506)
Stampin' Dimensionals (item #104430)
Measurements:
Early Espresso Cardstock
Card Base - 8 1/2" x 5 1/2" (Scored at 4 1/4")
Large Stitched Square die cut with the Stylish Shapes Dies
Sentiment Label die cut with the Stylish Shapes Dies
Pecan Pie Cardstock 
Card Front - 5 1/4" x 4"
Very Vanilla Cardstock 
Square - 2 5/8" x 2 5/8"
The images in the Next Destination stamp set work perfectly for creating a card with theme of going on a journey, starting a new adventure. I love the sketched style of the images and wanted to create an aged, worn look to my card similar to an old notebook with a vintage map on the cover. Pecan Pie is a wonderful, warm brown and it works beautifully with Early Espresso. I stamped the Watercolor World stamp with Pecan Pie Classic ink onto the Pecan Pie card front to create the look of a vintage world map. The focal image was stamped with Early Espresso Classic ink onto a Very Vanilla cardstock square and I colored the image with Stampin' Blends Markers. I used the Light Gray Granite Stampin' Blends Marker to create the background around the image and blended it with the Color Lifter to soften and distress the background. The sentiment was heat embossed with Gold embossing powder onto the Early Espresso cardstock label and I embellished the label with two of the Brushed Metallic Adhesive Backed Dots. I popped both the focal image and the sentiment label up using Stampin' Dimensionals, with the sentiment label overlapping the bottom right side of the focal square. I love how this card design turned out and I feel like it is perfect for someone preparing for the next stage in their life, their next adventure. 
Thank you for taking the time to visit my blog. I hope that my card design will help inspire you to explore creating your own beautiful projects. There are so many wonderful options in the new 2023-2024 Annual Catalog. 
Now it's time to visit Teri's Blog and see what adventures she has to share with us. Just click on the Next button below to visit her blog or use the Roll Call List below to find your way. We would appreciate it if you would leave us a comment and let us know what you enjoyed about our projects. 

Roll Call List

If you live in the U.S. and do not have a Stampin' Up! Demonstrator, please contact me and I would be happy to help you with your creative projects. You may also visit my Online Store to place your order and have it shipped to you. 

Until Next Time

Happy Stamping,

Tricia Butts
Independent Stampin' Up! Demonstrator

Like What You See? Visit My Online Store Here

Visit My Facebook Business Page for Updates & Ideas

Click here to Contact Me


Save 15% on Select Designer Series Paper 
During The Month of June
Click Below To Shop From My Online Store

Take Advantage of the Starter Kit+
Get $155 Worth of Products For Only $99
During The Month of June
Click Below For More Details

Explore Your Creativity
With The 2023-2024 Annual Catalog
Click Below To Visit My Online Store