Showing posts with label Softly Stippled Designer Series Paper. Show all posts

Wednesday, January 17, 2024

New At SU January Blog Hop Sale-a-bration Heartfelt Hellos & Softly Stippled

Welcome to the New At SU January Blog Hop as we start off 2024 with the theme of "Sale-a-bration". Our Design Team members will be sharing their projects and ideas to help inspire you to get creative for the New Year. Sale-a-bration is a wonderful time to earn exclusive products for free with a qualifying order to help you create your own beautiful projects.
For my card design, I decided to combine two of the Level 1 Sale-a-bration products that you can earn free with a qualifying order. I love sentiment stamp sets, especially when they coordinate with a punch and the Heartfelt Hellos stamp set coordinates perfectly with the Heartfelt Hexagon Punch from the January-April 2024 Mini Catalog. It gives you so many wonderful options for creating cards for a variety of occasions. The Softly Stippled Designer Series Paper is so beautiful and I have been using the various designs in this paper pack to create clean and simple cards. I felt like the simple sentiment from the Heartfelt Hellos stamp set would be great paired with this pretty paper. The finished card design has an elegant, vintage feel to it without being fussy or needing a lot of layers. It is a great option for creating beautiful cards to send to family and friends.
Products Used:
Heartfelt Hellos stamp set (item #162964) Level 1 Sale-a-bration Reward
Heartfelt Hexagon Punch (item #162888)
Softly Stippled Designer Series Paper (item #162975) Level 1
Sale-a-bration Reward
Pebbled Path Cardstock (item #161722)
Versamark Pad (item #102283)
Metallics Embossing Powders (item #155555)
Wild Wheat 3/8" Textured Ribbon (item #161628)
Iridescent Pearl Basic Jewels (item #158987)
Stampin' Dimensionals (item #104430
Measurements:
Pebbled Path Cardstock
Card Base - 5 1/2" x 8 1/2" (Scored at 4 1/4")
Sentiment Label punched out with the Heartfelt Hexagon Punch
Softly Stippled Designer Series Paper 
Card Front - 5 1/4" x 4"
This clean and simple design has a wonderful layout that can be used to create cards for a variety of occasions using any of the sentiments from the Heartfelt Hellos stamp set. When paired with the beautiful designs in the Softly Stippled Designer Series Paper, you can create a wonderful stash of cards for all occasions to send to family and friends. It's as simple as combining a card base with a card front and then personalizing it with a sentiment, ribbon and embellishments. To earn one of these Sale-a-bration products for free, you just need to place a qualifying order of US$50 and to earn both products you need a qualifying order of US$100. Here are some suggestions using the products I used for this card design:
Order 1 ($50 order)
Heartfelt Hexagon Punch              $22
Pack of cardstock (Pebbled Path)  $10
Textured Ribbon (Wild Wheat)      $8
Iridescent Pearls                             $7.50
Stampin' Dimensionals                   $4.25 
Total                                               $51.75

Order 2 ($100 order)
Heartfelt Hexagon Bundle              $37.75
Pack of Cardstock (Pebbled Path)   $10
Textured Ribbon (Wild Wheat)        $8
Iridescent Pearls                                $7.50
Versamark Pad                                   $9.50
Metallics Embossing Powders          $18
Stampin' Dimensionals                      $4.25
Basic White Medium Envelopes       $8.50
Total                                                  103.50

For the larger order, you may have noticed that I included the Heartfelt Hexagon Bundle instead of just the punch. This will provide you with even more sentiment options for creating your card designs. You can switch products to suit your personal needs, but I thought these suggestions would give you a starting point to help you to be able to create your own beautiful projects. 
Thank you for taking the time to visit my blog. I hope that my card design will help inspire you to create your own beautiful projects with these wonderful Sale-a-bration products. They are a great option to help you create clean and simple cards, quickly and easily to send out to family and friends. 
Please take a moment to visit with my fellow Design Team members by using the Roll Call List to visit their blogs to see their projects. We would love it if you would leave us a comment and let us know how you liked our projects. I hope you enjoy the rest of our blog hop. 

If you live in the U.S. and do not have a Stampin' Up! Demonstrator, please contact me and I would be happy to help you with your creative projects. You may also visit my Online Store to place your order and have it shipped to you. 

Until Next Time

Happy Stamping,

Tricia Butts
Independent Stampin' Up! Demonstrator

Like What You See? Visit My Online Store Here

Visit My Facebook Business Page for Updates & Ideas

Click here to Contact Me


Explore Your Creativity In 2024
With The January-April 2024 Mini Catalog
Click Below To Shop Now

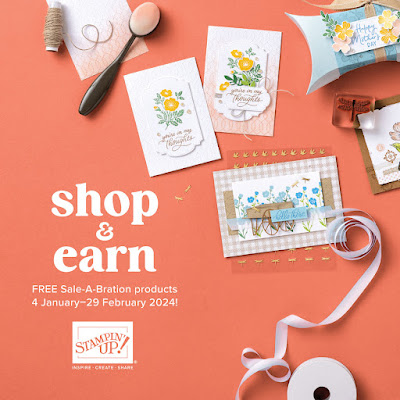
Sale-a-Bration Is here!
Earn Exclusive Free Products With A Qualifying Order
Click Below For More Details


Wednesday, January 10, 2024

Inspire. Create. Share January Blog Hop All About The Sale-A-Bration

It's time to visit with the Inspire. Create. Share. January Blog Hop and see the wonderful new Sale-a-bration products that are now available to order. Our wonderful Design Team will be sharing their projects and ideas to help spark your creativity for 2024. What is Sale-a-bration? It is a special time of the year when Stampin' Up! releases exclusive products that you can earn free with a qualifying order until February 29th. 
One of my favorite Sale-a-bration products would have to be the beautiful Softly Stippled Designer Series Paper, which you can earn free with a qualifying $50 order. The designs in this pack of paper are so pretty and they coordinate with the Stippled Roses Bundle that I chose to use to create my card design. I love the vintage feel of these products and that was the main influence for my card design. 
Products Used:
Stippled Roses Bundle (item #162667)
Deckled Circles Dies (item #162286)
Tailor Made Tags Dies (item #155563)
Softly Stippled Designer Series Paper (item #162975) Sale-a-bration Level 1 Reward
Pebbled Path Cardstock (item #161722)
Very Vanilla Cardstock (item #101650)
Pebbled Path Classic Ink Pad (item #161648)
Petal Pink Stampin' Blends Combo Pack (item #154893)
Calypso Coral Stampin' Blends Combo Pack (item #154881)
Soft Sea Foam Stampin' Blends Combo Pack (item #154902)
Pastel Adhesive Backed Sequins (item #160387)
Gold & Silver 1/8" Trim (item #161633)
Stampin' Dimensionals (item #104430)
Measurements:
Pebbled Path Cardstock 
Card Base - 5 1/2" x 8 1/2" (Scored at 4 1/4")
Deckled Circle die cut with the Deckled Circles Dies 
Very Vanilla Cardstock
Leaves and roses images stamped and die cut with the Stippled Roses Bundle 
Sentiment Tag die cut with the Tailor Made Tags Dies
Softly Stippled Designer Series Paper
Card Front - 5 1/4" x 4"
This pretty card design was so much fun to create and it gave me the opportunity to color with my favorite medium, Stampin' Blends Markers. I stamped the roses and leaves images with Pebbled Path Classic ink onto Very Vanilla cardstock and colored the roses using Petal Pink and Calypso Coral Stampin' Blends Markers and the leaves with the Soft Sea Foam Markers. I die cut them out with the coordinating Stippled Roses Dies and used the Light Petal Pink Stampin' Blends Marker to color around the edges of each of the images to soften the background. I attached the Pebbled Path Deckled Circle to the bottom left corner of the designer series paper card front and trimmed off the excess from the left and bottom sides. I attached the card front to the card base and then attached the leaves and roses to Deckled Circle area, popping up the top rose with Stampin' Dimensionals. For the sentiment label, I stamped the image with Pebbled Path Classic ink onto Very Vanilla cardstock and die cut it out with one of the Tailor Made Tags Dies. I attached it to the card front with Stampin' Dimensionals, slightly tucking it underneath the top rose. To embellish the card design, I added a small bow tied with Gold Trim and several of the Gold Pastel Adhesive Backed Sequins for a touch of sparkle. I love how this beautiful designer series paper brings this card design to life and how pretty the tone on tone floral design looks. It adds a wonderful elegance to a lovely Thank You card. 
Thank you for taking the time to visit my blog. I hope that my card design will help inspire you to create your own beautiful projects and take advantage of the wonderful Sale-a-bration rewards. There are so many options to explore.
Now it's time to visit Cheryl's blog and see what she has to share with us this month. Just click on the Next button below to visit her blog. We would love it if you would leave us a comment and let us know what you liked about our projects. I hope you enjoy the rest of our blog hop.


If you live in the U.S. and do not have a Stampin' Up! Demonstrator, please contact me and I would be happy to help you with your creative projects. You may also visit my Online Store to place your order and have it shipped to you. 

Until Next Time

Happy Stamping,

Tricia Butts
Independent Stampin' Up! Demonstrator

Like What You See? Visit My Online Store Here

Visit My Facebook Business Page for Updates & Ideas

Click here to Contact Me


Explore Your Creativity In 2024
With The January-April 2024 Mini Catalog
Click Below To Shop Now

Sale-a-bration Is Here!
Earn Exclusive Free Products With A Qualifying Order
Click Below For More Details


Around The World On Wednesday January Blog Hop Sketch Challenge

Welcome to the Around the World January Blog Hop as we start off the New Year with a Sketch Challenge. Our amazing Design Team will be sharing their projects and ideas to help spark your creativity for 2024. With the launch of the new January-April 2024 Mini Catalog and 2024 Sale-a-bration Catalog, there are so many possibilities to explore.
With today's sketch, I decided to create several different layers to create the look I wanted for my finished card design. I chose to use the beautiful Stippled Roses stamp set from the January-April 2024 Mini Catalog and paired it with the coordinating Softly Stippled Designer Series Paper that you can earn free during Sale-a-bration with a qualifying order. 
When I first saw the Stippled Roses stamp set, I thought it would be perfect for creating a vintage style card design. I chose to use Gold embossing powder for the focal image and the sentiment to give that worn, antique feeling. The beautiful designs in the Softly Stippled Designer Series Paper also fit with this theme, I cut two card fronts from the same sheet and then cut them both in half diagonally (in the same direction). I then flipped one of the pieces from one card front to match up with the opposite side of the other card front, to give the two design background. (This actually gives you enough to create two complete card fronts with this design.) I realized after I had cut the designer series paper that my diagonal was going in the opposite direction than the sketch, so I just flipped the sketch so that the banner and bow would be on the opposite side to the sketch. In the end, I think I like how it worked out better with the mistake. 
Products Used:
Stippled Roses stamp set (item #162657)
Nested Essentials Dies (item #161697)
Sending Dies (item #159271)
Softly Stippled Designer Series Paper (item #162975)
Pebbled Path Cardstock (item #161722)
Gray Granite Cardstock (item #146983)
Petal Pink Classic Ink Pad (item #147108)
Soft Sea Foam Classic Ink Pad (item #147102)
Gray Granite Classic Ink Pad (item #147118)
Versamark Pad (item #102283)
Metallics Embossing Powders (item #155555)
Gold & Silver 1/8" Trim(item #161633)
Small Blending Brushes (item #160518)
Stampin' Dimensionals (item #104430)
Mini Glue Dots (item #103683)
Measurements:
Pebbled Path Cardstock
Card Base - 5 1/2" x 8 1/2" (Scored at 4 1/4")
Banner die cut with the Nested Essentials Dies 
Sentiment Label die cut with the Sending Dies
Gray Granite Cardstock
Focal Layer - 4 1/2" x 3 1/4"
Softly Stippled Designer Series Paper 
2 pieces - 5 1/4" x 4" both cut diagonally (one half flipped over to line up with the other half)
It's difficult to photograph this card design because the Gold embossing catches the light and makes it hard to see all the detail. For the main focal panel, I heat embossed the large roses image onto the Granite Gray cardstock and then added soft color to the center of the roses with Petal Pink Classic ink and Soft Sea Foam Classic ink to the leaves, using the Small Blending Brushes. I wanted the edges of the panel to appear worn and aged, so I added Gray Granite Classic ink around the edges of the panel with a Small Blending Brush. For the background layer, I attached the pieces of designer series paper to the Pebbled Path card base, leaving a small gap between the diagonal seam to allow the Pebbled Path cardstock to show through. I attached the focal panel to the center of the card base with Stampin' Dimensionals to pop it up and add dimension to the design. I die cut a banner from Pebbled Path cardstock using the Nested Essentials Dies and added it to the right side of the focal panel, attaching it with Stampin' Dimensionals along the top edge to the card base. For the sentiment, I heat embossed the image with Gold embossing powder onto Pebbled Path cardstock and then die cut it with the long thin sentiment die from the Sending Dies set. I attached the sentiment to the card front with Stampin' Dimensionals along the bottom of the focal image towards the right side. To complete the card design, I tied a small bow with the Gold 1/8" Trim and attached it to the banner with Mini Glue Dots. I love how this card turned out and I think it is a good interpretation of this month's sketch.
Thank you for taking the time to visit my blog. I hope that my card design will help inspire you to give this Sketch Challenge a try and see what you can create. It's a wonderful way to help spark your creativity and step outside your comfort zone using products you already own. Just think of all the creative possibilities to explore. 
Now it's time to visit Theresa's blog to see what she has created with this month's Sketch Challenge. Just click on the Next button to visit her blog or use the Roll Call list to find your way along our blog hop. We would appreciate it if you would leave us a comment and let us know what you liked about our projects. I hope you enjoy the rest of our blog hop.


Roll Call List

If you live in the U.S. and do not have a Stampin' Up! Demonstrator, please contact me and I would be happy to help you with your creative projects. You may also visit my Online Store to place your order and have it shipped to you. 

Until Next Time

Happy Stamping,

Tricia Butts
Independent Stampin' Up! Demonstrator

Like What You See? Visit My Online Store Here

Visit My Facebook Business Page for Updates & Ideas

Click here to Contact Me


Explore Your Creativity In 2024
With The January-April 2024 Mini Catalog
Click Below To Shop Now

Sale-a-bration Is Here!
Earn Exclusive Free Products With A Qualifying Order
Click Below For More Details


Tuesday, January 2, 2024

We Create January Blog Hop New Year New Look

Happy 2024! I am excited to celebrate the New Year with a fun new project I have created for the We Create January Blog Hop as we showcase our theme, "New Year, New Look". With the new January-April 2024 Mini Catalog and 2024 Sale-a-bration Catalog due to launch on January 4th, this is a perfect opportunity for me to share with you some Sneak Peeks of brand new products to help you get excited to create in the New Year.
Now that the holidays are over, it's time to focus on creating cards for the other special occasions we celebrate throughout the year. I wanted to create a pretty birthday card using the new Filled With Happiness stamp set and I paired it with one of the beautiful new Sale-a-bration products, the Stippled Softly Designer Series Paper, which you can earn Free with a qualifying order. I love that this new stamp set coordinates with the Modern Oval Punch, which I am happy to say, is carrying over from the September-December 2023 Mini Catalog. To help step up this clean and simple card design, I chose to use heat embossing to make the sentiment pop and Watercolor Pencils to color in the focal image. I decided to skip the embellishments for this design and instead added some Clear Wink of Stella to the bird, leaves and berries for a touch of shimmer. 
Products Used:
Filled With Happiness stamp set (item #162915) Sneak Peek
Modern Oval Punch (item #162234) Carry Over Product
Softly Stippled Designer Series Paper (item #162975) Sale-a-bration Sneak Peek
Lost Lagoon Cardstock (item #133679)
Basic White Cardstock (item #159276)
Lost Lagoon Classic Ink Pad (item #161678)
Versamark Pad (item #102283)
Basics Embossing Powders (item #155554)
Watercolor Pencils Assortment 1 (item #161700)
Blender Pens (item #102845)
Clear Wink of Stella Glitter Brush (item #141897)
Stampin' Dimensionals (item #104430)
Measurements:
Lost Lagoon Cardstock
Card Base - 8 1/2" x 5 1/2" (Score at 4 1 4/")
Sentiment Layer - 2 1/2" x 3 1/4"
Basic White Cardstock
Focal image punched out with the Modern Oval Punch
Softly Stippled Designer Series Paper
Card Front - 5 1/4" x 4"
To start off the New Year, I thought I would share how to create a clean and simple card design that you can easily duplicate to personalize your cards as well as use other images from the Filled With Happiness stamp set to create designs for other occasions. The Softly Stippled Designer Series Paper has so many beautiful designs that will provide you with a wide variety of options to help you create so many pretty cards. I used a piece of one of these designs for my card front and I love how the Lost Lagoon card base makes this paper pop. For the sentiment, I heat embossed the image onto the Lost Lagoon cardstock using White embossing powder to coordinate with the card design. For the focal image, I stamped the image onto a piece of Basic White cardstock using Lost Lagoon Classic ink and then I punched out the center image using the Modern Oval Punch. To add a touch of color, I used the Daffodil Delight, Old Olive and Blue Watercolor Pencils to color the image and then gently blended with a Blender Pen to smooth out the coloring. To add a touch of shimmer, I added some Clear Wink of Stella to the bird, leaves and berries and then added the oval to the center of the sentiment panel using Stampin' Dimensionals. This pretty card is easy to assemble and fun to create. I hope this design helps inspire you to create your own beautiful designs.
Thank you for taking the time to visit my blog. I hope that my card design will help you get excited to start creating your own beautiful cards to send to the people you love this year. There are so many wonderful possibilities to explore in the new January-April 2024 Mini Catalog and 2024 Sale-a-bration Catalog to help spark your creativity. Remember that these catalogs launch on January 4th and you can earn Sale-a-bration products, like the Softly Stippled Designer Series Paper, for Free with a qualifying order. If you have any questions, please contact me and I would be happy to help. 
Now it's time to visit Heather's blog and see what she has created to share with us. Just click on the Next button below to visit her blog. We would appreciate it if you would leave us a comment and let us know what you enjoyed about our projects. 

Roll Call List

If you live in the U.S. and do not have a Stampin' Up! Demonstrator, please contact me and I would be happy to help you with your creative projects. You may also visit my Online Store to place your order and have it shipped to you. 

Until Next Time

Happy Stamping,

Tricia Butts
Independent Stampin' Up! Demonstrator

Like What You See? Visit My Online Store Here

Visit My Facebook Business Page for Updates & Ideas

Click here to Contact Me


Last Days To Stock Up 
On Your Favorite Retiring Last Chance Products
Click Below To Shop Now

Explore The Amazing Products Available
In The Online Exclusives
Click Below To Visit My Online Store
7                                                                                                                                                                                                                                                                                                                                                                                                                                                                                                                                                                m