Showing posts with label Framed Florets stamp set. Show all posts

Wednesday, February 15, 2023

ICS February Blog Hop Sale-a-bration Inspiration

It's time to hop along with the ICS February Blog Hop with our theme this month being "Sale-a-bration Inspiration". With less than two weeks left to take advantage of the wonderful Sale-a-bration products you can earn free with a qualifying order, our Design Team members have created some wonderful projects to help inspire you.
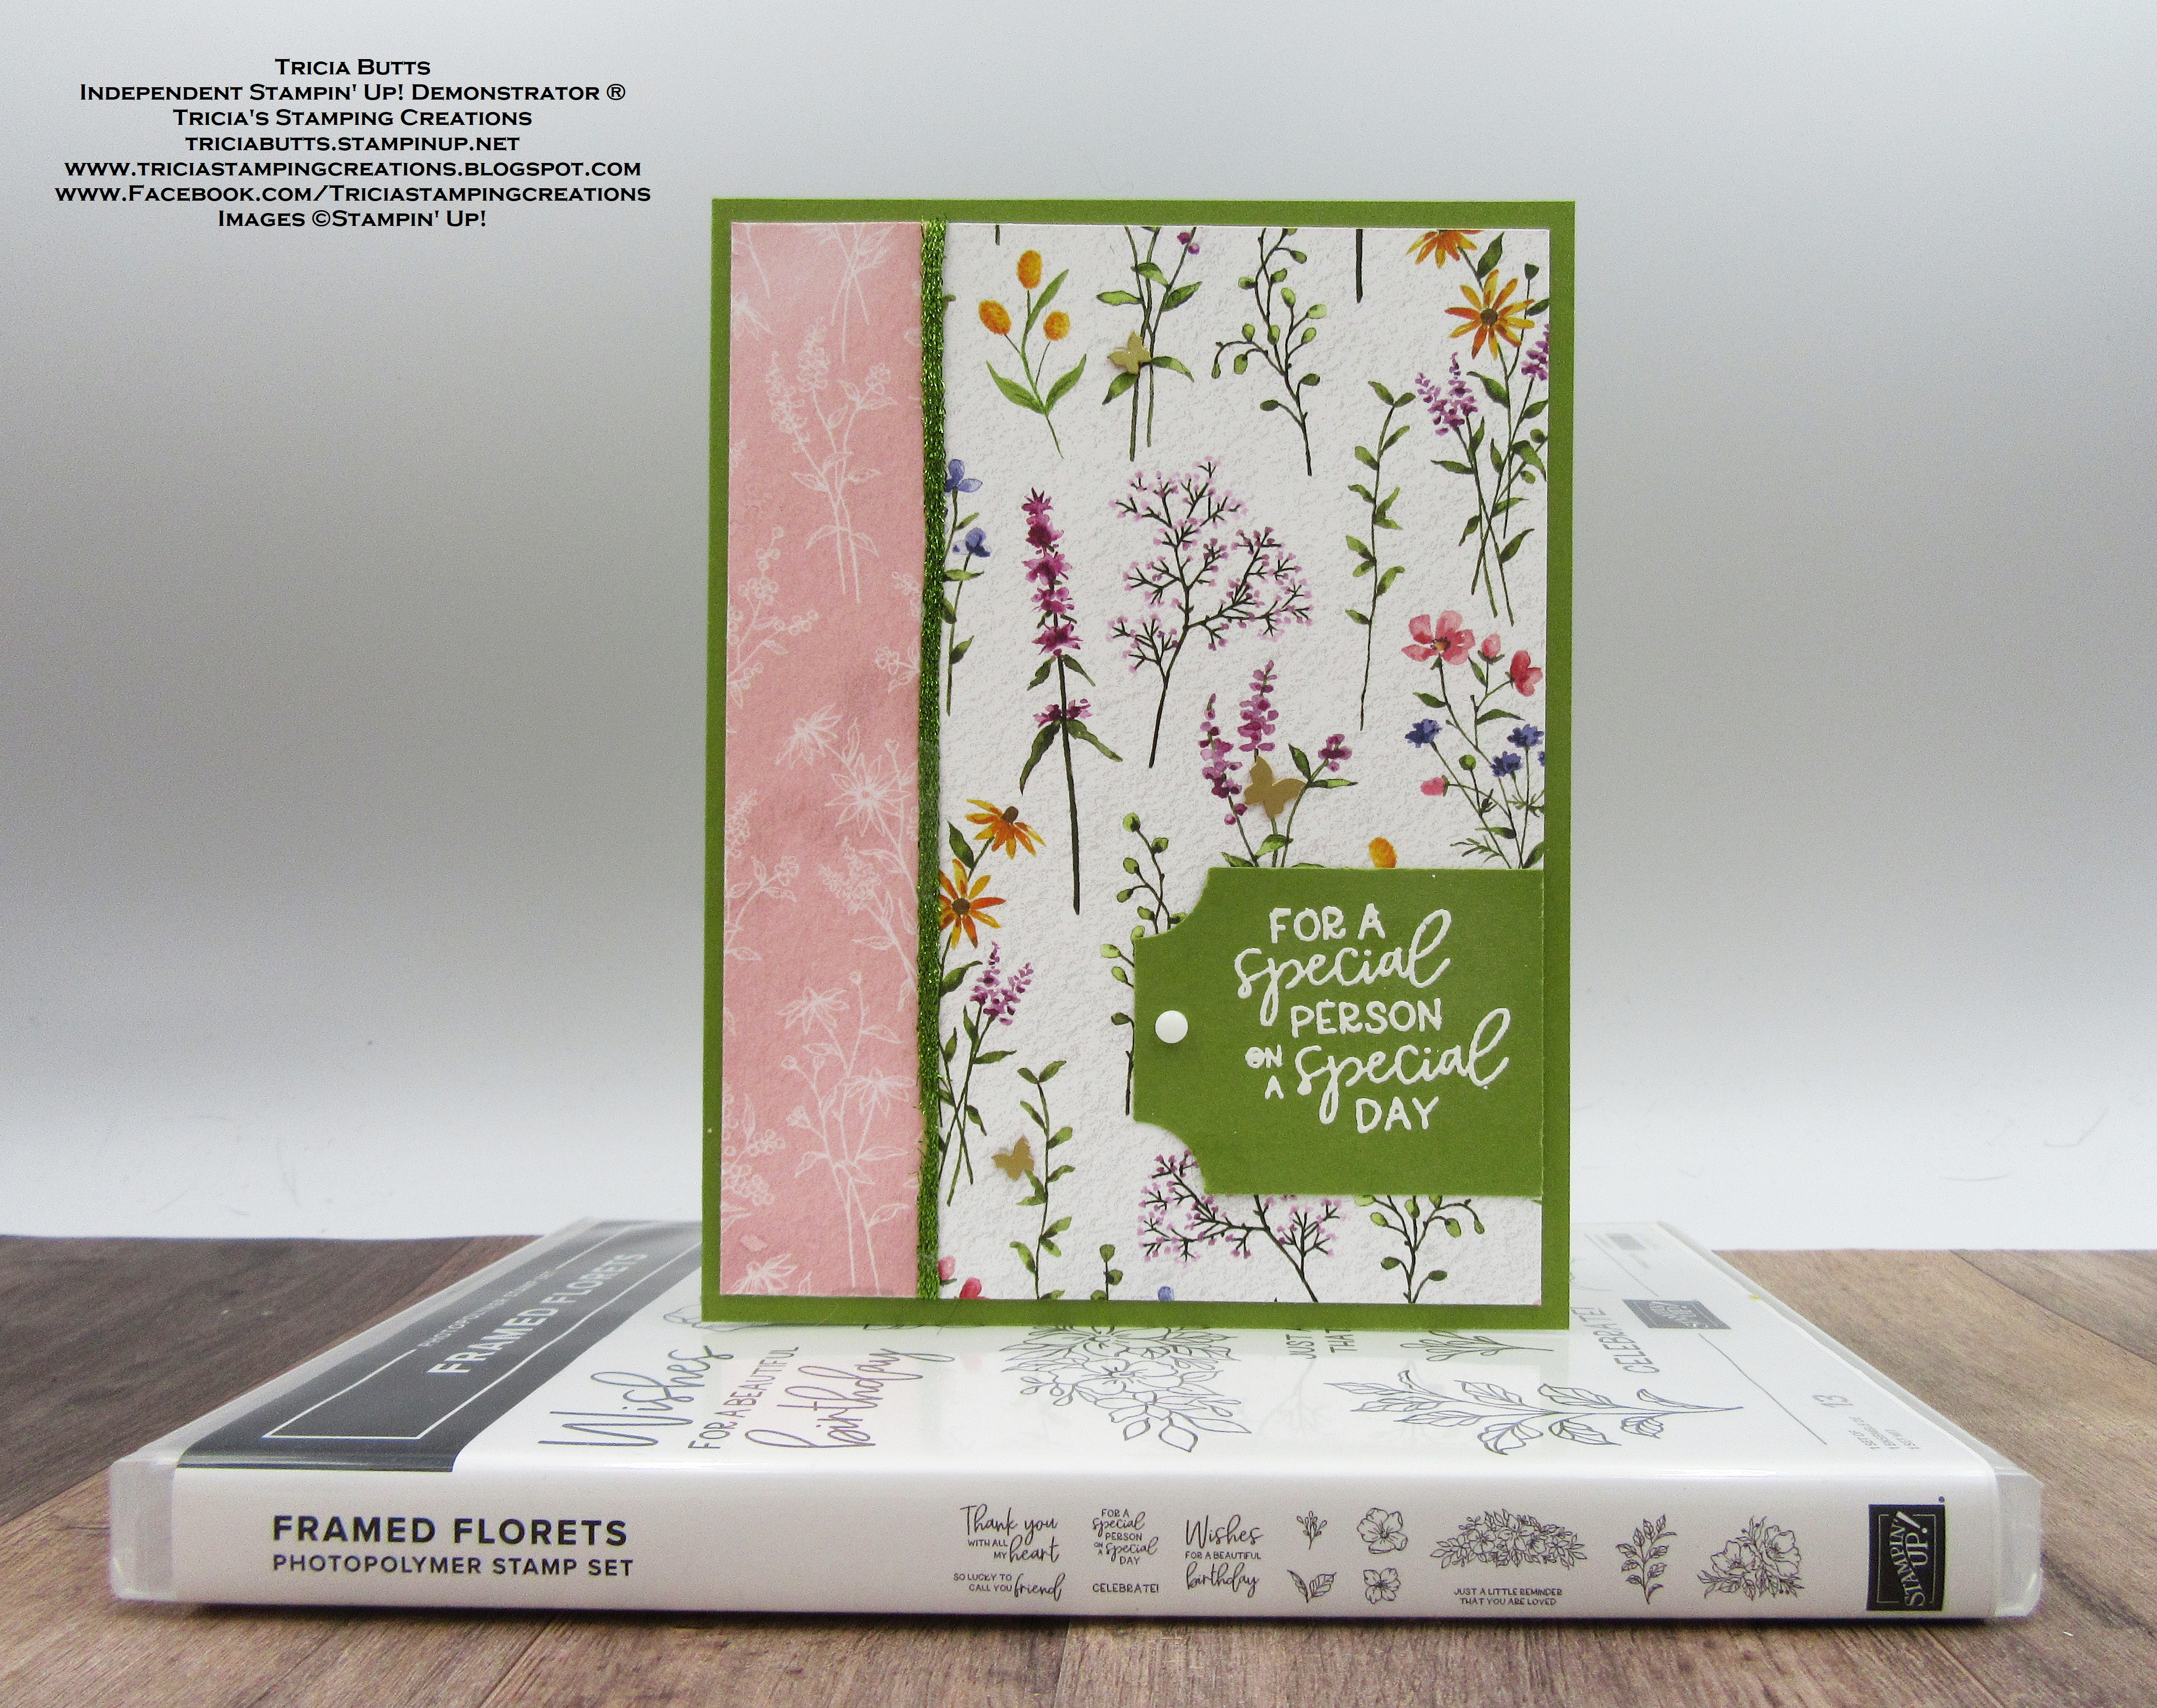
It's hard to believe that Sale-a-bration is almost over and I took a lot of time to decide what I products I wanted to showcase to inspire you. In the end, I chose one Dainty Flowers Designer Series Paper, one of my favorites, and added the Essential Tag Punch, which is one of the products that was added recently as a Sale-a-bration Level 1 Reward. I wanted to show how you can create a beautiful clean and simple card design that will work for a variety of occasions. The two panels that make up the card front have been cut from the same sheet of designer series paper. I started by cutting a 4" x 5 1/4" piece and then cut a 1"x 5 1/4" strip off one side of this piece, and flipped it over to have the reverse side up. As you can see, this is a simple technique that opens up new possibilities for your card designs.
Products Used:
Framed Florets stamp set (item #161815)
Dainty Flowers Designer Series Paper (item #160834) Sale-a-bration Level 1 Reward
Essential Tag Punch (item #164421)* Sale-a-bration Level 1 Reward 
Old Olive Cardstock (item #100702)
Basic White Cardstock (item #159276)
Versamark Pad (item #102283)
Basics Embossing Powders (item #155554)
Parakeet Party 1/8" Metallic Woven Ribbon (item #159196)
Classic Matte Dots (item #158146)
Brushed Brass Butterflies (item #158136)
*To claim this punch as a Free Sale-a-bration product, you must enter this item number
Measurements:
Old Olive Cardstock
Card Base - 8 1/2" x 5 1/2" (Scored at 4 1/4")
Sentiment Tag punched out with the Essential Tag Punch
Basic White Cardstock
Layer 1 - 5 1/4" x 4" 
Dainty Flowers Designer Series Paper
Card Front - 5 1/4" x 4" - cut into 2 pieces 1" x 5 1/4" & 3" x 5 1/4"
The secret to this clean and simple card design, is the assembly of the card front. After cutting your pieces of designer series paper, you adhere them to the piece of Basic White cardstock to provide stability as one layer. To hide the seam, I attached a piece of Parakeet Party Metallic Woven Ribbon over the top of the seam, attaching the ends to the back of the Basic White cardstock layer. I love that this ribbon is a close match to the Old Olive cardstock and adds just a touch of sparkle to the design. I then attached this layer to the card base. For the sentiment label, I used the Essential Tag Punch to punch it out from a piece of Old Olive cardstock. I heat embossed the sentiment from the Framed Florets stamp set using White embossing powder. I attached the label to the card front, lining up the short straight edge with the right side of the card front. To embellish the card, I added a White Classic Matte Dot to the sentiment label and several Brushed Brass Butterflies to the designer series paper card front to complete the design. I love the fresh Spring feel of this card design, which would be suitable for a variety of occasions. This simple layout can be used with your choice of designer series paper to create your own unique designs. 
Thank you for taking the time to visit my blog. I hope that my card design will help inspire you to take another look at the amazing Sale-a-bration products you can earn free with a qualifying order. There are so many wonderful options to explore.
Now it's time to visit Terri's blog and see what Sale-a-bration inspiration she has to share with us. Just click on the Next button below to visit her blog. We would appreciate it if you would leave us a comment and let us know what you liked about our projects. I hope you enjoy the rest of our blog hop. 


If you live in the U.S. and do not have a Stampin' Up! Demonstrator, please contact me and I would be happy to help you with your creative projects. You may also visit my Online Store to place your order and have it shipped to you. 

Until Next Time

Happy Stamping,

Tricia Butts
Independent Stampin' Up! Demonstrator

Like What You See? Visit My Online Store Here

Visit My Facebook Business Page for Updates & Ideas

Click here to Contact Me


Time Is Running Out
To Take Advantage Of Sale-a-bration
Click Below For More Details

Explore The Amazing New Products
In The January-April 2023 Mini Catalog
Click Below To Visit My Online Store


Saturday, January 21, 2023

Stamping With Friends January Blog Hop Sale-a-bration Favorites

It's time to hop along with the Stamping With Friends Blog Hop as we share projects created with our favorite Sale-a-bration products. Sale-a-bration is one of my favorite times of the year and there are so many amazing products you can earn free with a qualifying order from this wonderful catalog. Our talented Design Team members will be sharing their beautiful projects with you to help inspire you to get creative. 
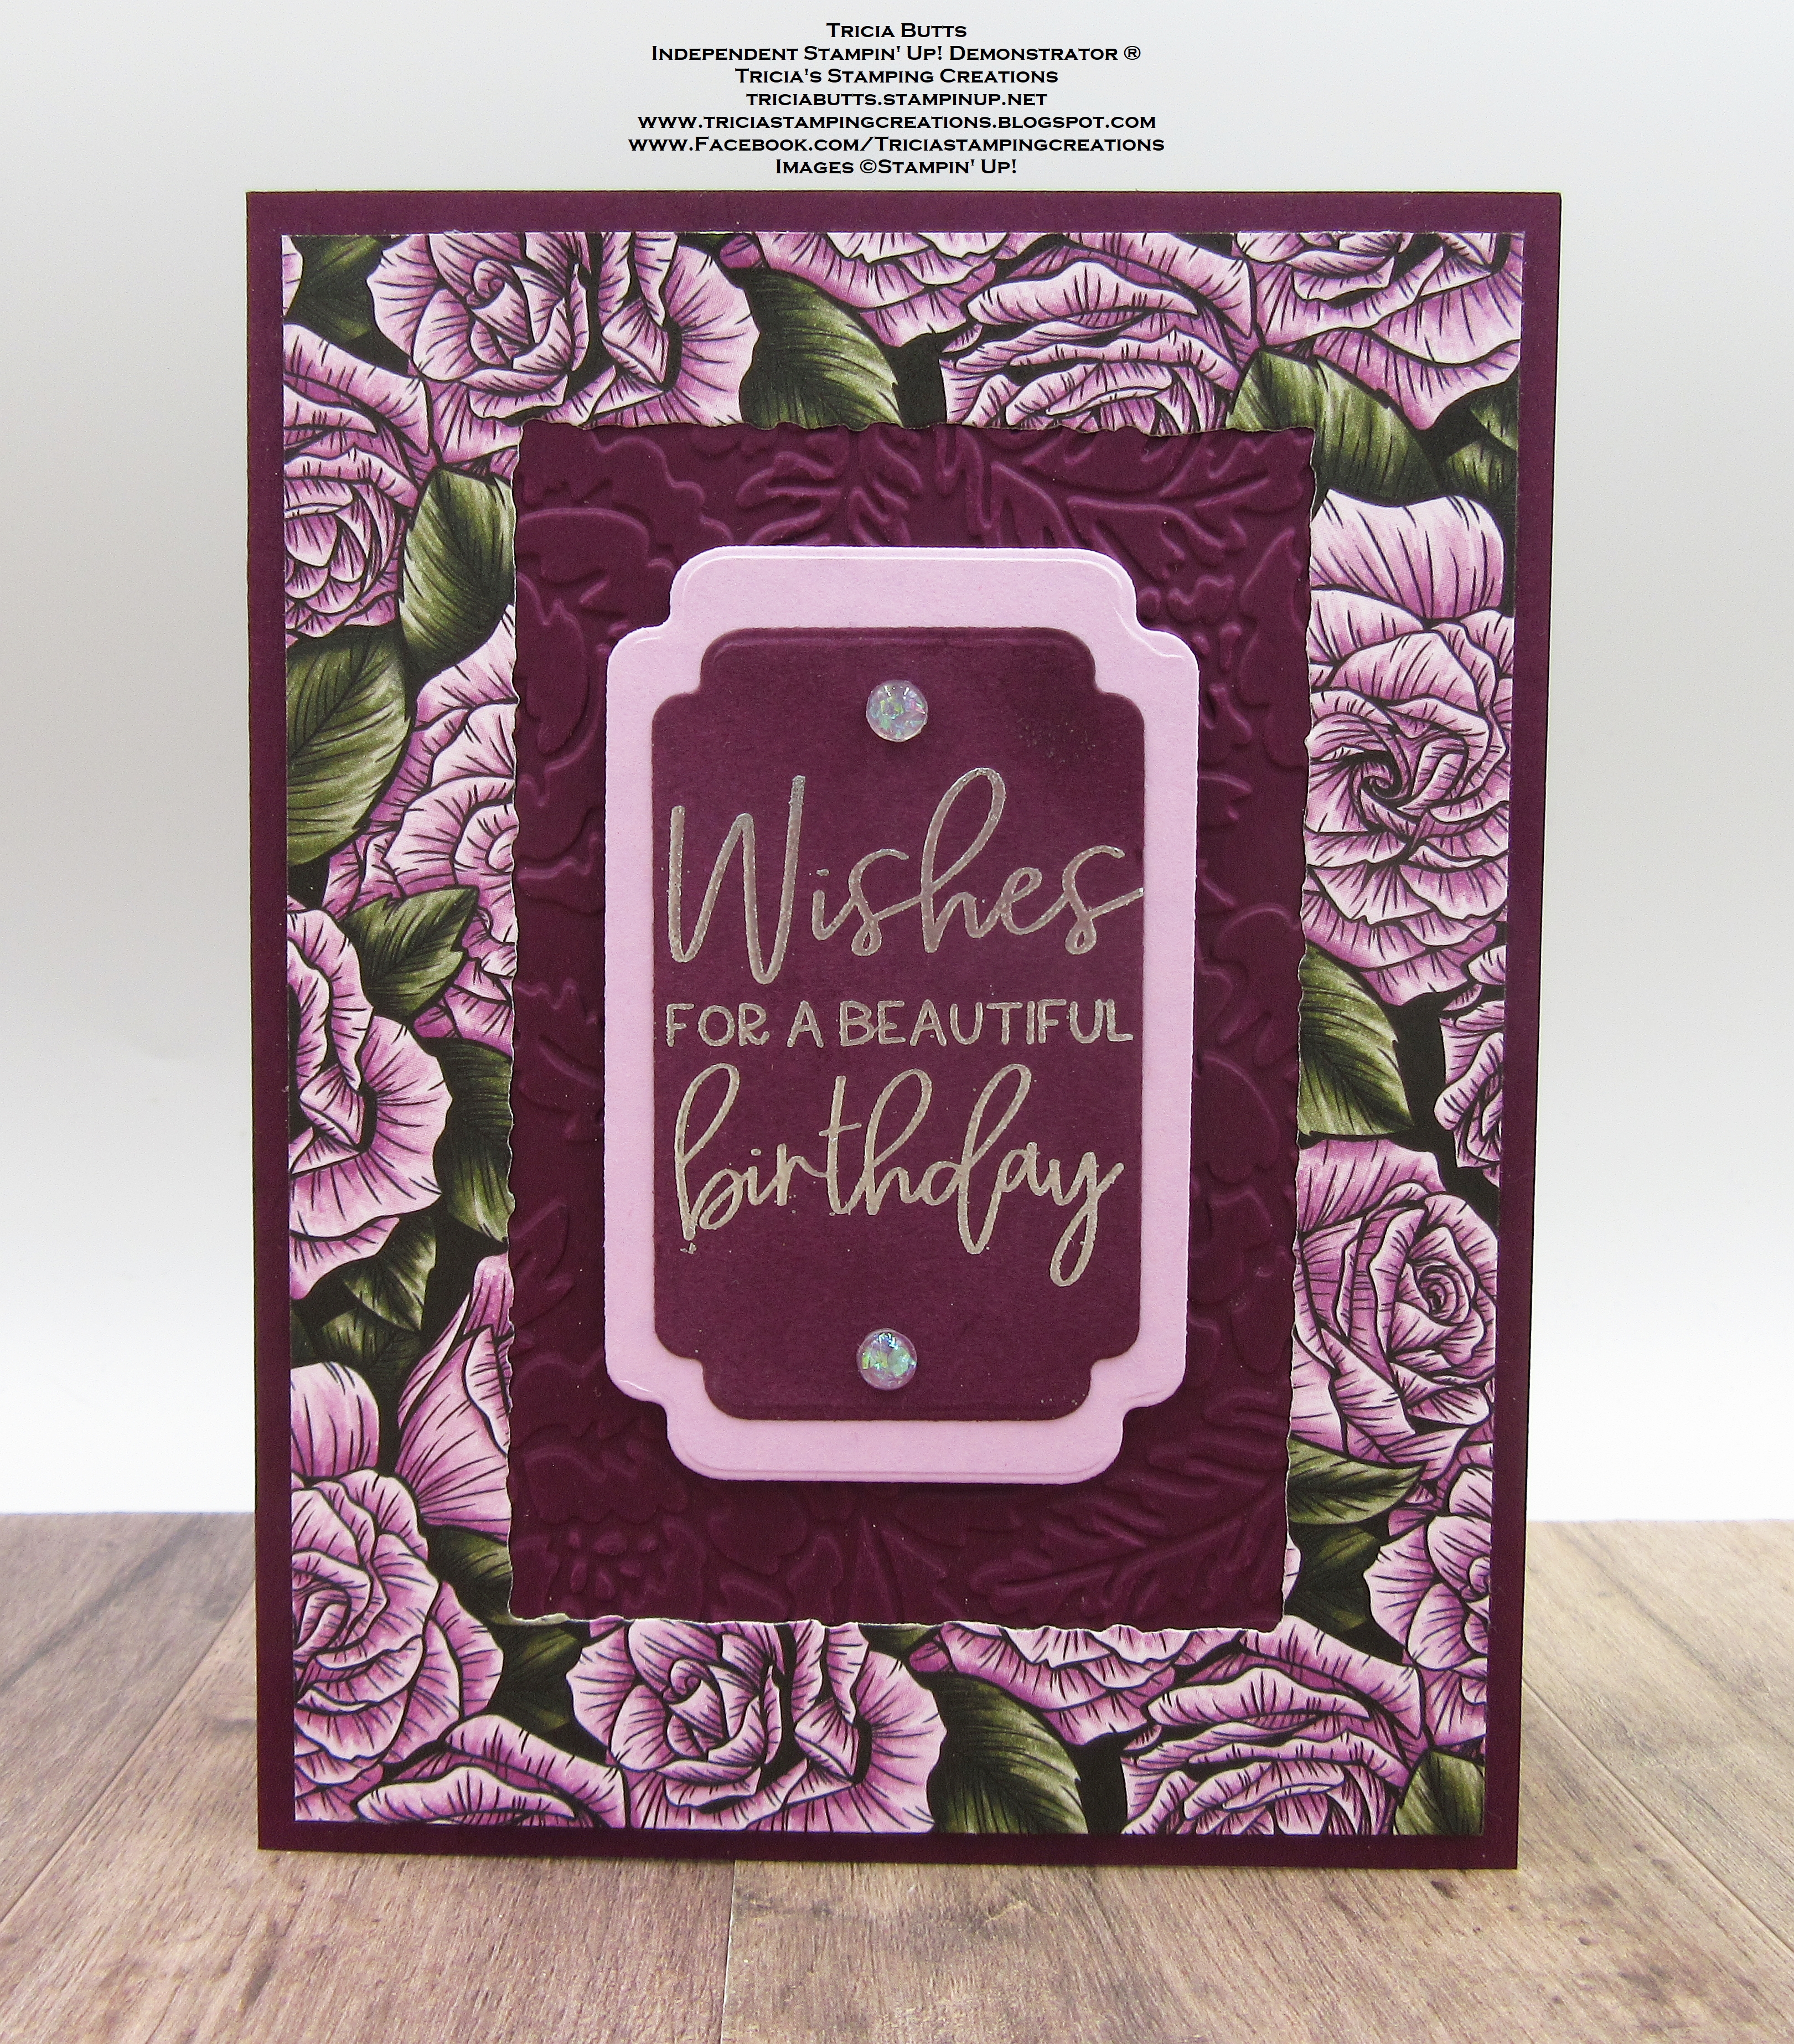
It's so hard to pick a favorite Sale-a-bration product because they are all so amazing in their own way. So today I am sharing with you a project I have created with my "new" favorite, the Favored Flowers Designer Series Paper, which is a Level 1 Reward you can earn free with a qualifying order. The designs in this paper pack are simply stunning and it coordinates perfectly with the Fragrant Flowers Bundle from the January-April 2023 Mini Catalog to provide you with even more options. But, for today's card design, I decided to show how you can use other Stampin' Up! products to create beautiful cards with this pretty paper. 
Products Used:
Framed Florets stamp set (item #161815)
Favored Flowers Designer Series Paper (item #160833) Level 1 Sale-a-bration Reward 
Deckled Rectangles Dies (item #159173)
Something Fancy Dies (item #160424)
Pretty Flowers Embossing Folder (item #155428)
Blackberry Bliss Cardstock (item #133675)
Fresh Freesia Cardstock (item #155613)
Versamark Pad (item #102283)
Metallics Embossing Powders (item #155555)
2021-2023 In Color Opal Rounds (item #159185)
Stampin' Dimensionals (item #104430)
Measurements:
Blackberry Bliss Cardstock
Card Base - 8 1/2" x 5 1/2" (Scored at 4 1/4")
Layer 1- 5 1/4" x 4" embossed with the Pretty Flowers Embossing Folder
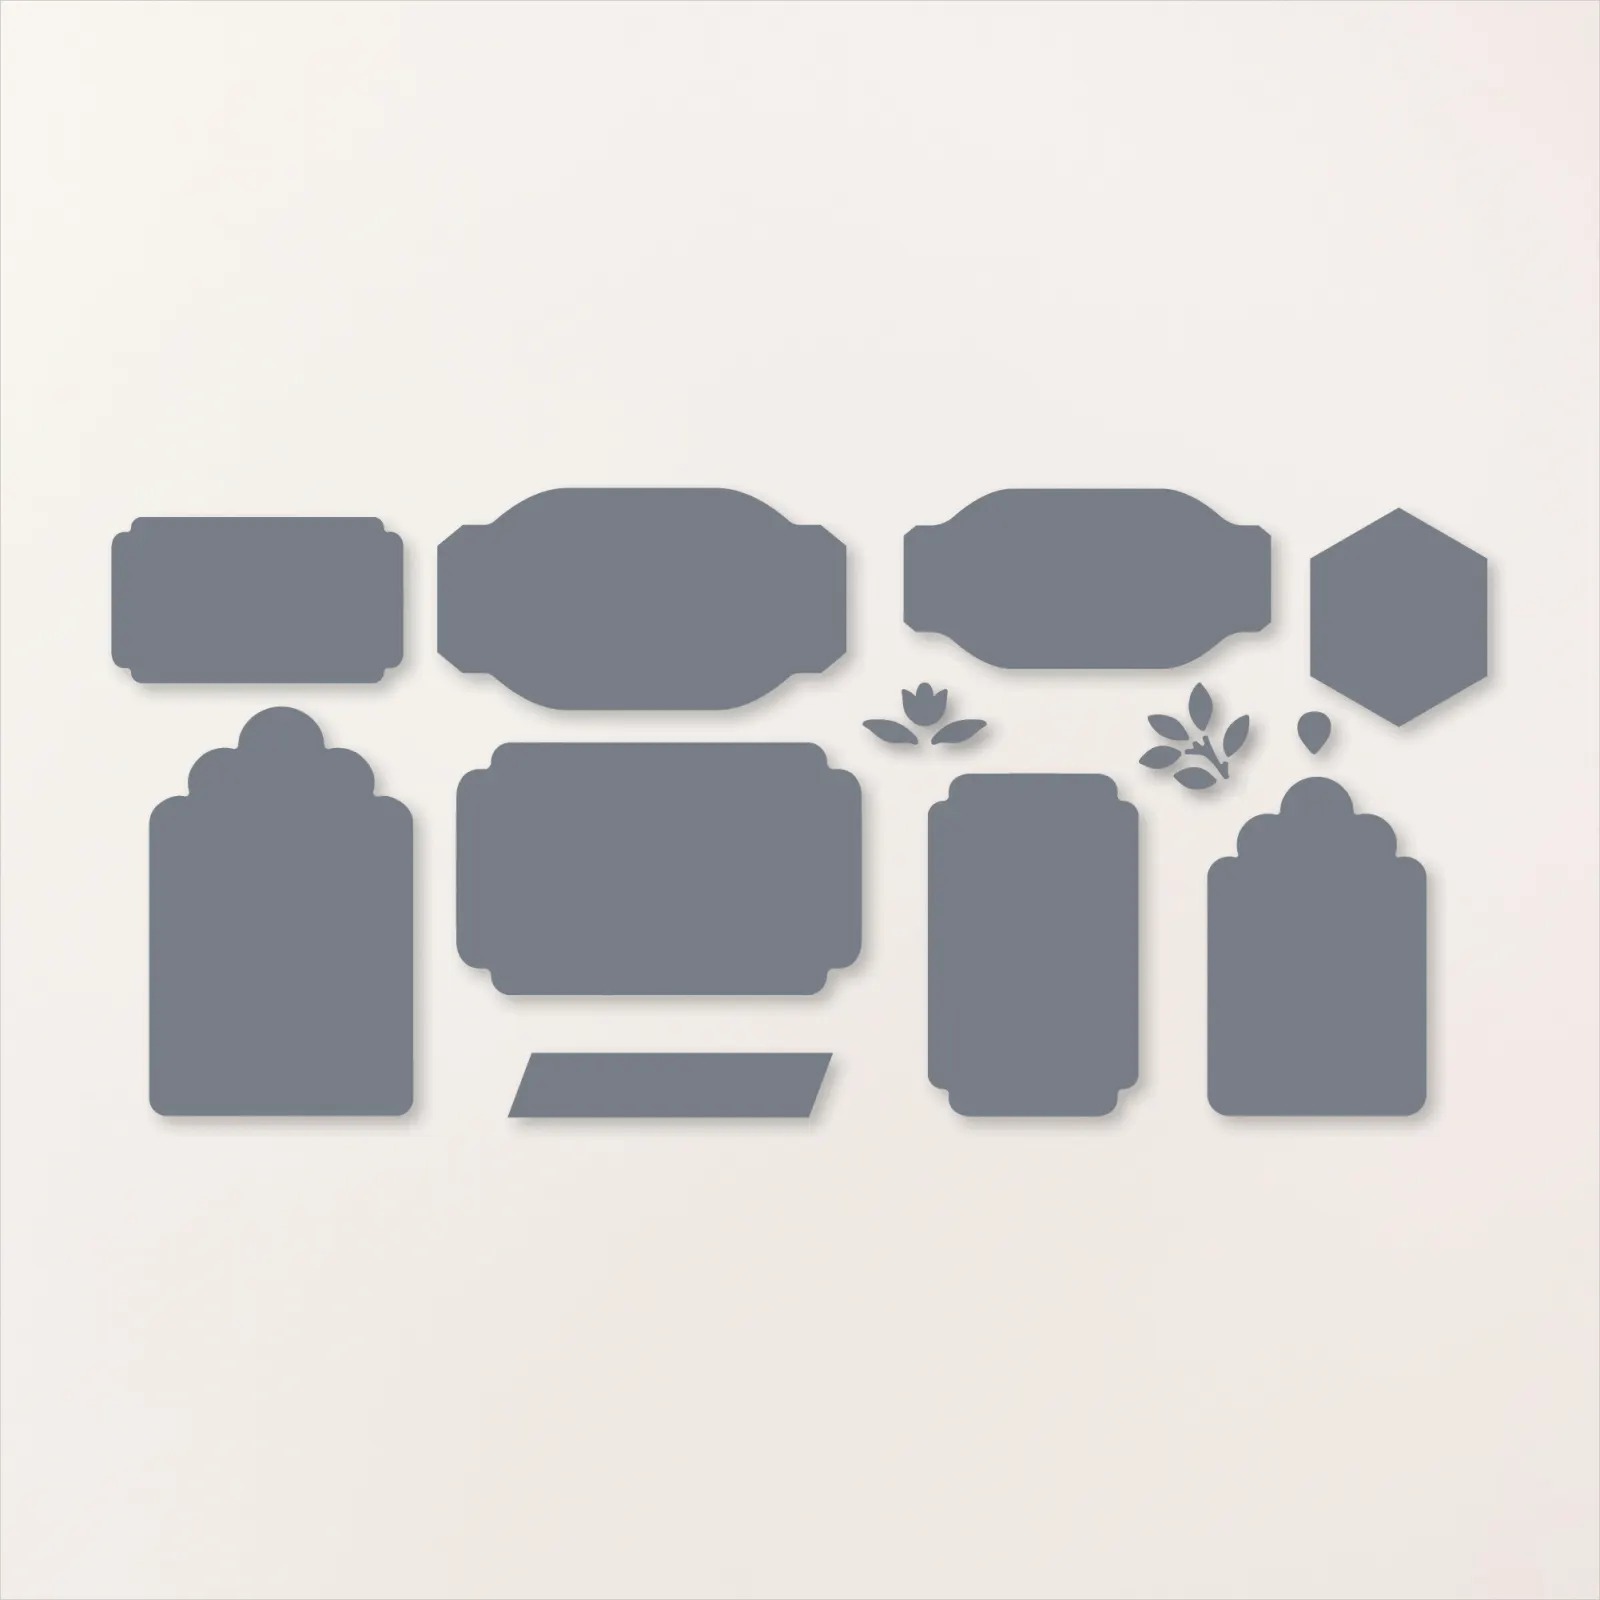
Sentiment Label die cut with the Something Fancy Dies 
Fresh Freesia Cardstock
Large Label die cut with the Something Fancy Dies 
Favored Flowers Designer Series Paper
Card Front Frame - 5 1/4" x 4" with center die cut with the Deckled Rectangles Dies 
This lovely clean and simple card shows how you can take one of the busier designs of this designer series paper and create a beautiful frame for your design. I used one of the Deckled Rectangles Dies to cut the opening in the card front to create the frame. I wanted the center opening to have some subtle detail, so I embossed a layer of Blackberry Bliss cardstock using the Pretty Flowers Embossing Folder. I love how the embossed flowers coordinate with this pretty paper and add texture to the card design. I attached the designer series frame to this layer and then added it to the card base. For the sentiment, I used one of the images from the Framed Florets stamp set, another one of my favorites, and heat embossed it with Silver embossing powder so that it would pop against the Blackberry Bliss label. I framed it with a slightly larger label from Fresh Freesia cardstock and added it to the center of the card with Stampin' Dimensionals. To finish off the design, I added two of the larger Fresh Freesia Opal Rounds to embellish the sentiment label. This simply stunning card design would work well for so many occasions and you could use this layout for other designs in the Favored Flowers Designer Series Paper. 
Thank you for taking the time to visit my blog. I hope that my card design will help inspire you to explore these wonderful new Sale-a-bration products and try mixing and matching to create your own beautiful projects. There are so many wonderful options to explore. 
Please take the time to visit with my fellow Design Team members by using the Roll Call List below. We would appreciate it if you would leave us a comment and let us know what you liked about our projects. I hope you enjoy the rest of our blog hop. 

If you live in the U.S. and do not have a Stampin' Up! Demonstrator, please contact me and I would be happy to help you with your creative projects. You may also visit my Online Store to place your order and have it shipped to you. 

Until Next Time

Happy Stamping,

Tricia Butts
Independent Stampin' Up! Demonstrator

Like What You See? Visit My Online Store Here

Visit My Facebook Business Page for Updates & Ideas

Click here to Contact Me


Celebrate The New Year
With The January-April 2023 Mini Catalog
Click Below To Visit My Online Store

Earn Exclusive Free Products
During Sale-a-bration
Click Below For More Details

Join The Stampin' Up Family
Choose From 3 Amazing Starter Kits
Click Below For More Information