Showing posts with label Framed & Festive stamp set. Show all posts

Friday, December 2, 2022

Global Stamping Friends December Blog Hop Season of Wonder

Welcome to the Global Stamping Friends December Blog Hop as we wrap up 2022 with the theme of "Season of Wonder". With the holidays upon us, now is the perfect time to create beautiful handmade projects to share with family and friends. We will be sharing projects and ideas to inspire you and help spark your creativity for the holiday season. 
So it's December 2nd and the panic has started to set in because suddenly you have so much to do and so little time to do it. Stress levels are going up and you still want to create some Christmas cards for family and friends. Don't worry, you can still do it. My Christmas card today is a beautiful clean and simple design that is easy to duplicate and will provide you with a way to create a bunch of wonderful cards in a relatively short time. For this card design, I chose to use the retiring Painted Christmas Designer Series Paper (which is currently discounted 60%) and combined it with the Framed & Festive stamp set and Framed Florets Dies. The simple detail on the frame and the elegance of the Gold embossing helps take this design to the next level and the pretty Gold bow adds the perfect finishing touch. With all the wonderful designs in this paper pack, you could create 6 cards from each 12"x12" sheet of designer series paper, which means you could create as many as 72 cards from this one pack of paper. The sentiments in the Framed & Festive stamp set provide you with a variety of options to personalize your cards. Plus, you can enjoy some creative therapy to help relieve the stress in your life. 
Products Used:
Framed & Festive stamp set (item #160888)
Framed Florets Dies (item #160623)
Painted Christmas Designer Series Paper (item #156292) - Retiring
Evening Evergreen Cardstock (item #155574)
Basic White Cardstock (item #159276)
Versamark Pad (item #102283)
Metallics Embossing Powders (item #155555)
Gold 3/8" Satin Edged Ribbon (item #159555)
Mini Glue Dots (item #103683)
Measurements:
Evening Evergreen Cardstock
Card Base - 8 1/2" x 5 1/2" (Scored at 4 1/4")
Medium Oval Frame die cut with the Framed Florets Dies
Basic White Cardstock
Large Oval die cut with the Framed Florets Dies
Painted Christmas Designer Series Paper
Card Front = 5 1/4" x 4"
There is something so satisfying about being able to create a lot of beautiful cards in one cardmaking session. The best way to succeed is to prepare each part of the card in advance so that you can use the "assembly line" method to complete your cards. Let me explain how this works. To start with, decide which cardstock colors you want to use for your card bases and oval frames. Hint: use the colors listed on the back of the designer series paper pack to help you pick coordinating colors. Go ahead and cut and scored the number of card bases you will need for the number of cards you plan to create. Remember, for each sheet of cardstock, you can get 2 card bases. Then die cut your coordinating frames so you have one for each card base. For the designer series paper, cut your sheets into 3 strips of 4" and then cut each strip twice at 5 1/4" to get 6 card fronts from each sheet. Remember that each sheet has two designs, so you could choose to use different sides to give you even more variety for your card designs. Next, die cut your Basic White cardstock using the large detailed oval frame to get the large oval for your sentiment. Heat emboss the sentiments onto the Basic White oval (you can also choose to stamp with a coordinating color of ink to save time) and then attach the oval frame to the Basic White oval. The last step is to tie your bows, one of each card and have them in a pile ready to add to your completed card design (if you are mailing your cards, you may choose to skip this step). 
Now you are ready to assemble your cards. Adhere the card front to the card base, then attach the completed oval to the center of the card. Add the bow if you choose and you are all done. If you have chosen darker colored cardstock for your card bases, I would suggest cutting a layer of Basic White cardstock, measuring 5 1/4" x 4", and adding it to the inside of your cards so that you can add your sentiment and message. This is a wonderful way to create your Christmas cards and you can even make it a family event. 
Thank you for taking the time to visit my blog. I hope that my card design help inspire you to create your own beautiful Christmas cards to celebrate the season. There are so many wonderful options to explore. Don't forget to check out the retiring products from the July-December 2022 Mini Catalog and save up to 60% on select products on the Last Chance Retirement List. These products are available only while supplies last, so don't wait to place your order. 
Now it's time to visit Jan's blog and see what she has created to share with us. Just click on the Next button below to visit her blog. We would love it if you would leave us a comment and let us know what you liked about our projects. I hope you enjoy our blog hop. 


If you live in the U.S. and do not have a Stampin' Up! Demonstrator, please contact me and I would be happy to help you with your creative projects. You may also visit my Online Store to place your order and have it shipped to you. 

Until Next Time

Happy Stamping,

Tricia Butts
Independent Stampin' Up! Demonstrator

Like What You See? Visit My Online Store Here

Visit My Facebook Business Page for Updates & Ideas

Click here to Contact Me


Save Up To 60% Off Select Retiring Products
With The July-December 2022 Mini Catalog Last Chance List
Click Below To Start Shopping

The Clearance Rack Has Been Refreshed
Save Up To 60% On Discontinued Products 
Available Only While Supplies Last
Click Below To Shop From My Online Store


Tuesday, November 8, 2022

ICS November Blog Hop Christmas Is Coming

It's time to hop along with the ICS November Blog Hop and this month we are celebrating that Christmas Is Coming! Our wonderful Design Team members will be sharing their projects and ideas to help inspire you to get creative for the holidays and create your own beautiful projects to share with family and friends.
Christmas is my favorite time of year and one of the things I love best about making my own Christmas cards, is that there are no rules as to how you should make them. You can choose traditional colors or Red and Green or go for Winter colors or non-traditional colors. Your designs can be classic and elegant or fun and whimsical or anything in between. The most important thing about creating a handmade card is that it comes from the heart and is made with love. So for my Christmas card today, I chose to create a design that is a mix of classic elegance with colors or Red, Green and Gold, with a touch of whimsy with the sentiments to one of my favorite Christmas songs. The end result is a beautiful clean and simple Christmas card that works well for people of all ages.
Products Used:
Framed Florets Bundle (item #162407)
Framed & Festive stamp set (item #160888)
Soft Succulent Cardstock (item #155776)
Evening Evergreen Cardstock (item #155574)
Basic White Cardstock (item #159276)
Evening Evergreen Classic Ink Pad (item #155576)
Versamark Pad (item #102283)
Metallics Embossing Powders (item #155555)
Real Red & Garden Green 3/8" Ribbon Combo Pack (item #159577)
Gold Adhesive Backed Swirls (item #161822)
Stampin' Dimensionals (item #104430)
Mini Glue Dots (item #103683)
Measurements:
Soft Succulent Cardstock
Card Base - 8 1/2" x 5 1/2" (Scored at 4 1 /4")
Detailed Frame die cut with the Framed Florets Dies
2 Detailed Leaf Stems die cut with the Framed Florets Dies
Evening Evergreen Cardstock
Card Front - 5 1/4" x 4"
Basic White Cardstock
Sentiment Oval die cut with the Framed Florets Dies
For this card, I wanted to create a fun background to add texture to the design. I stamped the leaf image from the Framed Florets stamp set all over the Evening Evergreen cardstock card front and then heat embossed the Falala image from the Framed & Festive stamp set, with Gold embossing powder randomly over the background to step up the design. For the main sentiment, I heat embossed the image also from the Framed & Festive stamp set with Gold embossing powder in the center of the Basic White cardstock oval. I attached the Soft Succulent detailed frame to the Basic White oval and attached it to the card front with Stampin' Dimensionals. To decorate the card, I added two of the long leaf stem die cuts from the Framed Florets Dies underneath the top of the framed oval sentiment and added a Real Red bow to the top of the frame with a Mini Glue Dot. To complete the design, I added several of the Gold Adhesive Backed Swirls to the frame for a touch of bling. I love how this card design turned out and I find myself singing the sentiments whenever I look at it. Do you? This wonderful Christmas card design is easy to create and a great way to share the holiday spirit with the people you love. 
Thank you for taking the time to visit my blog. I hope that my card design will inspire you to create your own beautiful Christmas cards to send out to family and friends. There are so many wonderful options to explore.
Now it's time to visit Darla's blog and see what she has to share with us. Just click the Next button below to visit her blog. We would appreciate it if you would leave us a comment and let us know what you liked about our projects. I hope you enjoy the rest of our blog hop. 


If you live in the U.S. and do not have a Stampin' Up! Demonstrator, please contact me and I would be happy to help you with your creative projects. You may also visit my Online Store to place your order and have it shipped to you. 

Until Next Time

Happy Stamping,

Tricia Butts
Independent Stampin' Up! Demonstrator

Like What You See? Visit My Online Store Here
Visit My Facebook Business Page for Updates & Ideas

Click here to Contact Me


Add A Touch Of Elegance To Your Projects
With The Fitting Florets Collection Available For A Limited Time
Click Below For More Details

Get Creative For The Holidays
With The July-December 2022 Mini Catalog
Click Below To Visit My Online Store


Saturday, October 22, 2022

Stamping With Friends Christmas Cards Blog Hop

Welcome to the Stamping With Friends Christmas Cards Blog Hop as we help inspire you to create your own beautiful cards for the Holidays. Our Design Team members will be sharing their beautiful projects and ideas to help spark your creativity.
One of my favorite things about being a Demonstrator, is the opportunity to take advantage of new products early. For today's card design, I had fun with the new Fittings Florets Collection, which will be available to customers November 1st, but Demonstrators can order it early during the month of October. This beautiful collection consists of a Sneak Peek of a new bundle from the January-June 2023 Mini Catalog, along with exclusive designer series paper, embellishments and a bonus stamp set that will only be available while supplies last. With these fabulous new products, you can create projects all through the year for so many occasions.
Products Used:
Fitting Florets Collection (item #163129) Available November 1st
- Framed & Festive stamp set (item #160888)
- Framed Florets Dies (item #160623)
- Fitting Florets Designer Series Paper (item #161814)
Kindest Gnomes Bundle (item #159626)
Soft Succulent Cardstock (item #155776)
Evening Evergreen Cardstock (item #155574)
Basic White Cardstock (item #159276)
Memento Tuxedo Black Pad (item #132708)
Versamark Pad (item #102283)
Metallics Embossing Powders (item #155555)
Soft Succulent Stampin' Blends Combo Pack (item #155521)
Evening Evergreen Stampin' Blends Combo Pack (item #155517)
Balmy Blue Stampin' Blends Combo Pack (item #154830)
Sweet Sorbet Stampin' Blends Combo Pack (item #159224)
Smoky Slate Stampin' Blends Combo Pack (item #154904)
Petal Pink Stampin' Blends Combo Pack (item #154893)
Clear Wink of Stella Glitter Brush (item #141897)
2021-2023 In Color Opal Rounds (item #159185)
Stampin' Dimensionals (item #104430)
Measurements:
Soft Succulent Cardstock
Card Base - 8 1 /2" x 5 1/2" (Scored at 4 1/4")
Oval Frame die cut with the Framed Florets Dies
Evening Evergreen Cardstock
Sentiment Oval die cut with the Framed Florets Dies
Fitting Florets Designer Series Paper
Card Front - 5 1/4" x 4"
Basic White Cardstock
Stamped & die cut Gnome image with the Kindest Gnomes Bundle
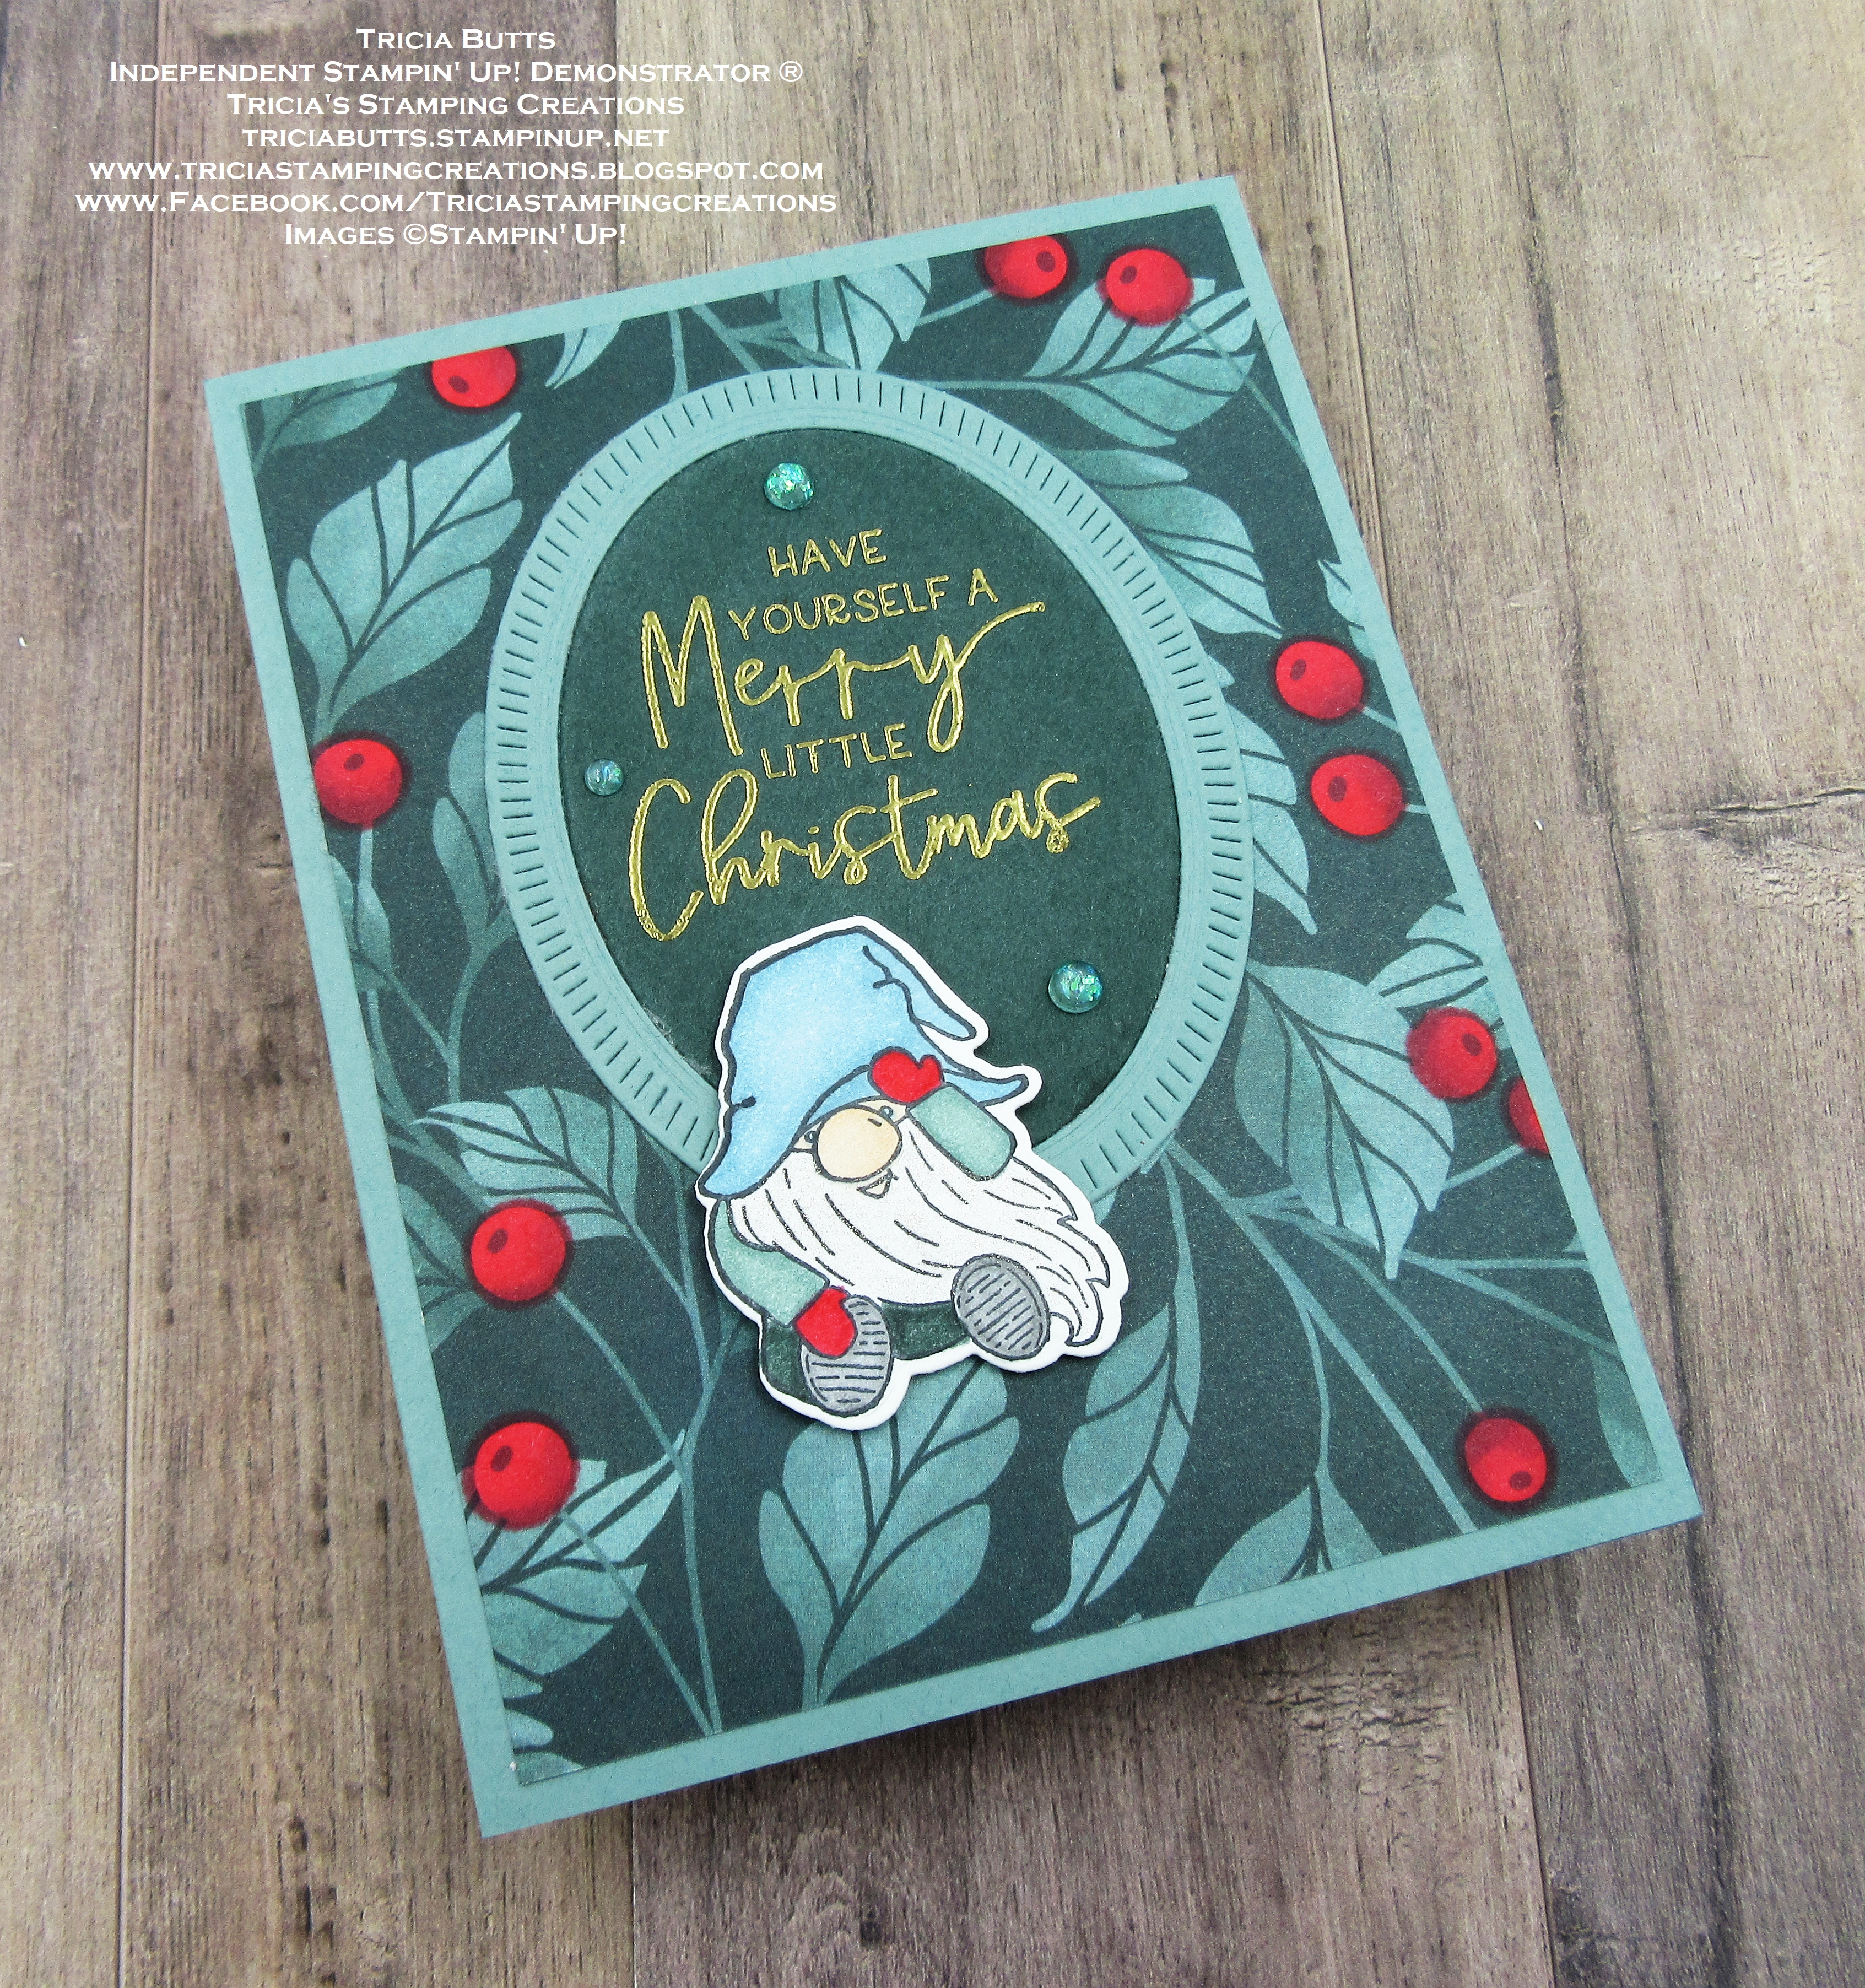
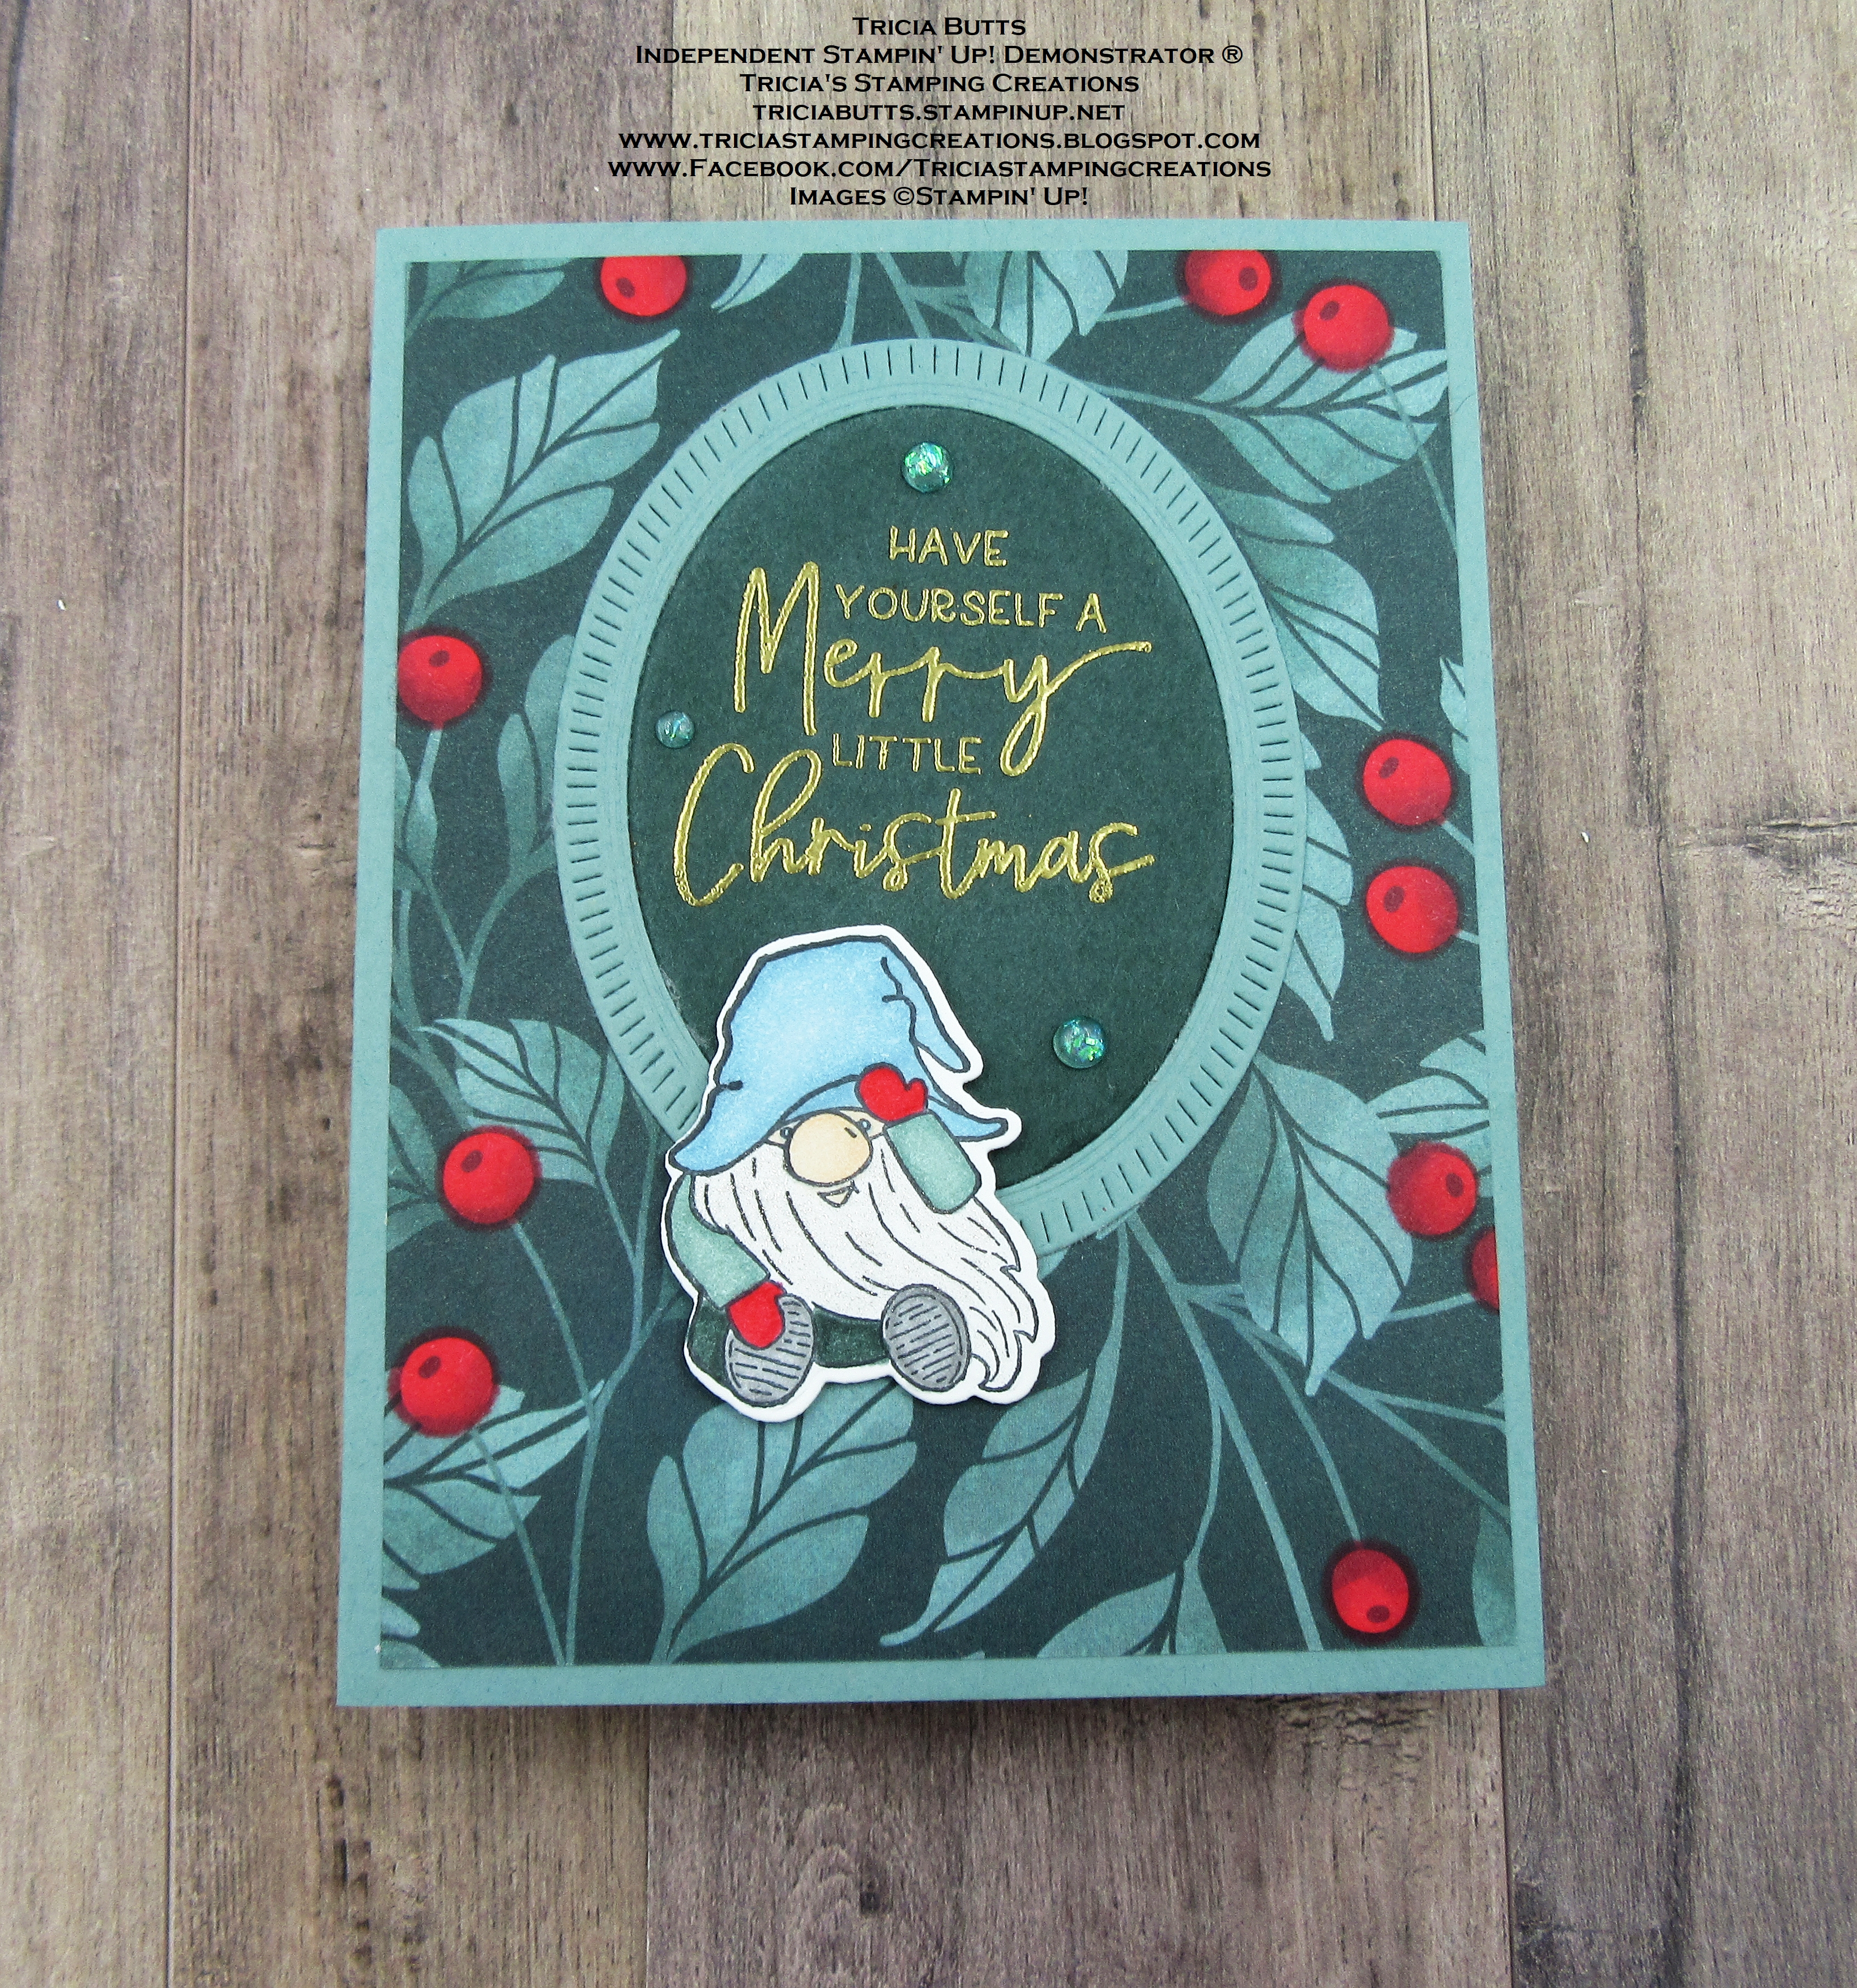
This pretty clean and simple Christmas card has a whimsical feel with the addition of the cute little gnome. One of my favorite color combinations for Christmas is Soft Succulent and Evening Evergreen and I just love the pop of color that the Sweet Sorbet berries add to this card design. The designer series paper has white berries as part of the design but I decided to color them with the Light Sweet Sorbet Stampin' Blends Marker to give it more of a Christmas feel. I am a big fan of ovals, so I was so excited to get the new Framed Florets Dies with the beautiful oval options that layer so beautifully together. I chose Soft Succulent for the detailed frame and Evening Evergreen for the sentiment, tying in with the colors in the designer series paper. I love how the Gold embossing of the sentiment from the Framed & Festive stamp set pops against the Evening Evergreen cardstock and it gives the card design a classically elegant look. This stamp set has so many wonderful sentiments for the holidays and I just love the combination of fonts. For the gnome, I colored the image using Stampin' Blends Markers to add a pop of color against the card front. To finish off th design, I added several Soft Succulent Opal Rounds to the sentiment label for a touch of bling. This card design was so much fun to create and I love how versatile this new collection of products is for creating projects not only for the holidays but throughout the year. 
Thank you for taking the time to visit my blog. I hope that my card design will help inspire you to create your own beautiful Christmas cards to send to family and friends. If you would like to explore the Fitting Florets Collection, contact me to learn how you can add it to your Starter Kit this month to get a jump start on your holiday card making and so much more.
Now it's time to visit with my fellow Design Team members and see their beautiful Christmas card designs. Just click on the links in the Roll Call List to find your way along our blog hop. We would appreciate it if you would leave us a comment and let us know what you liked about our projects. I hope you enjoy the rest of our blog hop. 

If you live in the U.S. and do not have a Stampin' Up! Demonstrator, please contact me and I would be happy to help you with your creative projects. You may also visit my Online Store to place your order and have it shipped to you. 

Until Next Time

Happy Stamping,

Tricia Butts
Independent Stampin' Up! Demonstrator

Like What You See? Visit My Online Store Here

Visit My Facebook Business Page for Updates & Ideas

Click here to Contact Me


Get Creative For The Holidays
With The July-December 2022 Mini Catalog
Click Below To Visit My Online Store

Join The Stampin' Up! Family
Get $155 Worth Of Products For Just $99
In Your Starter Kit In October
Click Below For Details