Let's celebrate Valentine's Day with the Inspire. Create. Share February Blog Hop as we showcase the theme, It's a Love Thing. There are so many occasions throughout the year to show some love to the people in our lives. Our wonderful Design Team will be sharing their ideas and projects to help inspire you to create your own beautiful projects to send to the people you care about.
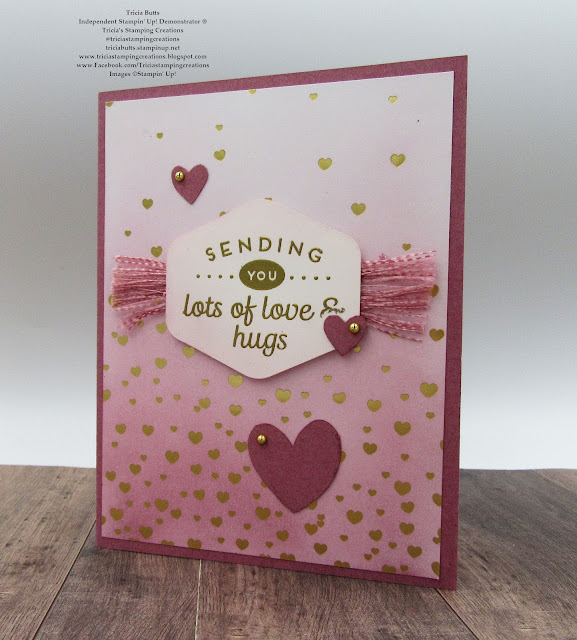
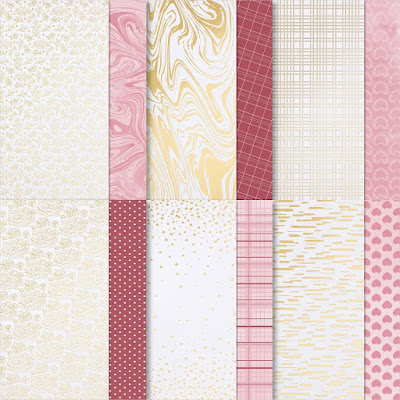
My card design today is one that could be sent out any time of the year as a way to send some love to someone special. I paired the beautiful Most Adored Specialty Designer Series Paper with the Heartfelt Hexagon Bundle to create a lovely clean and simple card design. I blended some soft color onto the designer series paper layer to create an ombre effect, using Bubble Bath and Moody Mauve Classic ink pads. I love the subtle gold accents that help step up the design without being to over the top.
Products Used:
Heartfelt Hexagon Bundle (item #162889)
Bee Builder Punch (item #162553)
Most Adored Specialty Designer Series Paper (item #162976)
Level 1 Sale-a-bration Reward
Moody Mauve Cardstock (item #161721)
Basic White Cardstock (item #159276)
Bubble Bath Classic Ink Pad (item #155611)
Moody Mauve Classic Ink Pad (item #161649)
Versamark Pad (item #102283)
Metallics Embossing Powders (item #155555)
Blending Brushes (item #153611)
Moody Mauve 3/8" Textured Ribbon (item #161630)
Festive Pearls (item #159963)
Stampin' Dimensionals (item #104430)
Measurements:
Moody Mauve Cardstock
Card Base - 8 1/2" x 5 1/2" (Scored at 4 1/4")
Hearts punched out with the Bee Builder Punch
Basic White Cardstock
Sentiment Label stamped and punched out with the Heartfelt Hexagon Bundle
Most Adored Designer Series Paper
Card Front - 5 1/4" x 4"
To create this pretty card design, I added some Bubble Bath Classic ink to the designer series paper layer using a Blending Brush, blending from the top down to the center. Once I had the color intensity I was looking for, I blended Moody Mauve Classic ink with another Blending Brush, moving from the bottom up to the center, blending the two colors together in the middle to create the ombre look. I gently wiped the designer series paper to remove any ink on the Gold embossed hearts. For the sentiment label, I heat embossed the sentiment with Gold embossing powder onto Basic White cardstock and punched out the sentiment with the coordinating Heartfelt Hexagon Punch. I took a piece of Moody Mauve Textured Ribbon and gently frayed both ends, leaving a section in the middle to apply adhesive to add it to the center of the card front. I added the sentiment label over the top of the ribbon with Stampin' Dimensionals and then added several Moody Mauve hearts punched out with the Bee Builder Punch. To finish off the design, I added several Gold Pearls from the Festive Pearls to coordinate with the rest of the card design. I love how pretty this card looks and how simple it was to create.
Thank you for taking the time to visit my blog. I hope that my card design will help inspire you to create your own love notes to send to the people you care about. There are so many wonderful options to explore. There is still time to earn the beautiful Most Adored Specialty Designer Series Paper for free with a qualifying order during Sale-a-bration. You have until February 29th, so place your order soon to avoid disappointment.
Now it's time to visit Charmane's blog and see what she has created to share with us. Just click on the Next button to visit her blog. We would love it if you would leave us a comment and let us know what you liked about our projects. I hope you enjoy the rest of our blog hop.If you live in the U.S. and do not have a Stampin' Up! Demonstrator, please contact me and I would be happy to help you with your creative projects. You may also visit my Online Store to place your order and have it shipped to you.
Until Next
Time
Happy
Stamping,
Tricia Butts
Independent Stampin' Up!
Demonstrator
Like What You
See? Visit My Online Store Here
Visit My Facebook Business Page for Updates & Ideas
Click here to Contact Me
More Sale-a-bration Products Now Available
To Earn Free With A Qualifying Order


Stunning! Thanks for hoping with us this month love ya!
ReplyDeleteThank you Deb. Love this beautiful paper.
DeleteBeautiful shading on this DSP
ReplyDeleteThank you Janey. I love how the colors blended on this designer series paper.
DeleteThat DSP is one of my favourites and so versatile when you add colour!
ReplyDeleteThank you Elizabeth. I love that you can blend color onto this design. It makes it so versatile.
DeleteI love how you use the blending brushes on this dsp. Super cute card!
ReplyDeleteThank you Renee. It is a fun technique and works great with this pretty paper.
DeleteThis is beautiful!!
ReplyDeleteThank you. It was a fun card to create. I love this pretty paper.
DeletePretty card!
ReplyDeleteI love the design of this card! The layout is just perfect! And works great with the hearts!
ReplyDelete