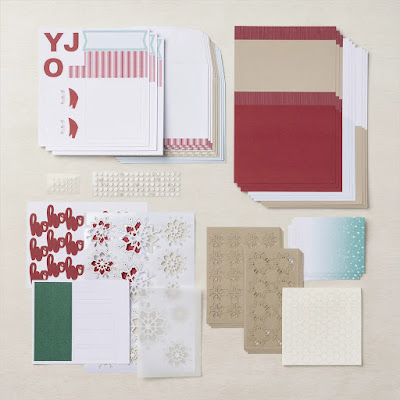
Welcome to the Paper Pumpkin Possibilities October Blog Hop as we showcase alternative projects created with the Ho Ho Ho Christmas Card Kit. Our talented Design Team members will be sharing their alternative projects and ideas to help inspire you to think outside the box using supplies from this kit.
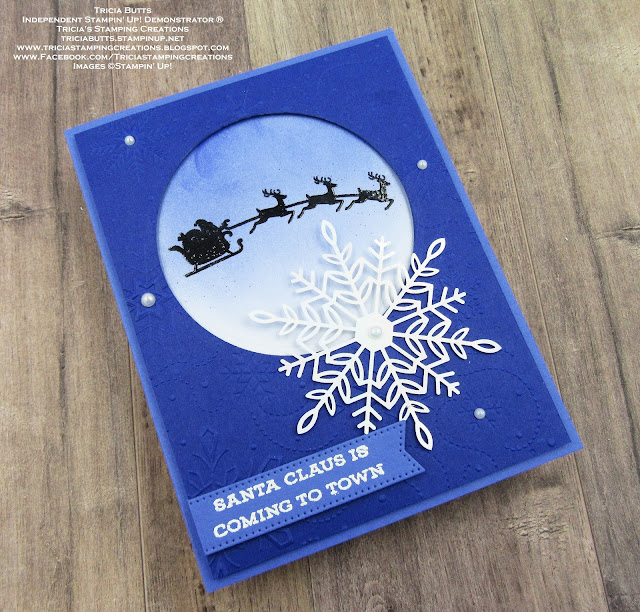
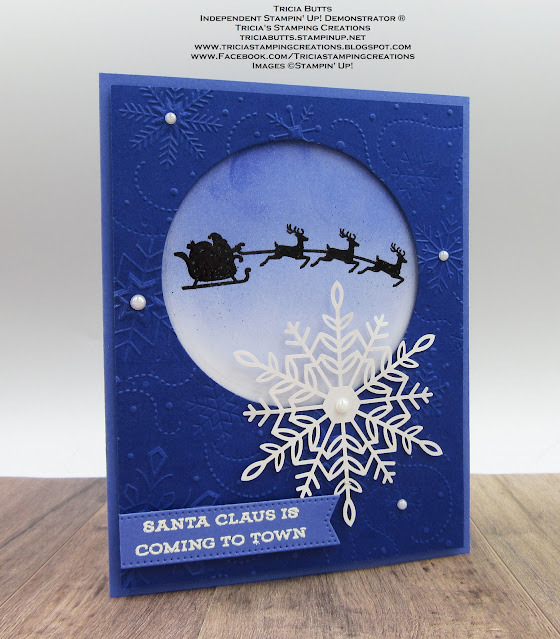
This month's Paper Pumpkin is probably one of my favorites and I love that it's a Christmas card kit. The card designs in this kit are amazing, so I wanted to show an alternative card design using the exclusive stamp set from this kit. The Santa and reindeer silhouette stamp is one of my favorites and I knew I wanted it to be my focal design for my card. I created a window for my design using the Layering Circles Dies and embossed the background using the Snowflake embossing folder from the Wintry 3D Embossing Folders.
Paper Pumpkin October Ho Ho Ho Card Kit
Layering Circles Dies (item #151770)
Stylish Dies (item #159183)
Wintry 3D Embossing Folders (item #155433)
Orchid Oasis Cardstock (item #159267)
Starry Sky Cardstock (item #159263)
Basic White Cardstock (item #159276)
Orchid Oasis Classic Ink Pad (item #159214)
Versamark Pad (item #102283)
Basics Embossing Powders (item #155554)
Wonderful Snowflakes (item #156340)
Iridescent Pearls Basic Jewels (item #158987)
Blending Brushes (item #153611)
Measurements:
Orchid Oasis Cardstock
Card Base - 8 1/2" x 5 1/2" (Scored at 4 1/4")
Sentiment Label die cut with the Stylish Shapes Dies
Starry Sky Cardstock
Card Front - 5 1/4" x 4"
Basic White Cardstock
Background Layer - 5" x 3 3/4"
The wonderful thing about creating your own Christmas cards is that you get to choose your own colors and your own designs. Instead of the more traditional red and green color combination, I decided to create my card in shades of blue. I love how Orchid Oasis and Starry Sky look together, so I chose these colors for my card and used Orchid Oasis Classic ink to sponge the sky background on the Whisper White cardstock layer. I used my Stamparatus to stamp the Santa and reindeer image with Versamark and heat embossed the image with Black embossing powder. For the card front, I die cut the window using the largest Circle Die from the Layering Circles Dies. I also embossed the background using the Snowflakes embossing folder from the Wintry 3D Embossing Folders to add texture to the card front. For the sentiment, I heat embossed the image with White embossing powder onto the sentiment label die cut with the Stylish Shapes Dies. I cut the left side so that it had a straight edge to line up with the left side of the card front and popped it up with Stampin' Dimensionals. To embellish the card, I added one of the Wonderful Snowflake Die Cuts so that it overlapped the window area and I added several Iridescent Pearls for a touch of bling. I love the simplicity of this card design and how it showcases the stamped image.
Thank you for taking the time to visit my blog. I hope that my card design will help inspire you to create your own beautiful projects using the exclusive stamp set from this kit.
Now it's time to visit Terri's blog and see what she has created with this kit. Just click on the Next button below to visit her blog. We would appreciate it if you would leave us a comment and let us know what you liked about our projects. I hope you enjoy the rest of our blog hop.
If you live in
the U.S. and do not have a Stampin' Up! Demonstrator, please contact me and I
would be happy to help you with your creative projects. You may also visit my
Online Store to place your order and have it shipped to you.
Until Next
Time
Happy
Stamping,
Tricia Butts
Independent Stampin' Up!
Demonstrator
Like What You
See? Visit My Online Store Here
Visit My Facebook Business Page for Updates & Ideas
Click here to Contact Me
Create Beautiful Christmas Tags For The Holidays
With The From The North Pole Paper Pumpkin Kit
Click Below To Subscribe By November 10th
With The From The North Pole Paper Pumpkin Kit
Click Below To Subscribe By November 10th
Join The Stampin' Up! Family
Get $155 In Stampin' Up! Products For Just $99
In Your Starter Kit During October
Click Below For More Details


This is a stunning card, great job!
ReplyDeleteThank you Deb. Love that the Wonderful Snowflakes are similar to the snowflakes in this kit. So many more possibilities.
DeleteAbsolutely gorgeous card. I love the orchid oasis color combination it really makes the card pop.
ReplyDeleteThank you Renee. Blue is my favorite color so I love using Orchid Oasis and Starry Sky together whenever I can.
DeleteIncredible card Tricia! Well done!
ReplyDeleteThank you Dana. I love how it turned out.
DeleteStunning Christmas Night card! I love it.
ReplyDeleteThank you Mary. These blues are perfect together.
DeleteThis is gorgeous! TFS!
ReplyDeleteThank you Tanya. It was so much fun designing with this stamp set.
DeleteLOVE...LOVE...LOVE this card! It is BEAUTIFUL!!
ReplyDeleteAbsolutely stunning and this color combination is gorgeous!
ReplyDeleteThank you Terri. It was fun exploring a different color combination with this kit.
DeleteA beautiful Christmas card! I love your layout and the use of embossing powders! Thanks for sharing.
ReplyDeleteThank you Elizabeth. I love the simplicity of this design.
DeletePerfect night sky for Santa!
ReplyDeleteThank you Janey. I felt the same way when I created this card.
DeleteBeautiful card! Love it
ReplyDelete